Table of Contents
Advertisement
Advertisement
Table of Contents

Summary of Contents for Jet DC-1100G
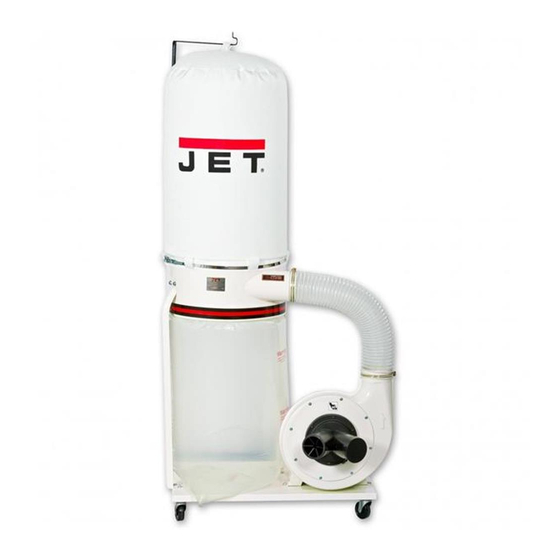
- Page 1 This Manual is Bookmarked Operating Instructions and Parts Manual Dust Collector Model: DC-1100A/C/RC DC-1100A/RC DC-1100C/RC WMH TOOL GROUP 2420 Vantage Drive Elgin, Illinois 60123 Part No. M-708639 Ph.: 800-274-6848 Revision G 07/04 www.wmhtoolgroup.com Copyright © WMH Tool Group...
-
Page 2: Warranty And Service
To obtain maximum life and efficiency from your dust collector and to aid in using it safely, please read this manual thoroughly and follow the instructions carefully. -
Page 3: Table Of Contents
Removing the Collector Bag – DC-1100A/RC ... 14 Cleaning the Filter – DC-1100C/RC... 14 Removing the Collector Bag – DC-1100C/RC ... 14 Motor ... 14 Connecting the Dust Collector to a Machine... 14 Grounding the Dust Collection System ... 14 Parts List – -1100A/RC Dust Collector... 15 Parts Breakdown –... -
Page 4: Warnings
5. Do not use this dust collector for other than its intended use. If used for other purposes, WMH Tool Group disclaims any real or implied warranty and holds itself harmless from any injury that may result from that use. - Page 5 22. Do not use the dust collector for anything except wood dust. Materials such as liquids, metal shavings, metal dust, screws, glass, plastic or rock can cause sparks and/or damage when coming into contact with any part of the dust collector.
-
Page 6: Introduction
Introduction This manual is provided by JET covering the safe operation and maintenance procedures for model DC-1100 Series Dust Collectors. This manual contains instructions on installation, safety precautions, general operating procedures, maintenance instructions and parts breakdown. This machine has been designed and constructed to provide years of trouble free operation if used in accordance to instructions set forth in this manual. -
Page 7: Unpacking
1. Remove all contents from the shipping carton. 2. Report any damage to your distributor. 3. Do not discard any shipping material until after the dust collector has been assembled and is running properly. Contents of the Shipping Carton 1 – Upper Bag Hanger 1 –... -
Page 8: Dc-1100C/Rc Dust Collector
1. Remove all contents from the shipping carton. 2. Report any damage to your distributor. 3. Do not discard any shipping material until after the dust collector has been assembled and is running properly. Contents of the Shipping Carton Canister Filter Box 1 –... -
Page 9: Assembly
M8 x 16 hex cap screws, four M8 flat washers (B, Fig. 2), and a 13mm wrench. The dust collector must not be connected to the power source during assembly. Failure to comply may result in serious injury! 4. -
Page 10: Connector Housing
(B, Fig. 6). Tighten the clamps to secure the hose. If you are assembling the DC-1100A/RC Dust Collector, proceed to the next section. If you are assembling the DC-1100C/RC Dust Collector, proceed to Collector Bag Installation – DC-1100C/RC section. Figure 4... -
Page 11: Filter Bag Installation - Dc-1100A/Rc
Filter Bag Installation – DC-1100A/RC Referring to Figure 7: 1. Place the hanger (A) on the hanger bracket (B). 2. Slide the filter bag loop (C) over the hanger hook. 3. Thread the retainer strap (D) through the loops on the filter bag (E) and fasten to the collector housing (F). -
Page 12: Collector Bag Installation - Dc-1100C/Rc
Collector Bag Installation – DC-1100C/RC 1. Place the ring over the top of the plastic bag and fold over the bag approximately three inches, Figure 9. 2. Insert the snap ring (A, Fig. 10) of the collector bag into the bottom of the housing at an angle. 3. -
Page 13: Dc-1100Rc
(Figure 9) or from a remote control unit (Figure 10). To start the dust collector, press the ON button. If the remote control unit (Figure 10) is used, aim it at the control panel (Figure 9). The machine will remain running until the OFF button is pressed. -
Page 14: Maintenance
The hose or ductwork you use to connect the tool to the dust collector must also be grounded. To assist in grounding your system you can purchase the JET “Dust Collector Grounding Kit”... -
Page 15: Parts List - Dc -1100A/Rc Dust Collector
Parts List – -1100A/RC Dust Collector Index No. Part No. 1 ... 411035W ... Impeller Housing...1 2 ... 411026W ... Motor Bracket ...1 3 ... 998621... Strain Relief ...1 4 ... MA2041J1W ... Motor...1-1/2 HP, 1Ph...1 ... DC1100-50W... Motor Fan Cover (not shown)...1 ... -
Page 16: Parts Breakdown - Dc -1100A/Rc Dust Collector
Parts Breakdown – -1100A/RC Dust Collector... -
Page 17: Filter Assembly For Dc-1100C/Rc Models
Filter Assembly for DC-1100C/RC Models Index No. Part No. Description Size 1 ... 331050... Handle ...1 2 ... TS-1540071... Hex Nut...M10 ...2 3 ... TS-1550071... Flat Washer ...M10 ...2 4 ... TS-2361101... Lock Washer...M10 ...1 5 ... BR000052... Rivet...5-2 ...3 6 ... -
Page 18: Remote Control Breakdown For Dc-1100Rc
Remote Control Breakdown for DC-1100RC Index No. Part No. Description Size ... DC1100RC-100 ... Receiver Assembly (Items 1-12) ...1 1 ... DCRC-101 ... Label ...1 2 ... DCRC-102 ... Counter Screw...3 3 ... DCRC-103 ... Switch Plate...1 4 ... DCRC-104 ... Seal...1 5 ... -
Page 19: Wiring Diagram - Dc-1100A/C
Wiring Diagram – DC-1100A/C... -
Page 20: Wiring Diagram - Dc-1100Rc
Wiring Diagram – DC-1100RC...


Need help?
Do you have a question about the DC-1100G and is the answer not in the manual?
Questions and answers