Table of Contents
Advertisement
Quick Links
FACTORY RECONDITIONED
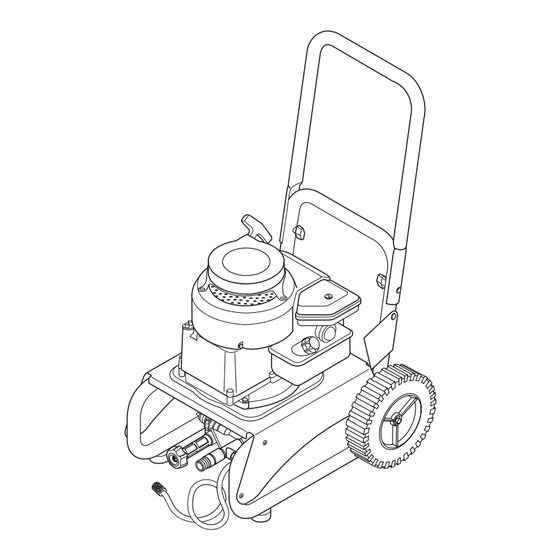
PRESSURE WASHER
Operating and Maintenance Manual
Models may vary in function and
appearance from units shown
This pressure washer is rated in accordance to the Pressure Washer
Manufacture Association (PWMA) standard PW101 (Testing and Rating
Performance of Pressure Washers).
BRIGGS & STRATTON POWER PRODUCTS GROUP, LLC
JEFFERSON, WISCONSIN, U.S.A.
Manual No. 193207 Revision C (04/25/2008)
Advertisement
Table of Contents

Subscribe to Our Youtube Channel
Related Manuals for Briggs & Stratton FACTORY RECONDITIONED PRESSURE WASHER


Summary of Contents for Briggs & Stratton FACTORY RECONDITIONED PRESSURE WASHER
-
Page 1: Pressure Washer
FACTORY RECONDITIONED PRESSURE WASHER Operating and Maintenance Manual Models may vary in function and appearance from units shown This pressure washer is rated in accordance to the Pressure Washer Manufacture Association (PWMA) standard PW101 (Testing and Rating Performance of Pressure Washers). BRIGGS &... - Page 2 Thank you for purchasing this factory reconditioned Briggs & Stratton pressure washer. We are pleased that you’ve placed your confidence in the Briggs & Stratton brand. When operated and maintained according to the instructions in this manual, your Briggs & Stratton pressure washer will provide years of dependable service. This manual contains safety information to make you aware of the hazards and risks associated with pressure washers and how to avoid them.
-
Page 3: Table Of Contents
Table of Contents Safety Rules ..........2 Assembly . -
Page 4: Safety Rules
Safety Rules Equipment Description Read this manual carefully and become familiar This is the safety alert symbol. It is used to alert with your pressure washer. Know its applications, you to potential personal injury hazards. Obey all its limitations and any hazards involved. safety messages that follow this symbol to avoid Every effort has been made to ensure that information in this possible injury or death. - Page 5 WARNING WARNING The engine exhaust from this product contains Fuel and its vapors are extremely flammable and chemicals known to the State of California to cause explosive. cancer, birth defects, or other reproductive harm. Fire or explosion can cause severe burns or death.
- Page 6 WARNING WARNING Starter cord kickback (rapid retraction) can result The high pressure stream of water that this in bodily injury. Kickback will pull hand and arm equipment produces can cut through skin and its toward engine faster than you can let go. underlying tissues, leading to serious injury and possible amputation.
- Page 7 WARNING NOTICE High pressure spray may damage fragile items including Starter and other rotating parts can entangle glass. hands, hair, clothing, or accessories. • DO NOT point spray gun at glass when using red 0° nozzle or Turbo nozzle. • NEVER operate pressure washer without protective housing or covers.
-
Page 8: Assembly
Assembly 2. Insert carriage bolts (A) through holes from back of unit and attach a plastic knob (B) from front of unit. IMPORTANT: Read entire operator’s manual before you Tighten by hand (see Figure 2). attempt to assemble or operate your pressure washer. IMPORTANT: Contact your local service center or look on the engine manufacturer’s website to obtain an engine operator’s manual. -
Page 9: Attach Detergent Siphon Hose To Pump
To attach handle supplied with “L” hooks or Wireform: Attach Detergent Siphon Hose to Pump Note: Your unit may be supplied with ”L” hooks or wireform If equipped with a cleaning tank, attach detergent siphon spraygun holders. hose to barbed hose fitting on pump (see Figure 6). 1. -
Page 10: Add Fuel
Add Fuel 1. Clean area around fuel fill cap. 2. Remove cap. Fuel must meet these requirements: 3. Refer to the two illustrations in Figure 10. Slowly add • Clean, fresh, unleaded gasoline. regular unleaded fuel (A) to fuel tank (B). Be careful not •... -
Page 11: Connect Hose And Water Supply To Pump
Connect Hose and Water Supply to Pump IMPORTANT: DO NOT siphon standing water for the water supply. Use ONLY cold water, less than 100°F (37.7°C). NOTICE 5. Connect garden hose (not to exceed 50 feet (15M) in DO NOT run the pump without the water supply connected length) to water inlet.Tighten by hand. -
Page 12: Features And Controls
Features and Controls Read this Operator’s manual and safety rules before operating your pressure washer. Your pressure washer may resemble one of the units shown below and on the next page. Compare the illustrations with your pressure washer to familiarize yourself with the locations of various controls and adjustments. Save this manual for further reference. - Page 13 Features and Controls continued 4 14 4 14 10. High Pressure Outlet — Connection for high pressure 16. Spray Gun — Controls the application of water onto hose. cleaning surface with trigger device. Includes safety latch. 11. Nozzle Extension with Quick Connect — Allows you to switch between different spray tips.
-
Page 14: Operation
Operation How to Start Pressure Washer To start your pressure washer for the first time, follow these instructions step-by-step. This starting information also Pressure Washer Location applies if you have let the pressure washer sit idle for at least a day. WARNING 1. - Page 15 9. Engage trigger lock (A) on spray gun trigger (see 3. Return starter grip handle slowly. DO NOT let rope Figure 17). “snap back” against starter. 4. When engine starts, slowly move choke lever to “Run” position, as engine warms. If engine falters, move choke lever to “Choke”...
- Page 16 WARNING Your unit may differ from that shown Starter cord kickback (rapid retraction) can result in bodily injury. Kickback will pull hand and arm toward engine faster than you can let go. Broken bones, fractures, bruises, or sprains could result. •...
-
Page 17: How To Stop Your Pressure Washer
How to Stop Your Pressure Washer 2. Point nozzle down towards a firm surface and press trigger to test pattern (see Figure 24). 1. Release spray gun trigger and let engine idle for two minutes. 2. If equipped, move throttle to slow position, then to stop position. -
Page 18: How To Use The Turbo Nozzle
If Unit is Equipped with Quick-Connect Spray Tips The quick–connect on the nozzle extension allows you to switch between several different spray tips. the spray tips vary the spray pattern as shown below (see Figure 26). High Pressure Low Pressure Use to apply Detergent Black... -
Page 19: Cleaning And Applying Detergent
3. Pull back on collar, insert turbo nozzle and release NOTICE collar (Figure 27). Tug on turbo nozzle to make sure it is securely in place. Keep the detergent siphoning tube/filter from coming in contact with the hot muffler. • When inserting the filter into a detergent solution bottle, route the tube so as to keep it from inadvertently contacting the hot muffler. -
Page 20: Pressure Washer Rinsing
Pressure Washer Rinsing Cleaning Detergent Siphoning Tube After you have applied detergent, scour the cleaning surface If your unit is not equipped with a cleaning tank and you with the high pressure water stream and then rinse it clean, used the detergent siphoning tube, you must flush it with as follows: clean water before stopping the engine. -
Page 21: Maintenance
Maintenance Typical Maintenance Schedule Follow the hourly or calendar intervals, whichever occurs first. More frequent service is required when operating in adverse conditions noted below. Maintenance Schedule - Fill in Dates as You Complete Regular Service Maintenance Task Service Dates Service Dates Every 25 Every 50... - Page 22 Inspect In-Line Filter Inspect High Pressure Hose Refer to Figure 31 and service the in-line filter if it becomes The high pressure hose can develop leaks from wear, clogged, as follows: kinking, or abuse. Inspect the hose each time before using it.
- Page 23 Adjustable Nozzle: Quick-Connect Spray Tips: 1. Remove orifice (A) from end of nozzle extension. 1. Remove spray tip from end of nozzle extension. Separate nozzle extension from spray gun. Twist nozzle 2. Use a small paper clip to free any foreign material clockwise to stream position.
-
Page 24: Engine Maintenance
Engine Maintenance Adding Oil A typical engine maintenance schedule is shown in Models with oil fill cap (Figure 36) Maintenance Schedule. For instructions on properly maintaining the engine, refer to operating and maintenance manuals found on the engine manufacturer’s website or from equipment dealers. -
Page 25: Service Air Cleaner
Service Air Cleaner 3. To clean cartridge, gently tap pleated paper side on a flat surface. Your engine will not run properly and may be damaged if 4. Reinstall clean or new cartridge assembly inside cover. you run it with a dirty air cleaner. 5. -
Page 26: Pump Maintenance
Pump Maintenance If your pump looks like the pump shown in Figure 43, follow these instructions: Only the pumps shown in Figures 42, 43 & 44 need periodic service. All other pumps are maintenance-free. If your pump looks like the pump shown in Figure 42, follow these instructions: Figure 43 —... - Page 27 If your pump looks like the pump in Figure 44, follow 2. Start and run pressure washer for at least 5 minutes. these instructions; 3. Turn off pressure washer and disconnect spark plug wire from spark plug. 4. Place suitable container under oil drain hole. 5.
-
Page 28: Storage
Storage Winter Storage After Each Use NOTICE Water should not remain in the unit for long periods of time. You must protect your unit from freezing temperatures. Sediments or minerals can deposit on pump parts and freeze • Failure to do so will permanently damage your pump and render pump action. -
Page 29: Long Term Storage
Long Term Storage Other Storage Tips 1. DO NOT store fuel from one season to another unless it If you do not plan to use the pressure washer for more than has been treated as described in Protect Fuel System. 30 days, you must prepare the engine and pump for long term storage. -
Page 30: Troubleshooting
Troubleshooting Problem Cause Correction 1. Low pressure nozzle Replace nozzle with high installed. pressure nozzle. 2. Water inlet is blocked. Clear inlet. 3. Inadequate water supply. Provide adequate water flow. Straighten inlet hose, patch 4. Inlet hose is kinked or Pump has following problems: leak. -
Page 31: Warranty
BRIGGS & STRATTON POWER PRODUCTS GROUP, LLC RECONDITIONED EQUIPMENT OWNER WARRANTY POLICY Effective December 1, 2005 replaces all undated Warranties and all Warranties dated before December 1, 2005 LIMITED WARRANTY Briggs & Stratton Power Products Group, LLC will repair or replace, free of charge, any part(s) of the equipment that is defective in material or workmanship or both. - Page 32 Briggs & Stratton Power Products Group, LLC Jefferson, WI 53549...
Need help?
Do you have a question about the FACTORY RECONDITIONED PRESSURE WASHER and is the answer not in the manual?
Questions and answers