
Related Manuals for Lorex LNC116


Summary of Contents for Lorex LNC116
-
Page 1: Instruction Manual
WIRELESS NETWORK CAMERA Instruction Manual English Version 2.0 INDUSTRY BUSINESS HOME RETAIL BUSINESS OUTDOOR LNC116 www.lorextechnology.com Copyright © 2013 Lorex Technology Inc. -
Page 3: Need Help
For all other matters, visit www.lorextechnology.com By Phone: North America: : 1-888-425-6739 Customer Service (for warranty matters) (1-888-42-LOREX) : 1-877-755-6739 Tech Support (for technical/installation issues) (1-877-75-LOREX) Mexico: 001-800-681-9263, 001-800-514-6739 International: +800-425-6739-0 (Example: From the UK, dial 00 instead of +) -
Page 4: Necesita Ayuda
1-888-425-6739 (1-888-42-LOREX) en E.U.A., vea la garantía ofrecida por el importador) 1-888-425-6739 (1-888-42-LOREX) Soutien technique (pour les questions d’ordre technique ou relatives à : 1-877-755-6739 (1-877-75-LOREX) Asistencia técnica l’installation) (para asuntos técnicos o de instalación) 1-877-755-6739 (1-877-75-LOREX) Mexique : 001-800-681-9263, 001-800-514-6739 Teléfono y Servicios Válidos Sólo en E.U.A.:... - Page 5 Please make sure to register your product at www.lorextechnology.com to receive product updates and technical support THIS PRODUCT MAY REQUIRE PROFESSIONAL INSTALLATION LOREX IS COMMITTED TO FULFILLING YOUR SECURITY NEEDS • We have developed user friendly products and documentation. Please read the Quick Start Guide and User Manual before you install this product.
- Page 6 ESTE PRODUCTO PUEDE EXIGIR UNA CE PRODUIT PEUT NÉCESSITER UNE INSTALACIÓN PROFESIONAL INSTALLATION PROFESSIONNELLE LOREX S’ENGAGE À RÉPONDRE À VOS LOREX SE COMPROMETE A SATISFACER BESOINS EN MATIÈRE DE SÉCURITÉ SUS NECESIDADES EN SEGURIDAD • Favor de leer la guía de instalación rápida y la •...
- Page 7 Welcome! Thank you for purchasing this Lorex wireless network camera. This user’s guide refers to the following models: • LNC116 Contents Before you start, make sure you have the contents listed below. • 1 x Camera • 1 x Camera power adapter and USB power cable •...
-
Page 8: Safety Instructions
Safety Instructions • Read this guide carefully and keep it for future reference. • Camera is rated for indoor use only. • Do not use in wet or humid areas. • Use the camera within given temperature, humidity, and voltage levels noted in the Technical Specifications. -
Page 9: If Using This Product As A Baby Monitor
If using this product as a baby monitor: We advise you to take the following precautions to avoid possible injury to infants: • DO NOT place the camera too close to cribs, bassinets, play yards, and other safe sleep environments for infants. •... - Page 10 • Two-way audio supported • Flexible indoor mounting (counter, wall, ceiling) As our product is subject to continuous improvement, Lorex Technology & subsidiaries reserve the right to modify product design, specifications & prices without notice and without incurring any obligation.
-
Page 11: Table Of Contents
TABLE OF CONTENTS 1. Camera Overview ....... 1 2. Getting Started ....... . . 3 2.1 Basic Setup . - Page 12 5. iPhone App ........68 5.1 Live Viewing with Lorex Ping for iPhone ....68 5.1.1 Using 2-Way-Audio (Intercom) .
- Page 13 6. iPad App ........90 6.1 Live Viewing with Lorex Ping HD ......90 6.1.1 Using 2-Way Audio (Intercom) .
- Page 14 7.1 Live Viewing with Lorex Ping for Android ....112 7.1.1 Using 2-way Audio (Intercom) ....... 113 7.1.2 Saving Snapshots .
- Page 15 8.4.4 Scheduling (Configuring Recording and Alarm Schedules) ..148 8.5 Admin ..........149 8.5.1 Admin Login .
-
Page 17: Camera Overview
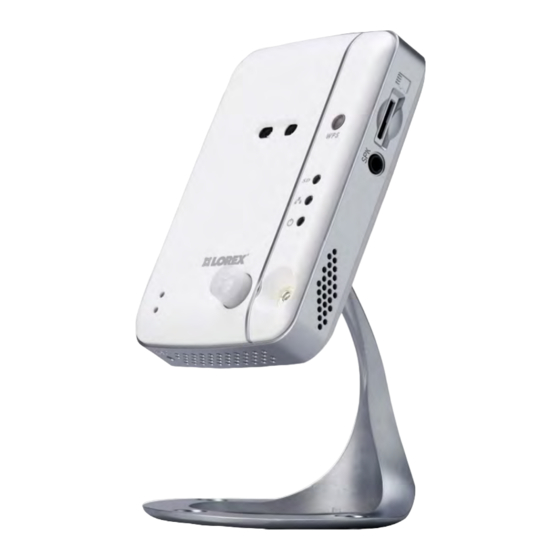
Camera Overview 1. CAMERA OVERVIEW 1. Camera Lens: The camera has separate lenses for day/night use. 2. Microphone 3. WPS Button: Used to connect the camera to a wireless router (not included) with a WPS button. 4. Indicator Lights: • SD: Glows when a microSD card (not included) is inserted. Flashes during recording. •... - Page 18 Camera Overview 8. CamID Label: Shows the camera’s CamID number and a QR code for easy setup using mobile devices. 9. NET: Connect an Ethernet cable and connect the other end to your router (not included). Bottom of camera 10.MicroSD Card Slot: Insert a microSD card (not included) to enable recording on the camera.
-
Page 19: Getting Started
Getting Started 2. GETTING STARTED 2.1 BASIC SETUP 1. Connect the power adapter cable to the power adapter using the USB connector. Power Adapter Power Adapter Cable 2. Connect the power adapter to a surge protector or power outlet. Connect the power adapter cable to the DC/IN port on the camera. - Page 20 Getting Started 3. A: Connect an Ethernet cable (included) to the NET port on the camera and connect the other end to an available LAN port (usually numbered 1~4) on your router (not included). The blue Network LED on the camera will glow blue when the camera is connected to your network.
-
Page 21: Connecting To Your Camera
Installing L-View (PC) 1. Insert the CD into your computer. The Autorun screen will appear. Click Run Lorex.exe Run Lorex.exe 2. Click Software, then L-View for PC to begin the installation. Follow the on-screen instructions to install the software. Connecting to your Camera on the Local Network (PC) 1. - Page 22 Auto Search 3. Enter the camera password. If this is the first time connecting to the camera, the password is lorex. Click OK. 4. If you have connected to this camera before, L-View connects to the camera. If this is the first time connecting to the camera, L-View will prompt you to create your own password for the camera.
- Page 23 Getting Started 5. Under New Password, enter a password that will be used for the camera. Under Confirm Password, enter the password again. Click OK. Enter a new password Confirm new password Click OK 6. Double-click the camera again under Auto Search to connect. Enter the new password for the camera then click OK to connect.
-
Page 24: Connecting To Your Camera On A Mac
Getting Started 5. Under Password, enter the camera password. If this is the first time connecting to the camera, the password is lorex. Click OK. Enter a camera name Enter the camera ID Enter the camera Password (default: lorex) 6. Double-click the camera or drag the camera to a display screen to connect to the camera. - Page 25 2. Double-click the camera ID. Double-click the camera ID 3. Enter the password (default: lorex) and then click OK to connect. L-View connects to your camera and streams live video. Enter the password (default: lorex) and then click OK...
- Page 26 Getting Started 4. If this is the first time connecting to the camera, you are prompted to change your password. Click OK. 5. Enter a new password and click OK. 6. Double-click the camera ID under Auto Search again, enter the new password, and click OK.
- Page 27 3. Under Camera ID, enter the CamID number printed on the label on the back of your camera. 4. Under Password, enter the camera password (default: lorex) and then click OK. Enter a name of your choice Enter the camID on the camera label...
-
Page 28: Connecting To Your Camera On Iphone
To connect to your camera using an iPhone: 1. Download Lorex Ping iPhone from the App Store. NOTE: Lorex Ping is a free application, but it requires a valid iTunes account to download. Lorex Ping requires iOS v4.0 and higher. - Page 29 Getting Started 3. Tap + to add a camera. Tap + 4. Under Name, enter a name for your camera. This can be anything of your choice. Enter a name for your camera of your choice 5. Under ID, press the QR code button ( ) and line up the QR code printed on the back of the camera using the camera on the phone.
- Page 30 Press Done. Enter the camera password. The default password is lorex. 7. Tap the name of the camera in the Camera List to connect to the camera. Lorex Ping connects to the camera. Tap the name of the camera to connect 8.
-
Page 31: Connecting To Your Camera On Ipad
To connect to your camera using iPad: 1. Download the Lorex Ping HD app from the App Store. NOTE: Lorex Ping is a free application, but it requires a valid iTunes account to download. Lorex Ping requires iOS v4.0 and higher. - Page 32 Getting Started 4. Under Name, enter a name for your camera. This can be anything of your choice. Enter a name for your camera of your choice 5. Under ID, press the QR code button ( ) and line up the QR code printed on the back of the camera using the camera on the iPad.
- Page 33 Press Done. Enter the camera password. The default password is lorex. 7. Tap the name of the camera in the Camera List to connect to the camera. Lorex Ping connects to the camera. Tap the name of the camera to connect 8.
-
Page 34: Connecting To Your Camera On Android
NOTE: Lorex Ping requires Android v.2.3 or higher. 2. Tap the Lorex Ping icon ( ) from the home screen or app list to open Lorex Ping. Lorex Ping opens to the Camera List. 3. Tap + to add a camera. - Page 35 Getting Started 4. Under Camera Name, enter a name for your camera. This can be anything of your choice. Enter a name for your camera of your choice 5. Under ID, press the QR code button ( ) and line up the QR code printed on the back of the camera using the camera on the Android phone or tablet.
- Page 36 Press OK. Enter the camera password. The default password is lorex. 7. Tap the name of the camera in the Camera List to connect to the camera. Lorex Ping connects to the camera. Tap the name of the camera to connect 8.
-
Page 37: Wifi Setup
Getting Started 2.3 WIFI SETUP You can setup the camera to use WiFi using your PC, Mac, iPhone, iPad, or Android phone or tablet. You can also quickly connect the camera to a WiFi network using WPS (WPS compatible router required; see step 3B on page 4 for instructions). 2.3.1 PC/MAC WIFI SETUP NOTE: The camera must be connected to your router using an Ethernet cable before you can set it up to use WiFi. - Page 38 Getting Started 5. Click WiFi Scan and select your WiFi network from the list. WiFi Scan Click your WiFi network from the list 6. Under WPA-PSK Key or WEP Key, enter the WiFi password. Click Save and Apply Enter WiFi Password Save &...
-
Page 39: Iphone Wifi Setup
NOTE: The camera must be connected to your router using an Ethernet cable before you can set it up to use WiFi. 1. Connect to your camera using Lorex Ping iPhone. For details, see “Connecting to your Camera on iPad” on page 15. Your iPhone must be connected to your WiFi, not your 3G/mobile network. - Page 40 Getting Started 3. Tap Camera Settings. Enter the camera’s admin username and password. By default, the admin username is admin and the password is left blank. Tap OK. Network WiFi Network 4. Tap Network then WiFi Network. 5. Slide Wi-Fi to ON. The camera scans for available networks in range. 6.
-
Page 41: Ipad Wifi Setup
NOTE: The camera must be connected to your router using an Ethernet cable before you can set it up to use WiFi. 1. Connect to your camera using Lorex Ping HD. For details, see “Connecting to your Camera on iPad” on page 15. Your iPad must be connected to your WiFi, not your 3G/mobile network. -
Page 42: Android Wifi Setup
NOTE: The camera must be connected to your router using an Ethernet cable before you can set it up to use WiFi. 1. Connect to your camera using Lorex Ping. For details, see “Connecting to your Camera on Android” on page 18. Your phone or tablet must be connected to your WiFi, not your 3G/mobile network. - Page 43 Getting Started 3. Tap Camera Settings. Enter the admin username and password. By default, the admin username is admin and the password is left blank. Tap OK. Tap Camera Settings 4. Tap Network then WiFi Network. 5. Check the WiFi checkbox. The camera will scan for available networks. Check WiFi Tap the name of your WiFi network...
-
Page 44: L-View 104 For Pc
L-View 116 for PC 3. L-VIEW 116 FOR PC L-View is a PC client software that supports up to 16 cameras. L-View is provided on the CD or available as a free download from www.lorextechnology.com. For instructions on installing and connecting to your camera using L-View, see “Connecting to your Camera on PC”... -
Page 45: L-View For Pc Interface
L-View 116 for PC 3.2 L-VIEW FOR PC INTERFACE 5 6 7 1. Display: Shows live or recorded video from your camera(s). • Click to select a camera and scroll up/down to zoom in/out. When the camera is zoomed in, click and drag the camera image to pan the camera. •... - Page 46 L-View 116 for PC • microSD: Click to open a list of recordings saved on the camera’s microSD card (not included). See “Playing Back Recordings on the microSD card with L-View” on page 42. • Snapshot: Click to save a still image screenshot of the camera. To access Snapshots, see “Directories (Opening or Changing the Snapshot Folder)”...
- Page 47 L-View 116 for PC • Click to mute audio from the camera. Click again to un-mute audio from the camera. • Use the top volume slider to control the volume for the camera speaker (not included) when the 2-way-audio is activated. •...
-
Page 48: Display Sub-Menu
L-View 116 for PC 3.2.1 DISPLAY SUB-MENU The Display sub-menu opens when you right-click on a camera’s display area. It contains additional camera controls. Right-click on a camera in the display area to open the Display sub-menu The Display sub-menu contains the following controls: •... -
Page 49: All Camera Action
L-View 116 for PC 3.2.2 ALL CAMERA ACTION Press to open the All Camera Action menu. The All Camera Action Menu contains the following controls: • Snapshot all: Take a snapshot from all connected cameras. • Play all: Connect to all cameras selected in display grid. •... -
Page 50: Adding Cameras To Camera List
L-View 116 for PC 3.3.1 ADDING CAMERAS TO CAMERA LIST • If the camera is on the local network, click and drag a camera from the Auto Search list to Camera List to add it. Click and drag camera from Auto Search to Camera List •... -
Page 51: Deleting Cameras
L-View 116 for PC NOTE: To change the camera’s password, see “Video Settings” on page 139. To save the camera password: 1. Right-click on the camera in Camera List and click ID/Password settings. 2. Under Name, enter a name for the camera that will appear in Camera List. This can be anything of your choice. -
Page 52: Configuring Mobile Streaming Settings
L-View 116 for PC 3.3.4 CONFIGURING MOBILE STREAMING SETTINGS Configure streaming settings when connecting using a smartphone or tablet. Select Bandwidth Check to automatically adjust resolution and frame rate based on bandwidth available Select Resolution and Frame Rate for mobile streaming Enable or disable audio streaming to mobile device To configure mobile streaming settings:... -
Page 53: Configuring Night Mode Control
L-View 116 for PC 3.3.5 CONFIGURING NIGHT MODE CONTROL Configure when the camera uses day or night mode. When day mode is on, the camera sees in color. When night mode is on, the camera sees in black and white, and the Infrared LED turns on to enable night vision. -
Page 54: Recording To Your Pc's Hard Drive
L-View 116 for PC • Manual night mode control: Manually select day mode or night mode. If using this option, under Mode, select Day for day mode or Night for night mode. Select day or night mode 3. Click Update to apply changes to your camera. Enter the admin username (default: admin) and password (default: left blank) for the camera and click OK. -
Page 55: Enabling Motion Triggered Recording
L-View 116 for PC 3.4.1 ENABLING MOTION TRIGGERED RECORDING L-View can automatically record the camera to your computer hard drive when motion is detected. This is useful if you don’t want to miss any events that occur, but want to avoid recording and using up hard drive space when nothing is happening. - Page 56 L-View 116 for PC • Periodic recording: Display a camera on the selected display screen and record on a repeating schedule. Schedules are managed by screens. Each screen can support 1 schedule, which records or displays 1 camera. There are a maximum of 16 possible screens that can be configured for recordings.
- Page 57 L-View 116 for PC 3.5.1 CONFIGURING A CONTINUOUS RECORDING OR PLAY ONLY SCHEDULE ATTENTION: Your computer must be on, and L-View must be running to enable scheduled recording to your computer hard drive. If your computer is off or on Sleep or Hibernate mode, scheduled recording to your computer hard drive will not work.
- Page 58 L-View 116 for PC 5. Under Mode, select Continuous recording to continuously record the camera from a start date to an end date, or select Play only to display the camera on the selected screen from a start date to an end date. 6.
- Page 59 L-View 116 for PC 2. Under Window #, select the screen you would like the schedule to run on. The arrangement of screens in L-View is shown above. Select Enable to enable schedule Select screen schedule will run on Double-click the camera Select Periodic...
- Page 60 L-View 116 for PC 7. Select Everyday to have the schedule apply to every day, or select Weekday to only have the schedule apply on certain days of the week. • If you select Weekday, click to select which days the schedule will apply to below. Selected days are shown in blue and un-selected days are shown in white.
-
Page 61: Playing Back Recordings On The Microsd Card With L-View
L-View 116 for PC 3.6 PLAYING BACK RECORDINGS ON THE MICROSD CARD WITH L-VIEW You can use L-View to playback recorded video on the camera’s microSD card (required; not included). For instructions on setting up recording on the microSD card, see “SD Card (Configuring microSD Recording)”... - Page 62 L-View 116 for PC 5. Click a recording from the list and then click Playback to view it. Click a recording from the list Click Playback to play 6. The recording plays back in the camera display area. • To return to a live view of your camera, wait for the recording to finish, then right-click and select Play.
-
Page 63: Configuring Camera Video Settings
L-View 116 for PC 1. In the Camera List, right-click the camera you would like to playback from, and then click NAS Playback. Right-click the camera and then click NAS Playback 2. Click + next to the day you would like to play back video from. 3. - Page 64 L-View 116 for PC NOTE: The camera will disconnect after making changes to video settings. Wait about 15 seconds after clicking Update and double-click the camera in Camera List or Auto Search to reconnect to the camera. TIP: Change only one camera image quality setting at a time before clicking Update so you can judge the effects.
-
Page 65: Quality Tab (Configuring Resolution, Frame Rate, And Bandwidth)
L-View 116 for PC 3.8.1 QUALITY TAB (CONFIGURING RESOLUTION, FRAME RATE, AND BANDWIDTH) Select Internet connection speed Check to automatically adjust resolution and frame rate based on bandwidth Select Resolution Select Frame Rate Select how image quality will be affected when bandwidth is low The Quality tab allows you to configure image quality settings such as the camera resolution, frame rate, and bandwidth settings. -
Page 66: Video Tab (Configure General Video Settings)
L-View 116 for PC • Select Video Motion to have the camera maintain the frame rate and reduce image quality when bandwidth is insufficient. • Select Image Quality to have the camera maintain image quality and reduce frame rate when bandwidth is insufficient. •... - Page 67 L-View 116 for PC 3. Under Place, select Outdoor video if the area with the camera is brightly lit. Select Indoor Video if you notice strip lines in the image or if the picture is too dark on the Outdoor video setting. Select Indoor video + Sunlight if the picture is too bright on the Indoor Video setting.
-
Page 68: Control Tab (Configure Status Led's And Motion Detection Sensitivity)
L-View 116 for PC 3.8.3 CONTROL TAB (CONFIGURE STATUS LED’S AND MOTION DETECTION SENSITIVITY) Configure status LED’s Configure motion detection sensitivity from 1 (High) to 10 (Low) The Control tab allows you to configure the camera status LED’s to make the camera harder to spot at night. -
Page 69: Camera Info Tab
L-View 116 for PC be triggered if a moving object is larger than 1% of the video area. If it is set to 10, a moving object must be larger than 10% of the video area to trigger motion detection. 2. -
Page 70: Configuring L-View
L-View 116 for PC 3.9 CONFIGURING L-VIEW To configure settings for L-View, click the settings button ( 3.9.1 DIRECTORIES (OPENING OR CHANGING THE SNAPSHOT FOLDER) The Directories menu shows you the folder where Snapshots are saved. It allows you to open or change the Snapshot folder. -
Page 71: Startup Options
L-View 116 for PC 3.9.2 STARTUP OPTIONS The Startup options menu allows you to configure startup options for L-View. To configure startup options: Check for L-View to open automatically when your computer turns on Check to restore camera layout and connect to previously open cameras when L-View opens 1. -
Page 72: Fixed Ip Access
L-View 116 for PC 3.9.3 FIXED IP ACCESS The Fixed IP Access menu is for advanced users only. It must be used if you have assigned your camera a fixed IP address on your router. Check to enable Fixed IP addresses for cameras To configure your camera to use a fixed IP address: 1. -
Page 73: Login (Enabling A Password To Access L-View)
L-View 116 for PC 3.9.4 LOGIN (ENABLING A PASSWORD TO ACCESS L-VIEW) The Login menu allows you to enable a password to open L-View. Select Enable Enter a User Name Enter a Password To enable a password for L-View: 1. Select Enable. 2. -
Page 74: Software Update
L-View 116 for PC To configure Image Ratio: 1. Check Keep Image Ratio to not allow any stretching of the image (bars may appear on the sides of the image). Un-check Keep Image Ratio to stretch the image to the entire size of the display. -
Page 75: L-View For Mac
L-View for Mac 4. L-VIEW FOR MAC L-View for Mac allows you to view your camera on a Mac computer. L-View for Mac is available as a free download from www.lorextechnology.com. For instructions on connecting to your camera using Mac, see “Connecting to your Camera on a Mac”... - Page 76 L-View for Mac 1. Window Controls: Click to exit or minimize L-View. 2. Camera List: Shows cameras that have been saved in L-View. Double-click cameras to connect to them. NOTE: To connect to multiple cameras, click to select a display area. The selected area is highlighted.
-
Page 77: Camera List (Managing Cameras)
L-View for Mac • Folder: Click to open the recording folder or snapshot folder for this camera. Click to open recording or snapshot folder 7. Display Area: Shows video from your camera. • Double-click to view the camera in full-screen; double-click again to exit full-screen. •... -
Page 78: Deleting Cameras From Camera List
L-View for Mac setting. Enter the camera password. If you want, you can also enter a Camera Name of your choice for your camera. Click OK. Enter a name of your choice. Click and drag camera ID Right-click and select Enter the camera password and from Auto Search List to ID/Password setting... -
Page 79: Playing Back Video From Your Mac's Hard Drive
L-View for Mac 2. Press the recording button again ( ) to stop recording. Click to Start/Stop recording 4.4.1 PLAYING BACK VIDEO FROM YOUR MAC’S HARD DRIVE You can playback video files you have saved to your Mac’s hard drive in L-View. To play back video from your Mac’s hard drive: 1. - Page 80 L-View for Mac 3. Select the video file you would like to playback. Click the arrow next to Recording to expand the recording list Click the arrows next to the camera you would like to playback from Click the arrows next to the date you would like to playback video from Double-click to open video files yyyymmdd 20121016...
-
Page 81: Playing Back Recordings On The Microsd Card With L-View
L-View for Mac 4.5 PLAYING BACK RECORDINGS ON THE MICROSD CARD WITH L-VIEW You can use L-View to play back recordings on the camera’s microSD card (not included). to set up microSD recording, you must use the camera’s web configuration tool. For details, see “SD Card (Configuring microSD Recording)”... -
Page 82: Using Camera List To Modify Camera Settings
L-View for Mac 4.6 USING CAMERA LIST TO MODIFY CAMERA SETTINGS You can use L-View to configure certain settings for the camera. TIP: Change only one camera setting at a time before clicking Update so you can judge the effects. To configure camera settings using Camera List: •... - Page 83 L-View for Mac To configure image quality settings: 1. Right-click on the camera in Camera List and select Video settings. Select the Quality tab. 2. Under Bandwidth, select the speed of your Internet connection. If your Internet connection is faster than 3Mbps, select 3Mbps. 3.
-
Page 84: Video Tab (Configure General Video Settings)
L-View for Mac 4.6.2 VIDEO TAB (CONFIGURE GENERAL VIDEO SETTINGS) The Video tab allows you to configure general video settings, such as color and brightness settings. Select Colored or Select Brightness Black & White Select Low Light Select Sharpness Sensitivity Enable/disable time Select Lighting stamps... -
Page 85: Control Tab (Configure Status Led's And Motion Detection Sensitivity)
L-View for Mac 8. Check Enable time display on video to turn on video time stamps or un-check it to disable video time stamps. 9. Under Microphone, select Enabled to enable the built-in microphone on the camera or select Disabled to disable the built-in microphone on the camera. 10.Click Update to save changes. -
Page 86: Camera Info Tab
L-View for Mac 3. Click Update to save changes. Enter the camera admin user name (default: admin) and password (default: left blank) and click OK. Click OK to exit the settings window. NOTE: The camera may reboot after settings are changed. Wait about 30 seconds and then double-click the camera in Camera List or Auto Search to reconnect to the camera. -
Page 87: Configuring Night Mode Settings
L-View for Mac 4.6.5 CONFIGURING NIGHT MODE SETTINGS Configure when the camera uses day or night mode. When day mode is on, the camera sees in color. When night mode is on, the camera sees in black and white, and the Infrared LED turns on to enable night vision. - Page 88 L-View for Mac • Manual night mode control: Manually select day mode or night mode. If using this option, under Mode, select Day for day mode or Night for night mode. Select day or night mode 3. Click Update to apply changes to your camera. Enter the admin user name (default: admin) and password (default: left blank) for the camera and click OK.
- Page 89 L-Play: Playing Recorded Video on your PC 5. L-PLAY: PLAYING RECORDED VIDEO ON YOUR PC L-Play is an advanced playback software that allows you to play back recorded video or snapshots from your computer hard drive or NAS. 5.1 RUNNING L-PLAY L-Play is automatically installed when you install L-View.
- Page 90 L-Play: Playing Recorded Video on your PC 5.2 L-PLAY OVERVIEW 1. Display 2. Minimize/Restore 3. Maximize/Revert to Window 4. Exit 5. Open Record: Open recordings from your computer hard drive. See “Playing Back Video from Computer Hard Drive in L-Play” on page 79. 6.
- Page 91 L-Play: Playing Recorded Video on your PC 8. Convert to AVI: Convert currently playing video to .avi file to play in Windows Media player or for sharing. See “Converting Video Files to AVI” on page 84. 9. Split-Screen Selectors: Click for different split-screen configurations.
- Page 92 L-Play: Playing Recorded Video on your PC 14.Playback Speed: Shows the current playback speed. Click + to increase playback speed or - to decrease. 15.Zoom: Click to zoom in on the selected video or click to zoom out of selected video. Once zoomed, click and drag on the video to pan the camera. 16.Snapshot : Click to take a snapshot from the currently playing video.
- Page 93 L-Play: Playing Recorded Video on your PC 3. Click + next to the year to expand recordings for the year. Click + next to month to expand recordings for that month. 4. Double-click a day to select it. 5. Click the camera or cameras you would like to playback from and then click Play. Double-click the day you would like to play back...
- Page 94 L-Play: Playing Recorded Video on your PC To playback NAS recordings in L-Play: NOTE: To complete the steps below, your NAS device must be connected to the same network as your computer. 1. Click Open NAS. Click Open NAS 2. Click Browse. Click Browse 3.
- Page 95 L-Play: Playing Recorded Video on your PC 4. Browse to your NAS device, double-click the folder you selected as the Shared public folder when you set up NAS recording, and then select IPCamRecordFiles. Click OK. Browse to IPCamRecordFiles Click Scan Click OK Neighborhood 5.
- Page 96 L-Play: Playing Recorded Video on your PC 7. Click the camera or cameras you would like to play back video from and click Play. 8. Playback begins from the earliest video files recorded on that day. Use the slider to adjust the playback time.
-
Page 97: Converting Video Files To Avi
L-Play: Playing Recorded Video on your PC 3. Click + next to the day the snapshot was taken. Click + to open snapshots from a camera Click + to open snapshots from the selected day Double click to open a snapshot 4. - Page 98 L-Play: Playing Recorded Video on your PC 1. While a video file is playing, click Start Time. The converted .avi video file will start at this point in the video. CamID of selected screen shown in white Click Start Time Click Stop Time Click Convert NOTE: If you have more than one video open, make sure to select the screen that is...
- Page 99 L-Play: Playing Recorded Video on your PC 3. Click Convert.The Convert to AVI menu opens. Select a save folder Enter a custom file name Convert file to .avi 4. (Optional) If you want to select a custom folder to save the .avi file, click Browse, or use the default folder.
-
Page 100: Iphone App
For instructions on connecting to your camera using an iPhone, see “Connecting to your Camera on iPhone” on page 12. 6.1 LIVE VIEWING WITH LOREX PING FOR IPHONE You can use Lorex Ping in portrait or landscape mode. Tilt the phone to switch between portrait or landscape. Disconnect button (only... -
Page 101: Using 2-Way-Audio (Intercom)
iPhone App 6.1.1 USING 2-WAY-AUDIO (INTERCOM) 1. While viewing, touch to activate 2-way-audio (intercom) using the phone microphone (speaker required; not included). • A volume slider appears that allows you to adjust the speaker volume. • Touch again to turn off 2-way audio. Turn off 2-way-audio Adjust speaker volume 6.1.2 TAKING SNAPSHOTS... -
Page 102: Playing Back Video Recorded On Iphone
iPhone App 6.2 PLAYING BACK VIDEO RECORDED ON IPHONE After using the record button to record video to your iPhone, you can playback video on iPhone. 6.2.1 USING PLAYBACK 1. From the Camera List, tap Playback ( NOTE: If you are still connected to the camera, tap Disconnect to return to the Camera List. -
Page 103: Using Camera List To Edit Camera Settings
iPhone App 3. Select the camera you would like to playback from. Select camera for microSD playback 4. The camera scans for recorded video files and shows a list of days with recorded video. Tap a day to view recordings created on that day. Tap a day to view recorded videos from that day. -
Page 104: Editing Camera Connection Settings
OFF to keep the icon as is. 4. Under Save admin password, select ON to have Lorex Ping save the admin user name and password the next time you enter it, or OFF to require the admin user name and password whenever settings changes are made. -
Page 105: Editing Alarm Notification Settings (Push Notifications)
iPhone App 2. Tap next to the camera you would like to delete then tap Delete to confirm. Then tap Delete Tap here 3. Tap Done. 6.4.3 EDITING ALARM NOTIFICATION SETTINGS (PUSH NOTIFICATIONS) Push Alarm Notifications can be set up to create a notification straight to your iPhone when motion or sound is detected by the camera. -
Page 106: Editing Camera Mobile Streaming Settings
iPhone App 3. Under Motion, select ON to enable Push Alarm Notifications when motion is detected using video motion detection or OFF to disable. 4. Under PIR, select ON to enable Push Alarm Notifications when motion is detected using the PIR motion sensor or OFF to disable. 5. -
Page 107: Editing Camera Video Settings
iPhone App 4. Under Auto, select ON to have the camera automatically select the resolution and frame rate based on available bandwidth. Or, select OFF to manually select the resolution and frame rate. If you select OFF, configure the following: •... -
Page 108: Configuring Led Control And Motion Detection Sensitivity
iPhone App 4. Configure the following: • Video color: Select Colored to view the camera in color or select Black & white. Tap Video to return to Video settings. • Brightness: Manually adjust the brightness of the image between 10 (highest) and 1 (lowest). -
Page 109: Configuring Night Mode Settings
iPhone App To configure LED’s and motion detection sensitivity: 1. In Camera List, tap next to the camera. 2.Tap Video Settings. Then tap Control. Select LED behavior Select video motion detection sensitivity 2. Under Status LED, select one of the following: •... - Page 110 iPhone App 2. Tap Video Settings. Then tap Night Mode Control. Select Night Mode control type 3. Select one of the following: • Auto: Camera will automatically switch between day mode or night mode, based on the amount of light in the room. •...
-
Page 111: Editing Camera Wired Network Settings
iPhone App • Manual: Manually select day mode or night mode. If using this option, select Day for day mode or Night for night mode. Select Manual Select Day or Night mode 4. Tap Update to save your changes. 6.4.8 EDITING CAMERA WIRED NETWORK SETTINGS Configure the camera IP address when connected using Ethernet. -
Page 112: Editing Camera Wifi Network Settings
iPhone App 4. Select DHCP (recommended) to allow the camera to automatically obtain an IP address from the router or Static to use fixed IP address settings. If you select Static, configure your IP Address, Subnet mask, Default gateway, DNS1, and DNS2. 5. -
Page 113: Enabling Email Notifications
iPhone App 9. Tap the camera in the Camera List to connect. If you cannot connect, check to make sure you have entered the correct wireless password and that the camera is in signal range of your wireless router. 6.4.10 ENABLING EMAIL NOTIFICATIONS Configure email alarms. -
Page 114: Enabling Speaker Alarms
iPhone App 6. Check the following trigger options for email alarms: • Motion: Use Video motion detection to trigger email alarms. Video motion detection looks for movement in the image to determine if there is motion. This means that there may be false alarms caused by changes in lighting, trees moving in the wind, etc. - Page 115 iPhone App 3. Tap Schedule then Speaker Alarm. Select speaker alarm triggers Select number of times speaker alarm will repeat Test speaker alarm 4. Under Speaker Alarm Trigger, check the triggers that will cause speaker alarms: • Motion: Use Video motion detection to trigger audio alarms. Video motion detection looks for movement in the image to determine if there is motion.
-
Page 116: Configuring Microsd Recording
iPhone App 6.4.12 CONFIGURING MICROSD RECORDING Configure video recording to the microSD card (required; not included). To playback recordings saved on the microSD card, use L-View or the iPhone, iPad, or Android apps. To configure microSD card recording: 1. Make sure a microSD card (not included) is inserted into the camera. It is recommended to format the microSD card before using it with the camera. -
Page 117: Configuring The Camera Recording And Alarm Schedule
iPhone App 6.4.13 CONFIGURING THE CAMERA RECORDING AND ALARM SCHEDULE Configure schedules for recording and alarms. Schedules can be configured separately for alarms and recording. You can configure up to 12 schedules. To create a schedule for alarms or recording: 1. - Page 118 iPhone App 8. Under SD card record, check Continuous for the camera to record to microSD continuously during the scheduled time. Check Motion trigger to record when video motion is trigger during the scheduled time, select PIR trigger to record when the PIR motion sensor is triggered during the scheduled time, or select both.
-
Page 119: Configuring The Camera Date And Time
iPhone App To delete a Schedule: 1. From the Scheduling menu, swipe the schedule you would like to delete from left to right. Swipe from left to right and then tap delete to delete a schedule 2. Tap Delete. 3. Tap Update to save your changes. 6.4.14 CONFIGURING THE CAMERA DATE AND TIME Configure the camera date and time. -
Page 120: Rebooting The Camera
iPhone App 5. Use the slider to select your time zone. Select your time zone Enable Daylight Savings and configure start and end times for daylight savings • If your region observes Daylight Savings Time, check Daylight Savings Time. Tap Start Time and End Time, use the sliders to configure the start and end time for Daylight Savings Time and then tap OK. -
Page 121: Using Local Search To Add Cameras
To add cameras using local search: 1. Tap the Local Search button ( 2. Lorex Ping automatically scans for cameras on your local network. Tap Search to re-scan. Tap Search to re-scan Tap a camera to add to camera list 3. -
Page 122: Ipad App
App 7. IPAD APP The app for iPad is called Lorex Ping HD. For instructions on connecting to your camera using iPad, see “Connecting to your Camera on iPad” on page 15. 7.1 LIVE VIEWING WITH LOREX PING HD... -
Page 123: Using 2-Way Audio (Intercom)
iPad App 7.1.1 USING 2-WAY AUDIO (INTERCOM) 1. While viewing, touch to activate 2-way-audio (intercom) using the phone microphone (speaker required; not included). 2. Tap again to deactivate 2-way-audio. 7.1.2 TAKING SNAPSHOTS • While viewing, tap to take a snapshot from the camera. You can view snapshots using the Camera app or save photos to your computer by connecting your iPad to your computer using a USB cable. -
Page 124: Playing Back Video Recorded To Microsd On Ipad
iPad App 4. During playback, tap in the display area to bring up playback controls. Tap to Select Camera Tap to Select Tap to play file Tap in the display area during playback for playback controls 7.3 PLAYING BACK VIDEO RECORDED TO MICROSD ON IPAD You can playback video recorded on the camera microSD card (not included) on your iPad. - Page 125 iPad App To play back video recorded on the camera microSD card: 1. Tap the Playback button ( ) then tap SD Card. 2. Select the camera you would like to playback from. 3. The camera scans for recorded video files and shows a list of days with recorded video.
-
Page 126: Using Camera List To Edit Camera Settings
iPad App 7.4 USING CAMERA LIST TO EDIT CAMERA SETTINGS You can use the Camera List to adjust the connections settings or other settings for your camera. To access Camera Settings: 1. Tap Camera List . Then tap next to the camera you would like to edit. 2. -
Page 127: Deleting Cameras From Camera List
OFF to keep the icon as is. 4. Under Save admin password, select ON to have Lorex Ping save the admin user name and password the next time you enter it, or OFF to require the admin user name and password whenever settings changes are made. -
Page 128: Editing Alarm Notifications Settings (Push Notifications)
iPad App 7.4.3 EDITING ALARM NOTIFICATIONS SETTINGS (PUSH NOTIFICATIONS) Push Alarm Notifications can be set up to create a notification straight to your iPhone when motion or sound is detected by the camera. Push Alarm Notifications go directly to the notifications area on your device. Example of Push Notification To enable Push Alarm Notifications: 1. -
Page 129: Editing Camera Mobile Streaming Settings
iPad App 4. Under PIR, select ON to enable Push Alarm Notifications when motion is detected using the PIR motion sensor or OFF to disable. 5. Under Sound, select ON to enable Push Alarm Notifications when sound is detected by the camera or OFF to disable. Under Sound Sensitivity, select a sensitivity for Sound Push Alarm Notifications between 1 (lowest) and 10 (highest). -
Page 130: Editing Camera Video Settings
iPad App • Under Frame rate, select the frame rate that will be used when connecting to the camera using a smart phone or tablet between 30fps (highest) and 1fps (lowest). Tap Done to confirm. 5. Under Microphone, select OFF to turn off audio streaming to your mobile device or tap to select ON to turn on audio streaming to your mobile device. -
Page 131: Configuring Led Control And Motion Detection Sensitivity
iPad App + Sunlight if the picture is too bright on the Indoor setting. If you select an indoor setting, select 60Hz or 50Hz to adjust the camera for the frequency of your indoor lighting. Tap Done to return to Video settings. •... -
Page 132: Configuring Night Mode Settings
iPad App 3. Under Status LED, select one of the following: • Normal: LED's will function as normal. For details on LED functions, see “Camera Overview” on page 1. • Always turn off: LED's are turned off at all times. •... -
Page 133: Editing Camera Wired Network Settings
iPad App 2. Tap Video Settings. Then tap Night Mode Control. Select Day/Night mode control type 3. Select one of the following: • Auto: Camera will automatically switch between day mode or night mode, based on the amount of light in the room. •... -
Page 134: Editing Camera Wifi Network Settings
iPad App 2. Tap Camera Settings. 3. Tap Network then Wired Network. Select DHCP or Static If Static, configure IP address information 4. Select DHCP (recommended) to allow the camera to automatically obtain an IP address from the router or Static to use fixed IP address settings. If you select Static, configure your IP Address, Subnet mask, Default gateway, DNS1, and DNS2. -
Page 135: Enabling Email Notifications
iPad App 3. Tap Network then WiFi Network. Slide Wi-Fi to ON Tap your WiFi network Tap Other to connect to a hidden network 4. Slide WiFi to ON to enable WiFi on the camera and scan for available networks. 5. - Page 136 iPad App 2. Tap Camera Settings. Enable/disable email notifications Select motion sensitivity for video motion Select email triggers Enable/disable email notifications Add up to 3 email recipients 3. Tap Schedule then Email Alarm. 4. Under Email trigger, select ON to enable email notifications or OFF to disable. Then under Send Email, select ON to enable email notifications.
-
Page 137: Enabling Speaker Alarms
iPad App • PIR: Use the PIR motion detector to trigger email alarms. The PIR motion detector uses changes in temperatures (e.g. from a person moving around in front of the camera) to determine if there is motion. PIR motion detection is less effective at higher temperatures. -
Page 138: Configuring Microsd Recording
iPad App 4. Under Speaker Alarm Trigger, check the triggers that will cause speaker alarms: • Motion: Use Video motion detection to trigger audio alarms. Video motion detection looks for movement in the image to determine if there is motion. This means that there may be false alarms caused by changes in lighting, trees moving in the wind, etc. -
Page 139: Configuring The Camera Recording And Alarm Schedule
iPad App 4. Tap Schedule then SD-Card. Enable microSD recording Select Always recording or Schedule recording Select if you want the camera to overwrite (Circular recording) or stop recording when the microSD card is full 5. Under Recording, select ON to enable microSD recording or OFF to disable. 6. - Page 140 iPad App To create a schedule for alarms or recording: 1. First, you must enable alarms or recording to use the schedule. 2. In Camera List, tap next to the camera you would like to edit. 3. Tap Camera Settings. 4.
-
Page 141: Configuring The Camera Date And Time
iPad App 9. Under Time period, select one of the following: • Every week: Create a weekly recording schedule. Tap and check the days you would like the schedule to apply to. Tap Start and End and use the sliders to configure the start and end time for the schedule. -
Page 142: Rebooting The Camera
iPad App 3. Tap Admin then Date/Time. Tap Time Zone 4. Tap Time Zone. 5. Use the slider to select your time zone. • If your region observes Daylight Savings Time, check Daylight Savings Time. Tap Start Time and End Time, use the sliders to configure the start and end time for Daylight Savings Time and then tap Done. -
Page 143: Using Local Search To Add Cameras
You can use the Local Search Menu to automatically add the ID's for cameras on your local network. To add cameras using local search: 1. Tap the Local Search button ( 2. Lorex Ping automatically scans for cameras on your local network. Tap Search to re-scan. Tap search to re-scan your local network Tap to add camera 3. -
Page 144: Android App
Camera on Android” on page 18. 8.1 LIVE VIEWING WITH LOREX PING FOR ANDROID You can use Lorex Ping in portrait or landscape mode. Tilt the phone to switch between portrait or landscape. Disconnect button (only shown in portrait mode) -
Page 145: Using 2-Way Audio (Intercom)
ANDROID DEVICE After using the record button to manually record video to your Android device, you can use Lorex Ping to play it back. To playback video recorded to your Android device: 1. From the Camera List, tap Play Back (... - Page 146 Android App 2. Tap the camera you would like playback. Tap the camera 3. Select the date that you would like to playback video from, and then tap a video file to open it. Tap the date to playback Tap to open a video file 4.
-
Page 147: Playing Back Video Recorded On Microsd On Android
Android App 8.3 PLAYING BACK VIDEO RECORDED ON MICROSD ON ANDROID You can playback video recorded on the camera microSD card (not included) on your Android phone or tablet. For details on setting up microSD recording, see “Enabling microSD Recording” on page 128. To play back video recorded on the camera microSD card: 1. -
Page 148: Using Camera List To Edit Camera Settings
Android App 4. Tap a day to view recordings for that day. Tap a recording to view it. Tap to view a recording 5. Tap Disconnect to return to the recording list. 8.4 USING CAMERA LIST TO EDIT CAMERA SETTINGS You can use the Camera List to adjust the connection or other settings for your camera. -
Page 149: Editing Camera Connection Settings
Android App 8.4.1 EDITING CAMERA CONNECTION SETTINGS You can edit your camera connection information. This is useful if you change the password of the camera or if you want to save the admin user name and password, so you don’t have to enter it to make settings changes. To edit camera connection settings: 1. -
Page 150: Editing Camera Mobile Streaming Settings
Android App 8.4.3 EDITING CAMERA MOBILE STREAMING SETTINGS Configure the camera image quality settings for streaming to mobile devices (i.e. smart phones and tablets). Please note that less bandwidth is generally available over mobile networks than over WiFi or Ethernet. To edit mobile streaming settings: 1. - Page 151 Android App 2. Tap Video Settings. Then tap Video. Select Color or Black & White Select Brightness Select Sharpness Select Low light sensitivity Select environment settings Select quality preference Enable/disable time stamps Enable/disable video flip 3. Configure the following: • Video color: Select Color to view the camera in color or select Black & white. •...
-
Page 152: Configuring Led Control And Motion Detection Sensitivity
Android App • Time Display on Video: Tap to select ON to enable time stamps on video or OFF to disable time stamps. • Video flip: Tap to select Video Flip to flip the camera image vertically and horizontally or select Normal for the normal orientation. This is useful if the camera has been mounted to a wall or ceiling upside down. -
Page 153: Configuring Night Mode Settings
Android App 8.4.6 CONFIGURING NIGHT MODE SETTINGS Configure when the camera uses day or night mode. When day mode is on, the camera sees in color. When night mode is on, the camera sees in black and white, and the Infrared LED turns on to enable night vision. -
Page 154: Enabling Push Alarm Notifications
Android App • Manual: Manually select day mode or night mode. If using this option, select Day for day mode or Night for night mode. Select Manual for manual day/night mode selection Select Day mode or Night mode 4. Tap Update to save your changes. 8.4.7 ENABLING PUSH ALARM NOTIFICATIONS Push Alarm Notifications can be set up to create a notification straight to your Android device when motion or sound is detected by the camera. -
Page 155: Editing Camera Wired Network Settings
Android App 2. Tap Alarm Notification. Enable/disable push notifications for video motion detection Enable/disable push notifications for sound Select sensitivity for sound push notifications Enable/disable push notifications for PIR motion detection 3. Under Motion, tap to select ON to enable Push Alarm Notifications when motion is detected using video motion detection or OFF to disable. -
Page 156: Editing Camera Wifi Network Settings
Android App 3. Tap Network then Wired Network. Select DHCP (recommended) or Static for a fixed IP address If Static, configure IP address information as needed 4. Select DHCP (recommended) to allow the camera to automatically obtain an IP address from the router or Static to use fixed IP address settings. If you select Static, configure your IP Address, Subnet mask, Default gateway, DNS1, and DNS2. -
Page 157: Enabling Email Notifications
Android App 3. Tap Network then WiFi Network. Check to enable WiFi Tap the network you would like to connect to and enter the password Tap Other to add a hidden WiFi network 4. Check WiFi to enable WiFi on the camera and scan for available networks. 5. - Page 158 Android App 3. Tap Schedule then Email Alarm. Enable/disable email notifications Select motion sensitivity for video motion Select email triggers Enable/disable email notifications Enter recipient email addresses 4. Under Email trigger, tap to select ON to enable email notifications or OFF to disable. Then under Send Email, tap to select ON to enable email notifications.
-
Page 159: Enabling Speaker Alarms
Android App NOTE: If you want to use a custom SMTP server to send Email messages, click SMTP Settings, enter your SMTP server information, and tap OK. 8.4.11 ENABLING SPEAKER ALARMS Configure audio alarms using a speaker (not included) connected to the camera. Audio alarms can be set up to go off when the camera detects motion. -
Page 160: Enabling Microsd Recording
Android App • Scheduling: Create audio alarms based on the settings set in the Schedule. 7. Tap Alarm Test to sound a test alarm. 8. Tap Update to save your settings. 8.4.12 ENABLING MICROSD RECORDING Configure video recording to the microSD card (required; not included). To playback recordings saved on the microSD card, use L-View or the iPhone, iPad, or Android apps. -
Page 161: Configuring The Recording And Alarm Schedule
Android App • Schedule Recording: Camera will record according to settings set in the recording schedule. NOTE: To enable Motion detection recording using Android, you must use Schedule recording. Then, create a schedule in the Scheduling menu with Motion trigger, PIR trigger, or both Motion trigger and PIR trigger selected. - Page 162 Android App 7. Under Speaker Alarm, check Motion trigger to create an audio alarm based on video motion, check PIR trigger to use the PIR motion sensor, or select both. 8. Under SD card record, check Continuous for the camera to record to microSD continuously during the scheduled time.
-
Page 163: Configuring The Camera Date And Time
Android App To delete a Schedule: 1. From the Scheduling menu, press the Android menu button and tap Delete. Tap Delete Press the Android menu button 2. Select the schedule you want to delete and tap Delete. Then tap Delete Select the schedule you want to delete 3. -
Page 164: Rebooting The Camera
Android App 4. Tap Time Zone. Tap Time Zone 5. Use the slider to select your time zone. 6. If your region observes Daylight Savings Time, check Daylight Savings Time. Tap Start Time and End Time, use the sliders to configure the start and end time for Daylight Savings Time and then tap OK. -
Page 165: Using Local Search To Add Cameras
Tap a camera to add the ID to your camera list 2. Lorex Ping automatically scans for cameras on your local network. Tap Search to re-scan. 3. Tap a camera from the list. The Add camera screen comes on with the camera ID already entered. -
Page 166: Configuring Camera Settings Using A Web Browser
Configuring Camera Settings using a Web Browser 9. CONFIGURING CAMERA SETTINGS USING A WEB BROWSER Web Configure lets you modify camera settings using a web browser. To access Web Configure: 1. Open L-View, right-click on the camera ID under Auto Search, and click Web configure. -
Page 167: Web Configure Overview
Configuring Camera Settings using a Web Browser 9.1 WEB CONFIGURE OVERVIEW 1. Information: View information about the camera and camera settings. 2. Network: Configure wired/wireless network settings. Connect to a wireless network. 3. Video: Configure camera video and streaming settings. Watch live video from the camera (Internet Explorer only). -
Page 168: Network
Configuring Camera Settings using a Web Browser 9.2 NETWORK Configure networking settings for WiFi or Ethernet connection. 9.2.1 WIRED NETWORK (DHCP OR FIXED IP) Configure the camera IP address when connected using Ethernet. Select DHCP or Fixed To configure the camera to use DHCP or fixed IP: 1. -
Page 169: Wifi Security (Configuring Wifi Settings)
Configuring Camera Settings using a Web Browser • Use the following DNS server address: Select and then manually enter DNS server information. 3. Click Save & Apply. 9.2.2 WIFI SECURITY (CONFIGURING WIFI SETTINGS) Configure the camera to connect to a WiFi network and configure WiFi settings. To configure WiFi Settings: NOTE: For instructions on connecting your camera to a WiFi network, see “WiFi Setup”... -
Page 170: Video
Configuring Camera Settings using a Web Browser 9.3 VIDEO Configure camera video and streaming settings. Watch live video from the camera (Internet Explorer only). 9.3.1 DISPLAY Watch live video from the camera. NOTE: Viewing live video using a web browser is only compatible with Internet Explorer on PC only. -
Page 171: Video Settings
Configuring Camera Settings using a Web Browser 9.3.2 VIDEO SETTINGS Adjust the video quality settings. Set the password to access camera video through L-View or apps. To set the camera password for accessing video through L-View or apps: 1. Under Password (play video), enter a password to access the camera video using L-View or smart phone and tablet apps. - Page 172 Configuring Camera Settings using a Web Browser • Use the following values: Select to manually select the video resolution and frame rate for the camera. Note that the image quality may decrease if there is not enough bandwidth for your selected settings. •...
-
Page 173: Mobile Video
Configuring Camera Settings using a Web Browser • Enable audio microphone/Disable audio microphone: Select Disable audio microphone to disable the built-in microphone in the camera or select Enable audio microphone to enable it. • Enable time display/Disable time display: Select Disable time display to turn off video time stamps or Enable time display to turn on video time stamps. -
Page 174: Night Mode
Configuring Camera Settings using a Web Browser 4. Under Frame rate, select the frame rate that will be used when connecting to the camera using a smart phone or tablet between 30fps (highest) and 1fps (lowest). 5. Select Enable audio to enable audio streaming to smart phones and tablets or Disable audio to disable audio streaming to smart phones and tablets. - Page 175 Configuring Camera Settings using a Web Browser and the second set of drop-down menus to select when the camera will return to day mode. Start of night mode Return to day mode (8:00 PM) (6:00 AM) • Manual night mode control: Manually select day mode or night mode. If using this option, under Mode, select Day for day mode or Night for night mode.
-
Page 176: Schedule
Configuring Camera Settings using a Web Browser 9.4 SCHEDULE Configure recording to microSD card, configure email or speaker alarms, and setup the recording/alarm schedule. 9.4.1 EMAIL/FTP ALARM SETTINGS (CONFIGURING EMAIL ALARMS) Configure email alarms. The camera can be set up to send email alerts when motion is detected. - Page 177 Configuring Camera Settings using a Web Browser NOTE: You may also select both PIR and Motion to receive alarms from both motion triggers. • Schedule: Send email alarms based on the settings configured under Schedule. see “Scheduling (Configuring Recording and Alarm Schedules)” on page 148. •...
-
Page 178: Speaker Alarm (Configuring Audio Alarms)
Configuring Camera Settings using a Web Browser 9.4.2 SPEAKER ALARM (CONFIGURING AUDIO ALARMS) Configure audio alarms using a speaker (not included) connected to the camera. Audio alarms can be set up to go off when the camera detects motion. This is helpful if you want to scare off intruders. -
Page 179: Sd Card (Configuring Microsd Recording)
Configuring Camera Settings using a Web Browser 9.4.3 SD CARD (CONFIGURING MICROSD RECORDING) Configure video recording to the microSD card (required; not included). To playback recordings saved on the microSD card, use L-View or the iPhone, iPad, or Android apps. Select Recording option Select overwrite or... - Page 180 Configuring Camera Settings using a Web Browser Before you can record to a NAS device, please make sure of the following: 1. Your NAS device must be connected to the same network as the camera and it must be turned on. 2.
- Page 181 Configuring Camera Settings using a Web Browser is full, or select Stop recording to have the NAS device stop recording video when the available space is full. Select Recording option Select Overwrite settings 3. Under Use NAS IP Address, enter the local IP address of the NAS device. OR, click NAS Scan to scan your network for connected NAS devices.
- Page 182 Configuring Camera Settings using a Web Browser 6. Under NAS access password, enter the admin password for your NAS device. See your NAS device’s instruction manual for details. Enter recording folder Enter NAS device’s admin user name and password Click Save & Apply Click to check NAS status 7.
-
Page 183: Scheduling (Configuring Recording And Alarm Schedules)
Configuring Camera Settings using a Web Browser 9.4.5 SCHEDULING (CONFIGURING RECORDING AND ALARM SCHEDULES) Configure schedules for recording and alarms. Schedules can be configured separately for alarms and recording. You can configure up to 12 schedules. Select recording or alarm types for the schedule Configure schedule times... -
Page 184: Admin
Configuring Camera Settings using a Web Browser • Fixed time: Create a one time schedule (for example, if you are going on vacation, and would like to record all the time). Under Start time, enter the exact date and time when you would like the schedule to start and enter the End time. 4. -
Page 185: Admin Login
Configuring Camera Settings using a Web Browser 9.5.1 ADMIN LOGIN Configure the admin user name and password for the camera. The admin user name and password are used to login to Web Configure or change settings using apps. Configure the web access port. To configure the admin user name and password used to login to Web Configure: 1. -
Page 186: Led Control
Configuring Camera Settings using a Web Browser 2. Click Save & Apply. Restart the camera by disconnecting and reconnecting the power adapter or pressing the Reboot button (see “Reboot” on page 154). NOTE: Your computer must be on the same network as the camera to use Web Configure. -
Page 187: Date/Time
Configuring Camera Settings using a Web Browser 9.5.3 DATE/TIME Configure the camera date and time. The camera syncs with an Internet NTP time server to automatically provide the correct time, once you have configured your time zone and daylight savings time settings. Select Time Zone Select Enable It is highly recommended to set the date and time when first setting... - Page 188 Configuring Camera Settings using a Web Browser 2. In L-View, right-click on the camera in Auto Search and click Web Configure. Right-click the camera under Auto Search and click Web Configure 3. Type the camera admin User Name (default: admin) and Password (default: left blank) and click Ok to log into the camera.
-
Page 189: Reboot
Configuring Camera Settings using a Web Browser 9.5.5 REBOOT Restart the camera from your Internet browser. This is useful if you need to restart the camera to apply settings changes or if the camera encounters an error. To restart the camera: 1. -
Page 190: Technical Specifications
Technical Specifications 10. TECHNICAL SPECIFICATIONS As our product is subject to continuous improvement, Lorex Technology & subsidiaries reserve the right to modify product design, specifications & prices without notice and without incurring any obligation. -
Page 191: Cleaning And Disposal
Cleaning and Disposal 11. CLEANING AND DISPOSAL Clean camera with a slightly damp cloth or an anti-static cloth. Never use cleaning agents or abrasive solvents. • Do not clean any part of the product with cleaners with thinners or other solvents and chemicals. -
Page 192: Notices
Notices 12. NOTICES Warning: Any changes or modifications not expressly approved by the grantee of this device could void the user's authority to operate the device. FCC Notice This device complies with Part 15, subpart C, of the FCC Rules. Operation is subject to the following two conditions: (1) this device may not cause harmful interference, and (2) this device must accept any interference received, including interference that may cause undesired operation. -
Page 193: Wall Or Ceiling Mounting
Wall or Ceiling Mounting 13. WALL OR CEILING MOUNTING 13.1 INSTALLATION TIPS AND WARNINGS • Camera is rated for indoor use only. Do not install in wet or humid areas. • MAKE SURE to run all power adapter and network cables at least 3ft / 1m away from cribs, bassinets, play yards, and other safe sleep environments for infants. - Page 194 Wall or Ceiling Mounting 3. Attach the camera to the wall or ceiling using the included mounting screws. Adjust the camera angle as necessary. See below for suggested stand configurations. Wall Mount Ceiling Mount 4. Secure the stand position by using a Philipshead screwdriver to tighten the screw connecting the camera to the stand.
-
Page 195: Troubleshooting
• Press and hold the Reset button under the camera for 4 or more seconds to reset the camera to factory default settings. The password will reset to the default password lorex. Camera does not appear in Auto Search or Local Search: •... - Page 196 Troubleshooting Cannot access Web Configure on PC: • Camera may be on different network than computer. Connect the camera and computer to the same network (i.e. the same router), or use a mobile device to change settings over the Internet. Bright spot in video when viewing camera at night: •...
- Page 200 LNC116 Ve rs i o n 2 .0 www.lorextechnology.com Copyright © 2013 Lorex Technology Inc.
Need help?
Do you have a question about the LNC116 and is the answer not in the manual?
Questions and answers