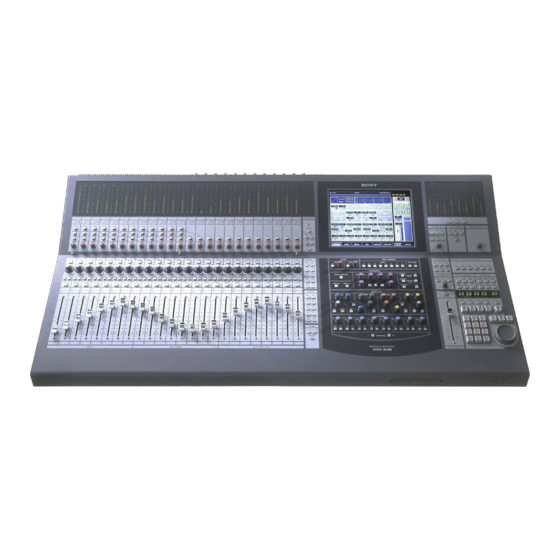
Sony DMX-R100 Quick Reference
Hide thumbs
Also See for DMX-R100:
- Operating instructions manual (134 pages) ,
- Quick reference (107 pages) ,
- Automation operation (34 pages)

Related Manuals for Sony DMX-R100


Summary of Contents for Sony DMX-R100
-
Page 1: Quick Reference
DIGITAL AUDIO MIXER DMX-R100 Quick Reference Revision 2.0 Applies to version 2.21 software... - Page 2 Introduction Welcome to the Sony DMX-R100 Quick Reference! This guidebook is designed to supplement the DMX-R100 Operating Instructions provided with your console, not to replace it. In these pages are presented detailed operating procedures for most common operations, along with basic tutorials for tracking and mixing (both manual and automated).
-
Page 3: Table Of Contents
Linking Functions .......................1-33 Monitoring ..........................1-35 Metering ..........................1-36 Chapter 2 Machine Control and MIDI Functions Controlling Pro Tools® From The DMX-R100 ..............2-3 Autolocating Within Pro Tools® .....................2-4 Using 9-Pin Machine Control ....................2-5 Using MIDI Machine Control ....................2-6 Slaving The DMX-R100 ......................2-7 Other MIDI Functions ......................2-9... - Page 4 Listening To Prerecorded Surround Material .................B-4 Surround Mixing ........................B-5 Appendix C: Channel Strip Block Diagram Channel Strip Block Diagram ....................C-1 Appendix D: Operating The DMX-R100 At 2Fs Operating The DMX-R100 At 2Fs ..................D-1 Surround Monitoring and Mixing At 2Fs ................D-3 Appendix E: MADI Operations MADI Operations ........................E-1...
-
Page 5: Chapter 1 Getting Started
(See Chapter 1 of the Operating Instructions.) All interconnections should be made with the POWER switch set to OFF. Also, determine whether you will be using the DMX-R100 as master clock or synchronizing it to an external word clock or video source and make the appropriate connections. Finally, if you are using a keyboard, mouse, and/or VGA monitor, connect them to the appropriate rear panel connectors. -
Page 6: First Bootup
First Bootup Set the POWER switch to ON. After about a minute, the DMX-R100 will complete its boot-up process, and the first screen that appears is the Channel Window. (See Figure 1) Figure 1 This Window shows all parameters for input channel 1 (note that the ACCESS button for channel 1 is lit). You... -
Page 7: Setting The Sample Rate And Clock Source
Setting The Sample Rate and Master Clock Source Before operating the DMX-R100, you need to set certain basic parameters, including the desired sample rate and master clock source. These parameters are set in the Sync/Time Code Window. Press the SYSTEM tab at the bottom of the touchscreen. From the pop-up menu select SYNC/TIME CODE;... - Page 8 (See Figure 5) Figure 5 Press YES to accept the new sample rate (in which case the DMX-R100 will go through a complete new power-up cycle and reboot) or press CANCEL to return to the previous sample rate.
-
Page 9: The Title Manager
The Title Manager The next step in setting up your DMX-R100 for initial usage is to save the current settings as a Title. The DMX- R100 can store up to ten Titles in its Flash Memory* (up to a total of 4 megabytes); each Title is a collection of system settings (including the SYNC/TIME CODE Window parameters), as well as Snapshots (up to 99 per Title) and mix automation and cue list data. - Page 10 — see Chapter 4 in the DMX-R100 Operating Instructions for a listing), and to store the currently loaded Title to floppy disk. Chapter 1 Getting Started...
-
Page 11: Saving A Title To Floppy Disk
Saving A Title To Floppy Disk The DMX-R100 is capable of saving one Title per floppy disk. It can read and write to standard DOS-formatted disks, allowing you to archive data to an external PC (either with or without the use of the Automation Editor —... -
Page 12: Loading A Title
To load (recall) a previously stored Title, follow this procedure. If loading from floppy disk, insert it into the DMX-R100 disk drive, and then, press the FLOPPY DISK touchscreen button in the Title Manager Window. If loading from Flash Memory, press the FLASH MEMORY touchscreen button. -
Page 13: Snapshots
Since you have 99 of them at your disposal, it's a good idea to get in the habit of creating a Snapshot every time you set up a new DMX-R100 configuration. The procedure for creating a Snapshot is similar to that of creating a Title, only it is done in the Snapshot Window instead of the Title Manager. -
Page 14: Recalling A Snapshot
To load (recall) all data from a previously stored Snapshot, simply select the number of the Snapshot to be recalled and press the RECALL button. The DMX-R100 also allows you to selectively recall only certain data from a previously stored Snapshot, through the use of a comprehensive series of Function (local) and Isolate Channel buttons. For example, to... - Page 15 SNAPSHOTS Alternatively, the Isolate buttons allow you to not recall the Snapshot data for a specific channel or channels. For example, to recall all data from a stored Snapshot except the data for channel 1, press the CH 1 button in the Isolate Channel section at the right of the touchscreen so that it lights green (see Figure 12) and then press RECALL.
-
Page 16: Matrixing System
Matrixing System The two most important screens for configuring your DMX-R100 are the Input Routing and Output Routing windows. These allow you access to the console's comprehensive matrixing system, which enables you to determine the signal flow for literally all input or output connections on the rear panel. Using these windows, any of the DMX-R100 physical inputs and outputs can be reutilized in any way you like. - Page 17 AD 1-8 button indicates the first 8 AD inputs). Similarly, the bottom two boxes (AUX RET 1 - 8 and MISC) are always available. However, depending on the number and types of expansion cards installed in your DMX-R100, some of the other boxes may be grayed out and unavailable. 1-13...
- Page 18 Matrixing System To complete the patching in blocks of eight, press a Channel button at the right of the screen to assign the selected inputs to that channel and the seven adjacent channels. For example, press the AD 1 -8 input, and then press Channel 25.
- Page 19 Matrixing System To complete the patch, select the individual source, then select the channel. For example, to patch AD input 1 (the signal connected to the first head amplifier) to input channel 48, press the AD 1-8 box a second time and then press the box labeled "1." Finally, press Channel 48. (See Figure 16) Figure 16 To mult that signal to channel 47 as well, simply press the Channel 47 button.
-
Page 20: Channel Strip Block Diagram
The Audio Output Routing Window The Audio Output Routing window plays the inverse role, allowing you to route a variety of signals to any of the physical output connectors on the DMX-R100 rear panel. The following signals are available in this window for routing:... - Page 21 Matrixing System The basic procedure for using the Output Routing Window is as follows: Press the AUDIO tab at the bottom of the touchscreen, then select OUTPUT ROUTING. The Audio Output Routing Window appears. (See Figure 18) Figure 18 The BUS section on the left of the screen displays a menu of all possible buses. If you press one of the BUS buttons a second time, a second drop-down menu will appear.
- Page 22 Matrixing System To complete the patching, press an OUTPUT button in the center of the screen to assign the selected bus to that physical output connector. For example, press the PGM L button, and then press Aux Send 1. The left PGM bus output will now appear at the physical Aux Send 1 output connector. (See Figure 20) Figure 20 To route that bus to Aux Send 2 as well, simply press the Aux Send 2 button.
- Page 23 Matrixing System You can also make output assignments in blocks. To do so, simply press the desired BUS button once only, then press the OUTPUT button of the first of the contiguous output connectors you wish to make the assignment to. For example, to assign Aux Send Outputs 1 - 8 to Slot 1 outputs 1 - 8, press the AUX 1 - 8 BUS button once, then press the first of the eight Slot 1 outputs.
-
Page 24: Creating Bus Inserts
As noted previously, the Output Routing window also allows you to set up 8 "floating" bus inserts in the DMX-R100. These are independent of the analog channel inserts available on input channels 1 - 12. The concept is to allow any physical inputs and outputs to be used as unity gain insert sends and returns for any of the buses available in the Audio Output Routing window. - Page 25 Creating Bus Inserts Now press R in the Bus drop-down menu, and press INS 2 in the Insertion section. PGM R will be selected for Insert 2, which will be set IN. (See Figure 24) Figure 24 Now that the Inserts are set, the next step is to select the physical output connectors to use as the Insert sends.
- Page 26 Creating Bus Inserts From the INS SEND 1-8 Bus drop-down menu, press 1, then press AUX SEND 1 in the Outputs section (center of the screen). INS SND1 will be selected for Aux Send 1. (See Figure 26) Figure 26 Now press 2 in the INS SEND 1-8 Bus drop-down menu, and press AUX SEND 2 in the Outputs section.
- Page 27 Creating Bus Inserts The final step is to select the physical input connectors to use as the Insert returns. Press the AUDIO tab at the bottom of the touchscreen, then select INPUT ROUTING. The Audio Input Routing Window appears. Press AUX RET 1-8 in the Source section twice so that the drop-down menu (1 - 8) appears. From the drop-down menu, press 1, then press the INS RTN 1 button in the Channels section (right- hand side of the screen).
- Page 28 Creating Bus Inserts Important Note: If a bus insert is IN, signal must physically get from return to send; otherwise, you won’t hear any sound. In this exercise, Aux Sends 1 and 2 were designated as Insert sends for the PGM bus, and Aux Returns 1 and 2 were designated as Insert returns, so you must make a physical connection from send to return (with any desired outboard gear patched in-between) in order for audio to appear in the PGM bus.
-
Page 29: Channel Windows
Channel Windows As you work on the DMX-R100, you will probably find yourself most often working in the main Channel window; this is the window that comes up by default following every power-up or reboot. (See Figure 31) Figure 31... - Page 30 Channel Windows Touching each section in the main Channel window brings up a secondary Channel window that shows that function in greater detail. For example, touching any area in the bus assignment section (top center of the screen) takes you to the Input/Pan/Assign window (which can also be accessed by pressing the CHANNEL tab at the bottom of the touchscreen, then selecting INPUT/PAN/ASSIGN.
- Page 31 EQ Libraries can also be named; simply touch the name of the Library and the Keyboard Window will appear (an external computer keyboard connected to the DMX-R100 can also be used. As with the SNAPSHOT window, there is a single level of UNDO available in case you inadvertantly overwrite, delete or recall settings.
- Page 32 Channel Windows Touching any area in the dynamics section of the Channel window takes you to the Dynamics window (also accessed by pressing the CHANNEL tab at the bottom of the touchscreen, then selecting DYNAMICS). (See Figure 35) Figure 35 If Auto Zoom is turned on in the Misc Setup window, the Dynamics window will automatically be called up any time any of the IN buttons in the hardware Dynamics section of the front panel are pressed.
- Page 33 DYNAMICS window, press the RETURN button in the upper right-hand corner of the screen. For more information on the use of the Dynamics Library, see Chapter 3 in the DMX-R100 Operating Instructions. Note that if two adjacent channels are stereo-linked, recalling a stored Dynamics Library setting into one channel will automatically place that same setting into the other one.
- Page 34 Channel Windows Other handy windows include the Audio Overview window (accessed by pressing the AUDIO tab at the bottom of the touchscreen, then selecting OVERVIEW). (See Figure 38) Note that, if Auto Zoom is turned on in the Misc Setup window, the Audio Overview window will automatically be called up any time any of the PAGES buttons are pressed.
-
Page 35: Copying / Linking
The Copy function is a powerful one in that it allows you to set up templates for your DMX-R100 in advance of your recording or mixing sessions. If you know that you always like to use certain EQs or Dynamics settings for certain instruments, for example, simply copy the data to the appropriate channels in a layout that is comfortable for you, then save your setup as a Snapshot within a Title. -
Page 36: Fader Copy Function
* When the MTR Send Fader option is set to "PRE EQ" or "PRE FDR" in the Input/Pan/Assign window, the DMX-R100 provides two discrete signal paths from each channel fader. In broadcast applications, this would allow one signal path (i.e., the main channel fader) to be used for on-air transmission while the other (i.e. the MTR Send fader) to be used for recording purposes. -
Page 37: Zeroing Function
Copying / Linking Zeroing Function The Copy/Link window also provides a means for zeroing out selected functions for any channel. The Zeroing function is accessed by pressing the ZERO tab at the bottom of the screen. All the same parameters available for Copying (see page 1 - 31 in this guidebook) are available for zeroing, except for Cut and Fader Group. - Page 38 Surround linking is accomplished within contiguous groups of six channels. The possible surround link assignments on the DMX-R100 are therefore: Channels 1 - 6, 7 - 12, 13 - 18, 19 - 24, 25 - 30, 31 - 36, 37 - 42, and 43 - 48; MTR masters 1 - 6; AUX sends 1 - 6; and AUX returns 1 - 6. Selecting any channel within these groups automatically places other channels in that group into a surround link.
-
Page 39: Monitoring
Studio loudspeakers can operate in stereo or mono. All monitoring operations can be carried out from the front panel of the DMX-R100 (see Figure 42) or from the Monitor window (see Figure 43), accessed by pressing the AUDIO tab at the bottom of the touchscreen, then selecting MONITOR. -
Page 40: Metering
Metering The metering of the DMX-R100 is also quite flexible. The 8 main meters on the right-hand side of the console can be assigned to show PGM stereo bus output, Aux send 1 - 8 output, or MTR multitrack bus output, depending upon the setting of the Meter switches. -
Page 41: Chapter 2 Machine Control And Midi Functions
Machine Control and MIDI Functions One of the most important features offered by the DMX-R100 is machine control, which enables the remote control of a wide range of connected devices, including tape and hard disk recorders, computer software, and video decks. Although the use of machine control is optional for general use, it is required for automated mixing functions, where both the DMX-R100 and any connected audio devices must be locked to the same time code. - Page 42 (lit green), the connected VTR will only arm audio, and not video tracks, for recording. Bear in mind that not all devices implement MMC or the 9-pin protocol fully, so the DMX-R100 may not be able to remotely control every kind of machine. A listing of currently compatible machines, along with the complete MMC and Sony Serial Interface Protocol supported by the DMX-R100 is provided in the DMX-R100 Software Version 2.1 / 2.2 Supplement.
-
Page 43: Controlling Pro Tools From The Dmx-R100
five seconds. (Again, each time you press Stop and Fast-Forward, it will roll ahead an additional five seconds.) The DMX-R100 Cue list function also allows you to autolocate Pro Tools to up to 99 different points. The procedure on the following page shows you how to do so. -
Page 44: Autolocating Within Pro Tools
DMX-R100 touchscreen; the Cue window appears. (See Figure 4) Figure 4 Begin playback of Pro Tools by pressing the Play switch in the DMX-R100 transport control. As you reach different cues in the song (i.e., verse, chorus, bridge, etc.), press the NEW button at the top of the touchscreen;... -
Page 45: Using 9-Pin Machine Control
Bear in mind that not all devices support all 9-pin commands. Refer to the Sony Software Version 2.1 / 2.2 Supplement or to the user manual of the receiving device for more information. -
Page 46: Using Midi Machine Control
F7 (127), which is used to receive all device numbers. In order for rewind, fast-forward and locate functions to be active via MMC, the DMX-R100 needs to be continuously updated with the current locate point of the device being controlled. This is accomplished with a two-way handshaking ("closed loop") connection between the MIDI Out jack of the DMX and the MIDI In... -
Page 47: Slaving The Dmx-R100
Slaving the DMX-R100 There may be circumstances where you want the DMX-R100 to slave to connected devices instead of controlling them. In such a configuration, either an external SMPTE or MIDI Time Code (MTC) generator can be used as master. These functions are set in the SYNC/TIME CODE Window. To open this window, press the SYSTEM tab at the bottom of the touchscreen, and, from the pop-up menu select SYNC/TIME CODE. - Page 48 Slaving the DMX-R100 When set to TC GENERATOR, the DMX-R100 acts as master, with its built-in time code generator providing the SMPTE time code to connected devices. When set to TIME CODE IN, SMPTE signal arriving from an external device at the Time Code In connector on the rear panel acts as master. When set to MTC IN, MIDI Time Code signal arriving at the dedicated MTC input connector (not the MIDI input connector) acts as master.
-
Page 49: Other Midi Functions
A MIDI Echo function, when on, retransmits data received at the DMX-R100 MIDI In port to the MIDI Out port, which may be useful when daisy-chaining the console to other MIDI devices such as sequencers. -
Page 50: Setup Of Producer's Talkback
(127), the five different DMX-R100 talkback operations will be activated. To turn the talkback function off, simply set the control to its minimum value of 0. One example of a suitable MIDI interface unit for triggering DMX-R100 remote talkback functions is the MIDI Solutions F8 (www.midisolutions.com). -
Page 51: Tutorial 1 Tracking And Overdubbing Session
Preparation This tutorial will take you through the basic procedures for tracking and overdubbing with a DMX-R100. All operations listed here are described in detail in the "Getting Started" section in this guide. The following peripherals are required for this Tutorial: •... - Page 52 Preparation Figure 1 Figure 2 T1-2 Tutorial 1 Tracking and Overdubbing Session...
- Page 53 Preparation In the Audio Input Routing window, assign AD12 (the microphone input) to channel 1. Then assign AD1 (the left side of the stereo source signal) to channel 3, and AD2 (the right side of the stereo source signal) to channel 4. Finally, assign Slot 1, tracks 1 - 8, to channels 17 - 24. Finally, assign NC (No Connect) from the MISC Source menu to channel 2 and to channels 25 - 32;...
-
Page 54: Setting Monitoring Levels
Setting Monitoring Levels In this Tutorial, we will be recording signal from the stereo source to tracks 1 and 2 of the multitrack, and then overdubbing the mic signal onto track 3. Accordingly, the next step is to set up the monitoring section (in this case, Channels 17 - 24) so that we hear tracks 1 and 2 in stereo, and track 3 in mono. -
Page 55: Initial Recording
Initial Recording We're now ready to begin recording the first pass — the stereo line-level source — onto tracks 1 and 2 of the multitrack. Press the ACCESS button for channel 3 (the left-hand side of the stereo input signal) and, in the mode selector box in the Channel window (which automatically appears whenever the ACCESS button is pressed or a new channel is selected for access), set channel 3 to STEREO. -
Page 56: Overdubbing
Overdubbing Press the Cut switch in the CR Monitor section or turn the CR Monitor knob all the way down to avoid feedback and signal bleeding problems. Connect a pair of headphones to the front-panel headphone jack and raise the Headphone level knob to a comfortable listening level*. Set track 3 of your multitrack recorder to monitor input signal. - Page 57 Overdubbing Set the Aux send levels to approximately unity gain (0.0 dB) and adjust the input controls of your outboard processor to get a strong input signal without clipping. You can switch the master meters to AUX to view the Aux send levels, or by pressing the MASTERS button in the faders section (in which case the Aux send levels appear in the associated channel meters).
-
Page 58: Tutorial 2 Mixing Session (Non-Automated Mixing)
1. Connect the inputs of your two-track recorder to the PGM outputs (digital or analog) of the DMX-R100, and connect the outputs of your two-track recorder either to the 2 TK1 input (if it provides only analog outputs) or the 2 TK2 input (if it provides AES/EBU digital outputs). - Page 59 Preparation Go to the Snapshot window and press the NEW button in order to create a new snapshot. Using the touchscreen keyboard or an externally connected keyboard, name it "Tutorial 2" Go to the Title Manager window and press the SAVE button in order to save the current Title to Flash Memory.
-
Page 60: Setting Monitoring Levels
Adjust the fader levels of Aux returns 1/2 or 7/8 to taste. NOTE: Signal arriving at the DMX-R100 Aux Return connectors can in fact be routed to any standard input Channel or Channels in the Audio Input Routing window, in which case they can have equalization and/or dynamics processing applied as well as being routed to other Aux sends. -
Page 61: Cue List Operation
(i.e., countoffs, lips smacking, chairs creaking) that occur before the song begins. The DMX-R100 Cue function allows you to call up different Snapshots, or even recall EQ or Dynamics library presets into specified channels, at the touch of a single button. These different "cues"... - Page 62 Cue List Operation Press the NEW button again and assign the "Tutorial 2" snapshot to CUE 3, then rename the cue "VERSE". Again, set TC LINK to OFF. (See Figure 3) Figure 3 Highlight CUE 3 by touching "3" or the cue name, then press the RECALL button at the top of the touchscreen.
- Page 63 Make a connection between the SMPTE (LTC) output of your time code generator or multitrack recorder* and the Time Code input of the DMX-R100. * If you are using an analog multitrack, you can use the analog output of a track striped with SMPTE.
- Page 64 In the CUE window, set TC LINK for Cues 2, 3, and 4 to ON, then highlight the TIME CODE value for CUE 3. Using the ten-keypad of the DMX-R100, enter a SMPTE time code value of 01:00:05:00 for CUE 3 (be sure to hit the Enter key on the keypad to complete the input). Then repeat the operation for CUE 4, this time entering a SMPTE time code value of 01:00:10:00.
- Page 65 Other functions in the Cue window allow you to store, delete, and recall individual cues. An undo button also allows you to undo your last operation in this window. Note that the RECALL and UNDO touchscreen buttons in the Cue window are duplicated by the equivalent hardware buttons in the Snapshot section of the DMX-R100. T2-8...
-
Page 66: Control Groups
The exercise below demonstrates how to create all three kinds of control groups. Make sure that the TC LINK button in the Snapshot section of your DMX-R100 is unlit (this will deactivate the Cue list created in the exercise above). - Page 67 Control Groups We'll begin by placing channels 1 and 2 into a cut control group. Accordingly, press the Mode button for GROUP1 repeatedly until it reads CUT. Then press the ON/OFF button for GROUP1 so that it reads ON. The right side of the screen contains buttons for all 48 input channels, all 8 Aux returns and sends, the 8 multitrack (MTR) buses, and the stereo Program (PGM) bus.* Touch the buttons for Channels 1 and 2: the words "CUT1"...
- Page 68 Manual gang control group, the fader automation data for those channels will no longer be played back and the audio levels for those channels will be determined solely by the "live" fader position. For more information, see the DMX-R100 Software Version 2.1/2.2 Supplement and Tutorial 3 in this guide. T2-11...
- Page 69 Control Groups Next, we'll place channels 5, 6, 7, and 8 into a VCA fader control group. Press the Mode button for GROUP3 repeatedly until it reads VCA. Then press the ON/OFF button for GROUP3 so that it reads ON. Touch the buttons for Channels 5, 6, 7, and 8: the words "GP3" appear in each, indicating that each of these channels have now been placed in Group 3, which has been designated as a VCA fader control group.
-
Page 70: Final Output
Final Output In this Tutorial, we have focused entirely on standard stereo mixing, using the PGM bus for final output (surround mixing applications are covered in Appendix B in this guidebook). As such, the level of the final signal is controlled by the Program master fader. The Program bus also has stereo equalization and dynamics processing available, so you can apply EQ and compression or gating to the overall signal before sending it on to a connected 2-track recorder. -
Page 71: Tutorial 3 Automated Mixing Session
Being a digital mixer, the DMX-R100 can be thought of as a highly specialized computer, optimized for the task of routing, summing, and processing audio, but another very important function is its ability to record and play back automated mixes. - Page 72 (Titles containing especially important or final mixes can be Locked so as to prevent inadvertant overwriting). The DMX-R100 supports the storage of a single Title to floppy disk, so you'll probably want to have a number of preformatted disks handy before you begin an automated mix.
-
Page 73: Preparation
Go to the Title Manager window and press the CLEAR button in the lower right-hand corner. This sets all parameters in the DMX-R100 to their default status (it does not affect any Titles saved to Flash Memory or floppy disk).* If your multitrack recorder is capable of chasing (chase-locking) to incoming SMPTE time code, follow the directions in the steps below. - Page 74 * Alternatively, a device capable of outputting stable MTC (MIDI Time Code) can be used; simply connect its MIDI output to the DMX-R100's dedicated MTC input, then set Time Code Reader Source to MTC IN in the Sync/Time Code window ** These advanced functions allow armed objects (see page T-7 for an explanation) to remain in write-ready mode even when time code is stopped.
-
Page 75: Setting Monitoring Levels
LOCATE button in the Machine Control window to shuttle your multitrack machine to that point. Jump to step 4 below. If your multitrack machine is instead providing SMPTE time code (or MTC) to the DMX-R100, locate it to the appropriate point. -
Page 76: About The Automation Window
Make Static (where specific channels or specific functions within all channels can be erased from the currently selected buffer). Additional information about each of the parameters in the Automation window can be found in Chapter 3 of the DMX-R100 Operations Guide; we will also be using many of them in this Tutorial. -
Page 77: Arming And Disarming Channels And Objects
Arming and Disarming Channels and Objects Perhaps the key to understanding the DMX-R100 dynamic automation system is the concept of arming and disarming channels and objects (that is, individual parameters within a channel, such as the fader, cut switch, panpot, bus assignment, etc.). - Page 78 Arming and Disarming Channels and Objects Try each of these arming/disarming methods out while viewing the Channel window: • Entire channels (that is, all objects within the channel) can be armed by touching the READY SETUP button at the top of the touchscreen so that it turns orange and then pressing the WRITE button for that channel (it will begin blinking —...
- Page 79 Arming and Disarming Channels and Objects Figure 2 • You can add other objects for global arming by touching the OPTION button again and selecting additional menu items. For example, you can globally arm all faders and cuts for all channels. Even after global arming, armed objects within individual channels can be disarmed (they will change from yellow back to green) by touching them in the Channel window or by pressing the associated switch or by moving the associated knob counterclockwise.
-
Page 80: First Pass: Setting Basic Fader Levels
SMPTE time code from the DMX-R100, but the key is to be certain that the word READY appears in the upper right-hand corner of the touchscreen (and that the TC ERROR message is not flashing, indicating unstable timecode) before attempting to write any automation data. - Page 81 First Pass: Setting Basic Fader Levels Begin playback of your multitrack machine. At any time after READY changes to RUN in the upper right-hand corner of the touchscreen, stop playback. Because we are using Hold To End mode, all current fader positions are now written for the entire song.
-
Page 82: Second Pass: Cuts
Second Pass: Cuts The second pass in a typical automated mixing session will often consist of writing channel cuts (mutes). Whenever creating successive passes of automation data, it's a good idea to set up a level of undo so that you can instantly return to the previous pass if you are dissatisfied with the new data you just added. - Page 83 Second Pass: Cuts To test that all cuts have been written, rewind your multitrack to the start of the song and begin playback. As long as the ABS button is lit (and the AUTO box is red), all the cuts you entered should occur at the corresponding SMPTE timecode points.
-
Page 84: Third Pass: Fader Moves
Third Pass: Fader Moves Now we're ready to do some "fine-tuning" of fader positions. Begin by using the procedure in steps 1 and 2 of the preceding exercise to copy the data from buffer B (containing basic fader levels and cuts) to buffer A in order to provide yourself with a level of undo. Then select buffer A by pressing the A button. -
Page 85: Fourth Pass: Writing Trims
0 and -20 dB instead of -10 to -30 dB. Accordingly, press the TRIM button in the TC Automation section of the DMX-R100 so that it lights. The light in the ABS button will go out and the AUTO box in the top center of the touchscreen will change color from red to green and will now read TRIM instead of ABS. - Page 86 The light in the TRIM button will go out and the AUTO box will change color from green back to red and will now read ABS instead of TRIM. All faders on the DMX-R100 will return to their previous positions, correctly indicating the current level for each channel. Rewind your multitrack to the start of the song and begin playback.
-
Page 87: The A/B Buffers / Safe And Audition
Bring the faders for channels 1 - 4 to unity gain (0.0 dB) and hold them that way for several seconds. If you are controlling an external multitrack recorder from the DMX-R100, press the STOP button in the DMX-R100 transport section; if the DMX-R100 is slaving to incoming timecode, stop the master machine. -
Page 88: Appendix A If This Is Your First Digital Console
Appendix A: If This Is Your First Digital Console If the DMX-R100 is your first digital console, there are a few important differences between analog and digital mixing you should be aware of. At first glance, both types of consoles may appear to be similar — they both provide multiple input channels, each with a dedicated fader, panpot and input trim controls —... - Page 89 Appendix A: If This Is Your First Digital Console A digital console’s main function is also to combine and process multiple signals, but all of this work is done strictly in the digital domain, meaning that analog input signals must first pass through analog-to-digital converters (ADCs) and all analog output signals must first pass through digital-to-analog converters (DACs).
- Page 90 Appendix A: If This Is Your First Digital Console There are two important considerations when converting analog to digital signal, or vice versa. The first of these is the sample rate, which determines how frequently "snapshots" of the signal are stored and reproduced. The standard CD sample rate, for example, is 44.1 kHz, which means that 44,100 samples are stored or played back every second.
- Page 91 Technological developments of recent years have allowed the use of double-speed (2fs) sample rates of 88.2 and 96 kHz, thus yielding an even broader frequency response in the final signal. The DMX-R100 is capable of operating at both single- and double-speed sample rates, although some functionality is reduced when using double-speed rates.
- Page 92 (usually with the addition of dither, or low-level noise, to reduce audio artifacts), maximum fidelity can be retained. The DMX-R100 allows two different kinds of dither (triangular or rectangular) to be applied to the PGM bus output; this is accomplished in the Audio Output Routing window.
- Page 93 (the touchscreen and external VGA display). A computer also requires a way for the user to input data. To a degree, the DMX-R100 keyboard and mouse input serves this purpose, but it is important to understand that it is the entire surface of the console that is acting as the main input device.
- Page 94 For example, the 24 main channel faders on the DMX-R100 can actually control up to 56 discrete input signals (48 inputs plus 8 aux returns) as well as the 8 multitrack (MTR) bus outputs and 8 Aux sends.
- Page 95 AES/EBU signal or, better yet, from a dedicated word clock output. The DMX-R100 provides both word clock input and output, and the clock signal it generates is stable and jitter-free (that is, there is little or no deviation between the timing of clock pulses), making it eminently suitable for use as a master clock source in any studio.
- Page 96 Alternatively, if a standalone clock signal generator or video house sync ("blackburst") system is available, the DMX-R100 (and all other interconnected digital audio devices) can be slaved to it, either via its reference video or word clock input. These settings are determined in the Sync/Time Code Window; for more information, see Chapter 3 in the DMX-R100 Operating Instructions.
- Page 97 It is worth noting that, even when a device is slipping in synchronization, the DMX-R100 will continue to pass audio, even though the signal may be somewhat degraded in quality. Depending upon the severity of the slippage, the degradation may not even be clearly audible, so the I/O Status Window can actually give you visual feedback of a problem you may not even be hearing.
-
Page 98: Appendix B: Surround Applications
Interconnections It is the presence of not two, but six discrete rear panel Control Room outputs that allows the DMX-R100 to provide surround monitoring. These outputs are labeled 1 through 6. When operating in standard stereo or mono mode, Control Room outputs 1 and 2 normally carry the PGM bus Left and Right signals, respectively. -
Page 99: Surround Monitoring
Surround Monitoring Setting up the DMX-R100 for surround monitoring is a simple process, requiring only a few touchscreen commands. Make all interconnections between the DMX-R100 Control Room outputs and your surround speakers as described on the preceding page. Press the SYSTEM tab at the bottom of the touchscreen. From the pop-up menu select MISC SETUP;... - Page 100 Surround Monitoring Set the Control Room monitor source to MTR, and set the CR monitor knob to a moderate listening level. Set the main meters to MTR. Press the AUDIO tab at the bottom of the touchscreen. From the pop-up menu select MONITOR; the window appears.
-
Page 101: Listening To Prerecorded Surround Material
Listening to Prerecorded Surround Material There are two basic ways to use your DMX-R100 to listen to prerecorded surround material such as DVDs, multichannel SACDs, or encoded CDs. The simplest method is to simply assign six inputs to the EXT MONITOR inputs in the Audio Input Routing window;... - Page 102 Listening to Prerecorded Surround Material While still viewing the Input/Pan/Assign window, access each of the remaining four channels in turn and assign them as follows: center signal to MTR bus 3 only at the front center position (upper center from the dropdown menu);...
-
Page 103: Surround Mixing
Surround Mixing Once the DMX-R100 is configured for surround monitoring, it's an easy process to do surround mixing. Make all interconnections between the Control Room outputs and your surround speakers, and then set up your DMX-R100 for surround monitoring, as described in the preceding pages. - Page 104 SW LEVEL control (touch it so that it lights green and then rotate the DMX-R100 jog wheel) to selectively send signal independent of the MTR bus 4 master fader setting. Note that if the GANG button immediately...
-
Page 105: Appendix C Channel Strip Block Diagram
Channel Strip Block Diagram ....Appendix C Channel Strip Block Diagram... -
Page 106: Appendix D Operating The Dmx-R100 At 2Fs
2Fs Operation In addition to being able to pass and process high resolution 24-bit audio, the DMX-R100 provides support for the increasingly popular double-speed (2Fs) sample rates of 88.2 and 96 kHz. At these higher sampling rates, however, the number of input channels, direct outs, bus inserts, and Aux returns is halved. -
Page 107: Operating The Dmx-R100 At 2Fs
2Fs Operation The bus structure of the DMX-R100 when operating at 2Fs sample rates becomes most apparent when accessing the Audio Input Routing and Audio Output Routing windows. (See Figures 2 and 3) Figure 2 Figure 3 Appendix D Operating The DMX-R100 At 2Fs... -
Page 108: Surround Monitoring And Mixing At 2Fs
Note that the DMBK-R103 AES/EBU and DMBK-R109 MADI expansion cards support 2Fs sample rates. If you have any other expansion cards installed in your DMX-R100 (such as, for example, DMBK-R106 or DMBK-R107 ADAT or TDIF cards), their slots will be grayed out and therefore unavailable as sources in the Audio Input Routing window and as outputs in the Audio Output Routing window. -
Page 109: Appendix E Madi Operations
Sync/Time Code window. If you are using a single DMX-R100, or if you have two DMX-R100s but do not wish to cascade them, be sure to set the DMBK-R109 Mode Select switch to MADI. For more information on cascading two DMX-R100s, see page E-5 in this guide. - Page 110 DMX-R100 is able to access the first 48 channels of data being received*; similarly, it transmits 48 channels via MADI. At double-speed sample rates of 88.2 or 96 kHz, the DMX-R100 recognizes the first 24 (out of a possible 28) channels being received, and transmits 24 channels worth of MADI data.
- Page 111 MADI Input and Output Routing Also, when a DMBK-R109 is installed, a new tab is added to the Audio Output Routing window, allowing any output bus to be routed to any of the 48 (or 24) MADI outputs. (See Figure 2) Figure 2 For large recording projects at 44.1 or 48 kHz, all 48 Direct outputs can be routed to all 48 MADI outputs.
- Page 112 The LEGACY button affects the outputted MADI audio signal itself. When on (lit green), the MADI output will be at 44.1 kHz if the DMX-R100 is operating at 44.1 or 88.2 kHz sample rates, or it will be at 48 kHz if the DMX-R100 is operating at 48 or 96 kHz sample rates.
-
Page 113: Cascading Two Dmx-R100S
Note that the MODE SELECT switch settings are polled by the DMX-R100 only once, during initial bootup; if for some reason you change the switch settings while the console is powered on, it will not recognize the change until the next bootup. When audio data is routed from a "SUB"... - Page 114 Cascading Two DMX-R100s Finally, use a standard Mini DIN 8-pin RS-422 serial cable to make a connection between the PC PORT connectors on the rear panels of both consoles (this is required to carry control link, as opposed to audio, data). Note that, when two DMX-R100s are cascaded, their PC ports cannot be used to receive MIDI Time Code (MTC) or MIDI Machine Control (MMC);...
- Page 115 Cascading Two DMX-R100s Once all connections are made, power both consoles up. When both consoles are booted, go to the master console's Cascade window (press the SYSTEM tab at the bottom of the touchscreen, then select CASCADE). (See Figure 5) Figure 5 This window allows you to set various functions for cascading.
- Page 116 Select WORD (not WORD COARSE) as the Unit selection, and slowly begin turning the Delay knob (in the Input section of the DMX-R100 front panel) clockwise. As you do so, you will hear the signal slowly start to reduce in volume as it goes out of phase. Keep turning the knob until the signal disappears entirely;...
-
Page 117: Appendix F Automation Editor
• An infinite number of Titles can be stored on your computer's hard drive or on external media. Titles can be transferred back and forth between the host computer and your DMX-R100 in a matter of sec- onds, using the console's built-in RS-232 SERIAL port. -
Page 118: Physical Interconnections
Title manager, a process that takes mere seconds. (Alternatively, you can choose "Export to FDD" in the File menu and save your data to a DOS-formatted floppy disk, insert it into the DMX-R100's disk drive and load it from there.) Note also that, as of software version 1.02 for the Automation Editor, there is no need to reboot your... -
Page 119: Copying Functions
Copying Functions Figure 2 Copying Functions The Automation Editor provides a powerful set of tools for copying data between different channels or snapshots; as noted above, you can even copy data from one title to another. When copying data between channels or snapshots, the Automation Editor provides both a standard Copy function, and a unique and comprehensive Optional Copy function. -
Page 120: The Do Menu
• A Fader Copy function works much like the feature of the same name in the DMX-R100 Copy/Link window — it allows you to copy and paste all channel, MTR, or even Aux send levels. -
Page 121: Editing Automation Data
Onscreen tools allow you to literally draw in fade-ins and fade-outs, pan movements, cuts, Aux send level changes — in fact, any kind of data in the DMX-R100 that's automatable is displayed and can be altered here.
Need help?
Do you have a question about the DMX-R100 and is the answer not in the manual?
Questions and answers