Sony RCD-W222ES Service Manual
Hide thumbs
Also See for RCD-W222ES:
- Operating instructions manual (32 pages) ,
- Specifications (2 pages) ,
- Limited warranty (1 page)
Table of Contents
Advertisement
Quick Links
SERVICE MANUAL
Ver 1.0 2002.09
DECK A (the CD player section)
System
Compact disc digital audio system
Laser
Semiconductor laser (λ =780 nm)
Emission duration: continuous
Frequency response
20 Hz – 20,000 Hz (±0.5 dB)
Wow and flatter
Below measurable limit
DECK B (the CD-R and CD-RW recording section)
System
Compact disc digital audio system
Laser
Semiconductor laser (λ =780 nm)
Emission duration: continuous
Playable discs
CD, CD-R, CD-RW
Recordable discs
CD-R, CD-RW (for music use)
Frequency response
20 Hz - 20,000 Hz (±0.5 dB)
Wow and flatter
Below measurable limit
Inputs
ANALOG IN
(Phono jacks)
Impedance: 47 kilohms
Rated input: 500 mVrms
Minimum input: 250 mVrms
DIGITAL OPTICAL IN
(Square optical connector jack) Optical wavelength: 660nm
DIGITAL COAXIAL IN
(Phono jack)
Impedance: 75 ohms
Rated input: 0.5 Vp-p,± 20 %
Sony Corporation
9-874-116-01
Home Audio Company
2002I0200-1
Published by Sony Engineering Corporation
© 2002.09
RCD-W222ES
Model Name Using Similar Machanism NEW
CD Mechanism Type
CD-R
section
Base Unit Name
Optical Pick-up Name
Model Name Using Similar Mechanism NEW
CD Mechanism Type
CDP
section
Base Unit Name
Optical Pick-up Name
SPECIFICATIONS
Outputs
ANALOG OUT
(Phono jacks)
DIGITAL OPTICAL OUT
(Square optical connector jack) Optical wavelength: 660nm
DIGITAL COAXIAL OUT
(Phono jack)
PHONES
(Stereo phono jack)
General
Power requirements
Power consumption
Dimensions (approx.) (w/h/d) incl. projecting parts and control
Mass (approx.)
Supplied accsessories
• Audio connecting cords
Phono jack x 2 (red/white) y Phono jack x 2 (red/white) (2)
• Remote commander (remote) (1)
• Size AA (R6) batteries (2)
Design and specifications are subject to change
without notice.
COMPACT DISC RECORDER
US Model
CDM65-RBD1
RBD1
KRS-220C
CDM53L-30B61B
BU-30BBD61B
A-MAX.3
Impedance: 47 kilohms
Rated output: 2 Vrms
Load impedance: over 10 kilohms
Rated output: –18 dBm
Rated output: 0.5 Vp-p, ± 20 %
Load impedance: 75 ohms
Rated output: 28mW
Load impedance: 32 ohms
120 V AC, 60 Hz
29 W
430 x 110 x 400 mm
( 17 x 4
3
/
x 15
3
/
inch)
8
4
7.5 kg (16
1
/
lbs)
2
Advertisement
Table of Contents

Related Manuals for Sony RCD-W222ES


Summary of Contents for Sony RCD-W222ES
- Page 1 • Remote commander (remote) (1) Rated input: 0.5 Vp-p,± 20 % • Size AA (R6) batteries (2) Design and specifications are subject to change without notice. COMPACT DISC RECORDER Sony Corporation 9-874-116-01 Home Audio Company 2002I0200-1 Published by Sony Engineering Corporation © 2002.09...
- Page 2 COMPONENTS IDENTIFIED BY MARK ! OR DOTTED LINE WITH MARK ! ON THE SCHEMATIC DIAGRAMS AND IN THE PARTS LIST ARE CRITICAL TO SAFE OPERATION. REPLACE THESE COMPONENTS WITH SONY PARTS WHOSE PART NUMBERS APPEAR AS SHOWN IN THIS MANUAL OR IN SUPPLEMENTS PUBLISHED BY SONY.
-
Page 3: Table Of Contents
RCD-W222ES TABLE OF CONTENTS SELF-DIAGNOSIS FUNCTION When the self-diagnosis function is activated to prevent the player from 1. SERVICING NOTE ............4 malfunctioning, three character service numbers in a combination with a message appears in the display. In this case, check the following table. -
Page 4: Servicing Note
RCD-W222ES SECTION 1 SERVICING NOTE NOTES REGARDING HANDLING OF THE PICK-UP 1. Notes for transport and storage 1) The pick-up should always be left in its conductive bag until immediately prior to use. 2) The pick-up should never be subjected to external pressure or impact. - Page 5 RCD-W222ES NOTES REGARDING COMPACT DISC PLAYER REPAIRS 1. Preparations 1) Compact disc players incorporate a great many ICs as well as the pick-up (laser diode). These compo- nents are sensitive to, and easily affected by, static electricity. If such static is high voltage, components can be damaged, and for that reason components should be handled with care.
- Page 6 RCD-W222ES Electrostatically Sensitive Devices (ESD) Some semiconductor (solid state) devices can be damaged easily by static electricity. Such components com- monly are called Electrostatically Sensitive Devices (ESD). Examples of typical ESD devices are integrated cir- cuits and some field-effect transistors and semiconductor chip components. The following techniques should be used to help reduce the incidence of component damage caused by static electricity.
-
Page 7: General
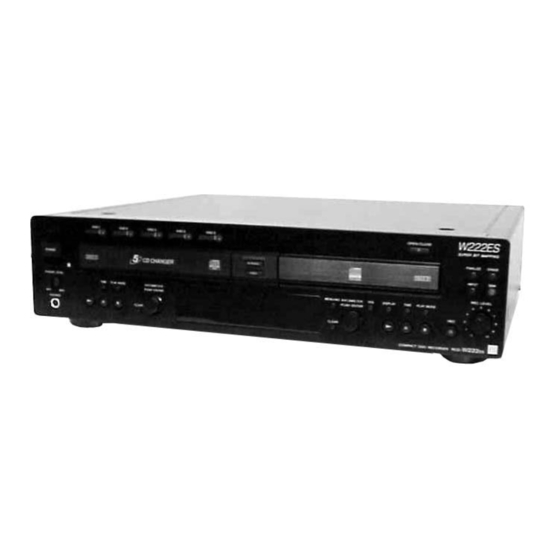
RCD-W222ES SECTION 2 GENERAL Parts and Controls 5 6 7 890qa qs qd qf wh wg ql qk qk X (pause) button -Deck B 1 POWER button ql N (play) button -Deck B 2 g(remote sensor) 3 DISC 1-5 A buttons w;... -
Page 8: Disassembly
RCD-W222ES SECTION 3 DISASSEMBLY Note: Disassemble the unit in the order as shown below. Case(top) Front panel section POWER SW board, HP board, RM board, CD SW board, LED board and DISPLAY board Deck A CD changer mechanism deck (CDM53L-30B61B) -
Page 9: Front Panel Section
RCD-W222ES 3-2. FRONT PANEL SECTION Insert a screwdriver to the square hole on the bottom, and slide the white lever in the arrow A direction to open the tray. Then remove the loading panel. (CD-R/CD-RW Recorder (deck B) only.) White lever... -
Page 10: Deck A (Cdm53L-30B61B), Deck B (Cdm65-Rbd1)
RCD-W222ES 3-4. DECK A (CDM53L-30B61B), DECK B (CDM65-RBD1) 0 Deck A CD changer mechanism deck (CDM53L-30B61B) 4 Two screws (+BVTP 3x8) 5 Two screws (+BVTP 3x8) 8 Wire (Flat type) (23 core) qh Connector (CN111) qg Wire (Flat type) qs Two screws... -
Page 11: Cd-R Board, Tray And Optical Pick-Up Block
RCD-W222ES 3-5. CD-R BOARD, TRAY AND OPTICAL PICK-UP BLOCK (KRM-220C) (DECK B) qh Three screws (+BVTP 2.6x8) qg Holder (MG) sub assy qj Dust cover w; Connector qk Two screws (+PTP 2x9) 0 Slide the tray out and stopped, wa Optical pick-up block... -
Page 12: Cd Base Unit (Bu-30Bbd61B) (Deck A)
RCD-W222ES 3-6. CD BASE UNIT (BU-30BBD61B) (DECK A) 7 CD base unit (BU-30BBD61B) 3 Two coil springs 6 Two coil springs (insulator) (insulator) 5 Stopper (BU) 2 Two screw (BVTP2.6) 1 Floating screw 4 Two screw (BVTP2.6) 3-7. FITTING BASE (GUIDE) ASSY, BRACKET (CHASSIS) AND MAGNET ASSY (DECK A) 8 Four screws (BVTP M2.6) -
Page 13: Tray (Sub) (Deck A)
RCD-W222ES 3-8. TRAY (SUB) (DECK A) 1 Rotating the pulley (LD), shift the slider (selection) in the direction of arrow A . 2 Rotating the pulley (mode) in the arrow direction, adjust the tray (sub) to be removed. 3 Rotating the pulley (LD), shift the slider (selection) in the direction of arrow B . -
Page 14: Assembly
RCD-W222ES SECTION 4 ASSEMBLY GEARS INSTALLATION (Page 14) SLIDER (SELECTION) INSTALLATION (Page 15) STOCKER SECTION INSTALLATION (Page 15) CHASSIS (MOLD B) SECTION INSTALLATION (Page 16) Note : Follow the assembly procedure in the numerical order given. 4-1. GEARS INSTALLATION 3 Gear (gear B) - Page 15 RCD-W222ES 4-2. SLIDER (SELECTION) INSTALLATION 6 Two screws (PTPWH M2.6 2 Gear (chucking) Rotary encoder 5 Washer 4 Compression spring 7 Insert the slider (selection) into the portion A. Align with the slot of rotary encoder. Portion A 3 Convex portion of...
- Page 16 RCD-W222ES 4-4. CHASSIS (MOLD B) SECTION INSTALLATION 3 Three screws (BVTP M2.6) 2 Insert the gear (eject) under the gear (LD 1 Insert the portion A of chassis (mold B) section deceleration). Portion A into the portion B of slider (selection).
-
Page 17: Test Mode
RCD-W222ES SECTION 5 TEST MODE Setting the Test Mode the sled moves to the innermost position. Procedure: 5. Press the l AMS L (DECK B) knob, then “SERVICE 1. Press the POWER button to POWER on. MODE” is displayed again. - Page 18 RCD-W222ES Contents of CDR error history 3. Press the MENU/NO button, then “LED CHECK” is displayed again. 4. To exit from this mode, turn the l AMS L (DECK B) display(example) knob to display “Ship Mode”, and press the l AMS L (DECK B) knob to execute the Ship Mode.
- Page 19 RCD-W222ES examples : 6 5 4 3 2 1 Operation mode normal speed, during 0000 0111 standby(waiting for command from the CD system)/during search 91 1001 0001 x4 speed, during operation of unfinalize 4 Start time of read in(compression method)
-
Page 20: Electrical Adjustment
RCD-W222ES SECTION 6 ELECTRICAL ADJUSTMENTS Note: A clear RF signal waveform means that the shape “◊” can be CD SECTION (DECK A) clearly distinguished at the center of the waveform. Note : VOLT/DIV : 200mV 1. CD Block is basically designed to operate without adjustment. - Page 21 RCD-W222ES CD-R/RW SECTION The following the method of locating the faulty point and (w/ Serial I/F) electrical adjustment. Connection and Setting of Programs COM1 1-1. Connection RCD-W222ES RS-232C Cable Oscilloscope MPXOUT 0-756-358-11 CDM65-RBD1 SERVICE CONTROL FIRM RESET Cables for Jig connecting...
- Page 22 RCD-W222ES 1-2. Equipments to prepare Test Object Both RBD1 and CDM65-RBD1 shall be tested. RBD1 : Flash Memory Writing of of Circuit Test by Self-diagnostics CDM65-RBD1 : Electrical Adjustment Performance Test (With 9 Cables, Parts No.J-2501-223-A) Windows95/98/2000/Me with COMport (RS-232C)
- Page 23 RCD-W222ES 1-3. Setting of Programs (Tera Term Pro and Service macro) Confirmation of System (Windows 98 is used in this explanation) Preparation for Terminal software Set up the serial port from OS. Select Start → Settings → Control Panel and select System →...
- Page 24 RCD-W222ES Press “Advanced...” button Remove the check “Use FIFO buffers ...” (See Fig.1-3) 4 Fig. 1-3 Unzip the file “ttermp.zip” by PC. (The file “ttermp.zip” is distributed together with the service manual.) After unzip the files, you can find setup.exe.
- Page 25 RCD-W222ES Terminal setup Set the parameters as below. New-line receive : CR transmit : CR After settings, press “OK” button. (See Fig.1-6) 4 Fig. 1-6 General setup Select the language and press “OK” button. (See Fig.1-7) 4 Fig. 1-7 Saving the setup Select Setup →...
- Page 26 RCD-W222ES Repair Works That Require Electrical Adjustment In the case of repair works as shown below, electrical adjustment is required. Locating the faulty point KRM-220CAA is replaced. RBD1 is replaced. The parts shown in the List (1) is replaced. The parts shown in the List (2) is replaced.
- Page 27 RCD-W222ES Locating the Faulty Point 3-1. Laser Power Check Select the menu as follows. Control → Macro, and select LDPtestL_S.ttl. Press “Open”. (See Fig. 3-1, 3-2) 4 Fig. 3-1 4 Fig. 3-2 Press the “RESET” button (SW101) of the jig as prompted by the display.
- Page 28 RCD-W222ES When the display shown in Fig. 3-4 appears, set the Range of a laser power meter to “1 mW” and press “OK”. 4 Fig. 3-4 Check that the laser power meter reading satisfies the following requirement. When the laser power satisfies the required specification, press “OK”.
- Page 29 RCD-W222ES Check that the message “Power Check End” appears on display. (See Fig. 3-9) If the measurement result is outside the specification value, either perform Section 4. CDM65-RBD1 Electrical Adjustment, or locate the cause of the error by performing the Laser Deterioration Judgment.
- Page 30 Connect the CDM65-RBD1 (abbreviated as CDM65 hereafter) that is going to be repaired, the jig and a PC following the Connection Diagram as shown in section 1-1. Turn on the power of the RCD-W222ES in which the CDM65 is installed. Start up the TeraTermPro that is installed in PC. Set the switch S510 on the jig to “CONTROL”.
- Page 31 RCD-W222ES Type diagno [Enter] from keyboard of PC. Note 6-1 : When the KRM-220CAA is connected, the spindle motor rotates at a high speed. If the message “Diagnosis END!” appears, press the “RESET” button and stop the spindle. Note 6-2 : When the KRM-220CAA is connected (i.e. when the FFC for optical laser unit is connected to CN101 is connected), ignore the message “AK8567 (w/o OP)
- Page 32 RCD-W222ES Type the filename in which result of electrical adjustment is going to be saved. Press “OK”. (See Fig. 3-19) 4 Fig. 3-19 Confirm that the message “completed!” appears. The EEPROM data is backed up. (See Fig. 3-20) 4 Fig. 3-20 Perform step 1) through step 6) of section “3-3.
- Page 33 RCD-W222ES Confirm that the message “completed!” appears. The EEPROM data is recovered. (See Fig. 3-23) 4 Fig. 3-23 Perform the operation check. 3-5. Acquisition of Error History and Acquisition of Elapsed Operating Hours Check if error has occurred or not by performing the following steps. If error has occurred, it is interpreted and saved in the specific directory.
- Page 34 RCD-W222ES Press the “RESET” button (SW101) of the jig as prompted by the display. When there is no error, the display as shown in Fig. 3-26 appears. 4 Fig. 3-26 When error has occurred, the display as shown in Fig. 3-27 appears showing error history.
- Page 35 RCD-W222ES CDM65-RBD1 Electrical Adjustment 4-1. Laser Power Adjustment Start up the TeraTermPro and set the switch S510 on the jig to “CONTROL”. Select the menu as follows. Control → Macro, and select 01ldp_S.ttl. Press “Open”. (See Fig. 4-1) 4 Fig. 4-1 Press the “RESET”...
- Page 36 RCD-W222ES When the display as shown in Fig. 4-6 appears, place the probe of the laser power meter on top of the optical laser unit, and press “OK”. (See Fig. 3-3-a, page 27) 4 Fig. 4-6 When the display as shown in Fig. 4-7 appears, set the Range of a laser power meter to “1 mW”...
- Page 37 RCD-W222ES 10) Adjust the laser output power as follows. The laser output power (i.e., laser power meter reading) should satisfy the specification shown below. LEADER LPM-8001 : 4.6 +/- 0.1 mW (4.5 to 4.7 mW) ADVANTEST @@@ : 5.0 +/- 0.1 mW (4.9 to 5.1 mW) To increase the laser output power Press [Yes] of the “Up?”...
- Page 38 RCD-W222ES 12) When the display shown in Fig. 4-18 appears, remove probe of the laser power meter and press OK. 4 Fig. 4-18 13) Check that the message “Laser Power CAL completed!” appears. (See Fig. 4-19) NG Judgment Result Indication 4 Fig.
- Page 39 RCD-W222ES Note :The clear RF signal waveform means that the shape “@@” can be clearly distinguished at the center of the waveform. RF signal waveform VOLT/DIV : suitable value TIME/DIV : 500ns 4 Fig. 4-22 As prompted by the message shown in Fig. 4-24, check that the waveform as shown in Fig.
- Page 40 RCD-W222ES 4-3. CD-RW Playback Adjustment Select the menu as follows. Control → Macro, and select 03cdr_S.ttl. Press “Open”. Place the test CD TCD-W091W on the tray as prompted by the display and press “OK”. (See Fig. 4-30) 4 Fig. 4-30 Press the “RESET”...
- Page 41 RCD-W222ES Check that the message “CDRW PB-CAL completed!” appears. (See Fig. 4-37) NG Judgment Result Indication 4 Fig. 4-37 4-3-1. Playback Measurement NG! Contents: This message appears when the BLER (Block Error Rate) during playback is outside the specification. Measure : Check if there is any abnormality in RBD1.
- Page 42 RCD-W222ES Press the H button of Deck A. After playback starts, press “OK”. (See Fig. 4-40) 4 Fig. 4-40 When the message as shown in Fig. 4-41 appears some seconds later, select 4x of the test mode (refer to page 18, Play Speed Selection Mode (Deck A)) PLAYBACK SPEED.
- Page 43 RCD-W222ES 4-5. CD-RW Recording Adjustment and Self Record/Playback Check Select the menu as follows. Control → Macro, and select 05cdrw_S.ttl. Press “Open”. Place the test CD disc PATD-012 on the Deck A. Place the recording CD-RW disc (See Note: 4-5-1) on the tray (Deck B) as prompted by the display and press “OK”.
- Page 44 RCD-W222ES As prompted by the message shown in Fig. 4-51, check that the waveform as shown in Fig. 4-50 appears on an oscilloscope. RF signal waveform VOLT/DIV : suitable value TIME/DIV : 500ns 4 Fig. 4-50 4 Fig. 4-51 As prompted by the message shown on display, check that the waveform as shown in Fig. 4-52 appears on an oscilloscope.
- Page 45 RCD-W222ES 4-6. VWDC Check Select the menu as follows. Control → Macro, and select 06vwdc_S.ttl. Press “Open”. As prompted by the message shown in Fig. 4-54, remove the disc from the tray and press “OK”. 4 Fig. 4-54 Because this step saves the result of electrical adjustment in a file, there can be a case that the dialog as shown in Fig.
- Page 46 RCD-W222ES 4-7. NG Message List Message Cause Tray OPEN NG! The tray has not opened within the specified time. Tray Close NG! The tray has not closed within the specified time. SLEDIN NG! The sled has not moved toward inner circumference within the specified time.
- Page 47 RCD-W222ES Operation Check 5-1. Erasing the Error History Select the menu as follows. Control → Macro, and select ErrHistClear.ttl. Press “Open”. (See Fig. 5-1, 5-2) 4 Fig. 5-1 4 Fig. 5-2 Press the “RESET” button (SW101) of the jig as prompted by the display.
- Page 48 RCD-W222ES 5-2. Playback Check using TCD-W032W Install the CDM65 in the equipment and install the TCD-W032W in Deck B. Rotate the l AMS L (Deck B) knob to select the track 16. Start playback by pressing the same knob or by pressing the H (Deck B) button.
- Page 49 RCD-W222ES Supplementary Information Method to Erase the CD-RW Disc Select the menu as follows. Control → Macro, and select RWeraseA.ttl. Press “Open”. (See Fig. A-1, A-2) 4 Fig. A-1 4 Fig. A-2 Press the “RESET” button (SW101) of the jig as prompted by the display.
- Page 50 RCD-W222ES Check that the time display as shown by the arrow mark in Fig. A-4 is updated after a while. 4 Fig. A-4 When update of time display is stopped and rotation of spindle is stopped, press the STOP button (SW501) of the Jig, and then press the...
-
Page 51: Diagrams
RCD-W222ES SECTION 7 DIAGRAMS • WAVEFORMS THIS NOTE IS COMMON FOR PRINTED WIRING BOARDS AND SCHEMATIC DIAGRAMS. – BD BOARD – – CD-R BOARD – – MAIN BOARD – (In addition to this, the necessary note is printed in each block.) •... -
Page 52: Block Diagrams - Bd Section
RCD-W222ES 7-2. BLOCK DIAGRAMS – BD SECTION – EQ AWITCH IC104 FILTER DIGITAL SIGNAL PROCESSOR, IC201 DIGITAL FILTER, D/A CONVERTER IC101 (1/2) CD D+5V RF AMP, 3.3V 55 52 3.3V CD+5V OPTIVCAL FOCUS/TRACKING ERROR AMP PICK-UP BLOCK WAVE IC103 CD D+5V (A-MAX.3) -
Page 53: Block Diagrams - Cd-R Section
RCD-W222ES – CD-R SECTION – TEST TEST TEST CONNECTOR CONNECTOR CD DECODER/ENCODER CONNECTOR X201 TTIP DECODE/CLV SERVO S/H, RF EQUALIZER, 33.8688MHz CN115 CN121 WRITE STRATEGE SERVO SIGNAL DETECT, APC 2 CN144 DIGITAL AUDIO I/F IC101 (PM-DC) BUFFER IC201 IC204 OPTICAL... -
Page 54: Block Diagrams - Main Section
RCD-W222ES – MAIN SECTION – INV. BUFFER DIN 1 IC671 CODEC CD-R DIN 2 DIR/DIT/DAC/ADC SECTION DOUT : LINE (ANALOG) IC500 OPTICAL (Page 53) OPTICAL (CD-R) TRANSCEIVER : CD REC IC651 : CD PLAY (DIGITAL) DOUT T661 SECTION (CD) J661... -
Page 55: Schematic Diagram - Cd-R (1/3) Section
RCD-W222ES 7-3. SCHEMATIC DIAGRAM – CD-R (1/3) SECTION – • See page 81 for IC Pin Function Description. -
Page 56: Schematic Diagram - Cd-R (2/3) Section
RCD-W222ES 7-4. SCHEMATIC DIAGRAM – CD-R (2/3) SECTION – • See page 75 for IC Pin Function Description. -
Page 57: Schematic Diagram - Cd-R (3/3) Section
RCD-W222ES 7-5. SCHEMATIC DIAGRAM – CD-R (3/3) SECTION – • See page 79 for IC Pin Function Description. -
Page 58: Printed Wiring Board - Cd-R Section (Side A)
RCD-W222ES 7-6. PRINTED WIRING BOARD – CD-R SECTION – • See page 51 for Circuit Boards Location. FOR SERVICE CD–R BOARD (SIDE A) MAIN BOARD (Page 65) M903 LOADING MOTOR MAIN BOARD (Page 64) FOR SERVICE • Semiconductor 1-683-342- Location Ref. - Page 59 RCD-W222ES M902 SLED MOTOR THERMO CD–R BOARD (SIDE B) SENSOR M901 SPINDLE MOTOR • Semiconductor Location Ref. No. Location D101 D102 IC101 IC103 IC110 IC171 IC172 IC201 IC204 IC301 IC302 IC501 1-683-342- IC504 IC505 IC506 OPTICAL PICK-UP Q170 BLOCK Q501...
-
Page 60: Printed Wiring Board - Bd Section
RCD-W222ES 7-7. PRINTED WIRING BOARD – BD SECTION – • See page 51 for Circuit Boards Location. BD BOARD (SIDE A) BD BOARD (SIDE B) – M101 (SPINDLE MOTOR) MAIN BOARD (Page 64) OPTICAL PICK-UP – 1-683-588- (11) BLOCK OP ASSY(A-MAX,3) -
Page 61: Schematic Diagram - Bd Section
RCD-W222ES 7-8. SCHEMATIC DIAGRAM – BD SECTION – • See page 72 for IC Pin Function Description. -
Page 62: Printed Wiring Board - Cdm Section
RCD-W222ES 7-9. PRINTED WIRING BOARD – CDM SECTION – • See page 51 for Circuit Boards Location. SENSOR 2 BOARD OUT SW BOARD CONNECTOR BOARD SENSOR BOARD LOAD MOTOR BOARD 1-675-727- (11) MAIN BOARD (Page 65) 1-675-726- (11) M702 LOADING... -
Page 63: Schematic Diagram - Cdm Section
RCD-W222ES 7-10. SCHEMATIC DIAGRAM – CDM SECTION –... -
Page 64: Printed Wiring Board - Main Section (Side A)
RCD-W222ES 7-11. PRINTED WIRING BOARD – MAIN SECTION – • See page 51 for Circuit Boards Location. MAIN BOARD (SIDE A) • Semiconductor Location Ref. No. Location D111 D112 D181 D211 D212 D310 D426 D462 D471 D472 D473 D493 IC100... -
Page 65: Printed Wiring Board - Main Section (Side B)
RCD-W222ES • Semiconductor Location ANALOG IN ANALOG OUT Ref. No. Location MAIN BOARD OPTICAL COAXIAL OPTICAL COAXIAL D301 D302 (SIDE B) D303 D311 D312 D313 D401 D402 D403 (CHASSIS) D404 D411 D412 D431 BOARD D432 (Page 68) D433 CD–R D434... -
Page 66: Schematic Diagram - Main (1/2) Section
RCD-W222ES 7-12. SCHEMATIC DIAGRAM – MAIN (1/2) SECTION –... -
Page 67: Schematic Diagram - Main (2/2) Section
RCD-W222ES 7-13. SCHEMATIC DIAGRAM – MAIN (2/2) SECTION – • See page 73 for IC Pin Function Description. -
Page 68: Printed Wiring Board - Led, Hp Section
RCD-W222ES 7-14. PRINTED WIRING BOARD – LED, HP SECTION – • See page 51 for Circuit Boards Location. • Semiconductor MAIN Location BOARD Ref. No. Location (Page 65) D751 D752 HP BOARD (SIDE A) HP BOARD (SIDE B) D753 D754... -
Page 69: Schematic Diagram - Led, Hp Section
RCD-W222ES 7-15. SCHEMATIC DIAGRAM – LED, HP SECTION –... -
Page 70: Printed Wiring Board - Display, Power Section
RCD-W222ES 7-16. PRINTED WIRING BOARD – DISPLAY, POWER SECTION – • See page 51 for Circuit Boards Location. T902 T901 (Page 65) (Page 65) POWER SW BOARD AC BOARD RM BOARD AC IN CD SW BOARD 1-684-813- (11) (CHASSIS) 1-684-811-... -
Page 71: Schematic Diagram - Display, Power Section
RCD-W222ES 7-17. SCHEMATIC DIAGRAM – DISPLAY, POWER SECTION –... -
Page 72: Ic Pin Functions
RCD-W222ES 7-18. IC PIN FUNCTION DESCRINTION Pin No. Pin Name Description • IC101 CXD3068Q (DIGITAL SERVO, DIGITAL SIGNAL PROCESSOR) (BD Board ) Tracking error signal input Pin No. Pin Name Description Center servo analog input DVDD0 — Power supply (+3.3V) - Page 73 RCD-W222ES • IC1 µPD70F3033AYGF-M04-3BA (SYSTEM CONTROL) (MAIN BOARD) Pin No. Pin Name Description FL-LD-DT FL/LED driver data output [HS] FL-LD-CLK FL/LED driver data clock output DA-DATA-IN Serial data input from CXD9692R DA-DATA-OUT Serial data output to CXD9692R DA-CLK Clock output to CXD9692R...
- Page 74 RCD-W222ES Description Pin No. Pin Name MIDOUT_SW MIDOUT detect signal input MIDIN SW MIDIN detect signal input OUT_SW Tray out detect signal input IN SW Tray in detect signal input LOD_POS Loading motor control signal output LOD_NEG Loading motor control signal output...
- Page 75 RCD-W222ES • IC201 LC89587-UK1-E CD DECODER/ENCODER,ATIP-DEMODULATER,TTIP-DECODE/CLV-SERVO,WRITE STRATAGE,DIGITAL AUDIO I/F (CD-R BOARD) Description Pin No. Pin Name DVSS — Ground 2 to 7 RA4 to RA9 Address output for RAM DVDD (DRAMVDD) — Power supply (+3.3V) DVSS — Ground 10 to 15...
- Page 76 RCD-W222ES Pin No. Pin Name Description DVDD (5VD) — Power supply (+5V) DVSS — Ground DVDD (3.3VD) — Power supply (+3.3V) DVSS — Ground AVDD (3.3VA) — Power supply (+3.3V) AVSS — Ground SLCIST1 EFM slice level set input SLCIST2...
- Page 77 RCD-W222ES Pin No. Pin Name Description TES comparator signal input from AK8567 EFMO (RFNG/EFLG/EFMO) Not used (open) LDON LD control signal output SPFG signal input from LB11698H PCK2 (34MHz) PICK clock output to AK8567 DODD (5VD) — Power supply (+5V) DOSS —...
- Page 78 RCD-W222ES Pin No. Pin Name Description DVSS — Ground ADCDATA Not used (pull down) ADCBCK Not used (open) ADCLRCK Not used (open) AUXDATA Not used (pull down) AUXBCK Not used (connected ground) AUXLRCK Not used (connected ground) DVDD (5VD) —...
- Page 79 RCD-W222ES • IC501 HD64F3064BFBL25 CD-R REC/PB CONTROL (CD-R BOARD) Pin No. Pin Name Description — Not used (Connected to ground with capacitor) XCSCDR Chip select signal output to LC89587-UK1-E 3 to 5 Not used (pull up) XRSTRFP Reset signal output to AK8567...
- Page 80 RCD-W222ES Pin No. Pin Name Description PHBETA Beta signal top level input from AK8567 BHBETA Beta signal bottom level input from AK8567 VREF Reference voltage input (+2.5V) from AK8567 Monitor signal multiplex input from AK8567 Thermometer signal input VWDC2 Write LD control signal output AVSS —...
- Page 81 RCD-W222ES • IC101 AK8567 (S/H,RF EQUALIZER,APC,SERVO ) (CD-R BOARD) Pin No. Pin Name Description AVDD3 — Power supply (+5V) BCENT Center signal output PHBETA Data signal top level output to HD64F3064BFBL25 BHBETA Data signal bottom level output to HD64F3064BFBL25 PHBTC...
- Page 82 RCD-W222ES Pin No. Pin Name Description FOK signal output Not used (open) MPDSH Servo sampling pulse input from LC89587-UK1-E SPDSH Servo sampling pulse input from LC89587-UK1-E RFPDSH Read APC sampling pulse signal input from LC89587-UK1-E WFPDSH Write APC sampling pulse signal input from LC89587-UK1-E...
-
Page 83: Ic Block Diagrams
RCD-W222ES 7-19. IC BLOCK DIAGRAMS IC500 CXD9692R (MAIN BOARD) D LRCK A LRCK A BICK D BICK R–OUT TEST2 D DATA A DATA L–OUT D MCLK A MCLK VCOM OPS1–0 R LRCK R BICK R DATA IPS1–0 PDOWN R MCLK... - Page 84 RCD-W222ES IC102 AN41050 (BD BOARD) 56 VO2– VO3+ VO3– VO2+ PGND2 PGND1 VCC1 VCC1 PGND2 PGND1 VO4+ VO1– STADBY VCC2 STBY PVCC/2(NC) VO4– VO1+ VCC2 PVCC2 PVCC1 VCC1 PVCC2 PVCC1 NC (BC4) NC (BC2) NC (BC3) NC (BC1) NC (VPCMP2)
-
Page 85: Exploded Views
RCD-W222ES SECTION 8 EXPLODED VIEWS NOTE: • Items marked “*” are not stocked since they • -XX, -X mean standardized parts, so they may are seldom required for routine service. Some The components identified by have some differences from the original one. -
Page 86: Front Panel Section
RCD-W222ES 8-2. FRONT PANEL SECTION supplied not supplied Supplied with RV851 FL750 not supplied Supplied with J851 not supplied not supplied 52 51 Ref. No. Part No. Description Remarks Ref. No. Part No. Description Remarks 3-354-981-11 SPRING (SUS), RING A-4676-881-A DISPLAY BOARD, COMPLETE... -
Page 87: Chassis Section
RCD-W222ES 8-3. CHASSIS SECTION Deck A (CDM53L-30B61B) T902 T901 not supplied not supplied The components identified by Deck B (CDM65-RBD1) mark 0 or dotted line with mark 0 are critical for safety. Replace only with part number specified. Ref. No. -
Page 88: (Cdm53L-30B61B)
RCD-W222ES 8-4. CD PLAY MECHANISM DECK SECTION (DECK A)-1 (CDM53L-30B61B) not supplied Chassis (mold) assembly section not supplied Ref. No. Part No. Description Remarks Ref. No. Part No. Description Remarks 3-341-549-01 SCREW(2.6X12)(DIA.7.5),+PTP WH A-4746-928-A BASE (MAGNET) ASSY, FITTING 4-951-620-01 SCREW (2.6X8), +BVTP... -
Page 89: (Cdm53L-30B61B)
RCD-W222ES 8-5. CD PLAY MECHANISM DECK SECTION (DECK A)-2 (CDM53L-30B61B) M702 Ref. No. Part No. Description Remarks Ref. No. Part No. Description Remarks 4-211-232-01 GEAR (LD DECELERATION) 4-951-620-01 SCREW (2.6X8), +BVTP 4-211-228-01 LEVER (GOOSENECK) 4-211-235-01 BELT (COMMUNICATION) 4-214-130-01 GEAR (TRAY) -
Page 90: (Cdm53L-30B61B)
RCD-W222ES 8-6. CD PLAY MECHANISM DECK SECTION (DECK A)-3 (CDM53L-30B61B) supplied Stocker overall section S707 supplied Optical pick-up M701 section Ref. No. Part No. Description Remarks Ref. No. Part No. Description Remarks 4-951-620-01 SCREW (2.6X8), +BVTP 4-211-217-01 GEAR (SELECTION) 4-211-244-01 SCREW, STEP... -
Page 91: Stocker Overall, Optical Pick-Up Section (Deck A)
RCD-W222ES 8-7. STOCKER OVERALL, OPTICAL PICK-UP SECTION (DECK A) CD base unit (BU-30BBD61B) Ref. No. Part No. Description Remark Ref. No. Part No. Description Remark 4-211-212-51 TRAY (SUB) 4-218-253-11 SCREW (M2.6), +BTTP 4-211-210-01 STOCKER (L) 4-231-151-01 STOPPER (BU) 4-218-253-21 SCREW (M2.6), +BTTP... -
Page 92: Base Unit (Deck A)
RCD-W222ES 8-8. BASE UNIT (DECK A) Ref. No. Part No. Description Remarks A-4735-885-A BU-30B ASSY A-4727-463-A BD BOARD, COMPLETE 4-233-832-01 GEAR (LB) 4-233-831-01 GEAR (LA) 1-782-817-11 WIRE (FLAT TYPE) (16 CORE) -
Page 93: Cd-R Mechanism Deck Section (Deck B)
RCD-W222ES 8-9. CD-R MECHANISM DECK SECTION (DECK B) supplied supplied supplied supplied supplied supplied M903 The components identified by mark 0 or dotted line with mark 0 are critical for safety. Replace only with part number specified. supplied Ref. No. -
Page 94: Electrical Parts List
RCD-W222ES SECTION 9 ELECTRICAL PARTS LIST NOTE: Ref. No. Part No. Description Remarks Ref. No. Part No. Description Remarks • Due to standardization, replacements in the • RESISTORS parts list may be different from the parts All resistors are in ohms. - Page 95 RCD-W222ES CD-R Ref. No. Part No. Description Remarks Ref. No. Part No. Description Remarks R217 1-216-829-11 METAL CHIP 4.7K 1/16W < IC > R218 1-216-821-11 METAL CHIP 1/16W IC101 8-752-408-73 IC CXD3068Q IC102 8-759-713-71 IC AN41050 R219 1-216-821-11 METAL CHIP...
- Page 96 RCD-W222ES CD-R Ref. No. Part No. Description Remarks Ref. No. Part No. Description Remarks C137 1-107-826-11 CERAMIC CHIP 0.1uF C230 1-162-912-11 CERAMIC CHIP 0.5PF C138 1-125-837-91 CERAMIC CHIP 6.3V C232 1-162-963-11 CERAMIC CHIP 680PF C139 1-107-826-11 CERAMIC CHIP 0.1uF C233 1-164-156-11 CERAMIC CHIP 0.1uF...
- Page 97 RCD-W222ES CD-R Ref. No. Part No. Description Remarks Ref. No. Part No. Description Remarks CN110 1-784-370-21 CONNECTOR, FFC/FPC 11P R106 1-216-829-11 METAL CHIP 4.7K 1/16W R107 1-216-857-11 METAL CHIP 1/16W CN111 1-764-250-11 PIN, CONNECTOR (PC BOARD) 4P R108 1-216-809-11 METAL CHIP...
- Page 98 RCD-W222ES CD-R Ref. No. Part No. Description Remarks Ref. No. Part No. Description Remarks R208 1-216-864-11 METAL CHIP 1/16W R302 1-216-845-11 METAL CHIP 100K 1/16W R209 1-216-864-11 METAL CHIP 1/16W R303 1-216-833-11 METAL CHIP 1/16W R210 1-216-864-11 METAL CHIP 1/16W...
- Page 99 RCD-W222ES CD-R CD SW CLAMP MOTOR CONNECTOR DISPLAY Ref. No. Part No. Description Remarks Ref. No. Part No. Description Remarks R555 1-216-833-11 METAL CHIP 1/16W < CONNECTOR > R556 1-216-833-11 METAL CHIP 1/16W CN712 1-568-954-11 PIN, CONNECTOR 5P < NETWORK >...
- Page 100 RCD-W222ES DISPLAY Ref. No. Part No. Description Remarks Ref. No. Part No. Description Remarks < FLUORESCENT INDICATOR TUBE > S719 1-762-875-21 SWITCH, KEYBOARD (CLEAR) FL750 1-518-789-11 INDICATOR TUBE, FLUORESCENT S720 1-762-875-21 SWITCH, KEYBOARD (OPEN/CLOSE) S721 1-762-875-21 SWITCH, KEYBOARD (NOMAL) < IC >...
- Page 101 RCD-W222ES INT/COUNT SW IN SW LOAD MOTOR MAIN Ref. No. Part No. Description Remarks Ref. No. Part No. Description Remarks < SWITCH > < SWITCH > S705 1-771-264-11 SWITCH, PUSH(DETECTION)(1 KEY) (INIT) S700 1-762-875-21 SWITCH, KEYBOARD (DISC 1) S706 1-771-264-11 SWITCH, PUSH(DETECTION)(1 KEY) (COUNT)
- Page 102 RCD-W222ES MAIN Ref. No. Part No. Description Remarks Ref. No. Part No. Description Remarks C173 1-137-365-11 MYLAR 0.0015uF 5% C492 1-164-156-11 CERAMIC CHIP 0.1uF C174 1-128-201-11 ELECT 100uF C505 1-164-156-11 CERAMIC CHIP 0.1uF C175 1-136-356-11 MYLAR 470PF C517 1-135-667-91 ELECT...
- Page 103 RCD-W222ES MAIN Ref. No. Part No. Description Remarks Ref. No. Part No. Description Remarks CN671 1-778-692-11 CONNECTOR, FFC/FPC 21P IC470 8-759-387-77 IC TC7WU04F-TE12L CN690 1-564-709-11 PIN, CONNECTOR (SMALL TYPE) 7P CN910 1-691-768-11 PLUG (MICRO CONNECTOR) 6P IC480 8-759-598-06 IC S-80942ANMP-DD6-T2...
- Page 104 RCD-W222ES OUT SW MAIN POWER SW Ref. No. Part No. Description Remarks Ref. No. Part No. Description Remarks R172 1-249-923-11 CARBON 1/4W R619 1-216-813-11 METAL CHIP 1/16W R173 1-249-925-11 CARBON 1.2K 1/4W R620 1-218-285-11 RES-CHIP 1/10W R174 1-249-923-11 CARBON 1/4W...
- Page 105 RCD-W222ES SENSOR SENSOR 2 Ref. No. Part No. Description Remarks Ref. No. Part No. Description Remarks 1-684-813-11 RM BOARD ACCESSORIES ******** *********** < CAPACITOR > 1-477-038-11 REMOTE COMMANDER (RM-R51) 1-791-732-11 CORD, CONNECTION C741 1-164-159-11 CERAMIC 0.1uF 4-240-491-11 MANUAL, INSTRUCTION (ENGLISH)
-
Page 106: Revision History
RCD-W222ES REVISION HISTORY Clicking the version allows you to jump to the revised page. Also, clicking the version at the upper right on the revised page allows you to jump to the next revised page. Ver. Date Description of Revision...
Need help?
Do you have a question about the RCD-W222ES and is the answer not in the manual?
Questions and answers