Table of Contents

Related Manuals for Sanyo FXD-780RDS


Summary of Contents for Sanyo FXD-780RDS
- Page 1 FXD-780RDS with CD Changer Control - - DISC - + Full Panel Detachable High Power FM/AM Stereo Receiver Compact Disc Player with CD Changer Controller ISO Mounting with Removable Trim Ring OPERATING INSTRUCTIONS ..... 1~24...
-
Page 2: Table Of Contents
• Use the Controls or adjustments or performance of procedures other than those specified herein may result in hazardous radiation exposure. • Changes or modifications not expressly approved by SANYO may void the uses’s authority to operate this equipment. GB–1... -
Page 3: Compact Disc Care
COMPACT DISC CARE Dirt, dust, scratches and warpage can cause a deterioration in the sound or intermittent skipping some tracks during play. • This unit has been designed to play compact discs bearing the identification logo shown on the left. No other discs can be played. •... -
Page 4: Digital Display
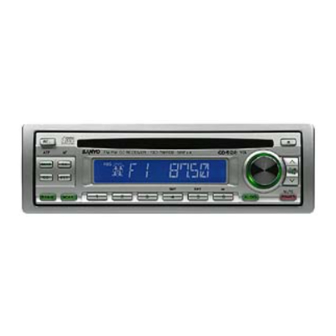
DIGITAL DISPLAY Audio Position Radio Frequency, Time, CD CD running indicator Track Number, Audio Control Selected Mode Disc IN CD changer mode (Disc repeat/ shuffle/scan) BAS-X Mute Repeat Play Shuffle Play Loudness CD changer Scan mode FM Stereo Local/DX Manual tuning Track No. -
Page 5: Detachable Front Panel
DETACHABLE FRONT PANEL The front panel is designed to be removable for antitheft purposes. It is recommended that you remove and carry the front panel with you when you leave your car. HOW TO ATTACH THE FRONT PANEL Align the right side of the panel with the stopper, and then push the left side of the panel into the unit until it clicks. -
Page 6: General Operation
GENERAL OPERATION FM /AM CD RECEIVER FXD-780RDS 50W x 4 - - DISC - + MUTE BAS-X SCAN AUDIO POWER TURNING THE POWER ON ........1 Install the front panel and press the PWR MUTE button 1 when ACC is on. -
Page 7: Switching The Display
SWITCHING THE DISPLAY ........3 Each time you press the AUDIO button 3, the item changes as follows ; Initial set ↓ PS ➔ Frequency ➔ PTY ➔ Clock ➔ BAS ➔ TRE ➔ LOUD ➔ BAL ➔ FAD ➔ Mute level ➔ LO/DX DISPLAY PRIORITY SELECTOR ............ - Page 8 ENHANCING THE BASS SOUND (BAS-X) ........7 Press the BAS-X button 7 to display the BAS-X INDICATOR ( ) on the display window. Each time you press the BAS-X button 7, current mode appears on the display window and the mode change as follows.
- Page 9 ADJUSTING THE SOUND STAGE ......4 You can adjust the position of sound stage to best serve a particular seat. TO MEMORY THE SOUND STAGE ........... 4 Adjust the BALANCE & FADER. Press the appropriate Preset buttons 4 for more than 2 seconds. The balance & fader indicator blinks and adjusted sound stage is stored.
-
Page 10: Radio Operation
RADIO OPERATION FM /AM CD RECEIVER FXD-780RDS 50W x 4 - - DISC - + MUTE BAS-X SCAN AUDIO POWER SELECTING RADIO MODE Press the BAND ATP button 1 to switch from CD mode to the radio mode. Each time the BAND ATP button is pressed, the selected band changes as shown below. - Page 11 ATP (AUTO TRAVEL PRESET) OPERATION ........1 The Auto Travel Preset function searches for and memorizes the 6 strong stations in one of the two bands (FM 3, AM 2) in order of signal strength. This feature is useful when you are driving in an unfamiliar location and want to memorize local stations without changing the standard preset stations.
-
Page 12: Rds Operation
RDS OPERATION Radio Data System (RDS) is a digital information system that sends additional digital information along with the regular FM radio programme signal. As soon as a radio station has been identified, the station name, including a regional identifier if applicable, will appear in the display window, for example SWF4MZ (local radio station of Rhein hassen, Germany). - Page 13 AUTOMATIC RE-TUNING ........1,3,5 The Alternative Frequencies (AF) function automatically selects and tune to the station with the strongest signal in a network. By using this function, you can continuously listen to the same programme during a long-distance drive without having to re-tune the station manually. Press the BAND ATP button 3 to select the FM band.
- Page 14 LOCATING A STATION WITH PTY ......2,4,5,6 You can locate the station you want to listen to by selecting one of the programmes from the following table. Programme types Display Programme types Display News NEWS Weather WEATHER Current Affairs AFFAIRS Finance FINANCE Information INFO...
-
Page 15: Cd Operation
CD OPERATION The compact disc player will accept 5” CD only. FM /AM CD RECEIVER FXD-780RDS 50W x 4 - - DISC - + MUTE BAS-X SCAN AUDIO POWER LOADING AND EJECTING THE CD Insert a disc into the CD slot 1 and the CD player will start. - Page 16 PLACING THE CD IN PAUSE MODE ..........5 While playing a CD, press the Preset 6 button 5. To resume playing, press the Preset 6 button again. Notes • During playback of a CD, the CD running indicator spins. • The unit will turn-on automatically when a CD is inserted if the ignition switch is “ON”.
-
Page 17: Cd Changer Operation
The unit can be used tocontrol the functions of the CD Changer. Please check with your nearest dealer for recommendations of the models that will work with this unit. FM /AM CD RECEIVER FXD-780RDS 50W x 4 - - DISC - + MUTE... - Page 18 REPEAT MODE .................. 6 • Repeat tracks ; ....Press the RPT button 6 to play the current track repeatedly. “RPT” indicator appears in the display window. • Repeat discs ; ....Press the RPT button 6 for more than 2 seconds to play the current disc re- peatedly.
-
Page 19: Error Signs
ERROR SIGNS If a problem should occur while operating the CD player, one of the following error signs may be displayed. Refer to the table below to identify the problem, then take the suggested corrective action. If the error persists, contact your nearest dealer. Message Cause Remedy... -
Page 20: Hints For Proper And Safe Operation
10 seconds, the player will reload the disc to prevent damage. • Servicing Should a problem develop, do not open the unit or try to repair it yourself. If servicing is required, bring the unit to a Sanyo Authorized Service Center. GB–19... -
Page 21: Troubleshooting
TROUBLESHOOTING Sometimes a simple operational error or a mistake in the wiring can appear to be a problem with the unit. Before having the unit serviced, refer to the troubleshooting chart below. Symptom Cause Solution The compact disc does not The volume control is turned Turn up the volume control. -
Page 22: Accessories And Hardware
ACCESSORIES AND HARDWARE INSTALLATION Mounting Bracket Mounting Strap Locking Screw (Half Sleeve) × 1 and Screws × 1 × 1 Removable Trim Ring Unlock Levers × 1 × 2 INSTALLATION 1. BEFORE INSTALLATION When mounting the unit in a car, keep the unit as level as possible. If the unit must be mounted at an angle, due to the design of the vehicle, make sure the unit does not tilt by more than 30°. -
Page 23: Unit Removal
2. INSTALLATION PROCEDURES Mounting Strap FIRE WALL DASH BOARD OR CONSOLE Mounting Bracket Removable Trim Ring When mounting the unit into a DIN–standard cutout (182 × 53 mm) in the dashboard or console, attach the provided Removable Trim Ring to the unit. Insert the mounting bracket into the DIN-standard cutout (182 ×... -
Page 24: Electrical Connections
ELECTRICAL CONNECTIONS WIRING ANTENNA SOCKET ANTENNA PLUG In the case of a 2-speaker system, tape the ends of unconnected terminals to prevent short circuit 4-speaker System 2-speaker System (White) (White) Front Left Left (White/Black) (White/Black) Speaker Speaker (Gray) (Gray) Front Right Right (Gray/Black) (Gray/Black) -
Page 25: Line Out Connections
Then install the new 10 amp. fuse. LINE OUT CONNECTIONS • The unit has a built-in CD changer controller and line out terminals. You can use a compatible Sanyo CD changer and a separate rear channel amplifier to upgrade your system. - Page 26 SANYO Electric Co., Ltd. Printed in Singapore Issue date 08-02 288F0630...
Need help?
Do you have a question about the FXD-780RDS and is the answer not in the manual?
Questions and answers
Cd autochanger fxd drains battery overnight
The manual does not provide a specific reason why the Sanyo FXD-780RDS CD autochanger would drain the battery overnight. However, possible causes could include improper electrical connections, a short circuit, or the unit not powering off correctly. If the fuse blows often, it suggests there may be a short circuit or an issue with the car’s voltage regulator. These electrical issues could lead to continuous power draw, draining the battery.
This answer is automatically generated