Table of Contents
Advertisement
Available languages
Available languages
FXD-770GD_Cover(English)
1
SANYO Electric Co., Ltd.
Printed in Singapore
Issue date 03-01
288F0150
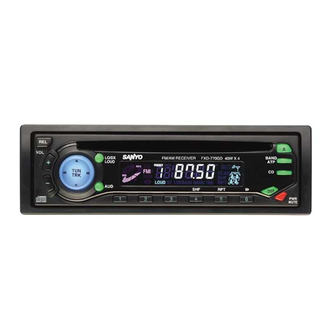
FXD-770GD
REL
VOL
LO/DX
FM/AM RECEIVER
LOUD
PRESET TRACK
CD
L
TUN
FMIII
TRK
R
AMII
LOUD ST LOCBASS MANU TRE
AUD
Full Panel Detachable
High Power FM/AM Stereo Receiver
Compact Disc Player
ISO Mounting with Removable Trim Ring
OPERATING INSTRUCTIONS ......................... 1~18
3/7/01, 5:56 PM
BAND
FXD-770GD 40W X 4
ATP
R
CD
FRONT
SCAN
F
SHF
RPT
SHF
RPT
DISP
PWR
MUTE
GB
F
D
Advertisement
Chapters
Table of Contents

Related Manuals for Sanyo FXD-770GD


Summary of Contents for Sanyo FXD-770GD
- Page 1 FXD-770GD BAND LO/DX FM/AM RECEIVER FXD-770GD 40W X 4 LOUD PRESET TRACK FMIII FRONT SCAN AMII LOUD ST LOCBASS MANU TRE DISP MUTE Full Panel Detachable High Power FM/AM Stereo Receiver Compact Disc Player ISO Mounting with Removable Trim Ring OPERATING INSTRUCTIONS ......
-
Page 2: Table Of Contents
• Use the Controls or adjustments or performance of procedures other than those specified herein may result in hazardous radiation exposure. • Changes or modifications not expressly approved by Sanyo may void the user’s authority to operate this equipment. FXD-770GD_Ebody(P01-18) -
Page 3: Compact Disc Care
COMPACT DISC CARE Dirt, dust, scratches and warpage can cause a deterioration in the sound or intermittent skipping some tracks during play. • This unit has been designed to play compact discs bearing the identification logo shown on the left. No other discs can be played. •... -
Page 4: Digital Display
DIGITAL DISPLAY Track No. Preset No. Radio Frequency, Time, CD Mode CD Track Number, Audio FM Bands Tuning Indicator Control Selected Mode Mute CD running indicator PRESET TRACK FMIII FRONT SCAN AMII LOUD ST LOCBASS MANU TRE Scan BASS Volume/Audio Audio Position Local/DX Control Level... -
Page 5: Detachable Front Panel
If the display window is not properly shown or the unit malfunctions, press the reset button with the point of a sharp object such as a ball-point pen. Release button LO/DX FM/AM RECEIVER FXD-770GD 40W X 4 BAND LOUD PRESET TRACK FMIII FRONT... -
Page 6: General Operation
GENERAL OPERATION BAND LO/DX FM/AM RECEIVER FXD-770GD 40W X 4 LOUD PRESET TRACK FMIII FRONT SCAN AMII LOUD ST LOCBASS MANU TRE DISP MUTE TURNING THE POWER ON ........1 Install the front panel and press the PWR MUTE button 1 when ACC is on. -
Page 7: Adjusting The Sound
ADJUSTING THE SOUND CHARACTERISTICS ........2,4,5,6,7 Each time you press the AUD button 4 until the desired mode is displayed. Press the following buttons to adjust the selected item. Make the adjustment within 5 seconds after selecting. After 5 seconds, the display window will revert to display priority. Adjustment Range BASS BASS –7... - Page 8 ADJUSTING THE SOUND STAGE ......3 You can adjust the position of sound stage to best serve a particular seat. TO MEMORY THE SOUND STAGE ............ 3 Adjust the BALANCE & FADER. Press the appropriate Preset buttons 3 for more than 2 seconds. The balance & fader indicator blinks and adjusted sound stage is stored.
-
Page 9: Radio Operation
RADIO OPERATION BAND LO/DX FM/AM RECEIVER FXD-770GD 40W X 4 LOUD PRESET TRACK FMIII FRONT SCAN AMII LOUD ST LOCBASS MANU TRE DISP MUTE SELECTING RADIO MODE Press the BAND ATP button 1 to switch from CD mode to the radio mode. - Page 10 ATP (AUTO TRAVEL PRESET) OPERATION ........1 The Auto Travel Preset function searches for and memorizes the 6 strong stations in one of the two bands (FM 3, AM 2) in order of signal strength. This feature is useful when you are driving in an unfamiliar location and want to memorize local stations without changing the standard preset stations.
-
Page 11: Cd Operation
CD OPERATION The compact disc player will accept 5” CD only. BAND LO/DX FM/AM RECEIVER FXD-770GD 40W X 4 LOUD PRESET TRACK FMIII FRONT SCAN AMII LOUD ST LOCBASS MANU TRE DISP MUTE LOADING AND EJECTING THE CD Insert a disc into the CD slot 1 and the CD player will start. - Page 12 PLACING THE CD IN PAUSE MODE ..........5 While playing a CD, press the Preset 6 button 5. To resume playing, press the Preset 6 button again. Notes • During playback of a CD, the CD running indicator spins. • The unit will turn-on automatically when a CD is inserted if the ignition switch is “ON”.
-
Page 13: Error Signs
ERROR SIGNS If a problem should occur while operating the CD player, one of the following error signs may be displayed. Refer to the table below to identify the problem, then take the suggested corrective action. If the error persists, contact your nearest dealer. Message Cause Remedy... -
Page 14: Hints For Proper And Safe Operation
10 seconds, the player will reload the disc to prevent damage. • Servicing Should a problem develop, do not open the unit or try to repair it yourself. If servicing is required, bring the unit to a Sanyo Authorized Service Center. FXD-770GD_Ebody(P01-18) 3/7/01, 5:57 PM... -
Page 15: Troubleshooting
TROUBLESHOOTING Sometimes a simple operational error or a mistake in the wiring can appear to be a problem with the unit. Before having the unit serviced, refer to the troubleshooting chart below. Symptom Cause Solution The compact disc does not The volume control is turned Turn up the volume control. -
Page 16: Accessories And Hardware
ACCESSORIES AND HARDWARE INSTALLATION Mounting Strap Locking Screw Mounting Bracket Bushing & Screw and Screws × 1 × 1 (Half Sleeve) × 1 × 1 Removable Trim Ring Unlock Levers × 1 × 2 INSTALLATION 1. BEFORE INSTALLATION When mounting the unit in a car, keep the unit as level as possible. If the unit must be mounted at an angle, due to the design of the vehicle, make sure the unit does not tilt by more than 30°. -
Page 17: Unit Removal
2. INSTALLATION PROCEDURES MOUNTING STRAP USE BUSHING USE Mounting Strap Screw FIRE WALL Bushing DASH BOARD OR CONSOLE Mounting Bracket Removable Trim Ring When mounting the unit into a DIN–standard cutout (182 × 53 mm) in the dashboard or console, attach the provided Removable Trim Ring to the unit. -
Page 18: Electrical Connections
ELECTRICAL CONNECTIONS WIRING ANTENNA SOCKET ANTENNA PLUG In the case of a 2-speaker system, tape the ends of unconnected terminals to prevent short circuit 4-speaker System 2-speaker System (White) (White) Front Left Left (White/Black) (White/Black) Speaker Speaker (Gray) (Gray) Front Right Right (Gray/Black) (Gray/Black) -
Page 19: Line Out Connections
Notes • When using a two-speaker installation, the Green, Green/Black, Violet, Violet/ Black wires, which are used for a four-speaker installation, are not used. The ends of these wires must be covered with electrical tape to prevent them from shorting to the unit or the vehicle chassis. •... - Page 20 FXD-770GD BAND LO/DX FM/AM RECEIVER FXD-770GD 40W X 4 LOUD PRESET TRACK FMIII FRONT SCAN AMII LOUD ST LOCBASS MANU TRE DISP MUTE Panel frontal totalmente extraíble Sintonizador estéreo AM/FM de gran potencia Reproductor de discos compactos Montaje ISO con embellecedor extraíble LIBRITO DE INSTRUCCIONES ......
- Page 21 • El uso de los mandos o la realización de ajustes o procedimientos que no estén explicados en este manual puede provocar una exposición peligrosa a la radiación. • Cualquier cambio o alteración del aparato no autorizados expresamente por SANYO puede prohibir al usuario la utilización del equipo.
-
Page 22: Cómo Tratar Los Discos Compactos
CÓMO TRATAR LOS DISCOS COMPACTOS Si el disco está sucio, tiene polvo o está rayado o doblado el sonido puede verse afectado y saltar en algunas pistas. • Este equipo ha sido exclusivamente diseña- do para la reproducción de discos compactos que lleven este indicativo. -
Page 23: Pantalla Digital
PANTALLA DIGITAL Nº de pista Radiofrecuencia, hora, Nº de presintonía nº de pista de CD, modo Modo CD de control de sonido se- Indicador de sintoni- Nº de banda FM leccionado zación Silenciador Indicador de funciona- miento del CD PRESET TRACK FMIII FRONT SCAN... -
Page 24: Frontal Extraíble
BAND LO/DX FM/AM RECEIVER FXD-770GD 40W X 4 por ejemplo, la punta de un bolígrafo. LOUD PRESET TRACK FMIII... -
Page 25: Funcionamiento Básico
FUNCIONAMIENTO BÁSICO BAND LO/DX FM/AM RECEIVER FXD-770GD 40W X 4 LOUD PRESET TRACK FMIII FRONT SCAN AMII LOUD ST LOCBASS MANU TRE DISP MUTE CÓMO ENCENDER EL EQUIPO ......1 Coloque el frontal extraíble y pulse el botón PWR MUTE cuando la llave de contacto esté en posición ACC. -
Page 26: Puesta En Hora Del Reloj
CÓMO CAMBIAR LAS CARACTERÍSTICAS DEL SONIDO ............2,4,5,6,7 Pulse el botón 4 (AUD) hasta ver en pantalla el modo deseado. Pulse los siguientes botones para cambiar las características del modo de sonido seleccionado. Tiene cinco segundos para hacerlo. Después de los cinco segundos, la pantalla volverá a mostrar la infor- mación prioritaria. - Page 27 CÓMO CAMBIAR LA POSICIÓN DE AUDICIÓN ......3 Si lo desea puede modificar la posición de audición y adecuarla a un(os) asiento(s) determinado(s). CÓMO MEMORIZAR LA POSICIÓN DE AUDICIÓN ......3 Modifique los niveles de balance y fáder. Pulse el botón de presintonía (3) en el que desee memorizarla durante más de dos segundos. Los indicadores de balance y fáder parpadearán y la posición quedará...
-
Page 28: Funcionamiento De La Radio
FUNCIONAMIENTO DE LA RADIO FXD-770RDS LO/DX BAND FM/AM RECEIVER FXD-770GD 40W X 4 LOUD PRESET TRACK FMIII FRONT SCAN AMII LOUD ST LOCBASS MANU TRE DISP MUTE CÓMO SELECCIONAR EL MODO DE RADIO Pulse el botón 1 (BAND ATP) para cambiar de modo CD a modo radio. - Page 29 FUNCIÓN ATP (SINTONIZACIÓN AUTOMÁTICA DE EMISORAS EN RUTA) ..1 La función ATP busca y memoriza automáticamente las seis emisoras de señal más fuerte por orden de intensidad en una de las dos bandas siguientes: FM 3 ó AM 2. Esta función le resultará...
-
Page 30: Funcionamiento Del Reproductor De Discos Compactos
FUNCIONAMIENTO DEL REPRODUCTOR DE DISCOS COMPACTOS Este aparato funciona únicamente con discos compactos convencionales de 5". BAND LO/DX FM/AM RECEIVER FXD-770GD 40W X 4 LOUD PRESET TRACK FMIII FRONT SCAN AMII LOUD ST LOCBASS MANU TRE DISP MUTE CÓMO INTRODUCIR Y EXPULSAR UN CD Introduzca un disco por la ranura;... - Page 31 CÓMO ACTIVAR LA PAUSA .............. 5 Pulse el botón 6 de presintonías (5) durante la reproducción del disco. Para reanudar la reproducción, vuelva a pulsar el mismo botón. Notas • Durante la reproducción del disco, el indicador empieza a girar. •...
-
Page 32: Códigos De Error
CÓDIGOS DE ERROR Cuando se produce alguna anomalía en la reproducción de discos compactos puede aparecer un mensa- je de error en la pantalla. Consulte la tabla que se muestra a continuación para saber a qué se debe el problema y siga el consejo que se le da. -
Page 33: Instrucciones De Mantenimiento Yseguridad
10 segundos el equipo volverá a introducirlo automáticamente para evitar que se estropee. • Reparaciones Si el equipo se estropea, no intente abrirlo y repararlo por su cuenta. Llévelo siempre a un centro de servicio técnico autorizado Sanyo. FXD-770GD_Sbody(P01-18) 3/7/01, 5:50 PM... -
Page 34: Resolución De Posibles Problemas
RESOLUCIÓN DE POSIBLES PROBLEMAS A veces, un simple problema de funcionamiento o un fallo en la conexión de algún cable puede parecer una anomalía del equipo; por ello, antes de llevarlo al servicio técnico, consulte la siguiente tabla. Problema Posible causa Solución El disco compacto no suena al El volumen está... -
Page 35: Accesorios De Montaje
ACCESORIOS DE MONTAJE INSTALACIÓN Carcasa Arandela y perno Banda metálica Tornillo de (media estructura) × 1 × 1 perforada y tornillos × 1 bloqueo × 1 Llaves Embellecedor (extraíble) × 1 × 2 INSTALACIÓN 1. ANTES DE LA INSTALACIÓN Cuando instale el equipo en el coche, sujételo lo más horizontal que le sea posible. Si la unidad se instala en ángulo, debido al diseño del vehículo, asegúrese de que la unidad no esté... -
Page 36: Cómo Extraer El Equipo
2. MONTAJE MONTAJE CON BANDA MONTAJE CON METÁLICA PERFORADA ARANDELA PARED DE Banda metálica Perno Arandela PROTEC- perforada CIÓN SALPICADERO Carcasa O CONSOLA Embellecedor extraíble Si instala el equipo en un espacio para radiocassettes homologado DIN (de 182 × 53 mm), colóquele el embellecedor extraíble suministrado. -
Page 37: Conexiones
CONEXIONES CABLES TOMA DE ANTENA CONECTOR DE LA ANTENNA Si el sistema es de dos altavoces, encinte los exremos de los cables que no se vayan a utilizar para evitar posibles cortocircuitos. Sistema de 4 altavoces Sistema de 2 altavoces (Blanco) (Blanco) Altavoz... -
Page 38: Conexiones Externas
Notas • Si el sistema sólo dispone de dos altavoces, anule los cables verde, verde/ negro, violeta y violeta/negro. Recuerde encintarlos con cinta aislante para evi- tar que entren en contacto con el equipo o el chasis y provoquen un cortocircui- •...
Need help?
Do you have a question about the FXD-770GD and is the answer not in the manual?
Questions and answers