Table of Contents
Advertisement
Quick Links
Advertisement
Table of Contents

Related Manuals for Garland Mealstream


Summary of Contents for Garland Mealstream
- Page 1 S E R V I C E ALL CTM3 MODELS & TIM HORTON'S COMBINATION OVEN MANUFACTURED FROM JANUARY 2003 CAUTION MICROWAVE EMISSIONS DO NOT BECOME EXPOSED TO EMISSIONS FROM THE MICROWAVE GENERATOR OR PARTS CONDUCTING MICROWAVE ENERGY Mealstream Ovens Pt. No. 32Z3403 Issue 15 Page 1...
-
Page 2: Table Of Contents
Error codes and diagnostics..........48 Appendix 1: Test Procedure for Tim Hortons......49 Appendix 2: MenuKey® Download procedure ...... 50 Appendix 3: Temperature Sensor resistance data....51 Manual corrections and modifications........52 Mealstream Ovens Pt. No. 32Z3403 Issue 15 Page 2... -
Page 3: Microwave Safety Precautions
A microwave leakage check to verify compliance with the Canadian (ii) Regulation, HEALTH AND WELFARE, SOR/79 920 should be performed on each oven prior to release to the owner. For CANADA. Mealstream Ovens Pt. No. 32Z3403 Issue 15 Page 3... -
Page 4: Safety Code
Upon completion of a service on a Mealstream oven, or before reconnecting the appliance to the electrical supply for testing, check all of the following points: •... -
Page 5: Product Specifications
100%,75%,50%,25%, Convection only Temperature Off, 300°F, 350°F, 400°F, 440°F, 480°F Timer Up to 30 minutes per stage Programs Cook Programs can have 3 cooking stages of up to 30 minutes for each stage Mealstream Ovens Pt. No. 32Z3403 Issue 15 Page 5... -
Page 6: Installation Instructions
Installation Instructions for Mealstream Combination Ovens Power Supply Requirements The Mealstream Series should be connected to a suitable electricity supply, which can cope with the switching-on surge that occurs with certain types of catering equipment, including microwaves. Because of this requirement, we strongly recommend that a separate, suitably rated supply is installed for the oven. -
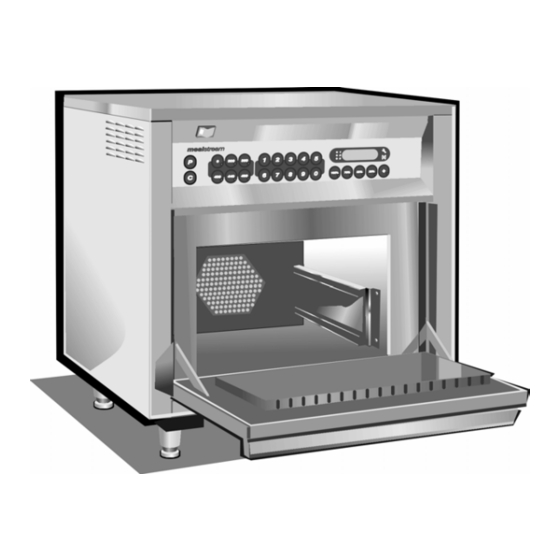
Page 7: Main Features
Electrical supply cord is situated on the rear oven cavity to support the rectangular of the oven, racks or oven trays. AIR FILTER Main intake for cooling air for internal components. Must be clear of obstructions. Mealstream Ovens Pt. No. 32Z3403 Issue 15 Page 7... - Page 8 Time / Preset Pads Temperature Set Pads Cancel / Callback Pad Program Pad Menukey™ Tim Hortons control panel MENU Preheat Cancel M Icon Cook Pads MenuKey™ Quarter, Half & Full Batch Load Mealstream Ovens Pt. No. 32Z3403 Issue 15 Page 8...
-
Page 9: Principal Components: Lhs
Microswitch ( Primary ) 30Z0240 30Z0240 Door hinge assembly ( LH ) 11C0167 11C0167 Note B See page 17 Door arm assembly 11C0300 11C0300 for parts Microswitch ( Monitor ) 30Z0240 30Z0240 Mealstream Ovens Pt. No. 32Z3403 Issue 15 Page 9... -
Page 10: Principal Components: Rhs
Steam pipe 40C1023 40C1023 June 2003 Steam vent guard 790061 790061 Temperature sensor 50E123 50E123 Rubber stop 31Z1150 31Z1150 Cavity Vent Pipe 40C1013 40C1013 Diode Board assy. with leads 11M0325 11M0325 Mealstream Ovens Pt. No. 32Z3403 Issue 15 Page 10... -
Page 11: Principal Components: Top
31Z0176 (99mm) Filter 30Z0997 2571016 Magnetron Thermal Trip 2571016 Note A: This Capacitor is replaced with 0.88µf 2500V and 2 x 109mm clips included in a service kit Part No. 10C0192 Mealstream Ovens Pt. No. 32Z3403 Issue 15 Page 11... -
Page 12: Principal Components: Back View
Hot air motor assembly 11C0312 11C0312 Capacitor 6µF 30Z1148 30Z1148 Overheat Safety Thermostat 30Z1024 30Z1024 Hot Air motor Resistor 50R 30Z1165 Twin Blower Resistor 39R 30Z1164 Twin Blower Resistor 50R 30Z1165 Mealstream Ovens Pt. No. 32Z3403 Issue 15 Page 12... -
Page 13: Principal Components: Door, Roof And Heater Element
Bolt 1/4" 20 UNC 3/4" Hex 109050 109050 Door Handle 40C1020 40C1020 Flat Washer S/S M5 x 20 104036 104036 Nylon Washer 104250 104250 Spring Washer 31Z5005 31Z5005 Flat Washer S/S M6 x 20 104054 104054 Mealstream Ovens Pt. No. 32Z3403 Issue 15 Page 13... -
Page 14: Principal Components: Cavity Parts & External Panels
Side Panel Left Side 790002 790002 Side Panel Right Side 790003 790003 Top Panel 790005 790005 Foot 32Z1052 32Z1052 Wire Rack 40C1011 40C1011 Crumb Tray RBR290X02 RBR290X02 Rear Outer Panel 40C0951 40C0951 Mealstream Ovens Pt. No. 32Z3403 Issue 15 Page 14... -
Page 15: Principal Components: Electronic Control Panel Assembly
See page 16 Logic Board (except Tim Hortons) 11C0377 11C0377 Relay Board (except Tim Hortons) 11C0316 11C0212 AC Ribbon connector 11M0116 11M0116 DC Ribbon connector 11M0117 11M0117 MenuKey Assembly 10C0148 10C0148 Mealstream Ovens Pt. No. 32Z3403 Issue 15 Page 15... -
Page 16: Principal Components: Tim Hortons Control Panels
Control Panel Assy with Menukey 11C0413 11C0413 Logic Board 11C0411 11C0411 Relay Board 11C0402 11C0403 Unbranded Description 208V 240V Control Panel Assy with Menukey 11C0414 11C0414 Logic Board 11C0411 11C0411 Relay Board 11C0402 11C0403 Mealstream Ovens Pt. No. 32Z3403 Issue 15 Page 16... -
Page 17: Principal Components ( Not Shown In Main Views )
40C1005 Hot air motor damper/seal 40C1008 790027 Roller 40C0752 M5 Hex/hd s/s Screw 101825 M5 stainless steel Nut 80X7003 LH Hinge bracket 790024 RH Hinge bracket 790025 Stirrer motor assembly 11C0162 Mealstream Ovens Pt. No. 32Z3403 Issue 15 Page 17... -
Page 18: Principal Components: Input Wiring Details
Input wiring details Green/Yellow Black Green White Description All models Electrical Supply Terminal Block 31Z0149 Cable Gland 31Z0500 Gland Nut 31Z0499 Electrical Supply Cord 3 Core 30Z1162 Electrical Supply Plug 50Amp 31Z0298 (Canada) Mealstream Ovens Pt. No. 32Z3403 Issue 15 Page 18... -
Page 19: Principal Components: Part No. Identification Charts
11C0412 Control Panel Assy. French C. Tim Hortons 11C0413 11C0413 Control Panel Assy. UnBranded Tim 11C0414 11C0414 Hortons Logic Board 11C0377 11C0377 (Except Tim Hortons) Logic Board Tim Hortons 11C0411 11C0411 Mealstream Ovens Pt. No. 32Z3403 Issue 15 Page 19... - Page 20 Tray Support 40C0950 40C0950 Door Assembly Garland 11C0336 11C0336 Door Assembly Tim Hortons 11C0380 11C0380 Door Assembly Unbranded 11C0418 11C0418 Hot Air motor Resistor 50R 30Z1165 Diode assy with leads 11M0325 11M0325 Mealstream Ovens Pt. No. 32Z3403 Issue 15 Page 20...
- Page 21 Flat Washer S/S M5 x 20 104036 104036 Nylon Washer 104250 104250 Spring Washer 31Z5005 31Z5005 Flat Washer S/S M6 x 20 104054 104054 Door Spacer Kit 10C0171 10C0171 Rear Outer Panel 40C0951 40C0951 Mealstream Ovens Pt. No. 32Z3403 Issue 15 Page 21...
-
Page 22: Procedure For Microwave Leakage Test
Check for radiation leakage after servicing. Should the leakage be more than 4mW/cm² Inform Garland service centre immediately. After repairing or replacing any radiation safety device, keep a written record for future reference, as required by D.H.H.S. and Health and Welfare Canada regulation. -
Page 23: Procedure For Microwave Leakage Test
• Readings must be below 4mW/cm². If a level greater that 4mW/cm² is observed, this should be reported to Garland Service Division immediately. • In any case, notes should be kept of the leakage that is observed. In terms of level and position on the oven. -
Page 24: Procedure For Power Output Measurement
27ºF ( 15ºC ) Minimum 36ºF ( 20ºC ) Maximum Power Output is affected by the line voltage under load. For correct Power Output measurement, the line voltage under load must be correct. Mealstream Ovens Pt. No. 32Z3403 Issue 15 Page 24... -
Page 25: Procedures For Principal Component Tests
Pass if over 10 MΩ Filament winding and chassis Pass if over 10 MΩ One end of the High Voltage winding is connected to the chassis, so this is not tested. Mealstream Ovens Pt. No. 32Z3403 Issue 15 Page 25... -
Page 26: Procedures For Principal Component Tests
4 Using the Megger, test for continuity in both directions. Compare results with following Open Circuit both ways FAIL Conducts one way only PASS Short Circuit both ways FAIL Conducts one way, leaks the other FAIL Mealstream Ovens Pt. No. 32Z3403 Issue 15 Page 26... -
Page 27: Procedure For Door Interlock Adjustment And Test
PROCEDURE DOOR INTERLOCK ADJUSTMENT TEST (1) The door on the Mealstream oven is monitored by three microswitches. These are used in the conventional “Primary, Secondary and Monitor” switch arrangement shown below. The switches operate as follows: Door Interlock Arrangement Switches shown in Door Closed position... - Page 28 Note both SW2 and SW3 activate together When opening the door. Interlock Order SW1 (Monitor) SW2 (Primary) Note both SW2 and SW3 activate together SW3 (Secondary) Note both SW2 and SW3 activate together Mealstream Ovens Pt. No. 32Z3403 Issue 15 Page 28...
- Page 29 Please note. It is very important after completing this procedure to carry out a microwave leakage test procedure. See pages 22-23. Mealstream Ovens Pt. No. 32Z3403 Issue 15 Page 29...
-
Page 30: Procedure For Building And Fitting The Door
10C0171 Tools required for door fitting M5 Nut runner Door Spacers S325 & 3 off S215 Flat head screw driver Long nose pliers 5mm open-ended spanner Adhesive skeleton gun Engineers rule Mealstream Ovens Pt. No. 32Z3403 Issue 15 Page 30... - Page 31 Hinge assy. and Inner side panel, loosely fit spacer in place with 1 off M5 bolt x 16mm, 1 off M5 flat washer, 1 off M5 shakeproof washer. Pivot pin Mealstream Ovens Pt. No. 32Z3403 Issue 15 Page 31...
- Page 32 Door arm pivot pin Spring clips 8. Fit door springs to door arms and to the hook at base of inner side panels. Check operation of door and remove (LHS) spring. Mealstream Ovens Pt. No. 32Z3403 Issue 15 Page 32...
- Page 33 Fit the remaining 20 M5 washers and nuts tighten the fixings evenly. Cavity base S325 Choke fingers Top S215 Choke fingers Left S215 Choke fingers Right S215 Remove spacing pieces and check door operation. Mealstream Ovens Pt. No. 32Z3403 Issue 15 Page 33...
- Page 34 LHS, RHS and top of the door. Please note. It is very important after completing this procedure, to carry out a Door interlock adjustment and test procedure. See pages 27-29. Mealstream Ovens Pt. No. 32Z3403 Issue 15 Page 34...
-
Page 35: Procedure For Replacing Door Seal Assembly
Seal the ends of the door seal with CAF 30 (See figure 8 page 36) Leave the door in the open position to allow the adhesive to set. * It is very important to carry out these procedures Mealstream Ovens Pt. No. 32Z3403 Issue 15 Page 35... -
Page 36: Procedure For Replacing Door Seal Assembly
Figure 3 Figure 6 Figure 5 Figure 7 Figure 8 Please note. It is very important after completing this procedure, to do a Door interlock adjustment and test procedure. See pages 27-29. Mealstream Ovens Pt. No. 32Z3403 Issue 15 Page 36... -
Page 37: Procedure For Removing Shelf Runners & Element Cover
Pull the shelf runners forwards away from the rear screws. Remove the 4 off M5 dome nut securing the Element cover plate. Lift the Element cover plate out taking care to not damage the temperature sensor pocket. Mealstream Ovens Pt. No. 32Z3403 Issue 15 Page 37... -
Page 38: Procedure For Replacing Heater Element
3x M5 Flat Washers 11. Perform Microwave Leakage procedure (see page 22-23) checking carefully around Mesh the heater element terminals at rear of oven. Washers 12. Replace outer covers and fully test oven. Mealstream Ovens Pt. No. 32Z3403 Issue 15 Page 38... -
Page 39: Procedure For Replacing Hot Air Motor Assembly
11. Refit shelf runners and element cover plate. 12. Perform Microwave Leakage procedure (see pages 22-23), checking carefully around the hot air motor assembly at rear of oven. 13. Replace outer covers and fully test oven. Mealstream Ovens Pt. No. 32Z3403 Issue 15 Page 39... -
Page 40: Procedure For Replacing Magnetron Assembly
Replace the 4 fixing nuts making sure that they are tightened equally. Reconnect the wiring to the over temperature stat. Reconnect the wiring to the magnetron. Replace the air duct cover. Mealstream Ovens Pt. No. 32Z3403 Issue 15 Page 40... - Page 41 Stat. Screws 4 x Magnetron screw fixings Figure 5 Figure 6 Temperature Magnetron mount Wire mesh Stat. Please note. After completing this procedure do a microwave leakage test. See page 22-23. Mealstream Ovens Pt. No. 32Z3403 Issue 15 Page 41...
-
Page 42: Procedure For Testing Membrane Panel Circuit
4. Using a D.M.M., check for continuity between the correct terminals when the pads are pressed. 5. When the panel has been tested, re-assemble and re-test the control circuit. Mealstream 501 US Mealstream Ovens Pt. No. 32Z3403 Issue 15 Page 42... - Page 43 PROCEDURE FOR TESTING MEMBRANE PANEL CIRCUIT (2) Mealstream 501 US Tim Hortons & Unbranded Variant Note:PINS 1-4 Lower Layer & Pins 5-10 upper layer Mealstream 501 US Tim Hortons French (Canada) Note:PINS 1-4 Lower Layer & Pins 5-10 upper layer Mealstream Ovens Pt.
-
Page 44: Circuit Diagrams
CIRCUIT DIAGRAM: ALL MODELS BEFORE 05.28.02 Mealstream Ovens Pt. No. 32Z3403 Issue 15 Page 44... - Page 45 CIRCUIT DIAGRAM: ALL MODELS AFTER 05.28.02-11.10.02 Mealstream Ovens Pt. No. 32Z3403 Issue 15 Page 45...
- Page 46 CIRCUIT DIAGRAM: ALL MODELS AFTER 11.11.02 SEE NOTE 1 Mealstream Ovens Pt. No. 32Z3403 Issue 15 Page 46...
-
Page 47: Circuit Diagrams
CIRCUIT DIAGRAM: ALL MODELS AFTER 04.06.03 Mealstream Ovens Pt. No. 32Z3403 Issue 15 Page 47... -
Page 48: Error Codes And Diagnostics
ERROR CODES AND DIAGNOSTICS The Mealstream will identify some of the most common problems by flashing an error message code in the time display window. These are the error messages, and suggestions for repairing them. Door not fully shut. Close door fully. -
Page 49: Appendix 1: Test Procedure For Tim Hortons
Follow the Power test procedure as detailed on Page 24 using Program Pad 01 ( Cake) to give the required 1 minute 3 seconds at 100% Microwave Power setting. On completion the current Menukey programs are automatically restored when the oven is next switched on. Mealstream Ovens Pt. No. 32Z3403 Issue 15 Page 49... -
Page 50: Appendix 2: Menukey® Download Procedure
Switch off the oven. Switch oven off and begin the Switch on and the display briefly will show the following: MenuKey download again. 1. The new key code 2. 0:00 (oven ready to use) Mealstream Ovens Pt. No. 32Z3403 Issue 15 Page 50... -
Page 51: Appendix 3: Temperature Sensor Resistance Data
1.000 1.050 0.3572 0.3865 0.4171 R(200)°C = 1 kΩ ± 5% Note: These resistances will only be apparent in a stable cavity temperature as the sensor has a slow response time. Mealstream Ovens Pt. No. 32Z3403 Issue 15 Page 51... -
Page 52: Manual Corrections And Modifications
Name Address Page number on which error occurs (if applicable) - Mealstream Garland Description of error Suggestion for improvement to manual Please return this form to:...
Need help?
Do you have a question about the Mealstream and is the answer not in the manual?
Questions and answers