Garland Moisture+ MPOE5L Service Manual
Moisture plus half-size electric oven
Hide thumbs
Also See for Moisture+ MPOE5L:
Table of Contents
Advertisement
Users are cautioned that maintenance and repairs must be performed by a Garland authorized service agent using genuine
Garland replacement parts. Garland will have no obligation with respect to any product that has been improperly installed,
adjusted, operated or not maintained in accordance with national and local codes or installation instructions provided
with the product, or any product that has its serial number defaced, obliterated or removed, or which has been modifi ed
or repaired using unauthorized parts or by unauthorized service agents. For a list of authorized service agents, please refer
to the Garland web site at http://www.garland-group.com. Th e information contained herein, (including design and parts
specifi cations), may be superseded and is subject to change without notice.
Continuous product improvement is a Garland policy, therefore design and specifi cations are subject to change without notice.
GARLAND COMMERCIAL INDUSTRIES
185 East South Street
Freeland, Pennsylvania 18224
Phone: (570) 636-1000
Fax: (570) 636-3903
Document #MPOELSVC0504
Document #MPOELSVC0504
Service Manual
for
Model MPOE5L
GARLAND COMMERCIAL RANGES,
LTD.
1177 Kamato Road, Mississauga, Ontario L4W 1X4
CANADA
Phone: 905-624-0260
Fax: 905-624-5669
Enodis UK LTD.
Swallowfi eld Way, Hayes, Middlesex UB3 1DQ ENGLAND
Telephone: 081-561-0433
Fax: 081-848-0041
© 2004 Garland Commercial Industries, Inc.
Page 1
Advertisement
Table of Contents

Related Manuals for Garland Moisture+ MPOE5L


Summary of Contents for Garland Moisture+ MPOE5L
- Page 1 Service Manual Model MPOE5L Users are cautioned that maintenance and repairs must be performed by a Garland authorized service agent using genuine Garland replacement parts. Garland will have no obligation with respect to any product that has been improperly installed, adjusted, operated or not maintained in accordance with national and local codes or installation instructions provided with the product, or any product that has its serial number defaced, obliterated or removed, or which has been modifi...
-
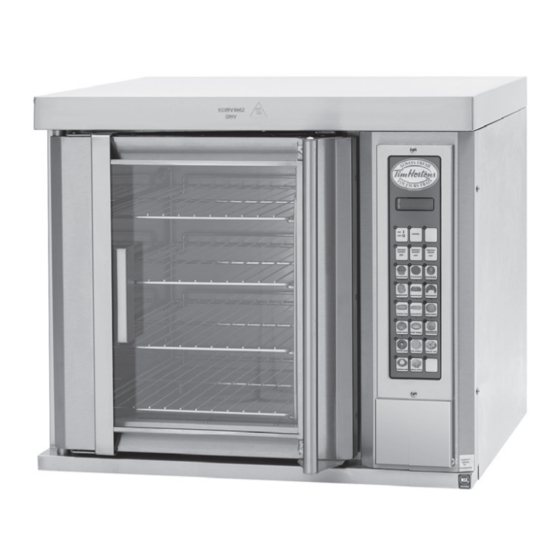
Page 2: Standard Features
Specifi cation: • 1/3 hp, 2-speed motor with thermal hi-limit and centrifugal switch protection Garland Moisture+ Half Size Oven is a multi- • 7.5kW elements and enhanced insulation function electric oven with electronic program- package provide quick recovery and even bake mable control and precise, programmable moisture •... -
Page 3: Table Of Contents
TABLE OF CONTENTS DIMENSIONS AND SPECIFICATIONS .... 4 Buttonpad Test ..............14 Door Switch Test .............14 WIRING DIAGRAMS ......... 5 Proper Door Switch Activation: ........14 Fan Speed Test ..............15 Hood Interlock ............6 Heat Test .................15 Control Panel Wiring Harness Pin -Outs ....6 Moisture Test ..............15 Temperature Calibration ..........15 Control Panel Relay Board .........7... -
Page 4: Dimensions And Specifications
• Each oven deck requires a ������� ��� ��������� ���� ���� ������� separate electrical connection. �������� • Garland recommends a separate 30 amp circuit be provided for each oven. ������� ������� • Customer must provide a ���� �������� 1/4" NPT water connection capable of 20 psig (minimum), to 100 psig (maximum).•... - Page 5 COM. N.C. N.O. N.O. N.C. FERRITES Document #MPOELSVC0504 Page 5...
-
Page 6: Wiring Diagrams
LINE OUT *** CAD PRODUCED DRAWING - DO NOT REVISE MANUALLY *** 2001 GARLAND COMMERCIAL INDUSTRIES THESE DRAWINGS AND SPECIFICATIONS ARE THE PROPERTY OF GARLAND COMMERCIAL INDUSTRIES AND SHALL NOT BE COPIED OR REPRODUCED WITHOUT THEIR WRITTEN PERMISSION. 9/11 RELEASED ITEM/S... -
Page 7: Control Panel Relay Board
WIRING DIAGRAMS Control Panel Relay Board Document #MPOELSVC0504 Page 7... -
Page 8: Installation
Water Quality floor, and should run directly to an open floor drain. Garland recommends that the supply water be filtered Avoid using flexible hose that could sag or kink, allowing before it enters the oven’s water delivery system. This water to accumulate. -
Page 9: Operating Instructions
OPERATING INSTRUCTIONS Description of Controls Display Th e display shows information about the control and its current operation mode i.e.: product name, time, program mode, etc. On/Off Button Th e On/Off Button is used to toggle the oven on/off . Upper Right Blank/Temp Button Th is button has several functions: 1. -
Page 10: Product Buttons (1 - 17)
OPERATING INSTRUCTIONS continued... Product Buttons (1 – 17) *NOTE: Preheat Bread has additional functions: 1. In Programming, Preheat Bread 425 The product buttons are used to select pre-programmed scrolls through available values (i.e. high/ recipes for each product. (Programming is available for low fan speed) and is used as the NO all product buttons.) button. -
Page 11: Control Operation
OPERATING INSTRUCTIONS continued... Control Operation 4. The external display will show the count down time of the item to be done first, then will switch to the Startup and Normal Operation next item to be done and so on. • Pressing the On/Off button will power up the •... -
Page 12: Control Programming
OPERATING INSTRUCTIONS continued... Control Programming 5. Next, the display will prompt for the Cook Time. Enter the cooking time using buttons 1 – 0 and Recipe Programming press the “ENTER” (lower right blank) button. • NOTE: In programming product buttons (1-17), each button can have different steps called Profiles. -
Page 13: System Programming
OPERATING INSTRUCTIONS continued... 9. The display will then ask if you would like to continue programming for this product. Press the “YES” (upper right blank) button to program additional profiles (profile 2-6). Press the “NO” 3. Next, the Software Number will be displayed. (Preheat Bread 425) button to exit programming Press “ENTER”... -
Page 14: Diagnostics Mode
OPERATING INSTRUCTIONS continued... Diagnostics Mode light, a buttonpad problem exists. After completing the Buttonpad Test, you will return to Diagnostics • To enter Diagnostics Mode, press and hold the Mode. (Press “CANCEL” at any time during the Program (lower right blank) button for three, (3), test to return to Diagnostics Mode.) seconds. -
Page 15: Fan Speed Test
OPERATING INSTRUCTIONS continued... Fan Speed Test Moisture Test 1. After selecting Fan Speed Test and pressing 1. After selecting Moisture Test and pressing “ENTER” (lower right blank), the control will turn “ENTER”, the control will show the moisture the oven fan on LOW speed for ten seconds. Verify status as OFF for ten seconds. -
Page 16: Control Safety Features
OPERATING INSTRUCTIONS continued... Temperature does not correspond to the pyrometer, • NOTE: The control will need a complete power enter the value on the pyrometer using buttons 1 down and restart (unplug/plug in oven) before – 0. The value will be input as Set Temp. any control functions will become operational. -
Page 17: Calibration
CALIBRATION Tools: Digital thermometer w/probe; oven mitt. Temperature Conversion & Resistance Equivalency See also, Temperature Calibration on page 15. DEG.F DEG.C OHMS 1. Clamp the probe in the center of the middle rack. -6.7 974.57 · Pass the probe wire out of the oven between the -1.1 995.77 door and the door seal and close the door. -
Page 18: Testing & Troubleshooting
TESTING & TROUBLESHOOTING Trouble Shooting Guide PROBLEM POSSIBLE CAUSE CORRECTIVE ACTION • No power to unit • Turn power on • No power to motor • Check fuses Fan Will not Run • Micro switch not OPENING • Check connections •... -
Page 19: Button Pad / Ribbon Connector Test Points
TESTING & TROUBLESHOOTING Button Pad / Ribbon Connector Test Points RIBBON TEST KEY # ICON POINTS HIDDEN KEY # 1 1 & 4 CANCEL 2 & 4 ON /OFF 3 & 4 PREHEAT 3 1 & 5 PREHEAT 2 2 & 5 PRE HEAT 1 3 &... -
Page 20: Relay Board Component Identification
TESTING & TROUBLESHOOTING Relay Board Component Identification RELAY RELAY OUTPUT LIGHT FAN HIGH FAN LOW HEAT DEMAND SPRITZER COOLING FAN DOOR LOCK ( not used ) HOOD LOCK DOOR LOCK ( not used ) �� �� �� �� �� �� ��... -
Page 21: Component Readings
TESTING & TROUBLESHOOTING Component Readings TR1 TRANSFORMER K5 CONTACTOR Primary Secondary Coil approx. approx. 73 Ω 1.3 Ω approx. 640 Ω TR2 TRANSFORMER S11 SOLONOID Primary Secondary Coil approx. approx. approx. 1.3 Ω 72 Ω 22 Ω Document #MPOELSVC0504 Page 21... -
Page 22: Service Procedures
SERVICE PROCEDURES Oven Door Service / Removal External Door Glass Frame Service/Removal 1. Disconnect power to unit. 1. Open the oven door. 2. Gain access to the RH oven panel. Disconnect 2. Unscrew the upper and lower finger bolts located the two wires going to the oven cavity lights at the on the RIGHT side of the external glass frame. -
Page 23: Door Micro Switch Service / Removal
SERVICE PROCEDURES Door Micro Switch Service / Removal Oven Temperature Probe Service/Removal 1. Open the oven door. The probe is located on the interior RIGHT rear side of the oven cavity. 2. Locate and remove the 2 machine screws located in the upper LEFT side of the cavity frame. -
Page 24: Component Identification
COMPONENT IDENTIFICATION Right Side (body panel removed) ������� �������� �� � ����������� ����� ������� ���� ������ ��� �������� �������� �������� �������� ����� ����� �������� ���� ��������� �� � ����������� �������� ����� Page 24 Document #MPOELSVC0504... -
Page 25: Oven Interior
COMPONENT IDENTIFICATION Oven Interior ����������� ����� �������� �������� ������ ����������� ����� ������ ����� Document #MPOELSVC0504 Page 25... -
Page 26: Oven Door
COMPONENT IDENTIFICATION Oven Door ���� ������ ���� ����� ���� �������� ��� ���� ������ � ������� ���� ����� ���� ������ ���� ���� ���� ������ ����� ����� ���� ������ ������� ������ ���� ������� ���� ���� ����� Page 26 Document #MPOELSVC0504... -
Page 27: Rear View
COMPONENT IDENTIFICATION Rear View �������� ���� ����� ������ ������� ����� ����� �� ������ ���� ��������� Document #MPOELSVC0504 Page 27...
Need help?
Do you have a question about the Moisture+ MPOE5L and is the answer not in the manual?
Questions and answers