Page 1
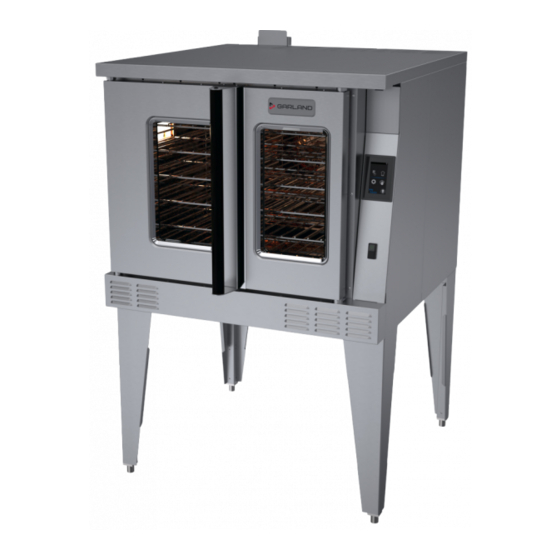
Bring Your Passion to the Surface Master Series Full-Size Gas Convection Ovens Installation, Operation and Maintenance Manual This manual is updated as new information and models are released. Visit our website for the latest manual. models MCO-GS-10S MCO-GD-10S MCO-GS-20S MCO-GD-20S MCO-GS-10M MCO-GD-10M...
Users are cautioned that maintenance and repairs must be performed by a Garland authorized service agent using genuine Garland replacement parts. Garland will have no obligation with respect to any product that has been improperly installed, adjusted, operated or not maintained in accordance with national and local codes or installation instructions provided with the product, or any product that has its serial number defaced, obliterated or removed, or which has been modified or repaired using unauthorized parts or by unauthorized service agents.
Casters (set of 4) with front MCO-GD-20M brakes Warranty • Extra oven rack Visit www.Garland-Group.com to view or download a copy of your warranty. Serial Plate Location • Deck fasteners for stainless When corresponding with the factory or your local authorized...
4. A 6 ft. line cord is provided for each 120V deck with a (NEMA #5-15P) plug. SINGLE DECK 5. Garland recommends a separate 15 AMP circuit for each 120V unit. FR ONT VIEW Gas Input ratings shown here are for installations up to 2,000-ft. (610m) above sea level. Specify altitudes over 2,000 ft.
NOTE: When checking pressure be sure that all other equipment on the same gas line is on. An internal pressure NOTE: Always provide adequate clearance for maintenance regulator is supplied with GARLAND Convection Ovens. and operation. Regulator is preset to deliver gas at pressure shown on the rating plate.
INSTALLATION Continued Installation Of Double Deck Models 90 Degree Street Elbow A. Position insert in bottom leg opening and tap insert up into leg till it seats at collar. Attach six inch (6") legs to lower oven section. Raise unit or lay on its left side. Place the front legs on the oven so as to line up with four (4) 20-1/2"...
INSTALLATION Continued Gas Connection Installation of a Direct Flue The 1" NPT inlet at the rear must be considered in piping the When the installation of a canopy type exhaust hood is gas supply for double stack units or ¾" NPT for individual (or impossible the oven may be direct vented.
INSTALLATION continued Less than 10 feet (3 meters) More than 10' (3 meters) 2' (60cm) Min. 3' (90cm) Min. 3' (90cm) Min. Termination Less than 10 feet (3 meters) from ridge Termination More than 10 feet (3 meters) from ridge Testing &...
OPERATING INSTRUCTIONS Master 200 Solid State Control With Electromechanical Timer In Off Mode When the oven is off, there are no lights or indicators. Start Up Press the Cook/Off/Cool Down rocker switch to the “Cook” position. The green lamp will light indicating the oven is powered in cook mode.
OPERATING INSTRUCTIONS Continued Electronic Control Start Up When the controller is off the display will be blank. Pressing the main power switch ON will activate the controller and the splash screen (photo 1) displaying the software version and then the home screen (photo 2), will appear on the user interface.
OPERATING INSTRUCTIONS Continued Manual Mode (chef’s hat) Manual Mode cont’d. -Cook temperature (photo 5) -Low or high fan speed or fan pulse mode whereby the fan -Program/Save recipes (photo 13 and 14) will pulse on and off when the oven is in holding mode. -Select one of nine default recipes (photo 15) (fan symbol photo 4 and 8) -Change icons and colour (photo 15)
OPERATING INSTRUCTIONS Continued Operating the Controls Setting the cook temperature (from 150 deg. F to 500 deg. F (65 deg. C to 260 deg. C)) and time are done in the same manner (see photos 5 and 6). When the timing cycle is started the display will count down from the Set time in minutes and seconds.
PERFORMANCE RECOMMENDATIONS AND GENERAL SAFETY PRECAUTIONS 1. Preheat oven thoroughly (approx. 20 minutes) before use. 14. When re-thermalizing frozen casseroles, preheat the oven 100° over the suggested temperature. Return to cooking 2. As a general rule, temperature should be reduced 25° temperature when the oven is loaded.
PROBLEM/SOLUTIONS Problem Solution Cakes are dark on the sides and not done in the center Lower oven temperature Cakes edges are too brown Reduce number of pans or lower oven temperature Cakes have light outer color Raise temperature Cake settles slightly in the center Bake longer or raise oven temperature slightly.
COOKING GUIDE The following suggested times and temperatures are provided as a starting guide. Elevation, atmospheric conditions, gas supply, recipe, cooking pans, and oven loading may affect your actual results. Product °F Time Product °F Time White Sheet Cakes – 5 lb 300°...
COOK AND HOLD Please refer to the operating instructions for cook and hold feature. The times and temperatures listed below are to be used as a starting guide. Your actual results may vary greatly depending on your elevation, gas supply, atmospheric conditions and other items being cooked at the same time.
This simple practice, if performed on a regular basis will keep it with a sponge. Be careful to apply light pressure and your Garland oven operating at peak performance. remember to rub only in the direction of the grain in the metal.
Need help?
Do you have a question about the MCO-GS-10S and is the answer not in the manual?
Questions and answers