Table of Contents
Advertisement
Quick Links
Download this manual
See also:
Service Manual
INSTALLATION & OPERATING
INSTRUCTIONS FOR
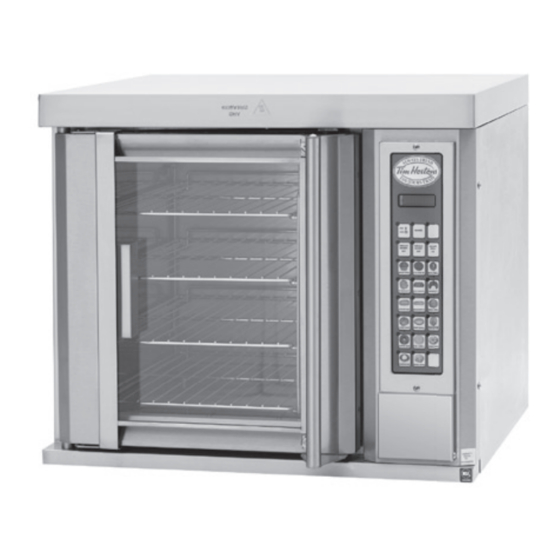
THE GARLAND 1/2-SIZE
ELECTRIC MOISTURE PLUS,
MODEL MPOE5L
FOR YOUR SAFETY
DO NOT STORE OR USE GASOLINE OR OTHER
FLAMMABLE VAPORS OR LIQUIDS IN THE
VICINITY OF THIS OR ANY OTHER APPLIANCE.
PLEASE READ ALL SECTIONS OF THIS MANUAL AND RETAIN FOR FUTURE REFERENCE.
THIS PRODUCT HAS BEEN CERTIFIED AS COMMERCIAL COOKING EQUIPMENT AND MUST BE INSTALLED
BY PROFESSIONAL PERSONNEL AS SPECIFIED.
Users are cautioned that maintenance and repairs must be performed by a Garland authorized service agent using genuine
Garland replacement parts. Garland will have no obligation with respect to any product that has been improperly installed,
adjusted, operated or not maintained in accordance with national and local codes or installation instructions provided
with the product, or any product that has its serial number defaced, obliterated or removed, or which has been modifi ed
or repaired using unauthorized parts or by unauthorized service agents. For a list of authorized service agents, please refer
to the Garland web site at http://www.garland-group.com. Th e information contained herein, (including design and parts
specifi cations), may be superseded and is subject to change without notice.
Continuous product improvement is a Garland policy, therefore design and specifi cations are subject to change without notice.
GARLAND COMMERCIAL INDUSTRIES
185 East South Street
Freeland, Pennsylvania 18224
Phone: (570) 636-1000
Fax: (570) 636-3903
Part # 4518084 Rev. 1 (09/04)
Part # 4518084 Rev. 1 (09/04)
ALTERATION, SERVICE OR MAINTENANCE CAN
CAUSE PROPERTY DAMAGE, INJURY OR DEATH.
MAINTENANCE INSTRUCTIONS THOROUGHLY
GARLAND COMMERCIAL RANGES,
LTD.
1177 Kamato Road, Mississauga, Ontario L4W 1X4
CANADA
Phone: 905-624-0260
Fax: 905-624-5669
WARNING:
IMPROPER INSTALLATION, ADJUSTMENT,
READ THE INSTALLATION, OPERATION AND
BEFORE INSTALLING OR SERVICING
THIS EQUIPMENT.
Enodis UK LTD.
Swallowfi eld Way, Hayes, Middlesex UB3 1DQ ENGLAND
Telephone: 081-561-0433
Fax: 081-848-0041
© 2004 Garland Commercial Industries, Inc.
Page 1
Advertisement
Table of Contents

Related Manuals for Garland MPOE5L


Summary of Contents for Garland MPOE5L
-
Page 1: Instructions For
BY PROFESSIONAL PERSONNEL AS SPECIFIED. Users are cautioned that maintenance and repairs must be performed by a Garland authorized service agent using genuine Garland replacement parts. Garland will have no obligation with respect to any product that has been improperly installed, adjusted, operated or not maintained in accordance with national and local codes or installation instructions provided with the product, or any product that has its serial number defaced, obliterated or removed, or which has been modifi... - Page 2 Page 2 Part # 4518084 Rev. 1 (09/04)
-
Page 3: Table Of Contents
Installing a New Recipe Program ... 13 Using the CARD Reader ...13 CLEANING AND MAINTENANCE ... 14 Check Calibration ... 14 Break in Period ...14 Oven Cleaning ... 14 Exterior ...14 Interior ...15 Motor Care ... 15 Part # 4518084 Rev. 1 (09/04) -
Page 4: Dimensions And Specifications
• Each oven deck requires a separate electrical connection. • Garland recommends a separate 30 amp circuit be provided for each oven. • Customer must provide a 1/4" NPT water connection capable of 20 psig (minimum), to 100 psig (maximum).•... -
Page 5: Electrical Connection
flow rate of three gallons per minute for proper operation of the oven’s moisture injection system. Water Quality Garland recommends that the supply water be filtered before it enters the oven’s water delivery system. This will extend the life of the oven and its water delivery system components by minimizing particles in typical Part # 4518084 Rev. -
Page 6: Operating Instructions
On/Off Button Th e On/Off Button is used to toggle the oven on/off . Upper Right Blank/Temp Button Th is button has several functions: 1. Pressing the temp button will display the actual and set temperatures of the oven. -
Page 7: Product Buttons (1 - 17)
System Programming, and Diagnostics Mode. Preheat Buttons Preheat Bakery 325, Preheat Bakery 350, and Preheat Bread 425 are used to preheat the oven to the different temperatures required for the various items: · Preheat Bakery 325: 325°F, high fan speed ·... -
Page 8: Control Operation
• If the oven temperature is more than 150°F, auto cool down mode will begin. Open the door slightly, only the fan will run at high speed to cool the oven. “Auto Cool Down” will show on the display. • If the door is open too much, “Close Door Slightly”... -
Page 9: Control Programming
OPERATING INSTRUCTIONS continued... Control Programming Recipe Programming • NOTE: In programming product buttons (1-17), each button can have different steps called Profiles. Each profile can change the fan speed, cook temperature, cook time, alarm, time mode, and moisture for a product. If more than one profile is programmed for a product, the product cannot be combined with other products. -
Page 10: System Programming
OPERATING INSTRUCTIONS continued... 9. The display will then ask if you would like to continue programming for this product. Press the “YES” (upper right blank) button to program additional profiles (profile 2-6). Press the “NO” (Preheat Bread 425) button to exit programming for this product. -
Page 11: Diagnostics Mode
OPERATING INSTRUCTIONS continued... Diagnostics Mode • To enter Diagnostics Mode, press and hold the Program (lower right blank) button for three, (3), seconds. When prompted, enter the code: 3-4-2- 4 using the buttons 1 – 0. Press “ENTER” (lower right blank). •... -
Page 12: Fan Speed Test
Fan Speed Test 1. After selecting Fan Speed Test and pressing “ENTER” (lower right blank), the control will turn the oven fan on LOW speed for ten seconds. Verify that the fan is indeed running on low speed. The control will show: 2. -
Page 13: Control Safety Features
The control has several built in safety features to protect both the user and the oven itself. • If the actual temperature inside the oven exceeds the set temperature by 50°F, the display will show “HI TEMP” and the alarm will sound. The fan will continue to run, however, power to the heaters will be cut. -
Page 14: Cleaning And Maintenance
See also, Temperature Calibration on page 12. 1. Clamp the probe in the center of the middle rack. 2. Pass the probe wire out of the oven between the door and the door seal and close the door. 3. Plug the probe wire into the thermometer. -
Page 15: Interior
• Since the blower wheel is in the oven cavity, it is at the same temperature as the oven. If the motor is stopped while the oven is hot, the heat from the blower wheel is conducted down the shaft and into the armature of the motor.
Need help?
Do you have a question about the MPOE5L and is the answer not in the manual?
Questions and answers