Table of Contents
Advertisement
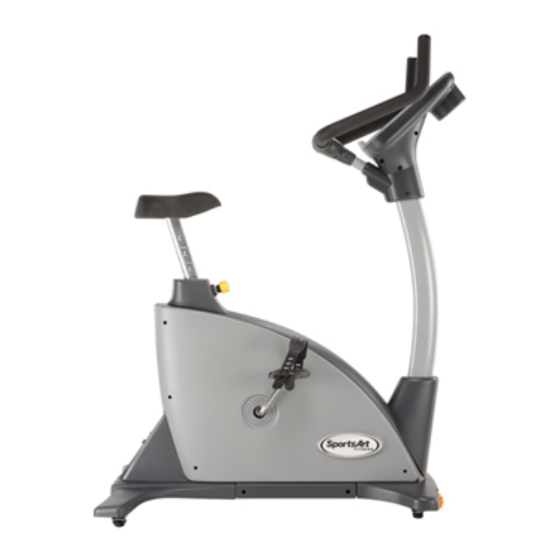
SPORTSART C50U UPRIGHT BIKE
TABLE OF CONTENTS
1. INTRODUCTION....................................................................................................
2. IMPORTANT SAFETY PRECAUTIONS ...............................................................
List of Parts............................................................................................................
Unit Assembly Procedure......................................................................................
Seat Adjustment Procedure....................................................................................
Display Windows...................................................................................................
Display Specifications...........................................................................................
Basic Functions....................................................................................................
Basic Operation....................................................................................................
Internal Settings....................................................................................................
Key Functions........................................................................................................
Exercise Programs................................................................................................
Pressing PAUSE From a Program........................................................................
Exercise Program Completion..............................................................................
5. USER PARAMETER SETTING............................................................................
6. MAINTAINING THE BIKE.......................................................................................
How long should I exercise .................................................................................
How often should I exercise.................................................................................
Error Message......................................................................................................
Procedure to Replace a Fuse...............................................................................
9. WIRING SCHEMATIC...........................................................................................
1
2
4
6
12
13
13
14
14
15
16
16
17
18
19
20
20
20
21
21
22
Advertisement
Table of Contents

Related Manuals for SportsArt Fitness C50U


Summary of Contents for SportsArt Fitness C50U
-
Page 1: Table Of Contents
TABLE OF CONTENTS 1. INTRODUCTION....................2. IMPORTANT SAFETY PRECAUTIONS ............... 3. ASSEMBLING YOUR BIKE List of Parts......................Unit Assembly Procedure..................Seat Adjustment Procedure..................4. UNDERSTANDING THE C50U DISPLAY CONSOLE Display Windows....................Display Specifications................... Basic Functions....................Basic Operation....................Internal Settings....................Key Functions...................... -
Page 2: Introduction
Congratulations on purchasing one of the finest pieces of exercise equipment on the market today, the SportsArt C50U Upright Bike. Constructed of high quality materials and designed for years of trouble-free usage, the C50U will be an integral part of your fitness regimen. -
Page 3: Important Safety Precautions
Your SportsArt bike was designed and built for optimum safety. However, certain precautions apply whenever you use your bike. Please read the entire manual before assembly and operation. Also, please note the following safety precautions: IMPORTANT SAFETY PRECAUTIONS Please read and observe the following safety guidelines: ‧... - Page 4 ‧ Allow sufficient space on both sides of the bike for users to mount and to dismount the unit. ‧ If any parts fail or are defective, please stop your workout immediately and contact your authorized dealer for repairs. ‧ Work within your recommended exercise level;...
-
Page 5: Assembling Your Bike
ASSEMBLING YOUR BIKE Thank you for purchasing our product. Even though we go to great efforts to ensure the quality of each product, occasional errors and/or omissions do occur. Please contact your dealer if you find this product to be defective or missing a part. Please read this owner's manual and follow the instructions. - Page 6 Pedestal Right pedal Pedestal cover Seat bottom Left pedal Handlebar mount lower cover Main frame Handlebars Rear support Handlebar mount upper cover Rear support cover Hardware kit...
-
Page 7: Unit Assembly Procedure
UNIT ASSEMBLY PROCEDURE STEP 1. For the following, please refer to Figure 1. Secure the rear support bar to the unit frame. Press screw inserts E into the holes in the rear support bar. Loosen screws A, B, C, D to make room for the rear support cover. Slide the rear support cover into place. - Page 8 STEP 2. First slip the pedestal cover onto the pedestal. Position the data cable for safety. Then insert the pedestal onto its mount. Lightly tighten screws A into the lower holes (at position D) to secure the pedestal. Do not fully tighten these screws.
- Page 9 STEP 3. Hold the handlebars in place on the frame while securing the handlebar bolts. Then secure the upper and lower handlebar mount covers. See Figures 7 and 8. Fig.7 Fig.8...
- Page 10 STEP 4. Be very careful in securing pedals to the pedal cranks. Otherwise, pedals and crank threads can easily become stripped and must be replaced. Note that left and right side designations refer to the user's left and right sides, as the person exercises on the bike.
- Page 11 STEP 5. Secure the seat bottom into place. See Figure 10. Fig.10 STEP 6. Plug the power cord into the bike. See Figure 11. Fig.11...
- Page 12 STEP 7. Level the bike as follows to ensure that it does not wobble. Rotate leveler feet A up or down as needed to stabilize the bike. Then rotate leveler nuts B upward, against the frame, to secure the position. See Figure 12. Fig.12...
-
Page 13: Seat Adjustment Procedure
SEAT ADJUSTMENT PROCEDURE To raise the seat height, turn the seat adjustment knob counterclockwise to loosen it, then pull the seat up. See Figure 13. Fig.13 To lower the seat height, do the following: 1. Pull the adjustment knob out, toward the pedestal, then push the seat down. 2. -
Page 14: Understanding The C50U Display Console
UNDERSTANDING THE C50U DISPLAY CONSOLE Display Windows Workout Profile Screen Workout profile appears from right to left, top to bottom. Feedback includes workout level, time, RPM, and calories. Display Specifications ˙ WORKOUT LEVEL - Resistance range: 1 ~ 14. ˙... -
Page 15: Basic Functions
Basic Functions ˙ Workout Profile Screen: Shows user settings or prompts, including USER, AGE, WT, KG, LB indicators. ˙ Feedback Screen: Shows exercise feedback, including RESISTANCE LEVEL, TIME, RPM, CALORIES. ˙ Program Indicators: TRACK, RANDOM, INTERVAL, HILL. ˙ ▲ Keys: TRACK, RANDOM, INTERVAL, HILL, WORKOUT LEVEL , WORKOUT ▼... -
Page 16: Internal Settings
※ The user's accumulated time appears as hh:mm (hours: minutes). When the accumulated time exceeds 99:59, minutes disappear; 100 hours appears. Maximum time is 9999 hours. Clearing Out User Settings While a user ID number appears on the screen, press and hold STOP + ENTER keys simultaneously for three seconds to clear out user time, distance, and calories. -
Page 17: Key Functions
Show Unit Total Time Time and distance windows show total time as four digits. The dot matrix window shows HOUR. Press the ENTER key to establish the display unit mode. Set Metric/US Mode ▲▼ Once in this setting, press keys to toggle between "LB" (representing US units) and "KG"... -
Page 18: Pressing Pause From A Program
RANDOM 1. A different random exercise program appears each time the RANDOM key is pressed. Press the key until you see a program you like. Then start exercising. Time counts down. ▲ ▼ 2. Press WORKOUT LEVEL keys to set the resistance level. INTERVAL Select INTERVAL. -
Page 19: Exercise Program Completion
Exercise Program Completion 1. When an exercise program counts down to zero, the display beeps three times (once every 0.5 seconds). Accumulated time, calories, and average heart rate appears, along with "ACCU DATA" At the end of one workout cycle, the following occurs: ˙... -
Page 20: User Parameter Setting
USER PARAMETER SETTING To check system default settings, at initial setting stage (select PROGRAM or QUICK START), hold the ENTER key for 3 seconds: ▲ ▼ 1. Unit of Speed (MPH or KPH): press keys to change the setting. Press ENTER to confirm your choice and to see the next setting. -
Page 21: Maintaining The Bike
MAINTAINING THE C50U BIKE The Sports Art C50U requires little maintenance but regular cleaning is recommended to keep your bike at peak performance. Before your workout, use a dry cloth to clean the surface of the display. NOTE: NEVER POUR LIQUIDS ON THE DISPLAY. -
Page 22: Troubleshooting Error Message
TROUBLESHOOTING ERROR MESSAGE ERR 7: This means the VR voltage exceeds the specified range of 0.4 VDC to 4.7 VDC. Please consult a qualified repair technician. PROCEDURE TO REPLACE A FUSE To remove a fuse, press the fuse cap in, then turn it counterclockwise. The fuse and cap will spring out. -
Page 23: Wiring Schematic
WIRING SCHEMATIC C50 CTL Board Receiver board Power Transformer C50DRV Board Magnetic Speed Sensor Your Authorized SPORTS ART Distributor...
Need help?
Do you have a question about the C50U and is the answer not in the manual?
Questions and answers