
Related Manuals for Fujitsu Siemens Computers SCENICVIEW P17-1A


Summary of Contents for Fujitsu Siemens Computers SCENICVIEW P17-1A
- Page 1 Betriebsanleitung / Operating Manual Monitor SCENICVIEW P17-1A Deutsch - English...
- Page 2 Sie haben ..technische Fragen oder Probleme? Wenden Sie sich bitte an unseren Help Desk (siehe Garantieheft). Aktuelle Informationen zu unseren Produkten, Tipps, Updates usw. finden Sie im Internet: http://www.fujitsu-siemens.com Are there ..any technical problems or other questions you need clarified? Please contact our Help Desk (see Warranty Booklet).
- Page 4 Este manual ha sido impreso sobre papel reciclado. Questo manuale è stato stampato su carta da riciclaggio. Denna handbok är tryckt på recyclingpapper. Dit handboek werd op recycling-papier gedrukt. Herausgegeben von/Published by Fujitsu Siemens Computers GmbH Bestell-Nr./Order No.: A26361-K960-Z101-1-5E19 Printed in Taiwan AG 0504 05/04...
-
Page 5: Lcd Monitor
Deutsch English SCENICVIEW P17-1A LCD-Bildschirm LCD monitor Betriebsanleitung Operating Manual TCO'99 Ausgabe Mai 2004 May 2004 edition... - Page 6 Dieses Handbuch wurde erstellt von cognitas. Gesellschaft für Technik-Dokumentation mbH www.cognitas.de Copyright Fujitsu Siemens Computers GmbH 2004 VESA, DDC and DPMS are registered trademarks of Video Electronics Standards Association. All rights, including rights of translation, reproduction by printing, copying or similar methods, even of parts are reserved.
-
Page 7: Table Of Contents
Contents Introduction............................1 Notational conventions.......................2 Important notes ..........................2 Safety notes..........................2 Cleaning ............................3 Transport ...........................4 Power cable..........................4 Energy Star Guidelines ......................4 CE marking..........................4 FCC Class B Compliance Statement ..................4 Declaration of Conformity ......................5 Disposal and recycling .......................6 Checking the contents of the consignment ..................6 Installing an ergonomic video workstation..................7 Mounting and removing the monitor base ..................8 Mounting/removing lower section of monitor base ..............8... -
Page 9: Introduction
This operating manual contains important information you require to start up and run your LCD monitor. A screen controller with VGA interface is required to control the SCENICVIEW P17-1A LCD monitor. The monitor processes the data supplied to it by the screen controller. The screen controller/the associated driver software is responsible for setting the modes (resolution and refresh rate). -
Page 10: Notational Conventions
Colour Monitor SCENICVIEW P17-1A Notational conventions The meanings of the symbols and fonts used in this manual are as follows: Pay particular attention to text marked with this symbol. Failure to observe this warning endangers your life, destroys the device, or may lead to loss of data. -
Page 11: Cleaning
Colour Monitor SCENICVIEW P17-1A ● Lay all cables so that nobody can stand on them or trip over them. When attaching the device, observe the relevant notes in the "Connecting the monitor" chapter. ● If you use a different data cable from the one supplied, ensure that it is adequately shielded. -
Page 12: Transport
20 million tons of carbon dioxide into the atmosphere - the equivalent of 5 million automobiles. As an Energy Star Partner, Fujitsu Siemens Computers GmbH has determined that this product meets the Energy Star guidelines for energy efficiency. -
Page 13: Declaration Of Conformity
● Consult the dealer or an experienced radio/TV technician for help. Fujitsu Siemens Computers GmbH is not responsible for any radio or television interference caused by unauthorised modifications of this equipment or the substitution or attachment of connecting cables and equipment other than those specified by Fujitsu Siemens Computers GmbH. The correction of interference caused by such unauthorised modification, substitution or attachment will be the responsibility of the user. -
Page 14: Disposal And Recycling
Colour Monitor SCENICVIEW P17-1A Disposal and recycling This device has been manufactured to the highest possible degree from materials which can be recycled or disposed of in a manner that is not environmentally damaging. The device may be taken back after use to be recycled, provided that it is returned in a condition that is the result of normal use. -
Page 15: Installing An Ergonomic Video Workstation
Colour Monitor SCENICVIEW P17-1A Installing an ergonomic video workstation Before you set up your equipment, you should select a suitable position for working at the monitor. Please observe the following advice when installing a video workstation. 600 mm 600 mm... -
Page 16: Mounting And Removing The Monitor Base
Colour Monitor SCENICVIEW P17-1A Mounting and removing the monitor base The monitor surface is susceptible to scratching! Therefore, lay the monitor on a soft surface when mounting or removing the monitor base. Mounting/removing lower section of monitor base When delivered the lower section of the monitor base is removed. If you do not want to use a swivelling arm or a wall mounting, you must mount the lower section of the monitor base. - Page 17 Colour Monitor SCENICVIEW P17-1A ► Lay the monitor on its face on a soft surface. ► Remove the cover and disconnect all cables. ► Remove the four screws on the rear of the monitor. You can now mount a swivel arm or a wall bracket as per VESA FPMPMI with 100 mm hole spacing.
-
Page 18: Connecting The Monitor
Colour Monitor SCENICVIEW P17-1A Connecting the monitor Observe the "Safety notes" in the "Important notes" chapter in this operating manual. CE conformance and optimum picture quality are guaranteed only if you use the data cable supplied. Do not cover the ventilation openings of the monitor. -
Page 19: Connecting Cables To The Computer
Colour Monitor SCENICVIEW P17-1A Connecting cables to the computer Information on the computer connections and interfaces is contained in the operating manual for your computer. If your computer has two monitor ports ("onboard" screen controller and separate graphics card), the monitor port for the separate graphics card is usually active. -
Page 20: Operation Of The Monitor
Colour Monitor SCENICVIEW P17-1A Operation of the monitor The monitor offers the following possibilities that enable it to be optimally adjusted for the respective user and the respective situation. Adjusting height, rake and rotation The monitor height can be adjusted within a range of approx. 2.5 inch/50 mm. -
Page 21: Switching The Monitor On/Off
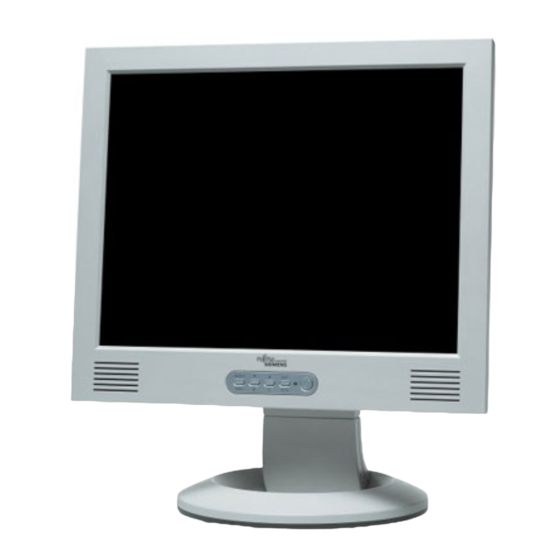
Colour Monitor SCENICVIEW P17-1A Switching the monitor on/off 1 = ON/OFF switch 2 = Power indicator 3 = Buttons for the OSD menu (On-Screen-display) 4 = Headphones port The ON/OFF switch (1) is used for switching the monitor on and off. -
Page 22: Changing The Monitor Settings
Colour Monitor SCENICVIEW P17-1A Once an input is made at the computer the screen contents are redrawn and full power is restored. For detailed information on how energy-saving mode operates refer to the operating manual or technical manual of the computer. - Page 23 Colour Monitor SCENICVIEW P17-1A Performing auto-adjustment of the monitor ► Press the AUTO button for approx. 1 second while the OSD menu is switched off. The Auto Processing message is displayed. Picture quality and position are set to optimum values for your system.
- Page 24 Colour Monitor SCENICVIEW P17-1A The first symbol ( Brightness/Contrast ) is highlighted. In the right-hand part of the display the associated functions are shown. ► If necessary, press the button to mark another icon (e.g. Image adjust ). ► Press the SELECT/MENU button to select the highlighted icon.
- Page 25 Colour Monitor SCENICVIEW P17-1A Adjusting the brightness and contrast Calling the Brightness / Contrast setting window. Brightness Setting the brightness of the display With this function you change the brightness of the background lighting. Setting the contrast of the display Contrast With this function you modify the contrast of bright colour tones.
- Page 26 Colour Monitor SCENICVIEW P17-1A Setting colour temperature and colours Calling the Colour setting window Selecting the colour temperature The "warmth" of the screen colours is set using the colour temperature. The colour temperature is measured in K (= Kelvin). You can select from sRGB , 6500 K , 7500 K , 9300 K , Native and Custom Colour .
- Page 27 Colour Monitor SCENICVIEW P17-1A Setting functions in the "Advanced " menu Calling the Advanced setting window Resolution Displaying monitor data Notifier The optimum resolution for this monitor is 1280 x 1024 pixels. With the function activated ( On ), a message appears on the screen after approx. 30 seconds if a different resolution is set.
-
Page 28: Notes On Ergonomic Colour Adjustment
Colour Monitor SCENICVIEW P17-1A Notes on ergonomic colour adjustment If you select colours for the display in your application programmes, take note of the information below. The primary colours blue and red on a dark background do not produce the minimum required contrast of 3:1 and are therefore not suitable for continuous text and data entry. -
Page 29: Vesa-Ddc-Compatible Vga Interface
VGA interface, it can automatically read the data for ensuring optimum operation from your monitor and select the appropriate settings. If the monitor SCENICVIEW P17-1A is not yet displayed in the list of monitors, you can select the following monitor instead:... -
Page 30: Preset Operating Modes
Colour Monitor SCENICVIEW P17-1A Preset operating modes The picture position and size have been set to optimum values at the factory for the operating modes listed above. Depending on the screen controller used, it may be necessary to adjust the display position and size. In this case, you can change and save the settings (see "Operation of the monitor"). -
Page 31: Troubleshooting
Colour Monitor SCENICVIEW P17-1A Troubleshooting Should an error occur, first check the following points. If the distortion is still not eliminated, the monitor should, if possible, be checked on another computer and/or with another data cable. If you are unable to solve the problem, please inform our help desk. - Page 32 Colour Monitor SCENICVIEW P17-1A Having this problem? Check the following points: Picture disturbances (vertical lines) ► Press the EXIT/AUTO button to perform the auto-adjustment of the screen. Picture disturbances (horizontal lines, picture ► Press the EXIT/AUTO button to perform noise) the auto-adjustment of the screen.
- Page 33 TCO'99 Congratulations You have just purchased a TCO'99 approved and labelled product! Your choice has provided you with a product developed for professional use. Your purchase has also contributed to reducing the burden on the environment and also to the further development of environmentally adapted electronics products.
-
Page 34: Environmental Requirements
TCO'99 Below you will find a brief summary of the environmental requirements met by this product. The complete environmental criteria document may be ordered from: TCO Development SE-114 94 Stockholm, Sweden Fax: +46 8 782 92 07 Email (Internet): development@tco.se Current information regarding TCO'99 approved and labelled products may also be obtained via the Internet, using the address: http://www.tco-info.com/ Environmental requirements...
Need help?
Do you have a question about the SCENICVIEW P17-1A and is the answer not in the manual?
Questions and answers