Paradox 1686V User Manual
10-zone spectra led keypads
Hide thumbs
Also See for 1686V:
- User manual (44 pages) ,
- User quick reference manual (2 pages) ,
- User manual (43 pages)
Table of Contents
Advertisement
Advertisement
Table of Contents

Subscribe to Our Youtube Channel
Related Manuals for Paradox 1686V


Summary of Contents for Paradox 1686V
- Page 1 10-Zone Spectra LED Keypads 1686H 1686V User’s Guide...
-
Page 3: Table Of Contents
Table of Contents Introduction ..............1 Basic Operation............. 2 Auditory Feedback..............2 Keypad Indicator Lights ............4 Zone Display................4 Alarm Memory Display ............4 Trouble Display..............4 Partitioning................9 Programming Access Codes ........10 System Master Code (Default: 123456) ....... 10 Master Codes ............... - Page 4 Panic Alarms ................ 22 Programming the Clock ............23 PGM Button (Programmable Outputs) ......... 23 Quick Function Keys............. 24 Keypad Backlight..............24 Fire Alarms..............26 Testing & Maintenance ..........29 System Checklist............30 Appendix A ..............35...
-
Page 5: Introduction
(i.e. motion detectors, door contacts, etc.) and various output devices (i.e. bells, sirens, lights, etc.). The elegant and user-friendly Spectra 1686H and 1686V LED keypads allow you to easily access your security system's functions and provide you with an easy-to- understand display of your security system's alarm and operational status. -
Page 6: Basic Operation
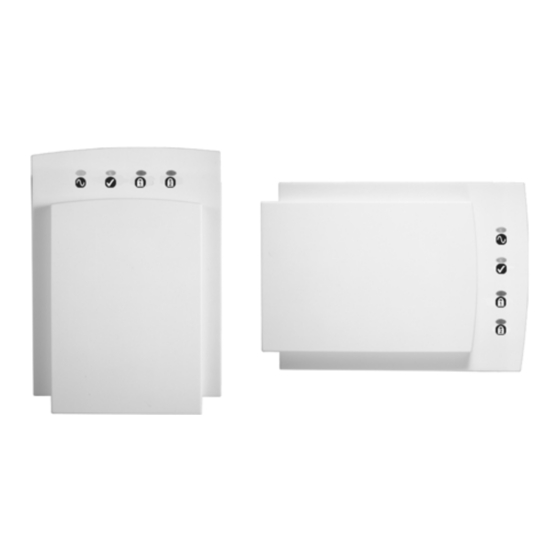
2.0 Basic Operation Both the Spectra 1686H and 1686V LED keypads function and display information in the same way. The following sections provide you with an introduction to the buttons and indicator lights on your keypad. Many of the features in your system must be enabled by the installer. - Page 7 Figure 1: Overview of the 1686V LED Keypad ARM LEDs (red): = Partition Regular or Forced armed = Partition disarmed FLASHING = Partition Stay or Instant armed FAST FLASHING = Partition in alarm READY LED (green): = Zones are closed...
-
Page 8: Keypad Indicator Lights
Figure 1 on page 3, the state of each light represents a specific condition in your system. 2.3 Zone Display The numerical buttons on the 1686V/H keypads are designed to communicate the status of the zones in your system. Each button corresponds to a zone in your system. - Page 9 The keypad can be programmed to emit a beep every 5 seconds whenever a new trouble condition has occurred. Press the [ ] button to stop the “Trouble Beep”. How do I access the Trouble Display? 1. Press the [ ] button.
-
Page 10: Trouble List
Trouble List [1] No or Low Battery Trouble When the [1] button illuminates, the backup battery is disconnected or the battery voltage is getting low. [2] Wireless Transmitter Battery Low When the [2] button illuminates, the battery voltage in one or more wireless transmitters is getting low. - Page 11 [6] Auxiliary Current Failure The auxiliary output, which supplies power to your alarm system’s accessories, uses a fuseless circuit to protect the power supply against current overload and automatically shuts down if the current exceeds 1.1A. If this occurs, the [6] button will illuminate.
- Page 12 [10] Telephone Line Monitoring Failure With button [10] illuminated, the presence of a telephone line has not been detected for more than 30 seconds. ] Fire Zone Trouble STAY When the [ ] button illuminates, a wiring problem on STAY the fire zone is occurring.
-
Page 13: Partitioning
2.6 Partitioning Your Spectra system is equipped with a partitioning feature which can divide your alarm system into two distinct areas identified as Partition 1 and Partition 2. Partitioning can be used in installations where shared security systems are more practical, such as a home office or warehouse building. -
Page 14: Programming Access Codes
3.0 Programming Access Codes Access codes are personal identification numbers that allow you to enter certain programming modes, arm or disarm your system as well as activate or deactivate PGMs (see PGM Button (Programmable Outputs) on page 23). The Spectra security system supports the following: •... -
Page 15: Duress Code
Master Code 2 is permanently assigned to Partition 2 (except when partitioning is disabled, Master Code 2 will be assigned to Partition 1) and can be used to create, modify or delete user access codes (see page 11) that are assigned to the same partition. - Page 16 How do I program access codes? 1. Press [ ENTER 2. Enter your [ MASTER CODE ] button flashes. ENTER 3. Enter 3-digit [ ] (see Table 1 on page 12). SECTION The [ ] corresponding to the first digit of the existing NUMBER code (if programmed) and the [ ] button will illuminate...
-
Page 17: Arming & Disarming
4.0 Arming & Disarming Take full advantage of your Spectra system by familiarizing yourself with all the arming methods. If your system is not partitioned (see page 9), the system considers everything as belonging to Partition 1 4.1 Exit Delay After entering a valid arming sequence, an Exit Delay Timer will provide you with enough time to exit the protected area before the system arms. -
Page 18: Regular Arming
How do I disarm the system? For a Stay or Instant armed system, go to step 2. 1. Enter through a designated entry point (i.e. front door). The keypad will beep during the Entry Delay. 2. Enter your [ ACCESS CODE After the confirmation beep, the light will turn OFF. -
Page 19: Stay Arming
4.4 Stay Arming This method allows you to remain in the protected area while partially arming the system. Stay zones are zones that are bypassed when Stay arming. For example, when you go to sleep at night, doors and windows can be armed without arming other zones like motion detectors. -
Page 20: Force Arming
If you have access to both partitions: To Instant arm one partition: To Instant arm both partitions: 1. Press the [ ] button. 1. Press the [ ] button. STAY STAY 2. Enter your [ 2. Enter your [ ACCESS CODE ACCESS CODE 3. -
Page 21: Manual Bypass Programming
How do I Force arm? 1. Close zones in the desired partition (except Force zones). 2. Press the [ ] button. FORCE 3. Enter your [ ACCESS CODE If you have access to both partitions (see page 9): 4. Buttons [1] and [2] will flash. Press the button corresponding to the desired partition. - Page 22 How do I program bypass entries? 1. Press the [ ] button. 2. Enter your [ ] (see note below). ACCESS CODE 3. Illuminate the button(s) corresponding to the zone(s) you wish to bypass by pressing the corresponding button. Press the button again to turn it OFF. Press the [ FORCE button to erase all the current zone bypass entries.
-
Page 23: One-Touch Arming
4.7 One-Touch Arming One-Touch arming allows you to arm the system without using an access code. If both partitions are enabled and you activate a One-Touch feature, buttons [1] and [2] will flash. Press the button corresponding to the desired partition(s). -
Page 24: Keyswitch Arming
Exit and Regular Arm: Press and hold the [ ] button ENTER for 3 seconds (see note on page 19) to start the Exit Delay (see page 13). When the Exit Delay elapses, the system will switch to Regular arming (see page 14). Exit and Force Arm: Press and hold the [ ] button FORCE... -
Page 25: Auto-Arming
4.9 Auto-Arming The Spectra alarm system can be programmed to automatically arm upon the following two conditions. 4.9.1 Timed Auto Arming The alarm system can automatically arm itself at a specified time everyday. As with Regular arming (see page 14), the system will not arm if a zone is open. If this occurs, the system will not arm until the next day. -
Page 26: Additional Features
5.0 Additional Features Each keypad must be Chime Programmed and Muted separately. Keypad Muting must be re- programmed if your system suffers a total power loss. When you press and hold a button and the keypad emits a confirmation beep, the chime feature has been enabled for that zone or Keypad Muting has been enabled for that keypad. -
Page 27: Programming The Clock
simultaneously pressing and holding two specific buttons for two seconds. Based on your needs, these panic alarms can generate audible alarms (sirens or bells) or silent alarms, both of which can send a message to your monitoring station. The three different panic alarms can communicate specific messages to your monitoring station. -
Page 28: Quick Function Keys
5.6 Quick Function Keys Upon the request of your installer or monitoring station you may have to perform one of the following. Press: 5.6.1 Test Report ] + [ ] + [ ENTER MASTER CODE If your system is monitored by your monitoring station, this feature will send a test report code to the monitoring station. - Page 29 reaching the maximum level, the backlight level will return to the lowest level and the whole process is repeated. To change the backlight level: How do I modify the backlight? 1. Press and hold the [ ] key for 3 seconds. 2.
-
Page 30: Fire Alarms
6.0 Fire Alarms In the event of a fire alarm, the bell/siren will emit three “squawks” at 2-second intervals until silenced or reset by entering a valid access code. If the zone is a Delayed Fire Zone, there will be a delay before the system contacts the monitoring station. - Page 31 Figure 2: Delayed Fire Zone Flowchart Minimizing Fire Hazards The three most common causes of fires: • Cooking is the leading cause of home fires in the U.S. It's also the leading cause of fire injuries. Cooking fires often result from unattended cooking and human error, Spectra LED Keypads 27...
- Page 32 rather than mechanical failure of stoves or ovens. • Careless smoking is the leading cause of fire deaths. Smoke detectors and smolder-resistant bedding and upholstered furniture are significant fire deterrents. • Heating is the second leading cause of residential fires. However, heating fires are a larger problem in single family homes than in apartments since the heating systems in single family homes are often not...
-
Page 33: Testing & Maintenance
7.0 Testing & Maintenance With the system disarmed and the light ON, activate READY motion detectors by walking in the protected area. Open and close protected doors and verify that the corresponding button illuminates. Your installer can advise you of the best way to test your particular system. Do not use open flame or burning materials to test your fire detection devices. -
Page 34: System Checklist
8.0 System Checklist Zone Description Is this system partitioned? Partition 1 = ____________________________________ Partition 2 = ____________________________________ Zone # and Partition Entry Byp Stay Force 24Hr Description 1 or 2 Delay 01:______________ ____ 02:_____________ ____ Keyswitch? Y Type:____________ 03:______________ ____ Fire Zone? Y Delayed? Y 04:______________... - Page 35 Zone # and Partition Entry Byp Stay Force 24Hr Description 1 or 2 Delay 14:______________ ____ 15:______________ ____ 16:______________ ____ Access Codes For security reasons, write only the user’s name and not his or her access code. 4-Digit Codes 6-Digit Codes Partition User # and Name Byp Stay Force...
- Page 36 Partition User # and Name Byp Stay Force 1 or 2 Only Only 012:___________ ____ ____ 013:___________ ____ 014:___________ 015:___________ ____ 016:___________ ____ ____ 017:___________ 018:___________ ____ 019:___________ ____ 020:___________ ____ ____ 021:___________ 022:___________ ____ 023:___________ ____ ____ 024:___________ 025:___________ ____ 026:___________ ____...
- Page 37 Partition User # and Name Byp Stay Force 1 or 2 Only Only 033:___________ ____ ____ 034:___________ ____ 035:___________ 036:___________ ____ 037:___________ ____ ____ 038:___________ 039:___________ ____ 040:___________ ____ 041:___________ ____ ____ 042:___________ 043:___________ ____ 044:___________ ____ ____ 045:___________ 046:___________ ____ 047:___________ ____...
- Page 38 Panic Alarms: [1] & [3] Police or __________ Silent Audible [4] & [6] Aux. or ___________ Silent Audible [7] & [9] Fire or ___________ Silent Audible PGMs: PGM 1: ________________________________________ PGM 2: ________________________________________ PGM 3: ________________________________________ System Timers Enter and exit your premises through the designated doors.
-
Page 39: Appendix A
9.0 Appendix A Your Spectra keypad can display data one of two ways when you to program the following parameters : • User Access Codes (see page 11) • System’s Clock (see pages 7 & 23) • Auto-Arm Time (see page 21) Do not read the following if you have not read the above mentioned sections. - Page 40 Warranty Paradox Security Systems Ltd. (“Seller”) warrants its products to be free from defects in materials and workmanship under normal use for a period of one year. Except as specifically stated herein, all express or implied warranties whatsoever, statutory or otherwise, including without limitation, any implied warranty of merchantability and fitness for a particular purpose, are expressly excluded.
- Page 41 Notes...
- Page 44 780 Industriel Blvd., St. Eustache (Quebec) J7R 5V3 CANADA Tel.: (450) 491-7444 Fax: (450) 491-2313 www.paradox.ca PRINTED IN CANADA 01/2005 1686-EU09...
Need help?
Do you have a question about the 1686V and is the answer not in the manual?
Questions and answers