Table of Contents
Advertisement
Quick Links
D
y
n
a
D
y
n
a
A
D
S
L
2
/
2
+
A
D
S
L
2
/
2
+
m
i
x
U
m
i
x
U
(
T
u
(
T
u
H
o
m
e
P
l
u
H
o
m
e
P
l
u
C
o
m
b
C
o
m
b
U
s
e
U
s
e
M
-
A
P
M
-
A
P
r
b
o
)
r
b
o
)
g
8
5
M
b
p
s
g
8
5
M
b
p
s
o
R
o
u
t
e
r
o
R
o
u
t
e
r
r
G
u
i
d
e
r
G
u
i
d
e
l
u
s
/
P
l
u
s
/
P
E
t
h
e
r
n
e
t
U
E
t
h
e
r
n
e
t
U
L
L
S
B
S
B
Advertisement
Table of Contents

Related Manuals for Dynamix UM-A Plus/PL


Summary of Contents for Dynamix UM-A Plus/PL
-
Page 2: Table Of Contents
Table of Contents Preliminary Pages Page Table of Contents ........................2 List of Illustrations .........................4 Chapter 1 - About this Manual.....................7 Introduction ..................7 Scope and Purpose................7 Targeted Audience................7 Manual Organisation ................7 Chapter 2 – Introduction ......................8 ADSL Router Overview ..............8 Chapter 3 - Your Gateway At A Glance ................9 Ports and Buttons................9 3.1.1 Front Indicators ................10... - Page 3 4.5.12 Port Forwarding................27 4.5.13 MAC Filtering (Bridge Filters) ............28 4.5.14 Access Control................29 4.5.15 Routing (Static Routing)..............30 4.5.16 Dynamic Routing................31 4.5.17 System Password ................32 4.5.18 Firmware Upgrade................33 4.5.19 Restore to Default................34 HomePlug ..................34 4.6.1 Local Password................35 4.6.2 Remote Password ................36 4.6.3 Scan Network .................37 Security...................37 4.7.1...
-
Page 4: List Of Illustrations
List of Illustrations Figure Page Figure 1-1 : HomePlug Ethernet USB Router Configuration Diagram ........8 Figure 1-2 : Front Indicators ....................10 Figure 1-3 : Back Panel Indicators ..................11 Figure 1-4 : Quick Start Page ....................13 Figure 1-5 : LAN Configuration ..................14 Figure 1-6 : Diagnostics Test Screen ...................15 Figure 1-7: Diagnostic Test Result screen ................15 Figure 1-8 : Ping Test Screen ....................16... - Page 5 Figure 1-25 : Dynamic Routing ...................31 Figure 1-26 : System Password ....................32 Figure 1-27 : Firmware Upgrade..................33 Figure 1-28 : Restore to Default prompt ................34 Figure 1-29 : HomePlug .......................34 Figure 1-30 : Local HomePlug ....................35 Figure 1-31 : Remote HomePlug ..................36 Figure 1-32 : Scan Network ....................37 Figure 1-33 : Security......................37 Figure 1-34 : IP Filters ......................38...
-
Page 6: Chapter 1 - About This Manual
This manual provides a general product overview and description of its subsystems and components and basic operation and preventive maintenance instructions of Dynamix UM-A Plus/PL (Turbo) ADSL2/2+ HomePlug 85Mbps Ethernet USB Combo Router. Scope and Purpose This manual provides the following: •... -
Page 7: Chapter 2 - Introduction
Chapter 2 – Introduction Dynamix UM-A Plus/PL (Turbo) ADSL2/2+ HomePlug 85Mbps Ethernet USB Combo Router is the perfect high-speed WAN bridge/router. This full-featured product is specifically designed to connect to the Internet and directly connect to your local area network via high speed 10/100 Mbps Ethernet. -
Page 8: Chapter 3 - Your Gateway At A Glance
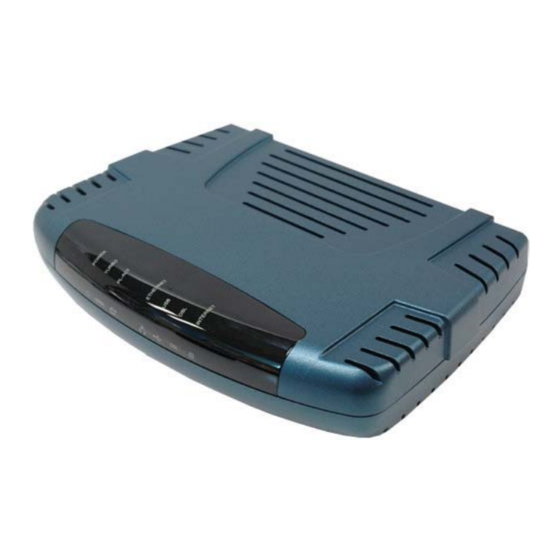
Chapter 3 - Your Gateway At A Glance Dynamix UM-APlus/PL (Turbo) ADSL2/2+ HomePlug 85Mbps Ethernet USB Combo Router may have different ports and LEDs. Let’s take a look at the different options. Depending on your model, it may have some or all of the features listed below. -
Page 9: Front Indicators
Front Indicators 3.1.1 Fig 1-2 shows the front indicators of Dynamix UM-A Plus/PL ADSL HomePlug Ethernet USBRouter. Figure 1-2 : Front Indicators Power 5. USB Lights up when the USB device driver is Lights up when power is supplied to the router. -
Page 10: Back Panel
Back Panel 3.1.2 Fig 1-3 shows the back panel indicators of ADSL HomePlug Dynamix UM-A Plus/PL (Turbo) Ethernet USB Router. Figure 1-3 : Back Panel Indicators 1. DSL Line jack (RJ-11) to connect to your Telephone Wall Socket (ADSL line). -
Page 11: Chapter 4 - Setting Up The Adsl Homeplug Ethernet Router
Chapter 4 - Setting Up Dynamix UM-A Plus/PL (Turbo) ADSL HomePlug Ethernet Router The basic tabs consist of features which are catered for basic users. This section will guide you through your ADSL Router’s configuration. The ADSL Router is shipped with a standard PPP configuration.. -
Page 12: Quick Start
Quick Start By default the ADSL Router has being configured to PPP connection and user is only required to enter the username and password (as specified by the local ISP) to connect to the Internet. The Quick Start page is meant for basic users whom only require easy connectivity to the Internet without worrying about any other advance configuration setting. -
Page 13: Figure 1-5 : Lan Configuration
The End IP Address is where the DHCP server stops issuing IP addresses. The ending address cannot exceed a subnet limit of 254. Hence the max value for our default gateway is 192.168.1.254. If the DHCP server runs out of DHCP addresses, users will not get access to network resources. -
Page 14: Diagnostic Test
Diagnostic Test Diagnostic Test is used for investigating whether the ADSL Router is properly connected to the WAN Network. See Fig 1-6. This test may take a few seconds to complete. To perform the test, select your connection from the list and press the Test button. Before running this test, make sure you have a valid DSL link. -
Page 15: Ping Test
Ping Test 4.4.1 Once you have your ADSL Router configured, ensure you can ping the network. Type the target address that you want to ping. If your PC is connected to the ADSL Router via the default DHCP configuration, you should be able to Ping the network address 192.168.1.1. See Fig 1-8. If your ISP has provided their server address, try to ping the address. -
Page 16: Advanced
Advanced This mode is catered for advance users, a brief explanation of the links are listed as shown below. See Fig 1-10. Figure 1-10 : Advanced Screen WAN Connection 4.5.1 On the other side of the ADSL Router is where your Wide Area Network (WAN) connection; also referred to as a broadband connection. -
Page 17: New Connection
New Connection 4.5.2 A new connection is basically a virtual connection. Your ADSL Router can support up to 8 different (unique) virtual connections. If you have multiple different virtual connections, you may need to utilize the static and dynamic routing capabilities of the modem to pass data correctly. -
Page 18: Adsl Modulation
ADSL Modulation 4.5.3 To configure the DSL modulation type, Click setup. Under WAN Setup, select Modem Setup. This will bring up the modem setup screen. Leave the default value if you are unsure or the DSL/ISP did not provide this information. In most cases, this screen should not be modified. Figure 1-12 : ADSL Modulation (Modem Setup) Quick start 4.5.4... -
Page 19: Lan Configuration
Idle Timeout: Specifies that PPPoE connection should disconnect if the link has no activity detected for n seconds. This field is used in conjunction with the On-Demand feature. To ensure that the link is always active, enter a 0 in this field. Keep Alive: When on-demand option is not enable, this value specifies the time to wait without being connected to your provider before terminating the connection. -
Page 20: Lan Clients
The hostname can be any alphanumeric word that does not contain spaces. The domain name is used to in conjunction with the host name to uniquely identify the gateway. To access the ADSL Router’s web pages the user can type 192.168.1.1 (the default IP address) or type mygateway.ar7. -
Page 21: Application (Upnp)
Application (UPnP) 4.5.7 UPnP NAT and Firewall Traversal allow traffic to pass-thru the ADSL Router for applications using the UPnP protocol. This feature requires one active DSL connection. In presence of multiple DSL connections, select the one over, which the incoming traffic will be present, for example the default Internet connection. -
Page 22: Figure 1-17 : Sntp
Tertiary SNTP Server - The IP address or the host name of the tertiary SNTP server. Timeout - If the HomePlug Ethernet USB Router failed to connect to a SNTP server within the ‘Timeout’ period, it will retry the connection. Polling Interval - Time between a successful connection with a SNTP server and a new attempt to connect to an SNTP server. -
Page 23: Snmp
SNMP 4.5.9 SNMP (Simple Network Management Protocol) is a troubleshooting and management protocol, which uses the UDP protocol on port 161 to communicate between clients and servers. SNMP uses a manager MIB (management information base) agent solution to fulfill the network management needs. -
Page 24: Ip Qos
IP QoS 4.5.10 When QoS is enabled in the AR7, the designated machine, application or person would have precedence over peers when competing for bandwidth. The IP QoS Setup page allows you to configure QoS for a connection, view previously configured QoS rules, add a new rule, or delete an existing rule. -
Page 25: Figure 1-20 : Igmp Multicast
IGMP Multicast 4.5.11 If the ADSL Router is connected to more than one network, you may need to set up a static route between them. A static route is a pre-defined pathway that network information must travel to reach a specific host or network. You can use static routing to allow different IP domain users to access the Internet through the ADSL Router. -
Page 26: Port Forwarding
Port Forwarding 4.5.12 Using the Port Forwarding page, you can provide local services (for example web hosting) for people on the Internet or play Internet games. When users send this type of request to your network via the Internet, the ADSL Router will forward those requests to the appropriate PC. Port forwarding can be used with DHCP assigned addresses but remember that a DHCP address is dynamic (not static). -
Page 27: Mac Filtering (Bridge Filters)
MAC Filtering (Bridge Filters) 4.5.13 The bridge filtering mechanism provides a way for the users to define rules to allow/deny frames through the bridge based on source MAC address, destination MAC address and/or frame type. When bridge filtering is enabled, each frame is examined against the each defined filter rules sequentially. -
Page 28: Access Control
Access Control 4.5.14 Access control allows you to open the access from the Internet LAN to the following management ports of the HomePlug Ethernet USB Router: • Telnet • • • TFTP • Secure Shell (SSH) • SNMP Fig 1-23 shows the default Access Control screen. The Access Control is disabled by default, remote management from the WAN side IP addresses is denied, most services from the LAN side IP addresses is enabled. -
Page 29: Routing (Static Routing)
Routing (Static Routing) 4.5.15 If the ADSL Router is connected to more than one network, you may need to set up a static route between them. A static route is a pre-defined pathway that network information must travel to reach a specific host or network. You can use static routing to allow different IP domain users to access the Internet through the ADSL Router. -
Page 30: Dynamic Routing
Dynamic Routing 4.5.16 Dynamic Routing allows the ADSL Router to automatically adjust to physical changes in the network. The ADSL Router, using the RIP protocol, determines the network packets’ route based on the fewest number of hops between the source and the destination. The RIP protocol regularly broadcasts routing information to other ADSL Routers on the network. -
Page 31: System Password
System Password 4.5.17 You can change your ADSL Router’s username and password by clicking on User Management. From here you can change the login name and password. You can also change the idle timeout; you will need to log back onto the ADSL Router once the timeout expires. If you forget your password, you can press and hold the reset to factory defaults button for 10 seconds (or more). -
Page 32: Firmware Upgrade
Firmware Upgrade 4.5.18 You can upgrade the ADSL Router’s firmware, clicking on Update Gateway under the Tools page. To upgrade the firmware, click browse, find the firmware file to download. Make sure this is the correct file. Click on upgrade firmware. Once the upgrade is complete the ADSL Router will reboot. -
Page 33: Restore To Default
Restore to Default 4.5.19 The restore to factory defaults feature will set the ADSL Router to its factory default configuration by resetting the ADSL Router. You may need to place the ADSL Router into its factory defaults if the configuration is changed, you loose the ability to interface to the ADSL Router via the web interface, or following a software upgrade,. -
Page 34: Local Password
Local Password 4.6.1 This is used to setup the Network Password of Local Homeplug. See Fig 1-30. All HomePlug devices are shipped using “HomePlug” as a Network Password. This page allows you to change this Network Password and set your own private password then apply it to the HomePlug device connected to the computer. -
Page 35: Remote Password
Remote Password 4.6.2 This is used to setup the Network Password of Remote HomePlug. See Fig 1-31. This page allows you to set up a Network Password remotely on other HomePlug devices through the powerline. The other devices on the network with HomePlug capabilities will have a Security ID/Device Password printed on the device itself. -
Page 36: Scan Network
Scan Network 4.6.3 The Scan Network function displays the MAC Address’ of all connected HomePlugs. See Fig 1- This page shows all HomePlug devices found on your powerline network identified by their MAC addresses. Click on the refresh button to refresh the listed information. Important Note: In case a HomePlug device in your home is not listed in the screen above, make sure that its Network Password is not with a different password than your current private Network Password. -
Page 37: Ip Filters
IP Filters 4.7.1 IP filter is identical to what Port blocking to Access Control. In (figure 26) it demonstrates that the router will block workstations with the IP in the defined range of 192.168.1.5 to 192.168.1.20 and port range from 2000 to 3000. See Fig 1-34. Figure 1-34 : IP Filters... -
Page 38: Lan Isolation
LAN Isolation 4.7.2 Figure 1-35 : LAN Isolation LAN isolation allows you to disable the flow of packets between up to three-user-defined LAN groups (WLAN and Ethernet). This allows you to secure information in private portions of the LAN from other, publicly accessible LAN segments. See Fig 1-35. -
Page 39: Status
Status This status section allows users to view the following connections and interfaces: See Fig 1-36. • Connection Status • System Log • Remote Log • Network Statistics • DHCP Clients • Modem Status • Product Information Figure 1-36 : Status... -
Page 40: Connection Status
Connection Status 4.8.1 Connection Status will display all the relevant information regarding your Internet Connection, it will display the type of protocol used, the WAN IP address, the connection state, the duration and if it is Disconnected the reason will be displayed. The “Disconnect” button on the right-hand side is for terminating the connection from the Internet. -
Page 41: Remote Log Settings
Remote Log Settings 4.8.3 This feature is for users to enable remote logging. Settings mentioned below are essential for this feature to work: • Log Level • Adding / Deleting IP address • Logging destination Figure 1-39 : Remote Log Settings Network Statistics 4.8.4 Information regarding the Status and Statistics of your Ethernet and DSL line will be displayed. -
Page 42: Dhcp Clients
DHCP Clients 4.8.5 Shows the users connected. It also shows the MAC address, IP address, host name and lease time. See Fig 1-41. Figure 1-41 : DHCP Clients Modem Status 4.8.6 This screen will display the Modem status and DSL statistics. See Fig 1-42. Figure 1-42 : Modem Status... -
Page 43: Product Information
Product Information 4.8.7 This screen will show a summary of all the product information and software version that comes bundled with the ADSL router. See Fig 1-43. Figure 1-43 : Product Information...
Need help?
Do you have a question about the UM-A Plus/PL and is the answer not in the manual?
Questions and answers