Table of Contents
Advertisement
WARNING
Improper installation,
adjustment, alteration, service or
maintenance can cause injury or
property damage.
Read the installation,
operation and maintenance
instructions thoroughly before
installing or servicing this
equipment.
DANGER
Failure to follow these
instructions could result in fire
or explosion that could cause
property damage, personal
injury or death.
DANGER
DO NOT use gas grill for indoor
cooking or heating. TOXIC
fumes can accumulate and
cause asphyxiation. DO NOT
use in or on boats or
recreational vehicles.
WARNING
FOR YOUR SAFETY:
For Outdoor Use Only
(outside any enclosure)
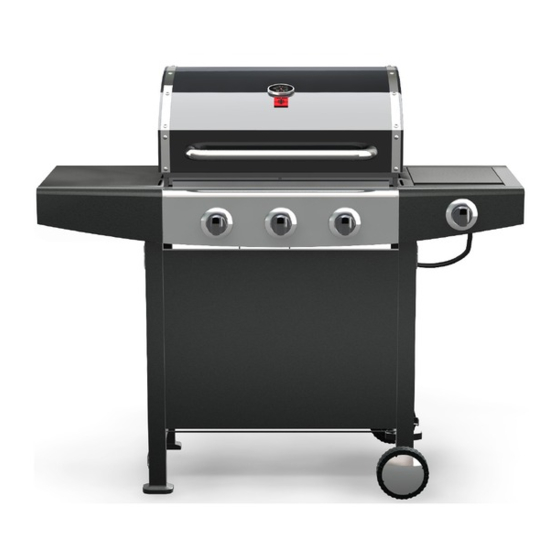
GSF2616AC
Owner's Manual
Backyard BBQ Grill
SAVE THESE INSTRUCTIONS FOR FUTURE REFERENCE. IF
YOU ARE ASSEMBLING THIS UNIT FOR SOMEONE ELSE, GIVE
THIS MANUAL TO HIM OR HER TO SAVE FOR FUTURE
REFERENCE.
FOR CUSTOMER SERVICE, PLEASE CALL 1-877-630-5396
(TOLL-FREE), 10:00 A.M. – 19:00 P.M. (EST), MONDAY-FRIDAY.
Service Center: 1-877-630-5396
0
TG 1301 3003
NG 383545
Advertisement
Table of Contents

Related Manuals for Tera Gear GSF2616AC


Summary of Contents for Tera Gear GSF2616AC
- Page 1 REFERENCE. WARNING FOR CUSTOMER SERVICE, PLEASE CALL 1-877-630-5396 FOR YOUR SAFETY: (TOLL-FREE), 10:00 A.M. – 19:00 P.M. (EST), MONDAY-FRIDAY. For Outdoor Use Only (outside any enclosure) Service Center: 1-877-630-5396 GSF2616AC Owner’s Manual...
-
Page 2: Grill Operation
NOTE: This grill must be used with propane gas only (propane gas cylinder not included). Installer: Leave this manual with the consumer. Consumer: Retain this manual for future reference. GSF2616AC Owner’s Manual... -
Page 3: Table Of Contents
For Your Safety....................3 Illustrated Parts List ..................5 Hardware List....................6 Assembly Instructions..................7 Operating Your Grill..................11 Connecting & Disconnecting Gas Cylinder............12 Checking for Leaks..................12 Lighting Your Grill....................12 Excess flow safety valve reset procedure............14 Care and Maintenance..................16 Troubleshooting....................16 Warranty Program.....................18 GSF2616AC Owner’s Manual... -
Page 4: For Your Safety
4. Move gas hoses as far away as possible from hot surfaces and dripping hot grease. 5. Never keep a filled gas container in a hot car or car trunk. Heat will cause the gas pressure to increase, which could open the relief valve and allow gas to escape. GSF2616AC Owner’s Manual... - Page 5 Step 3. Ensure that the valve nozzle is pointing straight and completely inserted into the venturi tube. GENERAL INFORMATION 1. A propane gas cylinder is required for operation. 2. This gas grill is NOT intended for commercial use. Don't obstruct the ventilation opening of the cylinder enclosure. GSF2616AC Owner’s Manual...
-
Page 6: Illustrated Parts List
Spare tank stopper-A 1 pc Right side shelf 1 pc Front panel 1 pc Spare tank stopper-B 1 pc Side burner assembly Upper side beam 1 pc Side knob seat 1 pc Lower side beam 1 pc GSF2616AC Owner’s Manual... -
Page 7: Hardware List
Hardware List Hardware listed above is not scaled to exact size. (A screwdriver is required for assembly and is included for your convenience). GSF2616AC Owner’s Manual... -
Page 8: Assembly Instructions
(P) & and left back leg (N). Push down on the lower back beam (M) until it locks into place, then tighten all the bolts using screwdriver provided. b) Repeat the procedure for the upper back beam (L). GSF2616AC Owner’s Manual... - Page 9 (DD) into the hole on the end of the spare tank stopper (AB) and the hole on the right back leg. Repeat the procedure on the left back leg. Tighten by hand until secure. d) Go back and tighten the bolt using the screwdriver provided. GSF2616AC Owner’s Manual...
- Page 10 (CC) and one flat washer (DD) into each hole. ighten by hand until secure. b) Repeat the procedure for the left side of the body assembly. Go back and tighten all bolts using the screwdriver provided. GSF2616AC Owner’s Manual...
- Page 11 Place the cylinder upon the tank seat of the left bottom beam hook. b) Push the cylinder toward the top hook on the left side beam to hook it. Connect the regulator to the cylinder by turning it clockwise. GSF2616AC Owner’s Manual...
-
Page 12: Operating Your Grill
Never fill the propane cylinder beyond 80% full. This grill is designed to connect to a standard 20 lb L.P. cylinder only, please refer to the Step 11 of assembly instructions for the installation. Warning: Don’t store spare gas cylinder in or near grill. GSF2616AC Owner’s Manual... -
Page 13: Connecting & Disconnecting Gas Cylinder
Danger: Failure to open lid while igniting the grill’s burners or not waiting five minutes to allow gas to clear if the grill does not light, may result in an explosion, which could cause serious bodily injury or death. WARNING: Never stand with your head directly over the grill when preparing to light the main burners, to prevent possible bodily injury. GSF2616AC Owner’s Manual... - Page 14 Press the control knob and rotate it counterclockwise to the ‘’HIGH’’ position. The burner should light immediately. Adjust burner to the desired cooking temperature. Observe flame height when lit: 2 in. Flame should be a blue/yellow color between 1 to 2 inches high. 1 in. GSF2616AC Owner’s Manual...
-
Page 15: Excess Flow Safety Valve Reset Procedure
This procedure is effective with all LP Tank sizes as well as Natural Gas. When performing the procedure on a Natural Gas model, simply substitute "Natural Gas valve" for "LP Tank". ● To ensure the procedure is safely and successfully performed, please carefully follow these instructions: GSF2616AC Owner’s Manual... -
Page 16: Care And Maintenance
Nylon cleaning pad Wire brush Paper clip Putty knife/scraper Compressed air DO NOT use cleaners that contain acid, mineral spirits or xylene. Outside surfaces Use a mild dishwashing detergent and hot water solution to clean. Rinse thoroughly with water. GSF2616AC Owner’s Manual... -
Page 17: Troubleshooting
Obstruction of gas flow. Clear burner tubes. Check for bent or kinked hose. Disengagement of burner to valve. Reengage burner and valve. Clean venturi. Spider webs or insect nest in venturi. Burner ports clogged or blocked. Clean burner ports. GSF2616AC Owner’s Manual... - Page 18 If flames are blue and noisy – close flap at the end of the venturi tubes in 1/8” increments until flames are correct. *Propane Models must be open a minimum of 1/8” *Natural Gas Models must be open a minimum of 1/16” GSF2616AC Owner’s Manual...
-
Page 19: Warranty Program
If you have any questions related to the product or warranty, please call our customer service center at 1-877-630-5396, 10:00 A.M. to 19:00 P.M. (EST), Monday through Friday. Printed in China GSF2616AC Owner’s Manual...
Need help?
Do you have a question about the GSF2616AC and is the answer not in the manual?
Questions and answers