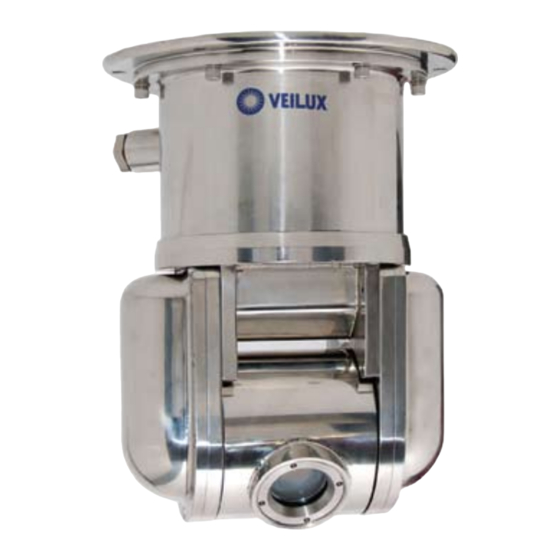
Summary of Contents for Veilux SVEX-Q18
- Page 1 Ex Mark: II 2 GD Ex d IIC T6 Gb, Ta : -15°C to +60°C YHQ18 Explosionproof Camera Manual Book Ex t IIIC T80°C Db Ver: 0.1 Certificate: Nemko 11ATEX1022 Veilux User Manual SVEX-Q1 8 Intelligence Camera Set...
- Page 2 SVEX-Q18 Explosion proof Camera Manual Book Ver: 0.1 Please carefully read the Manual Book before your operation 1. Installation „ Please install under required environment „ Ensure stable and reliable mounting in case camera be damaged „ Ensure supply power same as nameplate marked before equipment being powered „...
- Page 3 SVEX-Q18 Explosion proof Camera Manual Book Ver: 0.1 Most Suitable Position for Movement Choose the most suitable position when moving the equipment.
- Page 4 SVEX-Q18 Explosion proof Camera Manual Book Ver: 0.1 Move the camera like this Move the camera like this No hammar The camera can be rotated when power off Do not turn the camera when power on...
- Page 5 YHQ18 Explosionproof Camera Manual Book Ver: 0.1 Tighten this screw after the cable is connected Tighten the top panel when camera setting is finished. Pay attention to the o-ring...
-
Page 6: Table Of Contents
SVEX-Q18 Explosion proof Camera Manual Book Ver: 0.1 CONTEN T 1. BRIEF ..............................7 2. TECHNICAL .............................7 2.1 Type Code ..........................7 2.2 Certificate..........................7 2.3 Electric Data...........................8 2.4 Camera Data...........................8 2.5 Mechanical ..........................9 2.6 Environmental ........................9 2.7 Dimension ..........................9 2.8 Mounting Size ........................10 3. -
Page 7: Brief
Ver: 0.1 BRIEF This SVEXQ18 EXPLOSIONPROOF PAN TILT CAMERA(therefore as SVEX-Q18)as a new monitoring equipment adopts advanced production techniques and matured quality management system to make its quality, performance and appearance a leading position in explosion proof monitoring products. It can be used in flammable and explosive environment to realize monitoring purpose. -
Page 8: Electric Data
SVEX-Q18 Explosion proof Camera Manual Book Ver: 0.1 Ex Certificate Nemko 11ATEX1022 2.3 Electric Data Input voltage 110~240VAC, 50/60Hz ≤500mA Working current <50W Power consumption Communication RS-485 Communication speed multiple, could be set Communication protocol multiple, could be set Address code Preset position ≤0.1°... -
Page 9: Mechanical
SVEX-Q18 Explosion proof Camera Manual Book Ver: 0.1 Video output BNC joint / 1.0±0.2Vp-p / 75Ω 2.5 Mechanical Material Stainless 304 IP level IP67 0~360° continuously Tilt -90°~-+30° Pan speed 0.1°/S ~60°/S Tilt speed 0.1°/S ~60°/S Unit/ Ship weight 22Kg / 25Kg... -
Page 10: Mounting Size
Stop immediately while there is any unconformity 3.2 Ceiling Mount Cable out Mount hole for fix Camera Glass P3. Ceiling mount Please refer to chapter 4.2 for the setting of SVEX-Q18 before installation. For the bottom fix hole installation, please refer to P2. -
Page 11: Cable Working
SVEX-Q18 Explosion proof Camera Manual Book Ver: 0.1 P4. Tilt rotation angle 3.3 Cable Working 3.3.1 Ex Cable Use a. As P6, open the tighten screw on the base of camera, open ex cable screw joint for future use. Ex cable... - Page 12 SVEX-Q18 Explosion proof Camera Manual Book Ver: 0.1 Ex-proof Gland Parts Armored cable Rubber Cable inner layer Bushing Bushing Joint Protection Cover Sealing Loop Gasket Taper Volt Steel belt Cable core wire as Picture 8, install Ex-proof Gland to Armored Cable...
-
Page 13: Connection, Setting & Application
SVEX-Q18 Explosion proof Camera Manual Book Ver: 0.1 CONNECTION, SETTING & APPLICATION 4.1 System Diagram 4.1.1 Connecting Diagram Video signals can be connected with different equipment, such as LCD monitors, DVRs, video server or matrix. The signals can be also distributed or gained by video distributors as well. -
Page 14: Power And Video Cable Connection
Power and Video Cable Connection A junction box shall be used with SVEX-Q18 as Picture, and refer to Table 1 to connect cable of power and video inside Junction Box. Remember to use ex cable for power cable out of Junction Box. -
Page 15: Setting
SVEX-Q18 Explosion proof Camera Manual Book Ver: 0.1 4.2 Setting 4.2.1 Set Method To set address and baud rate here in camera Pay attention of the F.P P12. Set Method After opening the left side panel, the dip switch can be seen. The customer needs to set the protocol, address and baud rate. -
Page 16: Camera Address Set
SVEX-Q18 Explosion proof Camera Manual Book Ver: 0.1 4.2.2 Camera Address Set Decimal system is used for camera address, K1、K2、K3 dip switches are for address setting. K1 stands for the unit digit, K2 is for tens digit and K3 for hundreds digit. Other K4 is for baud rate and K5 for control protocol. -
Page 17: Remote Control Setting
SVEX-Q18 Explosion proof Camera Manual Book Ver: 0.1 4.2.5 Remote Control Setting When K4 is “0”, camera address, control protocol and baud rate can be set with OSD Menu (the default baud rate is shown on the display when power is on). At this time, the setting of K1, K2, K3 and K5 won‟t work. -
Page 18: Trouble Shooting
SVEX-Q18 Explosion proof Camera Manual Book Ver: 0.1 P14. Flameproof point location TROUBLE SHOOTING Table 4. Trouble shooting Problems Reason Method Power off Make sure the power is ok No image Video cable not Check the Video Cable good connection... -
Page 19: Quality Guarantee
Book Ver: 0.1 QUALITY GUARANTEE For any camera produced by Veilux, we promise half-year to change and one year to repair. During Guarantee period, we supply free service except following situations: User does not operate as manual book requires User un-install the whole product by themselves...


Need help?
Do you have a question about the SVEX-Q18 and is the answer not in the manual?
Questions and answers