
Related Manuals for TeleEye DM338


Summary of Contents for TeleEye DM338
-
Page 1: User Manual
USER MANUAL TeleEye DM338 Before using the product, please read this manual carefully. -
Page 3: Notice
Tele Eye is a trademark of Signal Communications Limited and is registered in China, Hong Kong, US and other countries. TeleEye's products are sold under the brand name of CAMERIO in Australia, Japan, Korea, New Zealand, Taiwan and Argentina. CAMERIO is a trademark of Signal Communications Limited and is registered in Australia, Japan, Korea, New Zealand, Taiwan and Argentina. -
Page 4: Precautions
6 Excessive light It is important that TeleEye DM338 is not left in a position where it is pointing directly at the sun or other extremely bright light source. This may result in CCD damage and poor image quality. -
Page 5: Table Of Contents
Contents NOTICE................2 PRECAUTIONS...............3 CONTENTS..............4 PRODUCT OUTLINE AND FEATURES ......5 DESIGNATION AND FUNCTION........6-9 TABLE FOR CAMERA ID..........10-12 SPECIFICATION AND DIMENSION........13 CONTROLLER...............14 CABLE CONNECTIONS FOR CONTROLLER....15 FUNCTION SETUP............16-19 CAMERA INSTALLATION...........20-21 EX) CAMERA INSTALLATION..........22 CABLE CONNECTION..........23-24 SPECIFICATION............25 SETUP FOR CAMERA FUNCTIONS.........26... -
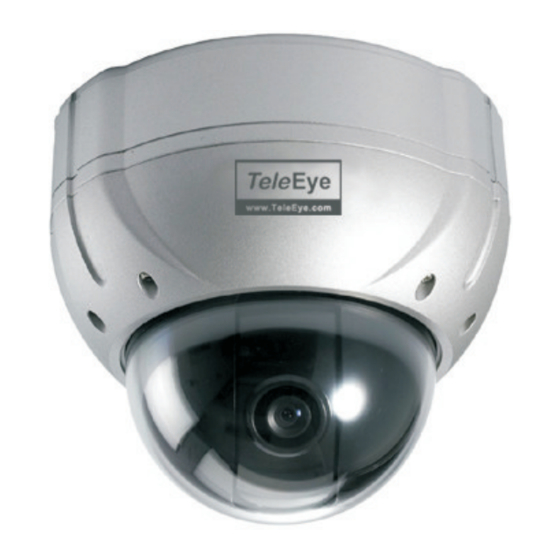
Page 6: Product Outline And Features
PRODUCT OUTLINE AND FEATURES 1.Product Outline This camera can be moved by simple special controller or DVR to up and down, left and right. As this dome is made of aluminum and Poly Carbornate , it can resist water, dust and external impact easily. 2. -
Page 7: Designation And Function 1
DESIGNATION AND FUNCTION 1 Designation and function Accessory M3x8 WASHER SCREW x 3 RUBBER PAD BASE CASE 4x25 COUNT SINK SCREW x 4 BOLT BASE SEAL RING WRENCH TORX T10 x 1 MID CASE SEAL RING CAMERA & P/T MODULE ASSEMBLY TERMINAL BLOCK x 1 COVER ASSEMBLY... - Page 8 Cable Cable connection Pin array DV12V, 600mA input VIDEO Connected to monitor. RS485A Connected to controller or RS485B...
- Page 9 DESIGNATION AND FUNCTION 2 1. Termination Switch : Used for RS-485 communication ON - Apply to terminal unit when communicated with PC or remote control in 1:1 or in multi-communication. OFF - Apply to all the cameras except terminal unit in multi-communication.
-
Page 10: Designation And Function
DESIGNATION AND FUNCTION 3 1. ID setup - Use it when you use many cameras or if you want to use special camera ID. - You can set up Max. 255 units. (Please refer to the table for camera ID setup at page11) - Optional remote control can control upto 99pcs of camera. -
Page 11: Table For Camera Id
TABLE FOR CAMERA ID Camera ID... - Page 13 The rest is omitted.
-
Page 14: Specification And Dimension
SPECIFICATION AND DIMENSION Camera ID setup : 1~255 Model No: DM338 Moving angle- PAN : 0 ~ 350 Tilt : 5 ~ 90 Power DC 12V Moving speed- PAN 9 /s~93 /s Tilt 9 /s ~ urrent onsumption Max 600mA... -
Page 15: Controller
CONTROLLER *Thecontrollerisadeviceforcontrollingtheconnectedcameras,itcancontrolMax. 99unitsofcamera. DISPLAY 1. Turn on the power switch on the right side of the controller. 2. First "0" is shown on the display. 3. Choose camera ID 1~99 as below. camera number Cam.( + Enter 4. You can move the camera to the direction you want to watch. -
Page 16: Cable Connections For Controller
CABLE CONNECTIONS FOR CONTROLLER Power lnput DC12V, 100mA - - - + RS 485 A(Red) RS 485 B(White) Detailed drawing of "C" Connect the communication connectors, RS-485 A,B with A,B connectors of the dome camera. After connecting cables, please isolate two cables. -
Page 17: Function Setup
FUNCTION SETUP 1. Position Initializing Use it when initialization of camera is need by external impact or other reasons. In this case, memorized positions are not erased. Cam.( ) + Cam.( ) + Enter (Initializing time : About 16 seconds) 2.Speed Control There are 10 steps of speed. - Page 18 * REFERENCE) Max. speed table per every step. Step Speed( /sec) 3. Position Memorizing Positions can be memorized up to 64 points (1~64). 1) Place the camera to the position you want. 2) After placing, press the buttons as below. SAVE( () + POSITION NO + Enter...
- Page 19 1) Goto( ) + POSITION NO + Enter 6.Sequential Pan You can move the camera to the memorized positions one by one. *Save more than two positions before using this function. 1) Seq( ) + Enter : Staying for 5 seconds in each position. 2) Seq( staying time (sec) + Enter : Staying for 5 seconds or longer by time setting.
- Page 20 2) Auto( POSITION NO + Auto( POSITION NO + Enter :From one position to the other position. * Save more than two positions to use Auto Pan(2) function. * Press ENTER button to stop sequential panning. * The Auto Panning speed is fixed at about 8/ seconds. If you want faster panning, you can use sequential panning after setting up two positions.
-
Page 21: Camera Installation
CAMERA INSTALLATION CAMERA FRONT DIRECTION FRONT REAR PANNING RANGE SEAL RING ASSEMBLY *When you assemble the seal ring, pay attention to the leakage. - Page 22 4 x25 TAPPING SCREW PT 1/2 CABLE PIPE CAMERA'S ORIENTATION MARK CABLE CONNECTION M3x15 TORX T10 SCREW WASHER SCREW M3x8 Surface Mounting When you install the camera, you should install it after considering its front direction. Tapping screws are included, but if you want to install it on the concrete ceiling, you should use a nail for concrete.
-
Page 23: Ex) Camera Installation
Ex) Camera installation SAFETY CABLE(NOT PROVIDED) - Safety cable must be able to support at least 15kg. JUNCTION BOX FLUSH-MOUNT ADAPTOR(OPTION) JUNCTION BOX MOUNTING SURFACE MOUNTING FLUSH MOUNTING... -
Page 24: Cable Connection
CABLE CONNECTION Power DC12V Video signal Mon it or 485 A (+) 485 A (+) 485 A (+) 485 A (+) 485B (-) 485B (-) 485B (-) 485B (-) Controller(option) or DVR First Camera Additional 1 Additional 2... -
Page 25: Cable Connection
CABLE CONNECTION 1) Connect video output of TeleEye DM338 to TeleEye video transmitter’s video input 2) Connect RS485 Controlling Cable to “RS232 to RS485 Converter”... -
Page 26: Specification
No. Of Preset No. Of Patrol Sequences Data Rate 2400, 4800, 9600 bps (auto detction) Data Interface RS-485 Protocal TeleEye Dm4, Pelco D Power & Environment Voltage 12V DC, (max. 600mA) Operation temp. -10 ~ 50 C Environmental Resistancet Ip66 Net Weight 1.2Kg... -
Page 27: Setup For Camera Functions
SETUP FOR CAMERA FUNCTIONS Function setting combination Dip switch combination H(O N) L(O FF ) DZOOM2 DZOOM1 ALC/ELC H(ON) L(OFF) AGC ON AGC OFF BLC ON BLC OFF Flickerless ON Flickerless OFF ALC/ELC *ALC : Auto IRIS Lens(DC type) *ELC : Board Lens DZOOM1 L(H) L(H)
Need help?
Do you have a question about the DM338 and is the answer not in the manual?
Questions and answers