Table of Contents
Advertisement
Quick Links
Advertisement
Table of Contents

Related Manuals for TeleEye MX600


Summary of Contents for TeleEye MX600
- Page 1 MX Series HD Network Camera MX600 SpeedDome Series Installation Guide...
- Page 3 Signal Communications Limited. TeleEye is a trademark of Signal Communications Limited and is registered in China, European Communities, Hong Kong, US and other countries. All other trademarks are the property of their respective owners.
-
Page 4: Table Of Contents
Contents 1. Introduction........................7 2. Safety Cautions........................8 3. Hardware Installation......................9 3.1 MX677-HD......................9 Features.......................9 Package Content..................11 Diagram......................12 Installation....................13 4. Software Installation......................15 4.1 PC Requirements..................15 4.2 sureSIGHT Installation..................16 5. Network Configuration.....................20 5.1 Connecting the Camera to Network.............20 5.2 Changing the IP Address................20 6. Video Monitoring......................23 6.1 sureSIGHT....................23 6.2 Web Browser....................27 7. - Page 5 High Definition Progressive Scan Video............31 IP-based Video Surveillance Solution............31 Total Solution for HD Video Surveillance...........31 Video Surveillance Everywhere..............31 7.2 Specifications....................32 MX600 Series.....................32 7.3 Dimensions....................34 MX677-HD....................34...
-
Page 7: Introduction
MX600 User Guide 1. Introduction TeleEye MX Series is a complete portfolio of professional and practical HD network camera utilizing our proprietary HD SMAC-M compression technology. The MX series offers the balanced combination of high-quality video, mobility, scalability and cost effectiveness. By using TeleEye MX, users can build an integrated, scalable, wired or wireless IP &... -
Page 8: Safety Cautions
MX600 User Guide 2. Safety Cautions • Do not install the camera in extreme temperature conditions. Use the camera under conditions where temperatures are within -30C ~ +40C: (-22F ~ 104F) • Do not install the camera under unstable lighting conditions. Severe lighting change or flicker can cause the camera to work improperly. -
Page 9: Hardware Installation
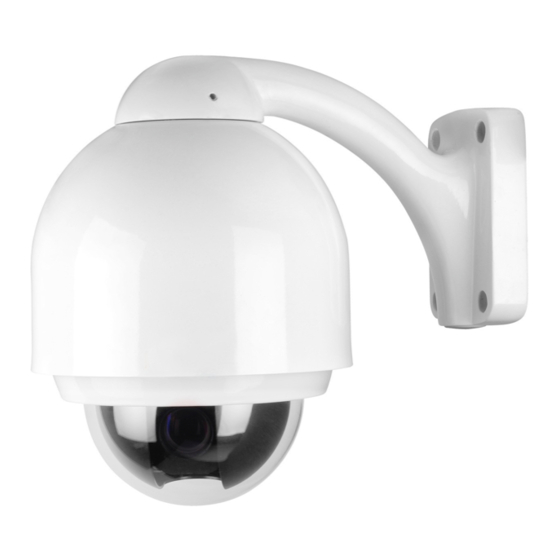
MX600 User Guide 3. Hardware Installation 3.1 MX677-HD MX677-HD High-definition SpeedDome Features • 1/3” 2MP Sony CMOS Sensor • 720p @ 25fps • Zoom: Optical 20X + Digital 12X • Day / Night, Minimum illumination: 0.095lux • Presets, Patrol, Tour and Auto-scan •... - Page 10 MX600 User Guide • Optional sureSIGHT Integrated Video Management Solution PAGE 10...
-
Page 11: Package Content
MX600 User Guide Package Con tent Content Description Content Description MX677-HD MX677-HD Wall Mount Bracket Housing MX677-HD 24V AC PTZ Core Power Supply Network Cable Screws Registration Code Warranty Card Sheet Installation Guide Software CD PAGE 11... -
Page 12: Diagram
MX600 User Guide Diagram PAGE 12... -
Page 13: Installation
MX600 User Guide Ins tallation 1. Draw the framework for bracket installation. Drill 4 holes on the wall. 2. Set 4 pieces of screws through the bracket and mount the bracket onto the wall. 3. Open the Lower Cover and remove the PTZ Core. - Page 14 MX600 User Guide 5. Connect the wires and lock the Upper Housing to the Wall Mount Bracket as below: 6. Then, set the PTZ Core into the Upper Housing and close the Lower Cover. 7. Finally, add the Twisted Pair Surge Protection Device between the SpeedDome and the Network for surge protection in outdoor environment.
-
Page 15: Software Installation
MX600 User Guide 4. Software Installation In this chapter, it will guide you how to install the sureSIGHT software. 4.1 PC Requirements sureSIGHT Lite sureSIGHT Business sureSIGHT Pro Intel® Core™ 2 Duo Processor Intel® Core™ 2 Quad Processor Processor Memory... -
Page 16: Suresight Installation
MX600 User Guide 4.2 sureSIGHT Installation sureSIGHT is an integrated video management platform for IP cameras and Video Recording Servers. Its modular design allows customers to scale up easily and add functional modules to suit specific requirements. For the sureSIGHT installation, please refer to the following steps: Step 1. - Page 17 After reading the License Agreement, select “I Agree” to confirm and then click the [Next >] button. Step 5. [Browse] change installation path sureSIGHT. [Disk Cost...] to check the available space for the installation. [Note] The default path “C:\Program Files\TeleEye\TeleEye sureSIGHT\” is recommended PAGE 17...
- Page 18 MX600 User Guide Step 6. Click the [Next >] button twice to confirm and start the installation. Step 7. When the installation is completed successfully, click the [Close] button to close the window. PAGE 18...
- Page 19 MX600 User Guide Step 8. If the PC does not have JAVA runtime installed, click the [Install] button next to “JAVA Runtime” from the installation menu to install. Step 9. After completing all the necessary installations, sureSIGHT is now ready in the start menu.
-
Page 20: Network Configuration
Step 1. Turn on the network camera and make sure the camera is connected to the network. Then select the “Run TeleEye IP Setup Utility” from the start menu. Step 2. Search the target camera by its serial number, and hightlight the corresponding row from the list on the left side of the window to select it. - Page 21 MX600 User Guide Step 3. There are 2 methods in assigning an IP address to the camera. Methods 1. For assigning IP address automatically, check the “Obtain an IP address automatically” in order to assign the IP address by the DHCP server.
- Page 22 MX600 User Guide Step 4. If users wants to enable the dynamic IP connection, check the “sureLINK enable”. Input the registered sureLINK address and select the desired refresh rate. [Note] If users do not have any sureLINK addresses, please go to http://www.teleeye.com/softreg/customer/s_domainreg.jsp...
-
Page 23: Video Monitoring
MX600 User Guide 6. Video Monitoring In this chapter, it will guide you how to do the video monitoring in a few steps. For more detailed procedures or operations, please refer to the relevant documents. 6.1 sureSIGHT Step 1. Turn on the network camera and make sure the network connection is set up properly. - Page 24 MX600 User Guide Step 4. Click on the target cameras by their serial number or site name, and click [Next>>] button. Step 5. There are 2 security modes for the users to make a connection, select and click [Next>>] button.
- Page 25 MX600 User Guide Mode 1. Basic Security Mode Only password is required in this mode of operation. Uncheck the “Use advanced security mode” and input the password. [Note] The default password is “000000” Mode 2. Advanced Security Mode Both user name and password are needed for this mode of operation.
- Page 26 MX600 User Guide PAGE 26...
-
Page 27: Web Browser
MX600 User Guide 6.2 Web Browser Step 1. Run the web browser, for example the Internet Explorer, and enter the IP address or the sureLINK address in the address bar. [Note] JAVA Runtime Environment (JRE) is required for the web browser to run the application. If the PC does not have JRE installed, please go to http://www.java.com... - Page 28 MX600 User Guide Step 2. Select the connection type and enter the password For basic security mode, only password is required. For advanced security mode, both user name and password are required. Step 3. Click the [Connect] button to connect the video stream and the video will be displayed on the browser as below.
- Page 29 MX600 User Guide There are several buttons on the top of the video screen. The function of each button is described as follow: In normal display mode, enlarge the video resolution. In normal display mode, shrink the video resolution. Change the video resolution to the full screen size.
-
Page 30: Appendix
7.1 Functional Features HD SMAC-M – Revolutionary Multi-stream Coder for HD Video HD SMAC-M is the world’s first multi-stream coder developed by TeleEye for HD video recording & transmission. It is specially designed for IP & mobile surveillance application. HD SMAC-M features an independent HD recording stream to facilitate undisturbed recording of HD video while viewing through Internet or mobile devices. -
Page 31: High Definition Progressive Scan Video
Total Solution for HD Video Surveillance TeleEye MX is capable of HD live video recording and multi-site viewing by using TeleEye sureREC HD Video Recording Solution and sureSIGHT Integrated Video Management Solution. sureREC is specifically designed for recording the independent HD video stream of up to 64 MX cameras. -
Page 32: Specifications
MX600 User Guide 7.2 Specifications MX600 Series Model MX677-HD VIDEO Image Sensor 1/3” CMOS Sensor Resolution 1280x720 Minimum Illumination 0.095 lux Lens 20x Optical Zoom View Angle (Horizontal) 55.4 – 2.9 Mechanical Removable IR-cut Filter CONNECTIVITY Network Interface RJ-45, 10/100 Base-T Ethernet (Auto-sensing) - Page 33 MX600 User Guide RECORDING Software sureREC Stream Independent recording stream, Independent resolution & frame rate Mode Manual, schedule motion, schedule event Resolution 1280x720, 960x540, 640x360, 320x180 Frame Rate Up to 25fps Playback Forward, Backward, Pause, Step forward, Step backward, x10 fast forward, x25 fast forward...
-
Page 34: Dimensions
MX600 User Guide 7.3 Dimensions MX677-HD PAGE 34...
Need help?
Do you have a question about the MX600 and is the answer not in the manual?
Questions and answers