
Related Manuals for TeleEye DM597


Summary of Contents for TeleEye DM597
-
Page 1: User Manual
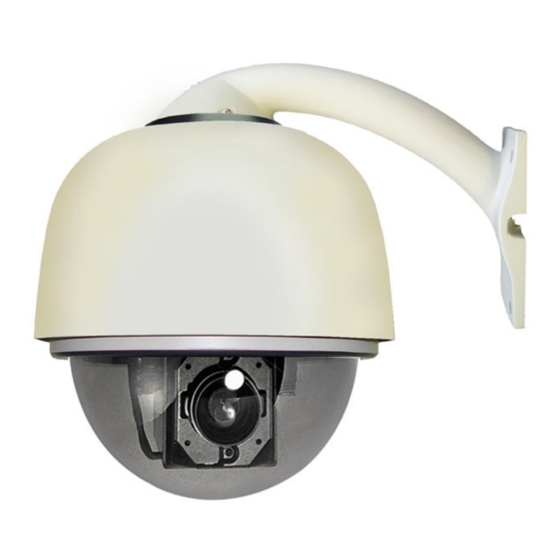
User Manual Tele DM597/DM599 High Speed Dome Before attempting to install or operate on this produce, Please read this manual carefully and keep it for future use. V1.1... -
Page 2: Table Of Contents
Content Chapter One Product Overview I. Performance instruction…………………………………………………………………………………….…2 II. Notice………………………………………………………………...……………………………………….3 III Installation steps of shield dome……………………………………………………………………………..4 IV. Installation Instruction of the Acrylic Demo Shield…………………………………………………………6 V. Install Bend-Tube-Style Bracket……………………………………………………………………………..7 Chapter Two Wiring and Setup of Dome System I. Wiring of Dome System………………………………………………………………………………………8 1. -
Page 3: Chapter One Product Overview
Chapter One Product Overview I. Performance instruction: 1. Address of Dome device is from 0~ ~ ~ ~ 255. The number (address) of dome device in the control system is setup by the hardware (8-digit on and off switch) of dome device. 2. -
Page 4: Notice
Tele Eye is a trademark of Signal Communications Limited and is registered in China, Hong Kong, US and other countries. TeleEye's products are sold under the brand name of CAMERIO in Australia, Japan, Korea, New Zealand, Taiwan and Argentina. CAMERIO is a trademark of Signal Communications Limited and is registered in Australia, Japan, Korea, New Zealand, Taiwan and Argentina. -
Page 5: Installation Steps Of Shield Dome
1. Before installing the full-view High-Speed Dome Video Camera, please read this user’s manual first. 2. This unit should be operated only from the type of power source indicated on the marking label found at the power adapter. If you are not sure of the type of power supply you plan to use, consult your appliance dealer or local power company. - Page 6 III. Installation steps of shield dome. Figure III.1 indicates the fixing holes of acrylic shield, i.e. four M3 screw holes. Fixing holes of shield dome Fig. III.1 Fig. III.2 Step one: Aim the open end of shield dome at the lens of camera. Aim the 4 holes on the shield to the 4 M3 screw holes on the dome device, as indicated in figure III.2.
-
Page 7: Installation Instruction Of The Acrylic Demo Shield
IV. Installation Instruction of the Acrylic Dome Shield 1. Remove Acrylic DOME shield (Please do not scrape the Acrylic shield. It is recommended to wear cotton gloves when operate). 2. As shown in the figure below, first take the flexible flat cable through connector above the base plate and buckle it on the connector. -
Page 8: Install Bend-Tube-Style Bracket
V. Install Bend-Tube-Style Bracket Fig V.1 Connecting the dome to the wall mount with the bracket. Fig V.2 Wall mount bracket installation V1.1... -
Page 9: Chapter Two Wiring And Setup Of Dome System
Chapter Two Wiring and Setup of Dome System I. Wiring of Dome System 1.Basic system connection.(One dome device) From the basic system connection, user can understand the electric wiring attribute of the dome device and bring great operation convenience of installation, testing and demo. When using this product for the first time, please read carefully and follow this electric wiring drawing as any wrong wiring may lead to permanent damage of the dome device or damage of other equipment. -
Page 10: Setting Of Dome Device Communication
On/Off 拔 拔 拔 拔 digit digit digit status 码 码 码 码 digit digit digit 开 开 开 开 Protocol type 关 关 关 关 PELCO-D 波 协 PELCO-P 特 议 率 设 设 置 TeleEye DM2 置 V1.1... -
Page 11: Address Setting Of Dome Device
AAttention: the protocol and baud rate of dome device should comply with those of controller, which need to be restarted after revision. On/Off status digit digit Baud rate 2400 This figure shows protocol of PELCO-D, Baud rate of 2400. 4800 9600 19200 2. -
Page 12: Setting Of Dome Device Id
V1.1... -
Page 13: Chapter Three Fast Operation Guide Of Dome Device
Chapter Three Fast Operation Guide of Dome Device I. Wiring (Please do not turn the power on). OD CONNECT-V3 Socket dome device Cables Image Video+ displayer Video- AC24V (Red) Dome power AC24V (Black) Control signal+ (orange) Control signal- (yellow) Keyboard power Keyboard of controller... -
Page 14: Setting Dome Device Address
III. Setting dome device address. (Turn the power off when setting, and restart the device after revision). The figure shows: Address of the dome device: No. 1 (Please refer to detailed parameter in next chapter) dome Set address for This dip switch located on PCB in the dome device IV. -
Page 15: Chapter Four English Operation Menu Of Dome Device
Chapter Four -English Operation Menu of Dome Device I. Main menu <1>. Press CALL+90+ENTER on the keyboard to enter the main menu of dome device (fig.1). <2>. Select options Joy stick only between up and down, the arrow points to the current selected option. Press OPEN or left or right of Joystick to command entering the submenu of that option or change the value or setting of that option. -
Page 16: Sector Setup
2.Set Preshot <<Set preshot Select preshot and press CLOSE to confirm the IRIS CLOSE When Done programming when done and auto exit and return to the upper stage menu. 3.Call Preshot <<Call preshot. Press OPEN or joystick left or right to enter The action of the dome device can be seen and return Call out to corresponding preshot point. -
Page 17: Control Options
5.Tilt Start pos << Setup tilt start point. Press OPEN or Joy stick left or right to enter Capture the start point and press CLOSE to exit and return to upper stage IRIS CLOSE When Done menu. 6.Tilt End pos <<... -
Page 18: Diagnostic Options
4.Operation ON/OFF <<Default function On/Off Joy stick left or right to select IRIS CLOSE Exit 3.Speed Limit ON/OFF <<Operation speed limit On/Off Joy stick left or right to select 4.Auto Flip ON/OFF <<Auto flip On/Off Joy stick left or right to select 5.Auto Focus PTZ/OFF/Z <<Auto focus options Joy stick left or right to select... -
Page 19: Camera Options
5.Camera Options << Camera options Press OPEN or Joy stick left or right to enter 1.Zoom and Focus << Zoom and focus setting Press OPEN or Joy stick left or right to enter 1.Zoom Speed ( 0~8 ) <<Zoom speed setting. Joystick left or right to select 2.Digital Zoom ON/OFF <<Digital zoom in On/Off Joystick left or right to select 3.AF Sensitivity... -
Page 20: Function Programming
6.Back Light ON/OFF <<Back light On/Off Joystick left or right to select 7.Picture Flip ON/OFF <<Picture flip On/Off Joystick left or right to select 8.Picture LR Rev ON/OFF <<Picture left and right reverse On/Off Joystick left or right to select 9.Picture Stable ON/OFF <<Picture stabilized... - Page 21 2.Program Vector Scan << Program vector scan Press OPEN or Joy stick left or right to enter 1.Number ( 1 ~~ 6 ) <<Vector scan number Joy stick left or right to select 2.Program a Vector scan <<Vector scan programming Press OPEN or Joy stick left or right to enter Name Dwell <<Joystick arbitrarily to move the...
-
Page 22: Program Alarms
3.Program Alarms <<Program alarms. Press OPEN or Joystick left or right to enter Name <<This function is not available at the moment. Name P/V/T 1~128 IRIS CLOSE to Exit 0 1 2 3 4 5 6 7 8 9 IRIS CLOSE When Done V1.1... -
Page 23: Coding Description Of Protocol And Serial Transmission Rate
Chapter Five Coding description of protocol and serial transmission rate When setting communication protocol of the Dome device (first 4 bits of SW2) and default serial transmission rate of the protocol (last 2 bits of SW2), if default serial transmission rate of the protocol does not match with serial transmission rate of host, please set the default serial transmission rate of the protocol consistent with the default serial transmission rate of host according to Chapter two II. - Page 24 Activate Preset Tour T + DWELL + S + TOUR 1) Input a number T, where T represent how much second the camera rest on one tour point before it move to another tour point. 2) Press DWELL. 3) Input S where S is the tour sequence number 4) Press TOUR.
-
Page 25: Chapter Six Trouble Shooting Of Dome Device
Chapter Six Trouble Shooting of Dome Device Problem S.N. Possible Reason Troubleshooting Remarks Description Power cable is connected Check if the power cable improperly. connected to power of AC24V Fault of power PCB of dome Change the power PCB After power on, Please follow the above device no motion and no... - Page 26 Vertical range is not Fault occurs when the Check and adjust the mechanical dome device is in tilt installation within 90 2 degree movement. with large deviation caused by obstacle of camera of other object, which lead to early tilt movement Wrong setting Set the protocol, baud rate and...
Need help?
Do you have a question about the DM597 and is the answer not in the manual?
Questions and answers