Table of Contents
Advertisement
Advertisement
Table of Contents

Related Manuals for Batribike Dash


Summary of Contents for Batribike Dash
- Page 1 Owner Manual LCD Range...
- Page 2 IMPORTANT PLEASE READ THIS MANUAL FULLY PRIOR TO ASSEMBLY AND USE For your safety and to ensure a long and trouble free life of your Batribike bicycle, check the operation of brakes, lights, bell and gears, and check tyre pressures are correct.
-
Page 3: Table Of Contents
Thank you for purchasing a BATRIBIKE Electric Bicycle With care and correct usage your bicycle will give many years of service. Important PLEASE CHARGE THE BATTERY BEFORE FIRST USING THE BICYCLE Even though the battery indicator will show charge this cannot be relied upon until the battery has had the initial full charge. -
Page 4: Parts Identification
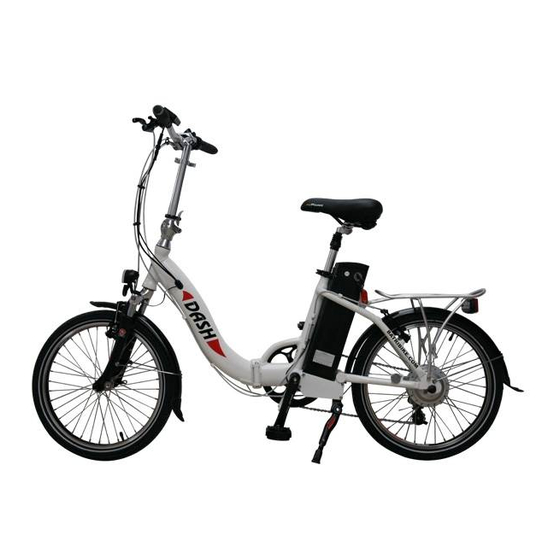
PARTS IDENTIFICATION We continually strive to ensure that we provide you with the best possible products, therefore SPECIFICATIONS ARE SUBJECT TO CHANGE WITHOUT NOTICE Battery Front LED Light Thumb Throttle Battery Meter Rear LED Light Rear Brake Lever Charging Socket Folding Pedals Front Brake Lever Rear Hub Motor... -
Page 6: Battery Charging
CHARGING THE BATTERY The battery can be charged on or off the bike. Sliding Cover To remove the battery, unlock by pushing the key and turning anti-clockwise. Remove the Saddle To remove the battery, unfold the handle and slide the battery upwards. Charging Socket When refitting the battery ensure that it is fully seated and lock back into position using the key. - Page 7 It is perfectly acceptable to recharge the battery after a short ride so that the battery is fully charged before the next ride. If your BATRIBIKE is not in use for an extended period it is imperative that you charge the battery before storage and then charge the battery once a month to prevent deterioration.
-
Page 8: Using The Power Assistance
Usage Your BATRIBIKE Electric Bicycle can be used as a normal pedal cycle by simply not switching on the battery. (or using in Assist Level 0 - see below) Display Information Areas BATTERY STATUS SPEED Buttons POWER DOWN ASSISTANCE CYCLE... - Page 9 ELECTRIC BICYCLE FUNCTIONS Switching On To use under electric power, switch on the battery with the key switch located on the left side of the battery. Then press the POWER button on the handlebar LCD display for two seconds. Control Buttons By means of the other three buttons, SET, UP and DOWN, on the handlebar mounted display unit, the various functions of the power controller...
- Page 10 Battery Meter The LCD shows the charge remaining in the battery in the upper left of the display. The indicators will gradually go out as the battery power is used up. Refer to the table below for details. BATTERY METER DISPLAYS THE CHARGE REMAINING IN THE BATTERY SYMBOL CHARGE EMPTY...
- Page 11 It is important to set the correct wheel size to calibrate the display so that reasonably accurate speed and distance can be shown. The DASH model is supplied with a 20" wheel and has been set to 20.2/1590 prior to leaving the factory.
- Page 12 Pedal Assistance There are 6 levels of pedal assistance available from the motor. Using the UP and DOWN buttons you can select from level 1 (LOW) to 6 (HIGH). The motor will then be activated upon pedalling. There is a rotation sensor located near the crank which senses when the pedals are being used.
- Page 13 Weather and terrain will affect the performance. In hilly areas or when the bike is heavily loaded there will be a significant increase in the power used from the battery and hence the range will decrease accordingly. A lightly loaded bike will achieve higher performance levels.
- Page 14 No Assistance - Normal Pedal Bicycle If the assistance level is set to 0, (ZERO) then the motor will not be turned on. Your BATRIBIKE will now act and feel like a normal bicycle. This is useful when you are feeling fit at the start of a journey or using your bike for exercise purposes.
- Page 15 If you want continuous power then one of the Assist modes should be selected. BS EN15194 Compliance The BATRIBIKE DASH conforms to BS EN15194. For the British market, the addition of a throttle control has rendered this not compliant in some countries. ●...
-
Page 16: Cycle Computer Functions
CYCLE COMPUTER The LCD models have useful Cycle Computer functions built in. There is a built in sensor and pickup located in the rear hub which activates the speed and distance readings. Total Distance The default display mode will show the TOTAL DISTANCE travelled by the bike. -
Page 17: Trip Time
Trip Time When the TRIP TIME icon is selected, the lower right of the display will show the time spent cycling since the last reset. This will show in hours and minutes. Maximum Speed When the MAXIMUM SPEED icon is selected the lower right of the display will show the maximum speed reached since the last reset. -
Page 18: Standard Bicycle Functions
STANDARD BICYCLE FUNCTIONS Gears DASH is provided with 6 speed Shimano gears. To change gear you use the right handlebar mounted selector. Gear number 1 is low for hills and rough terrain and gear 6 is high for normal road use. To increase the gear simply press the + button with your right thumb. -
Page 19: Side Stand
Bell The bell is integrated into the left brake lever. To operate the bell, pull the small lever towards the handlebar grip, then release. Braking To stop, release the throttle and pull the brake levers. Side Stand To put the bicycle on its stand:- 1) While holding the bicycle upright, push the stand to its full extent. - Page 20 Quick Release fittings for Seat Height Adjustment With the locking lever in the loose position, tighten the nut until finger tight. The final tightening is done by moving the lever to the locked position. To undo move the lever to the loose position to enable height adjustment.
- Page 21 The luggage rack provided is designed to carry a maximum load of 25kg. Make sure that any items carried are securely strapped and nothing is able to get caught in the rear wheel. BATRIBIKE All other operation of your Electric Bicycle is as per a...
-
Page 22: Maintenance Schedule
Beyond this manual, it is good to consult your BATRIBIKE dealer for advice if you are at all unsure about any of the procedures described. Normal maintenance is not covered under the warranty and this service may be chargeable. -
Page 23: Removing The Rear Wheel
● Hub motor and general inspection We recommend you arrange to have a thorough inspection of your bicycle by a BATRIBIKE dealer. This includes opening up the hub motor to inspect and lubricate the gears. Tyre Pressures The tyres should be pumped up to within the range stated on the sidewall. -
Page 24: Warranty
Warranty. The guarantee starts on the date of purchase. ● Warranty is non transferable and applies only to the original owner. The Frame of your new BATRIBIKE Dash is guaranteed for 3 ● years from date of purchase. - Page 25 Your Local Authority should have the necessary facilities in place. If you prefer you may take your original battery to BATRIBIKE for recycling. Never dispose of batteries in a fire or subject to puncture or crushing.
- Page 26 DASH Technical Specifictaion...
- Page 28 BATRIBIKE Electric Bicycles are exclusive to:- Fallowgate Limited Kellaway House Marton Road Sturton-by-Stow BATRIBIKE are Lincoln Full Members of LN1 2AH the British Electric Phone: 01427 787774 Bicycle Association E-mail: support@batribike.com ----- USER MANUAL Dash 2013 - ISSUE 1 - ©2012 Fallowgate Limited -----...
Need help?
Do you have a question about the Dash and is the answer not in the manual?
Questions and answers