
Related Manuals for Avtech AVN80X


Summary of Contents for Avtech AVN80X
-
Page 1: Operation Guide
AVN80X MEGAPIXEL NETWORK CAMERA SERIES OPERATION GUIDE Please read instructions thoroughly before operation and retain it for future reference. n80x_system_V1.1... - Page 2 IMPORTANT SAFEGUARD All lead-free products offered by the company comply with the requirements of the European law on the Restriction of Hazardous Substances (RoHS) directive, which means our manufacture processes and products are strictly “lead-free” and without the hazardous substances cited in the directive. The crossed-out wheeled bin mark symbolizes that within the European Union the product must be collected separately at the product end-of-life.
- Page 3 MPEG4 Licensing THIS PRODUCT IS LICENSED UNDER THE MPEG4 VISUAL PATENT PORTFOLIO LICENSE FOR THE PERSONAL AND NON-COMMERCIAL USE OF A CONSUMER FOR (i) ENCODING VIDEO IN COMPLIANCE WITH THE MPEG4 VISUAL STANDARD (“MPEG-4 VIDEO”) AND/OR (ii) DECODING MPEG4 VIDEO THAT WAS ENCODED BY A CONSUMER ENGAGED IN A PERSONAL AND NON-COMMERCIAL ACTIVITY AND/OR WAS OBTAINED FROM A VIDEO PROVIDER LICENSED BY MPEG LA TO PROVIDE MPEG4 VIDEO.
-
Page 4: Table Of Contents
TABLE OF CONTENTS 1. OVERVIEW............................1 1.1 Product Features............................1 1.2 Package Content............................1 1.3 Product Overview ............................1 1.4 Rear Panel ..............................2 1.5 External I/O Port............................2 1.6 Status Indicator............................2 1.7 Micro SD Card............................3 2. CAMERA ACCESS WITH INTERNET EXPLORER................4 2.1 Camera Login............................ -
Page 5: Overview
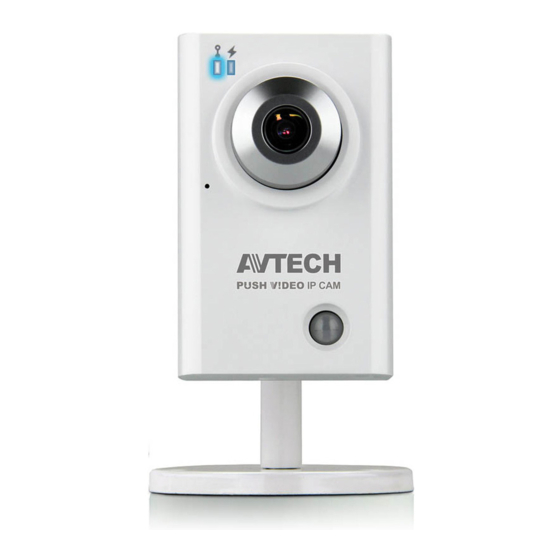
1. OVERVIEW 1.1 Product Features Easy network setup with your iPhone / iPad 1.3 Megapixel live MOS sensor with HDTV 720p quality, allowing users to notice minor details more easily SD card support for video storage Push Video support to send an event notification to your iPhone and Android phones immediately once the specified event type is triggered, and play video recording once you confirm the receipt. -
Page 6: Rear Panel
1.4 Rear Panel Ethernet: Connect your network cable. DC 5V: Connect the supplied regulated power supply. Reset: With the power connected, press to reset all parameters, including the IP address to factory default settings. The camera will reboot after default reset. Please do not disconnect your camera during the reset process. -
Page 7: Micro Sd Card
1.7 Micro SD Card For local video recording, a micro SD card slot can be found on the side of the camera. With the golden contact toward the slot, slightly push and insert the optional micro SD card to the slot, as indicated on the right. Note: It’s recommended to insert or remove the micro SD card with power disconnected, or the camera will reboot. -
Page 8: Camera Access With Internet Explorer
2. CAMERA ACCESS WITH INTERNET EXPLORER This network camera can be accessed via Microsoft® Internet Explorer® and iPhone / iPad / Android mobile devices with our self-developed program “EagleEyes” installed depending on different using situations. Note: For details about accessing network cameras via iPhone / iPad / Android mobile devices, please refer to http://www.eagleeyescctv.com. - Page 9 Function Icon User Level Description Supervisor / Power User Switch to the live view page. Live / Normal User / Guest Switch to the DPTZ configuration page. Supervisor / Power User DPTZ For details, please refer to “2.3 Digital PTZ (DPTZ) Operations” at page / Normal User Enter the event record list for video playback.
-
Page 10: Digital Ptz (Dptz) Operations
2.3 Digital PTZ (DPTZ) Operations This camera has PTZ capability, i.e. digital PTZ (hereafter called “DPTZ”), for wide area monitoring. STEP1: Click “DPTZ” to show the DPTZ control panel. STEP2: Select the functions when needed: ICON FUNCTION DESCRIPTION There are several display resolutions available. When the selected resolution is out of your current live view support, a part of your surveillance area might get covered on the screen, and you need to manually move on the screen to check the covered part. -
Page 11: Event Record Search & Playback
2.4 Event Record Search & Playback Note: This function is available only when a compatible micro SD card is inserted to this camera. To know how and where to insert a micro SD card, please refer to “1.7 Micro SD Card” at page 3. To know the compatible list of micro SD cards, please refer to “APPENDIX 3 MICRO SD CARD COMPATIBLE LIST”... -
Page 12: Camera Configurations
3. CAMERA CONFIGURATIONS Users can further configure this network camera by accessing via Internet Explorer. Note: You need to be “Supervisor” or “Power User” to enter the system configuration page. If not, please re-log into the camera with the supervisor user level. 3.1 System configuration menu Click “Config.”... -
Page 13: Network
Main Menu Sub-Menu Reference 1. Select the language of the web browser. General General 2. Check the MAC address of the camera. 3. Lock camera access after the specified time. Time Set daylight saving time and the current time. Available for Supervisor only. Server Log Check the system event logs. -
Page 14: Ftp
Function Description NTP Server Simply use the default SNTP server (For example, tock.stdtime.gov.tw) or change to another server with which users are familiar. Sync Click and the network camera will synchronize the time with the network time. 3.2.4 FTP Enter the detailed FTP information and click “Save” to confirm. The information you set here will be applied when “FTP”... -
Page 15: Filter
3.2.6 Filter Choose to permit or block the IP address(es) which can access this camera, and click “Save” to confirm. Function Description Filter Configuration Error Count Set the maximum count for login failure. When the maximum count is reached, the IP address trying to access the network camera will be locked. -
Page 16: Camera
Note: When the configurations are saved successfully, you’ll see a message indicating the IP address and port number assigned to this network camera. 3.3 Camera 3.3.1 Camera Adjust the camera parameters if necessary. Item Description Title Enter the title for the camera with up to 15 alphabetic characters. Snapshot Path Specify the location to save the snapshot pictures. -
Page 17: Cruise
How to check an existing preset point In “Available Positions”, select the name of the point you want to check from the drop-down list, and click “Goto”. You will see the camera view on the right side moving to the point it’s recorded. How to delete an existing preset point In “Available Positions”, select the name of the point you want to check from the drop-down list, and click “Remove”. -
Page 18: Color
Step2: Click “Add” again to add more preset points. To modify the existing preset point setting, click “Edit”. To insert a preset point before the selected point, click “Insert”. To remove the added preset point, click “Delete”. Step3: When all the points are added, click “Save” to confirm. 3.3.4 Color Adjust the color performance from Brightness, Contract, Hue and Saturation. -
Page 19: Audio
3.3.6 Audio Drag the slider to adjust the volume of the microphone and speaker. 3.4 Record Timer 3.4.1 Record Note: Before configuring this function, make sure a micro SD card is inserted into your camera for video data saving. For details, please refer to “1.7 Micro SD Card” at page 3. In “Record Configuration”, you can: Enable or disable all the record functions, such as manual record, motion record and alarm record. -
Page 20: Storage
3.5 Storage 3.5.1 SD Card In “SD Card”, you can check the current status of your micro SD card, and clear all recorded data saved in the card if needed. 3.6 Trigger 3.6.1 Trigger You can configure how this camera reacts when there’s an alarm, motion, PIR and audio event. Detect Item Description... -
Page 21: Push Video
Item Description Audio Detection Enable (ON) or disable (OFF) audio detection. This function allows the camera to be sensitive to any sound made around the surveillance area if your area is supposed to be a quiet place and no one is allowed to access. When this function is enabled, click the title “Audio Detection”... -
Page 22: General
Item Description SMS Text Define the context when you receive the Push Video message on your iPhone or Android mobile device. Up to 28 characters are allowed. 3.7 General 3.7.1 General In “General”, you can select the UI language, and check the MAC address of your camera. To allow the status LED indicators to show the status as indicated in “1.6 Status Indicator”... -
Page 23: Server Log
3.7.3 Server Log Note: This function is available only for “Supervisor”. To quickly search the system logs you want by event type, click “Prev. Page” or “Next Page” to find the logs you want, or check the event type(s) and click “Reload” to start searching. To clear all system event logs, click “Clear All”. -
Page 24: Upgrade
Column Description User Name Set a user name that will be used for camera access. The user name allows up to 16 alphanumeric characters. Password Set the password that will be used for remote login. The password allows up to 16 alphanumeric characters. Confirm Password Enter the password again to confirm. -
Page 25: Appendix 1 Product Specifications
APPENDIX 1 PRODUCT SPECIFICATIONS AVN80X ▓ Network Network Compression H.264 / MPEG4 / MJPEG Multiple Video Streaming 3 (H.264, MJPEG, MPEG4) (Encode Modes, IPS, Resolution) LAN Port LAN Speed 10/100 Based-T Ethernet DDNS, PPPoE, DHCP, NTP, SNTP, TCP/IP, Supported Protocols... -
Page 26: Appendix 2 Bit Rate Table For Reference
APPENDIX 2 BIT RATE TABLE FOR REFERENCE The data below is for reference only. The bit rates listed here may vary depending on the resolution, image quality & frame rate you choose, the complexity of your monitoring area, and how often the moving objects show in your monitoring area. Testing Environment Place: Office Entrance Network translation: H.264... - Page 27 Resolution Quality Frame Rate (Dynamic) kbps (Static) kbps SXGA Best 1/15 High Normal Basic Best High Normal Basic QVGA Best High Normal Basic...
-
Page 28: Appendix 3 Micro Sd Card Compatible List
APPENDIX 3 MICRO SD CARD COMPATIBLE LIST Manufacturer Capacity Class Manufacturer Capacity Class ADATA Transcend Class 6 Class 2 Apacer Class 4 Class 4 Class 6 SanDisk Class 6 Class 4 16GB Class 10 Class 4 Kingston 16GB Class 4 Class 4 32GB Class 4... -
Page 29: Appendix 4 Q&A
& Email notification methods. For this function to work normally, you need playback video clip but live images to install a micro SD card to AVN80X before this function is enabled. Or, when I select “View” for Push Video you’ll get live images when you select “View” for Push Video message.
Need help?
Do you have a question about the AVN80X and is the answer not in the manual?
Questions and answers