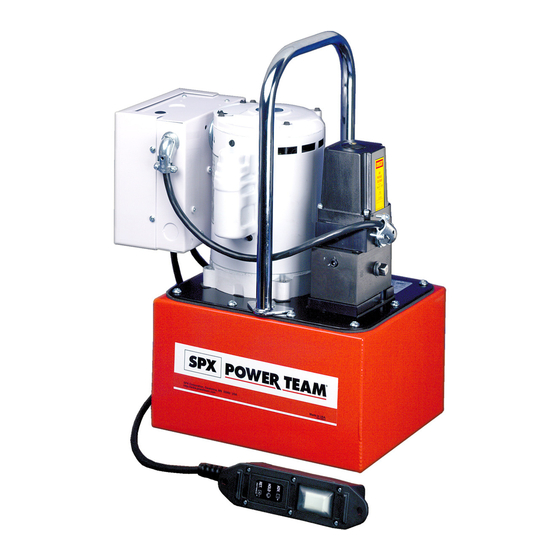
SPX PE8 Series User Manual

SPX PE8 Series User Manual

8 & 17 series electric-powered two-stage hydraulic pump
Hide thumbs Also See for PE8 Series:

Advertisement

User Manual for:
PE8 Series
PE17 Series
Electric-Powered
8 & 17 Series
Two-Stage Hydraulic Pump
Form No. 1000559
Rev. 0 February 3, 2012
© SPX

Advertisement

Table of Contents
loading

Summary of Contents for SPX PE8 Series

  • Page 1 User Manual for: PE8 Series PE17 Series Electric-Powered 8 & 17 Series Two-Stage Hydraulic Pump Form No. 1000559 Rev. 0 February 3, 2012 © SPX...
  • Page 2 Form No. 1000559 Rev. 0 February 3, 2012 © SPX...
  • Page 3: Table Of Contents

    Power Team Facilities ..........21 Form No. 1000559 Rev. 0 February 3, 2012 © SPX...
  • Page 4: Description

    Extremely quiet noise level (67-81 dBA). The PE8-series pumps are equipped with 1,725 rpm, single-phase, thermal protected induction motor. Figure 1. PE172SM Figure 2. PE84 Form No. 1000559 Rev. 0 February 3, 2012 © SPX...
  • Page 5: Control Valves

    HOLD RETURN pump mounted solenoid operated, normally closed PUMP “ON” PUMP “OFF” PUMP “OFF” SOLENDOID SOLENDOID SOLENDOID Diagrams DE-EMERGIZED DE-EMERGIZED EMERGIZED PE172S PE172SM Tank From Pump Table 1. Pump Configurations Form No. 1000559 Rev. 0 February 3, 2012 © SPX...
  • Page 6 Use with Valve No. Cylinder Type Single acting 45554 Auto/Dump manifold advance return ADVANCE RETURN Diagrams PUMP “ON” PUMP “OFF” PE172A PE172AM From Pump Tank Table 1. Pump Configurations (continued) Form No. 1000559 Rev. 0 February 3, 2012 © SPX...
  • Page 7: Safety Symbols And Definitions

    • Retract the system before adding fluid to prevent overfilling the pump reservoir. An overfill can cause personal injury due to excess reservoir pressure created when cylinders are retracted. • The load must be under operator control at all times. Form No. 1000559 Rev. 0 February 3, 2012 © SPX...
  • Page 8 Hoses also must not come in contact with corrosive material such as creosote- impregnated objects and some paints. Consult the manufacturer before painting a hose. Never paint the couplers. Hose deterioration due to corrosive materials may Form No. 1000559 Rev. 0 February 3, 2012 © SPX...
  • Page 9 • To help prevent personal injury, do not allow personnel to go under or work on a load before it is properly cribbed or blocked. All personnel must be clear of the load before lowering. Form No. 1000559 Rev. 0 February 3, 2012 © SPX...
  • Page 10 SAE grade 8 or better fasteners when attaching components to cylinders or rams and tighten securely. • Limiting the stroke and pressure on all cylinders will prolong their life. Form No. 1000559 Rev. 0 February 3, 2012 © SPX...
  • Page 11: Initial Setup

    Low voltage may cause: an overheated motor; a motor that fails to start under load; motor surging when trying to Form No. 1000559 Rev. 0 February 3, 2012 © SPX...
  • Page 12 IMPORTANT: Some spring return cylinders or rams have a cavity in the rod which forms an air pocket. This type of cylinder or ram should be bled when positioned upside down or lying on its side with the port facing upward. Form No. 1000559 Rev. 0 February 3, 2012 © SPX...
  • Page 13 9678). Install the elbow as shown. 3. Install sealant tape or non hardening sealer to the gauge. Figure 5. Elbow Installation 4. Refer to Figure 6. Install the pressure gauge. Figure 6. Pressure Gauge Installation Form No. 1000559 Rev. 0 February 3, 2012 © SPX...
  • Page 14: Operating Instructions

    Figure 9. Advance-Hold-Retract switch and hold to retract the cylinder. Remote 6. Release the rocker switch and the pump will stop but the system will hold. Generally used on 4-Way- 2-Position valves. Form No. 1000559 Rev. 0 February 3, 2012 © SPX...
  • Page 15 The pressure regulating valve bypasses this surplus fluid, preventing it from going into the system. As a result, the pressure differential can be held to approximately 20 Bar (300 PSI). Form No. 1000559 Rev. 0 February 3, 2012 © SPX...
  • Page 16: Performance Specifications

    PSI) (1,000 PSI) (5,000 PSI) (10,000 PSI) 690 Bar (10,000 PSI) PE17 690 Bar (10,000 PSI) ** Typical delivery. Actual flow varies with field conditions. Table 4. Fluid Pressure Chart Form No. 1000559 Rev. 0 February 3, 2012 © SPX...
  • Page 17: General Maintenance

    2. Drain, flush, and refill the reservoir with an approved Power Team hydraulic fluid after every 300 hours of use. The frequency of fluid changes depends upon general working conditions, severity of Form No. 1000559 Rev. 0 February 3, 2012 © SPX...
  • Page 18 5. Use only Power Team hydraulic fluid rated at AW 46 47 cSt @ 38°C (215 SUS @ 100°F). If low temperature requirements are needed, use hydraulic fluid 5.1 cSt @ 100°C (451 cSt @ -40°C). Form No. 1000559 Rev. 0 February 3, 2012 © SPX...
  • Page 19 3. The brush assemblies must be replaced if they are 4.5mm (1/8") long or less. See Figure 11. 4. Install brush assemblies, brush holder caps, and metal brush cover plates. Replace when 4.5 mm (1/8") or less 22 mm (7/8") (new) Figure 11. Brush Inspection Form No. 1000559 Rev. 0 February 3, 2012 © SPX...
  • Page 20: Troubleshooting Guide

    5. Relief valve or low pressure 5. Readjust as needed. unloading valve out of adjustment. 6. Sheared drive shaft key(s). 6. Replace. 7. Motor rotating in wrong 7. Reverse rotation. direction. Form No. 1000559 Rev. 0 February 3, 2012 © SPX...
  • Page 21 2. Increase air pressure. motor only). Pump delivers excess 1. Pressure gauge is not accurate. 1. Calibrate gauge. hydraulic fluid pressure. 2. Relief valve not properly set. 2. Reset the relief valve. Form No. 1000559 Rev. 0 February 3, 2012 © SPX...
  • Page 22 2. Seat the ball check. Inspect and is leaking past the low-to-high replace any faulty components. pressure check. This hydraulic fluid leaks back to the piston in the automatic valve, keeping the piston closed. Form No. 1000559 Rev. 0 February 3, 2012 © SPX...
  • Page 23: Power Team Facilities

    Power Team Facilities UNITED ST ATES CHINA EUROPE C E R T I F I E D SPX Hydraulic Technologies No. 1568 Hua Shan Road Albert Thijsstraat 12 6471 WX Eygelshoven International Park Center 5885 11th Street The Netherlands Shanghai 200052, China...

This manual is also suitable for:

Pe17 series

Table of Contents