RAIS RONDO User Manual
Hide thumbs
Also See for RONDO:
- User manual (44 pages) ,
- Instructions for installation, use and maintenance manual (38 pages) ,
- Instructions for installation, use and maintenance manual (38 pages)

Related Manuals for RAIS RONDO


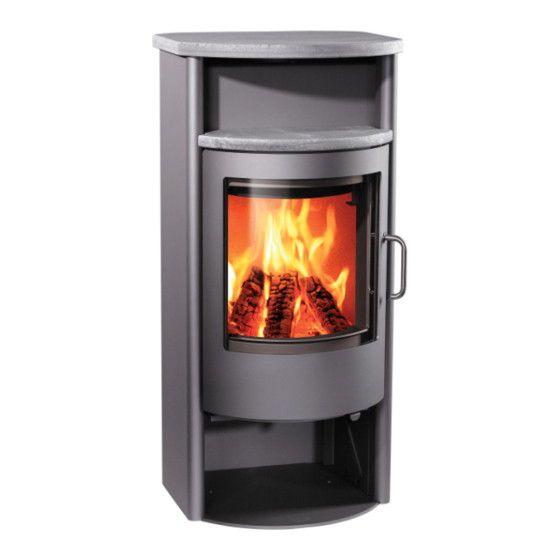
Summary of Contents for RAIS RONDO
- Page 1 ENGLISH RAIS - Manual for RONDO & MINO II U S E R M A N U A L RAIS Rondo & RAIS Mino II...
-
Page 2: Table Of Contents
Modified : 2 Date : March 2008 INTRODUCTION....................................4 WARRANTY ......................................4 SPECIFICATIONS RAIS MINO II, MINO II SOAPSTONE AND RONDO: ................5 CONVECTION ....................................6 INSTALLATION INSTRUCTION ................................ 7 CHIMNEY ......................................8-9 INSTALLATION ....................................11 OPERATION OF SWIVEL BASE (RAIS RONDO) ........................11 ADJUSTMENT OF CHIMNEY CONNECTION ........................ -
Page 3: Introduction
HETAS Ltd as an intermittent operating appliance for burning wood logs only. A RAIS wood burning stove is more than just a heat source: it also shows that you care about design and quality in your home. To make the most of your wood burning stove it is important that you read the manual thoroughly, before installing and using it. -
Page 4: Convection
Competent Person registered with a Government approved Competent Persons Scheme. The stoves are equipped with a “cold” lever – RAIS special feature – which means you HETAS Ltd operate such a Scheme and a listing of their Registered Competent Persons can could almost do away with gloves. -
Page 5: Chimney
ENGLISH RAIS - Manual for RONDO & MINO II ENGLISH RAIS - Manual for RONDO & MINO II Chimney If it is found that there is excessive draught in the chimney then either an adjustable flue damper or alternatively a draught stabiliser should be fitted. The adjustable flue damper The chimney is the driving force which makes the stove function. -
Page 6: Installation
043-168 RAIS A/S, Industrivej 20, 9900 Frederikshavn, Danmark When you choose where to set up your RAIS wood burning stove, you should consider EN 13240:2001+A2:2004 the heat distribution to the other rooms. This will enable you to get the best use of your Anordning til træ... -
Page 7: Adjustment Of Chimney Connection
ENGLISH RAIS - Manual for RONDO & MINO II ENGLISH RAIS - Manual for RONDO & MINO II Adjustment of chimney connection Remove the casing knock-out. The stove is always delivered for top connection, but can be changed to rear connection... -
Page 8: Installation Of Soapstone (Rais Mino Soapstone)
ENGLISH RAIS - Manual for RONDO & MINO II ENGLISH RAIS - Manual for RONDO & MINO II Assembly of soapstone sides Installation of soapstone (RAIS Mino II Soapstone) Install the fitting for the soapstone as well as the spring square using the supplied low- head screws. - Page 9 ENGLISH RAIS - Manual for RONDO & MINO II ENGLISH RAIS - Manual for RONDO & MINO II Install right and left soapstone Fit the baking compartment stone and the using the supplied pointed screws. The soapstone is top plate.
-
Page 10: Installation Distance In Case Of Combustible Wall
ENGLISH RAIS - Manual for RONDO & MINO II ENGLISH RAIS - Manual for RONDO & MINO II Installation distance in case of combustible wall 360° swivel base - normally placed as a To find out whether the wall next to where the stove is going to be installed is flammable, room divider you should contact your building contractor or the local building authorities. -
Page 11: For The Installer
ENGLISH RAIS - Manual for RONDO & MINO II ENGLISH RAIS - Manual for RONDO & MINO II For the Installer Operating instructions Please note that HETAS Approval only covers the use of wood in the stove Finally before firing the stove for the first time a check should be made to ensure that the... -
Page 12: Drying And Storage
When the flames are clear and yellow, the damper is set correctly, i.e. resulting in a slow/optimal burning. Regulating the combustion air All RAIS stoves are equipped with a one-handed operating lever for regulating the damper. The stove-specific regulating mechanisms can be seen on the diagrams. Position 3 Lift the lever upwards and push to the right. -
Page 13: First Usage
ENGLISH RAIS - Manual for RONDO & MINO II ENGLISH RAIS - Manual for RONDO & MINO II First usage A careful start pays off. Start with a small fire, so that the wood burning stove can get ac- customed to the high temperature. This gives the best start and any damage is avoided. -
Page 14: Lighting And Fuelling
ENGLISH RAIS - Manual for RONDO & MINO II ENGLISH RAIS - Manual for RONDO & MINO II Lighting and fuelling To light the stove, use alcohol briquettes or similar, as well as approx. 2 kg of firewood, split into kin- When the flames are clear - after approx. -
Page 15: Cleaning And Care
- Now rub with a piece of paper and the glass will become clean. Soot on glass: - As an alternative you can use glass polish, which you can buy from you RAIS distributor. Clean the exterior with a dry sponge. -
Page 16: Accessories And Spare Parts
Accessories and spare parts RAIS Mino II Soapstone plate for baking compartment If spare parts other than those recommended by RAIS are used, the warranty is voided. Item number: All replaceable parts can be bought as spare parts from your RAIS distributor. - Page 17 ENGLISH RAIS - Manual for RONDO & MINO II ENGLISH RAIS - Manual for RONDO & MINO II Spare parts diagram - Mino II Pos. Number Item no./description 9057002 Soapstone top plate with hole 9057001 Soapstone top plate without hole...
- Page 18 ENGLISH RAIS - Manual for RONDO & MINO II ENGLISH RAIS - Manual for RONDO & MINO II Spare parts diagram - RAIS Mino II Soapstone Pos. Number Item no./description 9057002 Soapstone top plate with hole 9057001 Soapstone top plate without hole...
- Page 19 ENGLISH RAIS - Manual for RONDO & MINO II ENGLISH RAIS - Manual for RONDO & MINO II Spare parts diagram - RAIS Rondo Pos. Number Item no./description 5057002 Soapstone top plate with hole 5057001 Soapstone top plate without hole...
- Page 20 ENGLISH RAIS - Manual for RONDO & MINO II ENGLISH RAIS - Manual for RONDO & MINO II...
- Page 21 RAIS A/S Industrivej 20 DK-9900 Frederikshavn www.rais.dk...
Need help?
Do you have a question about the RONDO and is the answer not in the manual?
Questions and answers