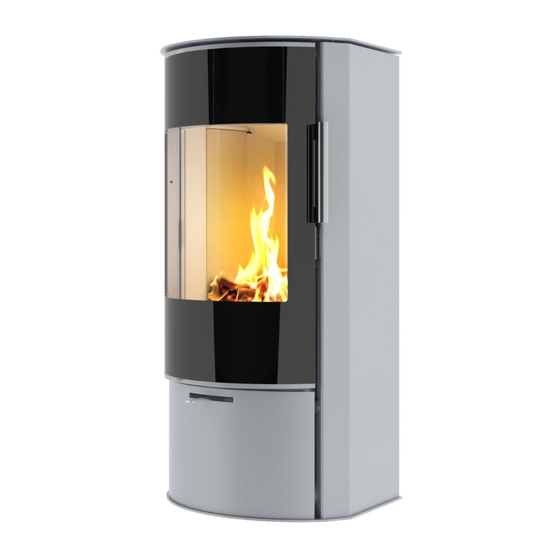
RAIS Rina User Manual
Hide thumbs
Also See for Rina:
- User manual (107 pages) ,
- Instructions for installation, use and maintenance manual (57 pages) ,
- Instructions for installation, use and maintenance manual (54 pages)

Related Manuals for RAIS Rina


Summary of Contents for RAIS Rina
- Page 1 English RAIS - Manual for RAIS Rina, RAIS Viva U S E R M A N U A L M A N U A L D ’ U T I L I S AT E U R G E B R U I K E R S H A N D L E I D I N G...
-
Page 3: Table Of Contents
ACCESSORIES AND SPARE PARTS ....................... 26 SPARE PART DIAGRAMS RAIS RINA 90 ....................27 SPARE PART DIAGRAMS RAIS VIVA 98 WITH SIDE GLASS ..............28 SPARE PART DIAGRAMS RAIS VIVA 98 WITHOUT SIDE GLASS ............29 SPARE PART DIAGRAMS RAIS VIVA 120 WITH SIDE GLASS ..............30 SPARE PART DIAGRAMS RAIS VIVA 120 WITHOUT SIDE GLASS ............ -
Page 4: Introduction
SCA/HETAS Ltd as intermittent operating appliances for burning wood logs only. A RAIS wood burning stove is more than just a heat source: it also shows that you care about design and quality in your home. To make the most of your wood burning stove it is important that you read the manual thoroughly, before installing and using it. -
Page 5: Specifications
English RAIS - Manual for RAIS Rina, RAIS Viva Specifications... -
Page 6: Installation Instructions
English RAIS - Manual for RAIS Rina, RAIS Viva Installation instructions The following pages give instructions for the safe and proper installation of this heating appliance in the UK. These instructions cover the basic principles of installation, although detail may need slight modification to suit particular local site conditions. In all cases the installation must comply with current UK Building Regulations, Local Authority Byelaws and other specifications or regulations as they affect the installation of the stove. -
Page 7: Convection
The heated air pours out at the top of the stove, which ensures a circulation of warm air throughout the room. The stoves are equipped with a “cold” lever – RAIS special feature – which means you could almost do away with gloves. Be aware, however, that all exterior surfaces become hot during use - so take extreme care. -
Page 8: Installation
English RAIS - Manual for RAIS Rina, RAIS Viva A single wall metal fluepipe is suitable for connecting the stove to the chimney but is not suitable for using for the complete chimney. The chimney and connecting fluepipe must have a minimum diameter of 150 mm and its dimension should be not less than the size of the outlet socket of the stove which is 150 mm in diameter. - Page 9 When you choose where to set up your RAIS wood burning stove, you should consider the heat distribution to the other rooms. This will enable you to get the best use out of your stove.
-
Page 10: Change Of Chimney Connection
English RAIS - Manual for RAIS Rina, RAIS Viva Change of chimney connection The stove is delivered ready for top outlet, but may be changed to back outlet in the fol- lowing way: Strike out the knock out plate at the rear of stove. -
Page 11: Installation Distance In Case Of Combustible Wall
English RAIS - Manual for RAIS Rina, RAIS Viva Installation distance in case of combustible wall To find out whether the wall next to where the stove is going to be installed is flammable, you should contact your building contractor or the local building authorities. -
Page 12: General Installation (Right Angle) - Rina
English RAIS - Manual for RAIS Rina, RAIS Viva Normal set-up - corner setting Rais Rina Distance to furniture 700 mm Distance to flammable materials: B. - in front (floor) 300 mm C. - to the side (floor) 150 mm D. -
Page 13: General Installation (Right Angle) - Viva
English RAIS - Manual for RAIS Rina, RAIS Viva Normal set-up - corner setting Rais Viva Rais Viva G Distance to furniture 700 mm 650 mm Distance to flammable materials: B. - in front (floor) 300 mm 300 mm C. -... -
Page 14: Corner Installation 45° - Rina
English RAIS - Manual for RAIS Rina, RAIS Viva Corner setting 45° Rais Rina Distance to furniture 700 mm Distance to flammable materials: B. - in front (floor) 300 mm C. - to the side (floor) 150 mm D. -... -
Page 15: Corner Installation 45° - Rina
English RAIS - Manual for RAIS Rina, RAIS Viva Corner setting 45° Rais Viva Rais Viva G Distance to furniture 700 mm 650 mm Distance to flammable materials: B. - in front (floor) 300 mm 300 mm C. - to the side (floor) -
Page 16: 360° Swivel Base - Viva
English RAIS - Manual for RAIS Rina, RAIS Viva 360° swivel base Rais Viva Rais Viva G Distance to furniture 700 mm 650 mm Distance to flammable materials: C. - to the side (floor) 300 mm 300 mm ... -
Page 17: Installation Distance In Case Of Non-Combustible Wall
English RAIS - Manual for RAIS Rina, RAIS Viva Installation distance in case of non-combustible wall We recommend a minimum distance to non-combustible material of 50 mm (F) for cleaning considerations. It should always be possible to access the access door. -
Page 18: For The Installer
English RAIS - Manual for RAIS Rina, RAIS Viva For the Installer Finally before firing the stove for the first time a check should be made to ensure that the assembly and stove installation has been satisfactory and that there are no leaks in any seals in the appliance and appliance connections to the chimney. -
Page 19: Operating Instructions
English RAIS - Manual for RAIS Rina, RAIS Viva Operating instructions Please note that HETAS Ltd Appliance Approval only covers the use of dry seasoned wood logs on this appliance. HETAS Ltd Approval does not cover the use of other fuels either alone or mixed with the wood logs, nor does it cover instructions for the use of other fuels. - Page 20 English RAIS - Manual for RAIS Rina, RAIS Viva IMPORTANT - Warning Note! Properly installed, operated and maintained this appliance will not emit fumes into the dwelling. Occasional fumes from de-ashing and re-fuelling may occur. However, persistent fume emission is potentially dangerous and must not be tolerated. If fume emission does persist, the following immediate actions should be taken: (a) Open doors and windows to ventilate room.
-
Page 21: Drying And Storage
2-3 days before you need it. Regulating the combustion air All RAIS stoves are equipped with a one-handed operating lever for regulating the damp- er. The stove-specific regulating mechanisms can be seen on the diagrams. Primary air is the combustion air added to the primary combustion zone, i.e. the bed of glowing embers. -
Page 22: Using The Wood Burning Stove
English RAIS - Manual for RAIS Rina, RAIS Viva Using the wood burning stove (front of the user manual) Adjustment of the air damper - the damper has 3 settings Position 1 The damper is almost closed meaning that there is a minimal air intake. -
Page 23: Lightning And Fuelling
English RAIS - Manual for RAIS Rina, RAIS Viva Lighting and fuelling (back of the user manual) ”Top-Down” lighting Start by placing 3-4 pieces wood - approx. 1½-2 kilogram - in the bottom of the burning chamber. Place approx. 1kilogram of dry firewood, split into kindling sticks., and a couple of alcohol briquettes or similar (1-2). -
Page 24: Cleaning And Care
- Moisten a piece of paper or newspaper, dip it in the ash, and rub the sooty glass with it. - Now rub with a piece of paper and the glass will become clean. - As an alternative you can use glass polish, which you can buy from you RAIS distributor. Clean the exterior with a dry sponge. -
Page 25: Interruption Of Operation
- leaky chimney - leakage between chimney and flue If your stove continues to malfunction, we recommend that you contact your RAIS dis- tributor or chimney sweep. IMPORTANT!! To ensure safe burning there must be clear yellow flames or clear embers at all times. -
Page 26: Accessories And Spare Parts
English RAIS - Manual for RAIS Rina, RAIS Viva Accessories and spare parts If spare parts other than those recommended by RAIS are used, the warranty is voided. Swivel base 2311590 - 8142390 - Ball coupling... -
Page 27: Spare Part Diagrams Rais Rina 90
RAIS - Manual for RAIS Rina, RAIS Viva Spare parts drawing Rina 90 (back of the user manual) All replaceable parts can be bought as spare parts from your RAIS distributor. See the following spare parts diagrams for the individual products. Pos./Ref. -
Page 28: Spare Part Diagrams Rais Viva 98 With Side Glass
RAIS - Manual for RAIS Rina, RAIS Viva Spare parts drawing Viva 98 with side glass (back of the user manual) All replaceable parts can be bought as spare parts from your RAIS distributor. See the following spare parts diagrams for the individual products. Pos./Ref. -
Page 29: Spare Part Diagrams Rais Viva 98 Without Side Glass
RAIS - Manual for RAIS Rina, RAIS Viva Spare parts drawing Viva 98 without side glass (back of the user manual) All replaceable parts can be bought as spare parts from your RAIS distributor. See the following spare parts diagrams for the individual products. Ref. -
Page 30: Spare Part Diagrams Rais Viva 120 With Side Glass
RAIS - Manual for RAIS Rina, RAIS Viva Spare parts drawing Viva 120 with side glass (back of the user manual) All replaceable parts can be bought as spare parts from your RAIS distributor. See the following spare parts diagrams for the individual products. Pos./Ref. -
Page 31: Spare Part Diagrams Rais Viva 120 Without Side Glass
RAIS - Manual for RAIS Rina, RAIS Viva Spare parts drawing Viva 120 without side glass (back of the user manual) All replaceable parts can be bought as spare parts from your RAIS distributor. See the following spare parts diagrams for the individual products. Ref. -
Page 32: Installation Of Soapstone
English RAIS - Manual for RAIS Rina, RAIS Viva Installation of soapstone 4 x 0110-M5x16 (BN272) socket head cap screws 3327002 2 x 0110-M8x35 (BN433) slotted set screws partialy threaded 2 x 3327006 4 x 0110-15x7x5,2 Bush... - Page 33 English RAIS - Manual for RAIS Rina, RAIS Viva...
- Page 35 Français Manuel d’utilisateur pour les modéles RAIS Rina, RAIS Viva RAIS Rina RAIS Viva Revision: Dato Mars 2012 INTRODUCTION .......................36 GARANTIE ........................36 SPÉCIFICATIONS ........................37 CONVECTION ........................38 CHEMINÉE ........................38 INSTALLATION ........................39 MODIFICATION DE RACCORDEMENT DE LA CHEMINÉE ...........40 DÉGAGEMENTS PAR RAPPORT AUX MURS COMBUSTIBLES ........41-46 INSTALLATION STANDARD (ANGLE DROIT) - RINA ............42...
-
Page 36: Introduction
Félicitations pour votre nouveau poêle à bois RAIS ! Un poêle à bois RAIS est bien plus qu’une simple source de chaleur, c’est aussi un symbole de l’importance que vous accordez à décorer votre intérieur en utilisant des produits de qualité... -
Page 37: Spécifications
Français Manuel d’utilisateur pour les modéles RAIS Rina, RAIS Viva Spécifications:... -
Page 38: Convection
Manuel d’utilisateur pour les modéles RAIS Rina, RAIS Viva Convection Tous les poêles RAIS sont des poêles à convection, ce qui veut dire que les parois latérales du poêle ne deviennent jamais trop chaudes. Le principe de convection consiste à faire entrer de l’air froid dans le système à... -
Page 39: Installation
Le sol doit être capable de supporter le poids du poêle, et éventuellement de la cheminée. Installez votre poêle RAIS dans une pièce d’où on peut parvenir à une distribution maxi- male de la chaleur vers les autres pièces. Placez votre poêle à une distance sécuritaire des matériaux combustibles. -
Page 40: Modification De Raccordement De La Cheminée
Français Manuel d’utilisateur pour les modéles RAIS Rina, RAIS Viva Modification du raccord à la cheminée Le poêle livré est préparé pour l’évacuation des fumées par le dessus, mais cela peut être modifié pour une évacuation des fumées par l’arrière de la manière suivante : Défoncez le flan prédécoupé... -
Page 41: Dégagements Par Rapport Aux Murs Combustibles
Français Manuel d’utilisateur pour les modéles RAIS Rina, RAIS Viva Dégagements par rapport aux murs combustibles Afin de déterminer si le mur près duquel votre poêle va être placé est combustible ou non, veuillez contacter l’architecte qui a conçu le bâtiment ou encore les autorités de la con- struction locales. -
Page 42: Installation Standard (Angle Droit) - Rina
Français Manuel d’utilisateur pour les modéles RAIS Rina, RAIS Viva Installation standard - angle droit Rais Rina Dégagement 700 mm Distance de sécurité aux matériaux combustibles: B. - devant (sol) 300 mm C. - latérale (sol) 150 mm D. - arrière (mur) -
Page 43: Installation Standard (Angle Droit) - Viva
Français Manuel d’utilisateur pour les modéles RAIS Rina, RAIS Viva Normal set-up - corner setting Rais Viva Rais Viva G Dégagement 700 mm 650 mm Distance de sécurité aux matériaux combustibles: B. - devant (sol) 300 mm 300 mm C. - latérale (sol) - Page 44 Français Manuel d’utilisateur pour les modéles RAIS Rina, RAIS Viva nstallation d’angle 45° Rais Rina Dégagement 700 mm Distance de sécurité aux matériaux combustibles: B. - devant (sol) 300 mm C. - latérale (sol) 150 mm D. - arrière (mur) 150 mm E.
-
Page 45: Installation D'angle 45° - Rina
Français Manuel d’utilisateur pour les modéles RAIS Rina, RAIS Viva Installation d’angle 45° Rais Viva Rais Viva G Dégagement 700 mm 650 mm Distance de sécurité aux matériaux combustibles: B. - devant (sol) 300 mm 300 mm C. - latérale (sol) -
Page 46: Socle Pivotant 360° - Viva
Français Manuel d’utilisateur pour les modéles RAIS Rina, RAIS Viva Socle pivotant 360° - généralement placë de façon à compartimenter l’espace Rais Viva Rais Viva G Dégagement 700 mm 650 mm Distance de sécurité aux matériaux combustibles: C. - devant (sol) -
Page 47: Dégagements Par Rapport Aux Murs Non Combustibles
Français Manuel d’utilisateur pour les modéles RAIS Rina, RAIS Viva Dégagements par rapport aux matériaux non combustibles: Nous recommandons un dégagement minimum par rapport aux matériaux non combus- tibles d’au moins 50 mm (F) de manière à faciliter le nettoyage. -
Page 48: Bois De Chauffage
à bois RAIS. Si de tels matériaux ou une plus grande quantité de bois de chauffage que celle recommandée sont utilisés, votre poêle sera alors exposé à une trop forte chaleur, laquelle conduira à... -
Page 49: Séchage Et Stockage
à l’intérieur deux à trois jours avant de les utiliser. Réglage de l’approvisionnement d’air comburant Tous les poêles RAIS sont pourvus d’un levier facile d’utilisation pour régler le contrôle d’air. Pour les différentes positions du contrôle, voyez les illustrations. -
Page 50: Utilisation Du Poêle À Bois
Français Manuel d’utilisateur pour les modéles RAIS Rina, RAIS Viva Utilisation du poêle ( Au début du manuel d’instruction Réglage du volet d’air. Le volet d’air possède 3 positions. Position 1 Le volet d’air est quasiment fermé et l’alimentation d’air est minimale. -
Page 51: Allumage Et Remplissage
Français Manuel d’utilisateur pour les modéles RAIS Rina, RAIS Viva Allumage et remplissage (À la fin du manuel d’instruction) Allumage dit ”de haut en bas” Commencez par placer 2-3 morceaux de bois d’environ 1-1½ kg au fond de la chambre de combustion. -
Page 52: Nettoyage Et Entretien
Français Manuel d’utilisateur pour les modéles RAIS Rina, RAIS Viva Entretien Vous devriez faire contrôler votre cheminée ainsi que votre poêle une fois par an par un ramoneur professionnel. Durant le nettoyage, le contrôle ou la réparation, le poêle doit être froid. -
Page 53: Diagnostic Des Pannes
Français Manuel d’utilisateur pour les modéles RAIS Rina, RAIS Viva Diagnostic des pannes De la fumée s’échappe par la porte : • Il n’y a pas suffisamment de tirage dans la cheminée (<12 Pa) • Assurez-vous que la cheminée ou la conduite d’air ne sont pas obstruées •... -
Page 54: Accessoires Et Piéces De Rechange
Français Manuel d’utilisateur pour les modéles RAIS Rina, RAIS Viva Accessories et pièces de rechange Si vous utilisez d’autres pièces de rechange que celles recommandées par RAIS, la garantie devient caduque. 2311590 - Scole pivotant 8142390 - Raccord á rotule... -
Page 55: Dessin Des Pièces De Rechange Rais Rina 90
Français Manuel d’utilisateur pour les modéles RAIS Rina, RAIS Viva Dessin des pièces de rechange - Rina 90 (À la fin du manuel d’instruction) En outre, toutes les pièces amovibles du poêle sont proposées en tant que pièces de re- change chez votre revendeur RAIS. -
Page 56: Dessin Des Pièces De Rechange Rais Viva 98 G
Français Manuel d’utilisateur pour les modéles RAIS Rina, RAIS Viva Dessin des pièces de rechange - Viva 98 G (À la fin du manuel d’instruction) En outre, toutes les pièces amovibles du poêle sont proposées en tant que pièces de re- change chez votre revendeur RAIS. -
Page 57: Dessin Des Pièces De Rechange Rais Viva 98
Français Manuel d’utilisateur pour les modéles RAIS Rina, RAIS Viva Dessin des pièces de rechange - Viva 98 (À la fin du manuel d’instruction) En outre, toutes les pièces amovibles du poêle sont proposées en tant que pièces de re- change chez votre revendeur RAIS. -
Page 58: Dessin Des Pièces De Rechange Rais Viva 120 G
Français Manuel d’utilisateur pour les modéles RAIS Rina, RAIS Viva Dessin des pièces de rechange - Viva 120 G (À la fin du manuel d’instruction) En outre, toutes les pièces amovibles du poêle sont proposées en tant que pièces de re- change chez votre revendeur RAIS. -
Page 59: Dessin Des Pièces De Rechange Rais Viva 120
Français Manuel d’utilisateur pour les modéles RAIS Rina, RAIS Viva Dessin des pièces de rechange - Viva 120 (À la fin du manuel d’instruction) En outre, toutes les pièces amovibles du poêle sont proposées en tant que pièces de re- change chez votre revendeur RAIS. -
Page 60: I'nstallation De La Stéatite
Français Manuel d’utilisateur pour les modéles RAIS Rina, RAIS Viva L’installation de la stéatite 4 x 0110-M5x16 (BN272) socket head cap screws 3327002 2 x 0110-M8x35 (BN433) slotted set screws partialy threaded 2 x 3327006 4 x 0110-15x7x5,2 Bush... - Page 61 Français Manuel d’utilisateur pour les modéles RAIS Rina, RAIS Viva...
- Page 63 SCHOORSTEEN ........................66 INSTALLATIE ........................67 WIJZIGING VAN SCHOORSTEENAANSLUITING ..............68 VRIJE RUIMTE TOT BRANDBARE WANDEN ..............69-74 NORMALE OPSTELLING (RECHTE HOEK) - RINA ..............70 NORMALE OPSTELLING (RECHTE HOEK) - VIVA ..............71 HOEKMONTAGE 45° - RINA .....................72 HOEKMONTAGE 45° - VIVA ....................73 360° DREIESOKKEL - VIVA....................74 VRIJE RUIMTE TOT NIET-BRANDBARE MATERIALEN ............75...
-
Page 64: Inleiding
Inleiding Gefeliciteerd met uw nieuwe RAIS houtkachel! Een RAIS houtkachel is meer dan zomaar een warmtebron: ze toont aan dat u uw huis wil inrichten met perfect ontworpen kwaliteitsproducten. Om het maximum te halen uit uw nieuwe houtkachel, is het belangrijk dat u deze handleiding grondig leest vóór u de kachel installeert en gebruikt. -
Page 65: Specificaties
Flemish Gebruikershandleiding voor RAIS Rina, RAIS Viva Specificaties... -
Page 66: Convectie
Gebruikershandleiding voor RAIS Rina, RAIS Viva Convectie Alle RAIS kachels zijn convectiekachels, wat betekent dat de zijkanten nooit te heet worden. Bij convectie wordt aan de onderzijde van de kachel koude lucht in het systeem gezogen. Deze lucht gaat dan naar boven door de convectieleiding, die naast de ver- brandingskamer ligt. -
Page 67: Installatie
De vloer moet voldoende stevig zijn om het gewicht van de kachel en eventueel de schoorsteen te dragen. Installeer uw RAIS kachel in een ruimte van waaruit u zoveel mogelijk warmte naar andere kamers kunt leiden. Plaats uw kachel op een veilige afstand van brandbaar materiaal. -
Page 68: Wijziging Van Schoorsteenaansluiting
Flemish Gebruikershandleiding voor RAIS Rina, RAIS Viva Wijziging van de schoorsteenaansluiting De oven wordt kant en klaar geleverd met een rookuitlaat bovenaan, Deze kan op de volgende manier veranderd worden in een achteruitlaat: Klop de uitgestanste cirkel eruit op de bekleding van de... -
Page 69: Vrije Ruimte Tot Brandbare Wanden
Flemish Gebruikershandleiding voor RAIS Rina, RAIS Viva Vrije ruimte tot brandbare wanden Contacteer uw architect of de bevoegde overheidsinstanties om te weten of de wand in de buurt van uw kachel brandbaar is. Als de vloer brandbaar is, moet de kachel op niet-brandbaar materiaal worden geplaatst,... -
Page 70: Normale Opstelling (Rechte Hoek) - Rina
Flemish Gebruikershandleiding voor RAIS Rina, RAIS Viva Normale opstelling - (rechte hoek) RAIS Rina Afstand tot meubelen 700 mm Afstand tot brandbare materialen: B. - vooraan (vloer) 300 mm C. - zijkant (vloer) 150 mm D. - achteraan (wand) 150 mm... -
Page 71: Normale Opstelling (Rechte Hoek) - Viva
Flemish Gebruikershandleiding voor RAIS Rina, RAIS Viva Normale opstelling - (rechte hoek) RAIS Viva RAIS Viva G Afstand tot meubelen 700 mm 650 mm Afstand tot brandbare materialen: B. - vooraan (vloer) 300 mm 300 mm C. - zijkant (vloer) -
Page 72: Hoekmontage 45° - Rina
Flemish Gebruikershandleiding voor RAIS Rina, RAIS Viva Hoekmontage 45° Rais Rina Afstand tot meubelen 700 mm Afstand tot brandbare materialen: B. - vooraan (vloer) 300 mm C. - zijkant (vloer) 150 mm D. - achteraan (wand) 150 mm E. -... -
Page 73: Hoekmontage 45° - Viva
Flemish Gebruikershandleiding voor RAIS Rina, RAIS Viva Hoekmontage 45° Rais Viva Rais Viva G Afstand tot meubelen 700 mm 650 mm Afstand tot brandbare materialen: B. - vooraan (vloer) 300 mm 300 mm C. - zijkant (vloer) 150 mm 150 mm D. -
Page 74: 360° Dreiesokkel - Viva
Flemish Gebruikershandleiding voor RAIS Rina, RAIS Viva 360° dreiesokkel Rais Viva Rais Viva G Afstand tot meubelen 700 mm 650 mm Afstand tot brandbare materialen: C. - zijkant (vloer) 300 mm 300 mm ... -
Page 75: Vrije Ruimte Tot Niet-Brandbare Materialen
Flemish Gebruikershandleiding voor RAIS Rina, RAIS Viva Vrije ruimte tot niet-brandbare materialen: We bevelen een afstand van minimum 50 mm (F) tot niet-brandbare materialen aan, zo- dat u makkelijk kunt schoonmaken. De reinigingsdeur moet altijd bereikbaar zijn. ... -
Page 76: Brandhout
Gebruikershandleiding voor RAIS Rina, RAIS Viva Brandhout Uw RAIS kachel is ontworpen en EN-gecertificeerd voor het branden van gekliefd en gedroogd brandhout Het brandhout mag slechts 15-22% water bevatten en een maximale lengte hebben van ongeveer 28 cm, of de breedte van de stookplaats min 50-60 Nat hout verbranden is niet economisch voordelig en veroorzaakt roet en andere stoffen die schadelijk zijn voor het milieu. -
Page 77: Drogen En Opslaan
De verbrandingslucht afstellen Alle RAIS kachels zijn uitgerust met een makkelijk te bedienen hendel voor het afstellen van de luchttoevoer. De illustraties tonen u de verschillende standen. Primaire lucht is de lucht die wordt toegevoerd naar de primaire verbrandingsruimte of de aslaag. -
Page 78: Gebruik Van De Kachel
Flemish Gebruikershandleiding voor RAIS Rina, RAIS Viva Gebruik van de kachel ( Vooraan in de gebruiksaanwijzing Instellen van de klep. De klep heeft drie mogelijke instellingen. Stand 1 De luchtklep is bijna gesloten, zodat de luchttoevoer minimaal is. Stand 2 Schuif het handvat naar rechts tot de eerste inkeping. -
Page 79: Aanmaken En Bijvullen
Flemish Gebruikershandleiding voor RAIS Rina, RAIS Viva Aanmaken en bijvullen ( Achteraan in de gebruiksaanwijzing ”Top-Down” aanmaken Leg eerst 2-3 stukken hout (ongeveer 1 tot 1½ kg) op de bodem van de verbrandingska- mer. Leg daarop ongeveer 1 kg droog hout, gekloofd tot aanmaakhout, alsook 2-3 aanmaak- blokjes of iets dergelijks (1-2) Zet de luchttoevoer volledig open. -
Page 80: Onderhoud
Gebruik een ander stuk papier om op te poetsen en het glas zal opnieuw schoon zijn. U kunt ook de glasreiniger gebruiken die te koop is bij uw RAIS dealer. De andere delen kunt u schoonwrijven met een droge spons. -
Page 81: Oplossen Van Problemen
• De schoorsteen lekt • Een lek tussen schoorsteen en rookkanaal Als de problemen blijven aanhouden, raden we u aan uw schoorsteenveger of uw RAIS dealer te contacteren. Indien de brandstof enkel smeult of rook afgeeft en er te weinig lucht wordt toegevoerd, worden er onverbrande rookgassen gewormd. -
Page 82: Accessoires En Reserveonderdelen
Flemish Gebruikershandleiding voor RAIS Rina, RAIS Viva Accessoires en reserveonderdelen Indien u gebruik maakt van andere reserveonderdelen dan degene die RAIS aanbeveelt, vervalt de waarborg. 2311590 - Draaibare sokkel 8142390 - Kogelverbinding... -
Page 83: Reserveonderdelen Rais Rina 90
Gebruikershandleiding voor RAIS Rina, RAIS Viva Reserveonderdelen - Rina 90 ( Achteraan in de gebruiksaanwijzing Verder kunnen alle vervangbare onderdelen als reserveonderdelen bij uw RAIS-verkoper worden aangekocht. Zie de hierna volgende tekeningen van reserveonderdelen voor de afzonderlijke producten (Achteraan in de gebruiksaanwijzing) Ref. -
Page 84: Reserveonderdelen Rais Viva 98 G
Gebruikershandleiding voor RAIS Rina, RAIS Viva Reserveonderdelen - Viva 98 G ( Achteraan in de gebruiksaanwijzing Verder kunnen alle vervangbare onderdelen als reserveonderdelen bij uw RAIS-verkoper worden aangekocht. Zie de hierna volgende tekeningen van reserveonderdelen voor de afzonderlijke producten (Achteraan in de gebruiksaanwijzing) Ref. -
Page 85: Reserveonderdelen Rais Viva 98
Gebruikershandleiding voor RAIS Rina, RAIS Viva Reserveonderdelen - Viva 98 ( Achteraan in de gebruiksaanwijzing Verder kunnen alle vervangbare onderdelen als reserveonderdelen bij uw RAIS-verkoper worden aangekocht. Zie de hierna volgende tekeningen van reserveonderdelen voor de afzonderlijke producten (Achteraan in de gebruiksaanwijzing) Ref. -
Page 86: Reserveonderdelen Rais Viva 120 G
Gebruikershandleiding voor RAIS Rina, RAIS Viva Reserveonderdelen - Viva 120 G ( Achteraan in de gebruiksaanwijzing Verder kunnen alle vervangbare onderdelen als reserveonderdelen bij uw RAIS-verkoper worden aangekocht. Zie de hierna volgende tekeningen van reserveonderdelen voor de afzonderlijke producten (Achteraan in de gebruiksaanwijzing) Ref. -
Page 87: Reserveonderdelen Rais Viva 120
Gebruikershandleiding voor RAIS Rina, RAIS Viva Reserveonderdelen - Viva 120 ( Achteraan in de gebruiksaanwijzing Verder kunnen alle vervangbare onderdelen als reserveonderdelen bij uw RAIS-verkoper worden aangekocht. Zie de hierna volgende tekeningen van reserveonderdelen voor de afzonderlijke producten (Achteraan in de gebruiksaanwijzing) Ref. -
Page 88: Installatie Van Speksteen
Flemish Gebruikershandleiding voor RAIS Rina, RAIS Viva Installatie van speksteen 4 x 0110-M5x16 (BN272) socket head cap screws 3327002 2 x 0110-M8x35 (BN433) slotted set screws partialy threaded 2 x 3327006 4 x 0110-15x7x5,2 Bush... - Page 90 RAIS A/S Industrivej 20 DK-9900 Frederikshavn www.rais.dk...
Need help?
Do you have a question about the Rina and is the answer not in the manual?
Questions and answers