Table of Contents
Advertisement
INSTRUCTIONS FOR INSTALLATION,
USE AND MAINTENANCE
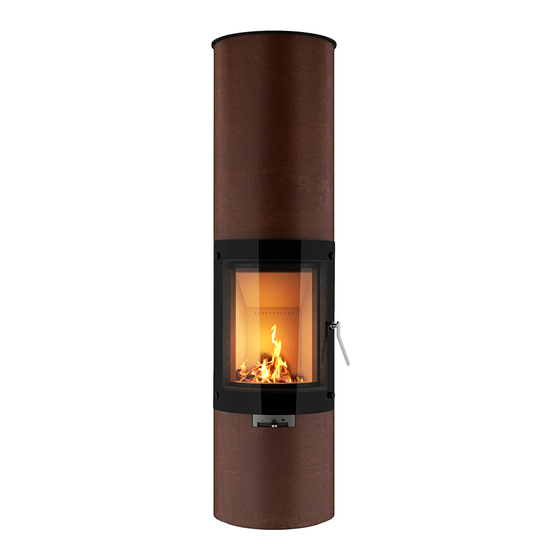
RAIS PALO & RAIS PILAR
IMPORTANT INFORMATION
On first lighting the stove you must be careful not to touch the painted
surfaces and it is MOST IMPORTANT that the door is kept slightly 'ajar' in
order for the door seal and sealant to cure.
This will prevent the door seal sticking to the painted body and becoming
damaged.
Advertisement
Table of Contents

Related Manuals for RAIS Rais Palo


Summary of Contents for RAIS Rais Palo
- Page 1 INSTRUCTIONS FOR INSTALLATION, USE AND MAINTENANCE RAIS PALO & RAIS PILAR IMPORTANT INFORMATION On first lighting the stove you must be careful not to touch the painted surfaces and it is MOST IMPORTANT that the door is kept slightly ‘ajar’ in order for the door seal and sealant to cure.
-
Page 3: Table Of Contents
INSTALLATION ……………………………………………………………... OPERATION OF SWIVEL BASE ………………...……………………….. 12-13 INSTALLATION DISTANCE TO COMBUSTIBLE WALL ……………… GENERAL INSTALLATION ( PALO / PALO C ) ………………………. (RIGHT ANGLE) SECURE BASE …………………………………... CORNER INSTALLATION 45° ………………………………………. GENERAL INSTALLATION ( PILAR ) ……………..……………………. (RIGHT ANGLE) SECURE BASE …………………………………... -
Page 4: Introduction
These appliances have been approved by HETAS as intermittent operating appliances for burning wood logs only. A Rais wood burning stove is more than just a heat source: it also shows that you care about design and quality in your home. -
Page 6: Convection
Convection Rais stoves are convection stoves. This means that the stove’s back and side panels are not over-heated. Convection means that there is a circulation of air, which ensures that the heat is distributed more evenly throughout the entire room. The cold air is sucked in at the base of the stove and up through the convection channel, which runs along the stove’s combustion chamber. -
Page 7: Installation Instructions
Installation Instructions The following pages give instructions for the safe and proper installation of this heating appliance in the UK. These instructions cover the basic principles of installation, although some details may need slight modification to suit particular local site conditions. In all cases the installation must comply with current UK Building Regulations, Local Authority Byelaws and other specifications or regulations as they affect the installation of the stove. -
Page 8: Chimney
Chimney The chimney is the driving force which makes the stove function. In order for the stove to perform satisfactorily the chimney height must be sufficient to ensure the correct draught of 14 to 18 Pa, so as to clear the products of combustion and prevent problems of smoke leaking into the room when the stove is lit. - Page 9 If it is found that there is excessive draught in the chimney then either an adjustable flue damper or alternatively a draught stabiliser should be fitted. The adjustable flue damper should not close off the flue entirely, but should in its closed position leave a minimum continuous opening free area of at least 20 % of the total cross sectional area of the flue or fluepipe.
-
Page 11: Installation
When you choose where to set up your RAIS wood burning stove, you should consider the heat distribution to the other rooms. This will enable you to get the best use out of your stove. -
Page 12: Operation Of Swivel Base
Operation of revolving base If the stove has a revolving base then please do the following: Palo Lift up the positioning bolt and rotate the stove at 30 degree intervals. When you have reached the desired position, release the positioning bolt and turn the stove... -
Page 14: Installation Distance To Combustible Wall
Installation distance to combustible wall To find out whether the wall next to where the stove is going to be installed is flammable, you should contact your building contractor or the local building authorities. The hearth should be able to accommodate the weight of the stove. The chimney must be independently supported by wall brackets or a ceiling support plate. -
Page 17: For The Installer
For the Installer Finally before firing the stove for the first time a check should be made to ensure that the assembly and stove installation has been satisfactory and that there are no leaks in any seals in the appliance and appliance connections to the chimney. Ensure that the appliance and chimney flue are functioning correctly before finally handing over to the user. -
Page 18: Operating Instructions
Operating instructions Please note that HETAS Appliance Approval only covers the use of dry seasoned wood logs on this appliance. HETAS Approval does not cover the use of other fuels either alone or mixed with the wood logs, nor does it cover instructions for the use of other fuels. -
Page 19: Drying And Storage
2-3 days before you need it. Regulating the combustion air All RAIS stoves are equipped with a one-handed operating lever for regulating the damper. The stove-specific regulating mechanisms can be seen on the diagrams. Primary air is the combustion air added to the primary combustion zone, i.e. the bed of glowing embers. -
Page 20: Using The Wood Burning Stove
Using the wood burning stove Adjusting the air damper. The damper has 3 settings. Position 1 The damper is closed meaning that there is no air in- take. Position 2 Pull the lever until it clicks. This position gives full secondary air. -
Page 21: First Usage
First usage A careful start pays off. Start with a small fire, so that the wood burning stove can get accustomed to the high temperature. This gives the best start and any damage is avoided. Be aware that a strange but harmless odour and smoke concoction may emanate from the surface of the stove, the first time you fire up. -
Page 22: Lighting And Fuelling
Lighting and fuelling To light the stove, use alcohol briquettes or similar, as well as approximately 2kg of firewood, split into kindling sticks. Set the air damper to the fully open position. It is important that the Air-Kit system airtight flap, located at the rear of the stove (if fitted), is always opened prior to lighting the stove. - Page 23 When the flames are clear, after approximately 5-10 minutes, close the door. Damper - see adjustment of the damper. After approximately 10-20 minutes, when you have a good bed of glowing embers, add 2-3 pieces of wood. Leave the door ajar until the fire has caught properly, then close the door.
-
Page 24: Cleaning And Care
- Moisten a piece of paper or newspaper, dip it in the ash, and rub the sooty glass with it. - Now rub with a dry piece of paper and the glass will become clean. - As an alternative you can use glass cleaner, which you can buy from you RAIS distributor. -
Page 25: Cleaning Of The Flue Ways
Cleaning the flue ways Remove the baffle plate by lifting it up at one end and tilting it slightly at an angle. Carefully pull out the plate. Remove the upper baffle plate by pushing it up towards the smoke leader, tilting it up slightly at an angle and the carefully pull it out. -
Page 26: Problem Solving
- dirty smoke channels - leaking chimney - leakage between chimney and flue If your stove continues to malfunction, we recommend that you contact your RAIS distributor or chimney sweep. IMPORTANT!! To ensure safe burning there must be clear yellow flames or clear embers at all times. The firewood should not be smouldering. -
Page 27: Accessories And Spare Parts
Accessories and spare parts If spare parts other than those recommended by RAIS are used, the warranty is voided. All replacement spare parts can be purchased from your RAIS distributor / stockist. See the following spare parts diagrams for the individual products. -
Page 28: Spare Part Diagrams
PILAR Position Quantity Item No Description 5040602SV Stainless steel top plate with hole 504060590 / 95 Steel top plate with hole 5040601SV Stainless steel top plate without hole 504060490 / 95 Steel top plate without hole 5041090 / 95 Door 5042200 Firebrick set 5045500... - Page 30 PALO Position Quantity Item No Description 6040604SV Stainless steel top plate without hole 604060190 / 95 Steel top plate without hole 6040605SV Stainless steel top plate with hole 604060290 / 95 Steel top plate with hole 6041090 / 95 Door...
- Page 32 PALO C Position Quantity Item No Description 6040604SV Stainless steel top plate without hole 604060190 / 95 Steel top plate without hole 6040605SV Stainless steel top plate with hole 604060290 / 95 Steel top plate with hole 6041090 / 95...
- Page 38 U K Distributor. Robeys Ltd. Riverside, Goods Road, Belper, Derbyshire, England. DE56 1UU Tel: 01773 820940 Fax: 01773 820477 E Mail: info@robeys.co.uk www.robeys.co.uk June 2011...
Need help?
Do you have a question about the Rais Palo and is the answer not in the manual?
Questions and answers