Table of Contents
Advertisement
Advertisement
Table of Contents
Troubleshooting

Related Manuals for THOMSON TG580


Summary of Contents for THOMSON TG580
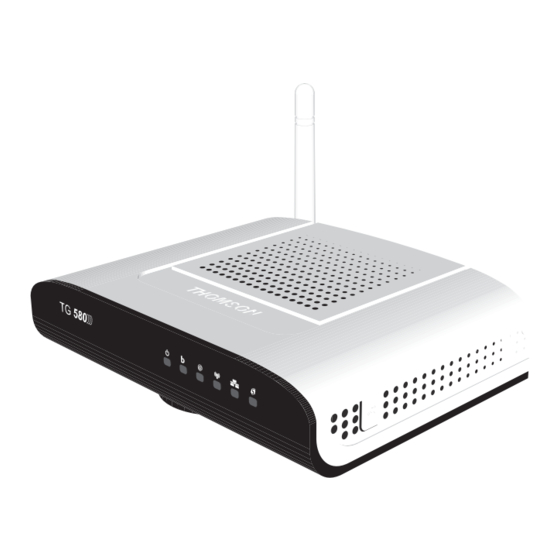
- Page 1 THOMSON TG580 Wireless-n Multi-User ADSL2+ Gateway Setup and User Guide...
- Page 3 THOMSON TG580 Setup and User Guide...
- Page 4 Distribution and copying of this document, use and communication of its contents is not permitted without written authorization from THOMSON. The content of this document is furnished for informational use only, may be subject to change without notice, and should not be construed as a commitment by THOMSON. THOMSON assumes no responsibility or liability for any errors or inaccuracies that may appear in this document.
-
Page 5: Table Of Contents
3.3.2 Configuring WEP Encryption ....................... 24 4 Thomson Gateway Tools............25 UPnP ......................26 4.1.1 Accessing Your Thomson Gateway with UPnP ................. 27 4.1.2 Managing your Internet connection with UPnP................. 28 4.1.3 Configuring UPnP on the Thomson Gateway ..................29 4.1.4... - Page 6 Home Network ....................76 6.4.1 Devices ..............................77 6.4.2 Interfaces ............................... 79 7 Troubleshooting ................ 87 General Thomson Gateway Troubleshooting ..........88 7.1.1 Wired Connection Troubleshooting....................89 7.1.2 Wireless Connection Troubleshooting ....................90 Reset to Factory Defaults ................91 E-DOC-CTC-20090507-0002 v1.0...
-
Page 7: About This Setup And User Guide
Terminology Generally, the THOMSON TG580 will be referred to as Thomson Gateway in this Setup and User Guide. Typographical Conventions Following typographical convention is used throughout this manual: Sample text indicates a hyperlink to a Web site. - Page 8 About this Setup and User Guide E-DOC-CTC-20090507-0002 v1.0...
-
Page 9: Installation
In a few minutes you will be able to access the Internet using your Thomson Gateway. This Setup and User Guide will show you how to set up your Thomson Gateway and how to connect your computer(s) to the Internet. -
Page 10: Preliminary Steps
Installation Preliminary Steps DSL service The DSL service must be up and running on your telephone line. If both conventional telephone and DSL service are simultaneously available from the same copper pair, you will need a central splitter or distributed filters for decoupling DSL and telephone signals. Public telephone lines carry voltages that can cause electric shock. -
Page 11: Installing Your Thomson Gateway
Installing your Thomson Gateway Overview How it works The Setup and User Guide will first help you to connect your computer to the Thomson Gateway. After this is done, you can configure your Thomson Gateway using your web browser. Requirements Javascript must be enabled on your web browser. -
Page 12: Manual Installation
The Thomson Gateway GUI appears. Click the Thomson Gateway menu item on the left-hand side. The Thomson Gateway page appears. In the Pick a task list, click Setup. The Easy Setup wizard appears. This wizard will guide you through the configuration of your Thomson Gateway. -
Page 13: Adding A New Computer To Your Network
Installation Adding a New Computer to your Network Overview If you want to connect your computer to the Thomson Gateway using: A Wireless connection, continue with ”3 Wireless Access” on page An Ethernet cable connection, continue with ”1.4 Connecting a Computer Using the Ethernet Cable” on page E-DOC-CTC-20090507-0002 v1.0... -
Page 14: Connecting A Computer Using The Ethernet Cable
Procedure Proceed as follows: Connect one end of the Ethernet cable to the yellow Ethernet port(s) of your Thomson Gateway: Connect the other end of the Ethernet cable to your computer. Your computer is now connected to your network. No additional configuration is needed. -
Page 15: Thomson Gateway Basics
Thomson Gateway Basics Thomson Gateway Basics In this chapter Topic Page Thomson Gateway LED Behaviour Thomson Gateway GUI Backing Up/Restoring your Configuration E-DOC-CTC-20090507-0002 v1.0... -
Page 16: Thomson Gateway Led Behaviour
Thomson Gateway Basics Thomson Gateway LED Behaviour Content This chapter describes the behaviour of: Status LEDs WPS Button LED E-DOC-CTC-20090507-0002 v1.0... -
Page 17: Status Leds
Thomson Gateway Basics 2.1.1 Status LEDs Introduction On the front panel of your Thomson Gateway, you can find a number of status LEDs, indicating the state of the device during normal operation. Following LEDs are available on your Thomson Gateway: Name... - Page 18 Thomson Gateway Basics Power LED Colour State Description Green Solid on Power on, normal operation Solid on Power on, self-test failed, indicating device malfunction Amber Blinking Bootloader active (during upgrade) Power off Broadband LED Colour State Description Green Blinking Pending DSL line synchronisation or No DSL line...
- Page 19 Thomson Gateway Basics Ethernet LED Colour State Description Green Solid on Ethernet connection, no activity Blinking Ethernet activity No Ethernet connection E-DOC-CTC-20090507-0002 v1.0...
-
Page 20: Wps Button Led
Thomson Gateway Basics 2.1.2 WPS Button LED Introduction The WPS button allows you to add new wireless clients to your network. For more information, see Connecting Your Wireless Client via WPS. WPS LED Colour State Description Green Solid On Client successfully registered via WPS... -
Page 21: Thomson Gateway Gui
IP address of your Thomson Gateway (by default: 192.168.1.254). If you have protected your Thomson Gateway with a user name and password, the Thomson Gateway will prompt you to enter these. Enter your user name and password and click OK. -
Page 22: Backing Up/Restoring Your Configuration
Backing Up/Restoring your Configuration Introduction Once you have configured your Thomson Gateway to your needs, it may be a good idea to backup your configuration for later use. This way you can always return to your working configuration in case of problems. -
Page 23: Wireless Access
Connects different wireless devices with each other. Secures the data sent over wireless connection. The Thomson Gateway comes with an integrated wireless access point. The only thing you need is a wireless client. Other devices like media players and smartphones may also have a built-in wireless client. Check the documentation of your device for more information. -
Page 24: Connecting Your Wireless Client Via Wps
Shortly press the WPS button on the Thomson Gateway: The WPS button LED starts blinking orange. This indicates that the Thomson Gateway is now searching for wireless clients that are in registration mode. You now have two minutes to start WPS on your wireless client. - Page 25 Wireless Access Make sure that the WLAN LED is blinking amber when you start WPS on your wireless client. If you still have trouble connecting to the Thomson Gateway, try connecting your wireless client without WPS. For more information, see ”3.2 Connecting Your Wireless Client without WPS”...
-
Page 26: Connecting Your Wireless Client Without Wps
Thomson Gateway is using. What Network Name (SSID) is the Thomson Gateway using? If you did not change the SSID manually, your Thomson Gateway uses the SSID that is printed on the bottom panel label of your Thomson Gateway. -
Page 27: Securing Your Wireless Connection
We strongly recommend you to use WPA+WPA2. Although the Thomson Gateway allows you to use WEP or no security, it is not recommended to use these settings. Only use WEP if you have wireless clients that don’t support a higher encryption level. - Page 28 Wireless Access Under Wireless, click your access point. Your access point will be listed in the following format: “WLAN:<Network Name> (<Actual Speed>)”. For example, WLAN: Thomson83C7C7 (54Mbps). The Wireless Access Point page appears. In the Location bar, click Configure. Under Security, you can change the Encryption. If you want to use: WPA-PSK Encryption, continue with ”3.3.1 Configuring WPA-PSK Encryption”...
-
Page 29: Configuring Wpa-Psk Encryption
Wireless Access 3.3.1 Configuring WPA-PSK Encryption Procedure Continuing from ” Configuring the wireless encryption” on page Select Use WPA-PSK Encryption. In the WPA-PSK Encryption Key box, type a pass phrase (also known as Pre-shared key) of your choice. The pass phrase must consist of 8 to 63 alphanumeric characters or 8 to 64 hexadecimal characters (characters from 0 to 9 and from A to F). -
Page 30: Configuring Wep Encryption
Configuring WEP Encryption Warning Although the Thomson Gateway allows you to use WEP or no security, it is not recommended to use these settings. Only use WEP if you have wireless clients that don’t support a higher encryption level. Procedure Continuing from ”... -
Page 31: Thomson Gateway Tools
Assigning a service (HTTP, FTP,...) to a computer Dynamic DNS Feature availability Depending on the configuration offered by your Internet Service Provider (ISP), some features may not be available on your Thomson Gateway. For more information, contact your ISP. E-DOC-CTC-20090507-0002 v1.0... -
Page 32: Upnp
If your computer is running Windows XP, you first have to install the UPnP component. For more information, see ”4.1.4 Installing UPnP on Windows XP” on page UPnP and the Thomson Gateway With UPnP you can: Access the Thomson Gateway GUI without opening your web browser. -
Page 33: Accessing Your Thomson Gateway With Upnp
Windows Vista If your computer runs Windows Vista: On the Windows Start menu, click Network. The Network window appears: Right-click your Thomson Gateway (displayed as THOMSON TGXXX) and click View device web page. Thomson Gateway GUI appears. Windows XP If your computer runs Windows XP: Go to My Network Places. -
Page 34: Managing Your Internet Connection With Upnp
If your computer runs Windows Vista: On the Windows Start menu, click Network. The Network window appears: Right-click your Thomson Gateway (displayed as THOMSON TGXXX). If you are currently: Connected to the Internet, click Disable to disconnect from the Internet. -
Page 35: Configuring Upnp On The Thomson Gateway
Thomson Gateway Tools 4.1.3 Configuring UPnP on the Thomson Gateway Introduction On the Thomson Gateway GUI you can: Enable/Disable UPnP Enable/Disable UPnP Proceed as follows: Browse to the Thomson Gateway GUI. On the Toolbox menu, click Game & Application Sharing. -
Page 36: Installing Upnp On Windows Xp
Thomson Gateway Tools 4.1.4 Installing UPnP on Windows XP Adding UPnP If you are running Microsoft Windows XP, it is recommended to add the UPnP component to your system. Proceed as follows: In the Start menu, click (Settings >) Control Panel. - Page 37 Adding IGD Discovery and Control Your Windows XP system is able to discover and control Internet Gateway Devices (IGD) like the Thomson Gateway on your local network. Therefore, it is recommended to add the IGD Discovery and Control client to your system.
-
Page 38: Assigning A Service (Http, Ftp
Thomson Gateway has to decide to which computer he should forward the incoming message. Internet In the latter case, the Thomson Gateway cannot decide all along the service related to the message is not assigned to one computer. Solution To avoid this problem you can: Enable UPnP. - Page 39 Assign a game or application to a local networking device If you assign a game or application to a local networking device, you will basically tell the Thomson Gateway that if it receives requests for a specific game or application, it has to forward these messages to a specific computer.
-
Page 40: Dynamic Dns
Thomson Gateway Tools Dynamic DNS Introduction The dynamic DNS service allows you to assign a fixed DNS host name (for example john.dyndns.org) to a broadband connection even if this connection is using a dynamically assigned IP address. As soon as the device gets a new IP address, the dynamic DNS server updates its entry to the new IP address. -
Page 41: Internet Security
Internet Security Internet Security Overview The Thomson Gateway offers you various options to secure your network: Topic Page Firewall Parental Control E-DOC-CTC-20090507-0002 v1.0... -
Page 42: Firewall
Firewall Changing the security level Proceed as follows: Browse to the Thomson Gateway GUI. On the Toolbox menu, click Firewall. The Firewall page appears. In the upper-right corner, click Configure. A list with security settings with a brief description is displayed. -
Page 43: Parental Control
Internet Security Parental Control Introduction The Thomson Gateway allows you to deny access to specific web sites. Access Denied page When a user tries to access a page that is being blocked, the following page is displayed: Address-based filtering With address-based filtering (or URL-filtering) you can... -
Page 44: Adding Rules For The Address Based Filter
Allow access to a specific Web site Deny access to a specific Web site Proceed as follows: Browse to the Thomson Gateway GUI. On the Toolbox menu, click Web Site Filtering. Make sure the Use Address Based Filter check box is selected. -
Page 45: Thomson Gateway Gui
The Thomson Gateway comes with an integrated configuration web interface, commonly referred to as the Graphical User Interface (GUI). It allows you to configure your Thomson Gateway simply by using a web browser from any local computer connected to the Thomson Gateway. - Page 46 Tasks To allow a quick configuration of your Thomson Gateway, some pages may offer you a number of related tasks in the Pick a task list. These tasks will guide you to the page where you can perform the selected task.
-
Page 47: Thomson Gateway
Thomson Gateway GUI Thomson Gateway The Thomson Gateway page The Thomson Gateway page gives you an overview of some basic product information and configuration parameters of your Thomson Gateway. The Thomson Gateway menu In the Thomson Gateway menu, you can find the following items: Click... -
Page 48: Information
Thomson Gateway GUI 6.1.1 Information Introduction On the System Information page, you can find some important system information of your Thomson Gateway. You may need this when contacting your help desk. This page lists the Thomson Gateway’s: Product Name Software Release... -
Page 49: Configuration
Thomson Gateway GUI 6.1.2 Configuration Overview The System Configuration Overview page displays basic configuration information. Details The System Configuration Details page displays all of the available configuration information. E-DOC-CTC-20090507-0002 v1.0... - Page 50 This page consists of the following sections: Service Configuration: Click Configuration Wizard to edit the service settings of your Thomson Gateway. The Easy Setup wizard will be launched. For more information, see ” Setting up your Thomson Gateway” on page 45...
- Page 51 In the Select a service list, select the service specifiied by your Serivce Provider and click Next to continue. Subsequent screens will guide you through the configuration setup of your Thomson Gateway. Follow the instructions and enter the required information whenever needed. The requested information will depend on the selected Service profile and should be provided by your Service Provider.
- Page 52 Thomson Gateway GUI Easy Setup will update the Thomson Gateway configuration according to the service profile. As soon as the Easy Setup wizard completed the update of the Thomson Gateway configuration, the following window appears: Click Finish to close the Easy Setup wizard.
- Page 53 Thomson Gateway GUI Returning to Factory Default Settings The Reset to Factory Defaults page allows you to return to the initial configuration of your Thomson Gateway All changes you have made to the configuration will be deleted. If you want to save your current configuration, see ”2.3 Backing Up/Restoring your Configuration”...
- Page 54 Thomson Gateway GUI Firmware upgarde This Firmware Upgrade page allows you to upgrade the Thomson Gateway with a firmware which is located on your computer. Proceed as follows: In the Pick a task list, click Firmware Upgrade. Click Browse. Browse to the firmware on your local computer and open it.
-
Page 55: Event Logs
6.1.3 Event Logs Introduction The Event Logging page summarises the last events recorded on your Thomson Gateway. The first entry is the most recent recorded event. Recorded Events The Recorded Events table gives you an overview of the last event logs that have been recorded since the Thomson Gateway was turned on. -
Page 56: Broadband Connection
In the Broadband Connection menu, you can find the following items: Click... To... Broadband Connection View all information on the DSL connection configured on your Thomson Gateway. Internet Services View basic information on the Internet service(s) configured on your Thomson Gateway. -
Page 57: Broadband Connection
Thomson Gateway GUI 6.2.1 Broadband Connection Overview The DSL Connection Overview page displays basic DSL Link Information: Uptime: Time since the DSL link is up for this session. DSL Type: Type (modulation) of DSL line. Bandwidth (Up/Down): Available up- and downstream bandwidth in kilobits per second (kbps). - Page 58 Thomson Gateway GUI Vendor ID (Local/Remote) The Vendor ID of the equipment at the local (i.e. the Thomson Gateway) and remote (Central Office) side. Loss of Link (Local/Remote) The number of times "Loss of link" is occurred. This is an indication of how many times the link to the CO is lost on the physical layer.
-
Page 59: Internet Services
Thomson Gateway GUI 6.2.2 Internet Services Introduction The Internet Services page displays the following basic information on the Internet service(s) configured on your Thomson Gateway: Uptime Data Transferred Click View more on the corresponding service to view the Internet service settings of this Internet service. - Page 60 Thomson Gateway GUI Details The Internet Service Settings Details page displays all information of this Internet service: In addition to the information shown on the Overview page, the following fields are added: Connection Settings: PVC Info (VPI.VCI) Type, either be “Bridge”, “PPPoE”, “PPPoA” and etc.
- Page 61 Click Check Connectivity. The following items are checked if applicable: DSL line ATM interface Ethernet interface PPP connectivity The Thomson Gateway lists the test results. If a test is successful, you will get a green check mark. If a test fails you will get a red cross. E-DOC-CTC-20090507-0002 v1.0...
-
Page 62: Toolbox
In the Toolbox menu, you can find the following items: Click... To... Remote Access/Assistance Make your Thomson Gateway accessible for remote support (temporary or permenant). Game & Application Share services and games that you run in your private network towards the Sharing Internet. -
Page 63: Remote Access/Assistance
Once a remote authenticated session started, no other remote sessions can be started on the Thomson Gateway. It is now possible for a remote user to access your Thomson Gateway via the specified URL using the provided user name and password. - Page 64 Thomson Gateway GUI Disabling Remote Access/Assistance To disable remote access/assistance, click Disable Remote Access/Assistance. E-DOC-CTC-20090507-0002 v1.0...
-
Page 65: Game & Application Sharing
Assigned Games & Applications: Displays an overview of all assigned Games & Applications. These are applications or games installed on a specific local host on your network, for which the Thomson Gateway should accept inbound initiated connections coming from the Internet. - Page 66 UPnP provides NAT-Traversal: UPnP aware applications on a computer will automatically create Hyper- NAT entries on the Thomson Gateway for incoming traffic on the protocol ports this type of traffic needs. As a consequence these applications are able to traverse the Thomson Gateway without the need for extra and manual configuration.
- Page 67 Manual Entry of Port Maps, if you want to configure the port mapping for this game or application manually. Click Next. The Thomson Gateway creates the game or application sharing entry and guides you to the Game or Application Definition Configure page to configure the port mappings for this game or application. For more information, see ”...
- Page 68 In the Pick a task list, click Modify a game or application. The Defined Games & Applications page appears: This page gives you an overview of the games and applications defined on your Thomson Gateway. Each game or application can be assigned to a device on your local network.
- Page 69 In the Translate To box, type the start port of the range to which the Thomson Gateway has to translate the ports specified under Port Range. If you leave this box empty the same range is used as for the Port Range.
- Page 70 If you want to make a dynamic translation rule (optional) you must specify a Trigger Protocol and Trigger Port. As soon as the Thomson Gateway receives outgoing traffic on this trigger port, it will activate this translation rule. The mapping will be added dynamically in an internal table of the device and will exist only for the lifetime of this connection.
-
Page 71: Parental Control
Thomson Gateway GUI 6.3.3 Parental Control Introduction Parental Control can be done: Based on the Web site’s address (URL), also known as address-based filtering. Overview The Overview page displays the current parental control settings. The status of Address Based Filter, being enabled (Yes) or disabled (No). - Page 72 If your administrator account is configured as default user, make sure you configure a password for this account or change the default user. Otherwise any user on your local network can browse to your Thomson Gateway to disable your filtering rules. For more information, see also ”6.3.8 User Management”...
-
Page 73: Firewall
6.3.4 Firewall Introduction The firewall allows you to secure traffic from, through and to the Thomson Gateway. There are different security levels, depending on the degree of security you need. Overview The Overview page summarizes the overall security policy configured on your Thomson Gateway. - Page 74 Game and Application Sharing. Disabled: (This is the default firewall level) All in- and outgoing traffic is allowed to pass through your Thomson Gateway, including Game and Application Sharing. The firewall levels only have impact on traffic passing through your Thomson Gateway. This means that the handling of traffic directly appointed from and to Thomson Gateway is independent of the selected firewall level.
-
Page 75: Intrusion Detection
Thomson Gateway GUI 6.3.5 Intrusion Detection Introduction Your Thomson Gateway protects your network against malicious intrusions. The Intrusion Detection page shows you the intrusions you are protected against. Enabling Intrusion Detection Proceed as follows: Under Firewall Options, select the check box(es) of the Intrusion Name(s) you want to block. -
Page 76: Dynamic Dns
Thomson Gateway GUI 6.3.6 Dynamic DNS Overview The Dynamic DNS Service Overview page displays the configuration of dynamic DNS. Under Configuration, the following items are displayed: Use DynDNS: Informs whether the service is enabled (Yes) or not (No). Internet Service: Informs the Interface on which the dynamic DNS service is enabled. - Page 77 Type the Username and Password of your dynamic DNS service account. In the Service list, click your dynamic DNS service provider. In the Host text box, type the host name you want to assign to this interface (for example Thomson Gateway.dyndns.org), as registered at the dynamic DNS service provider.
-
Page 78: Dynamic Routing
The Thomson Gateway, using the RIP (Routing Information Protocol) protocol, determines the network packet's route based on the fewest number of hops between the source and the destination. In this case, you can allow the Thomson Gateway to automatically adjust its ranking to physical changes in the network layout. -
Page 79: User Management
Thomson Gateway GUI 6.3.8 User Management Introduction The User Management page gives you an overview of the currently configured users and their privileges. On this page, you can: Change password: Click Change Password to change the password of the selected user account. For more information, see ”... - Page 80 Thomson Gateway GUI Changing the password Proceed as follows: Click Change Password after the user you want to edit on the User management page, the Change Password page appears: Fill in the Old Password box with the current password of the user account your are currently logged on with.
- Page 81 Thomson Gateway GUI Adding a new user Proceed as follows: You can only add users with less than or equal administration rights as yourself. On the User Management page, click Add User, the following page appears: In the Login Account table, you can configure: The Name of the new user.
-
Page 82: Home Network
Thomson Gateway GUI Home Network The Home Network page The Home Network page summarises your Thomson Gateway network configuration (all interfaces and detected devices). You can find an overview of the following interfaces: Wireless (only in case of a WLAN) Ethernet The detected devices and interfaces are indicated with a corresponding icon. -
Page 83: Devices
6.4.1 Devices Overview The Local Network Devices Overview page summarises all devices that are connected to the Thomson Gateway network. Click on a device name to get more information on a specific device. The first detected device in the list is the Thomson Gateway itself. - Page 84 Thomson Gateway GUI Physical Address: Displays the MAC address of the device. IP Address Assignment: Displays whether the device is using a static or dynamic IP address. IP Address: Displays the IP address of the device. DHCP Lease Time (if applicable): Displays the time for which the client can use this IP address.
-
Page 85: Interfaces
Interfaces Introduction The Interfaces page gives you an overview of the interfaces available on your Thomson Gateway. Viewing and configuring LAN interface If you want to know more about the network settings of the LAN interface, click on LocalNetwork. For more information, see ”... - Page 86 Thomson Gateway GUI Host Name: Displays the host name for the local network. Domain Name: Displays the domain name you specified. DHCP Server: Indicates the DHCP server is enabled (Yes) or disabled (No). Under DHCP Server Parameters: Address Pool Start IP: The start IP address of the DHCP server’s address pool.
- Page 87 Displays the MAC address of your Thomson Gateway’s wireless access point interface. Network Name (SSID): Displays the Network Name or the SSID of your wireless network. Interface Type: Displays one of the following interface types (supported interface types depend on Thomson Gateway variant): 802.11b/g 802.11b/g/n BandWidth: The maximum available bandwidth in both up- and downstream direction.
- Page 88 Besides the same information as on the Overview page, the following fields are available: Under Configuration: Channel Selection: Displays whether you select a fixed channel yourself (Manual)or the Thomson Gateway selects a channel for you (Auto). Region: Displays your regulatory region.
- Page 89 Network Name (SSID): The network name or SSID of your wireless LAN is by default the SSID of your Thomson Gateway as mentioned on a label. You can change the name of the SSID by typing a new name in the text box.
- Page 90 Under Security: Broadcast Network Name: By default the Thomson Gateway broadcasts its network name, allowing you to easily recognize your wireless network in the list of available networks. Once you have configured your wireless clients, you can disable this feature by clearing this check box.
- Page 91 Click Apply to immediately apply your changes. Configure your wireless client(s) with the same settings. The default WEP key and the default WPA-PSK key are printed on the Thomson Gateway bottom label. Before configuring the Thomson Gateway encryption, make sure you know which encryption methods are supported by your wireless client.
- Page 92 Thomson Gateway GUI E-DOC-CTC-20090507-0002 v1.0...
-
Page 93: Troubleshooting
Thomson Gateway. If the suggestions do not resolve the problem, look at the support pages on http://www.thomson.net contact your service provider. Topics This chapter describes the following topics: Topic Page General Thomson Gateway Troubleshooting Reset to Factory Defaults E-DOC-CTC-20090507-0002 v1.0... -
Page 94: General Thomson Gateway Troubleshooting
Thomson Gateway. Only use the power adaptor supplied with your Thomson Gateway. The Thomson Gateway is turned on via the push button or rocker switch on the back panel. The Broadband LED does not light up Make sure that: The DSL cable is correctly connected. -
Page 95: Wired Connection Troubleshooting
Ethernet LED does not light up Make sure that: The Ethernet cable is securely connected to the Ethernet port on your Thomson Gateway and your computer. You are using the correct cable type for your Ethernet equipment, that is at least UTP CAT5 with RJ-45 connectors. -
Page 96: Wireless Connection Troubleshooting
Try the following: Change the wireless channel. Make sure both the wireless client adapter and the Thomson Gateway are allowed to connect through wireless channels as defined for local regulatory domain. Check the location of the Thomson Gateway in the building. -
Page 97: Reset To Factory Defaults
Reset to Factory Defaults Resetting your Thomson Gateway If at some point you can no longer connect to the Thomson Gateway or you want to make a fresh install, it may be useful to perform a reset to factory defaults. - Page 98 Hardware Reset Proceed as follows: Make sure the Thomson Gateway is turned on. Use a pen or an unfolded paper clip to push the recessed Reset button. Push it until the Power LED lights red - this will take about 7 seconds.
- Page 100 THOMSON Telecom Belgium Prins Boudewijnlaan 47 2650 Edegem www.thomson-broadband.com © THOMSON 2009. All rights reserved. E-DOC-CTC-20090507-0002 v1.0.
Need help?
Do you have a question about the TG580 and is the answer not in the manual?
Questions and answers