
Related Manuals for D&R Airlab


Summary of Contents for D&R Airlab
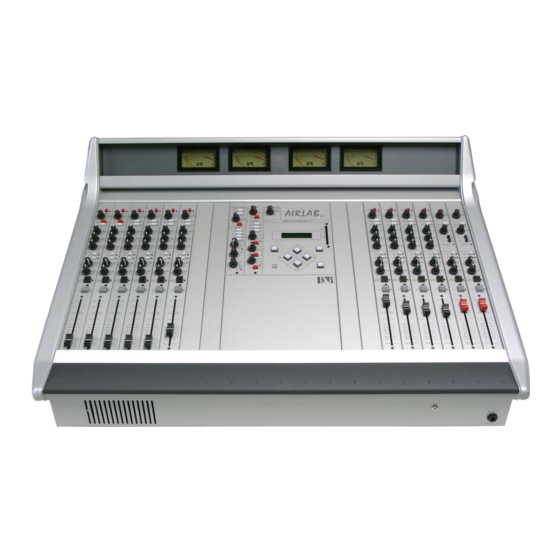
- Page 1 AIRLAB User Manual Mixing consoles Version 2.02 D&R ELECTRONICA WEESP BV Rijnkade 15B 1382 GS Weesp The Netherlands Phone: +31 (294) 418014 Fax: +31 (294) 416987 Website: http://www.d-r.nl E-mail: info@d-r.nl...
-
Page 2: Table Of Contents
SICO REMOTE UNIT ..........................68 DIRECTOR UNIT (DISCONTINUED) ......................69 LIST OF FIGURES ............................ 70 LIST OF TABLES............................71 AIRLAB USER QUESTIONNAIRE......................72 PRODUCT SAFETY..........................73 DECLARATION OF CONFORMITY......................75 DISCLAIMER ............................76 Airlab from D&R Phone +31 294 418014, email: info@d-r.nl Page 2... - Page 3 Contents Airlab from D&R Phone +31 294 418014, email: info@d-r.nl Page 3...
-
Page 4: Introduction
Dear client, Thank you for choosing the Airlab console. The Airlab is designed by specialists in the field of radio broadcast and is intended to be used as an 24 hour "On-Air" console as well as a production console. We are confident that you will be using the Airlab for many years to come, and wish you much success. -
Page 5: Package Contents
Package Contents 2 PACKAGE CONTENTS The Airlab package comes with the following parts inside. • 1x Airlab • 1x This manual • 1x Airlab Control Center supporting Win98SE/Win2000/WinXP/WinNT4.0 • 1x Chipcard • 1x Power cable Airlab from D&R Phone +31 294 418014, email: info@d-r.nl... -
Page 6: System Description
Airlab Quality The high standard of quality of the Airlab is demonstrated by the welded steel RF screening and sturdy housing, the heavy duty power supply, its modular approach and locking IDC connectors mounted on high quality double sided, plated through, glass epoxy printed circuit boards. - Page 7 System Description The Airlab is a complete and self-contained piece of hardware, requiring no additional items in order to be operated. All relevant functions are built-in, such as fader start/stop (pulse or continuously selectable). There is also no need for complex mic-on/cough switching to the announcer booth. A stereo jack, a LED and a simple push-button switch complete this task.
- Page 8 In this situation, the Airlab is capable of being the main On-Air console due to the two main outputs it contains. These main outputs can be fully transformer balanced as an option.
-
Page 9: Triple Input Stereo Module
Transmits a stereo signal to the AUX master post fader. A jumper on the board determines whether this is pre or post VCA. The channel 'ON' switch also affects the aux send (only when set to post fader). Airlab from D&R Phone +31 294 418014, email: info@d-r.nl Page 9... - Page 10 The CUE switch also acts as a SELECT switch for the programming of the modules functions. Channel on/off switch. The Airlab is capable of sending out a pulse by ON switch as well as by fader. This is software programmable. In any case the adjacent LED will lit when the ON switch is activated.
-
Page 11: Short Overview Of Triple Input Module Functions
NOTE: Polarity is not important with reed relays! DO NOT CONNECT 115/230VOLT AC TO THIS CONNECTOR!!! Pulse or Continuous Signal: Software programmable between active or not and between pulse or continue Airlab from D&R Phone +31 294 418014, email: info@d-r.nl Page 11... - Page 12 The front end of this module is designed to amplify balanced microphone signals. A +48 Volt phantom power supply is available for condenser microphones. The Airlab has the ultimate in mic amplification with a wide dynamic range and extremely low noise.
- Page 13 0 dB position in the master VU meter is reached. When the fader is in its 0 dB position, the signal has a nominal level in the Airlab. This way of alignment will give enough headroom to compensate for signal losses of up to 10 dB, whilst the noise floor remains well below the nominal level.
- Page 14 0 dB reading is achieved. If the `ON' switch is now activated, the signal level will be nominal. When the fader is opened, the CUE signal will be automatically reset, and its associated LED will switch off. Airlab from D&R Phone +31 294 418014, email: info@d-r.nl Page 14...
- Page 15 This setup makes production work possible during ON-AIR broadcast due to extremely good cross talk figures achieved in the Airlab console by careful usage of high-end CAD design systems in the initial design stage of the console.
- Page 16 When the fader is closed, the signal is automatically muted, providing a cut-off in excess of 100 dB. This high dB cut-off value ensures that the main output is protected from cross talk from announcers. Airlab from D&R Phone +31 294 418014, email: info@d-r.nl Page 16...
-
Page 17: Triple Dig Input Module
Transmits a stereo signal to the AUX master post fader. A jumper on the board determines whether this is pre or post VCA. The channel 'ON' switch also affects the aux send (only when set to post fader). Airlab from D&R Phone +31 294 418014, email: info@d-r.nl Page 17... - Page 18 The CUE switch also acts as a SELECT switch for the programming of the modules functions. Channel on/off switch. The Airlab is capable of sending out a pulse by ON switch as well as by fader. This is software programmable. In any case the adjacent LED will lit when the ON switch is activated.
-
Page 19: Short Overview Of Triple Dig Input Functions
NOTE: Polarity is not important with reed relays! DO NOT CONNECT 115/230VOLT AC TO THIS CONNECTOR!!! Pulse or Continuous Signal: Software programmable between active or not and between pulse or continue Airlab from D&R Phone +31 294 418014, email: info@d-r.nl Page 19... - Page 20 The front end of this module is designed to amplify balanced microphone signals. A +48 Volt phantom power supply is available for condenser microphones. The Airlab has the ultimate in mic amplification with a wide dynamic range and extremely low noise.
- Page 21 0 dB position in the master VU meter is reached. When the fader is in its 0 dB position, the signal has a nominal level in the Airlab. This way of alignment will give enough headroom to compensate for signal losses of up to 10 dB, whilst the noise floor remains well below the nominal level.
- Page 22 0 dB reading is achieved. If the `ON' switch is now activated, the signal level will be nominal. When the fader is opened, the CUE signal will be automatically reset, and its associated LED will switch off. Airlab from D&R Phone +31 294 418014, email: info@d-r.nl Page 22...
- Page 23 This setup makes production work possible during ON-AIR broadcast due to extremely good cross talk figures achieved in the Airlab console by careful usage of high-end CAD design systems in the initial design stage of the console.
- Page 24 Digital Otput: The AirLab Triple digital input have 2 digital outputs. AES3 on the XLR and S/P-dif on de black cinch. Dependent on the jumper setting the output is giving the stereo PROG signal or the stereo SUB-signal. Normal the output level is -9dBFS but the level (headrome) can be adjusted.
-
Page 25: Telco Module
Channel on/off switch. While in closed fader stand-by mode, i.e. when green LED is off incoming calls can be connected by pressing the "ON" switch. FADER Channel VCA volume-control adjusts overall channel level. Airlab from D&R Phone +31 294 418014, email: info@d-r.nl Page 25... - Page 26 The stereo auxiliary sends a post fader signal, dependent upon the 'ON' switch of the input channel, to the master auxiliary busses. The PAN control creates a stereo image in the Aux masters. This setup makes production work possible during ON-AIR broadcast. Airlab from D&R Phone +31 294 418014, email: info@d-r.nl Page 26...
- Page 27 ON. FADER The Airlab is fitted with a modern ultra-smooth linear fader controlling a high quality VCA and the Airlab internal logic circuitry. This system eliminates any noise from disturbing the audio signal path. When the fader is closed, the signal will be automatically muted, which provides excellent fader attenuation in excess of 100dB.
-
Page 28: Communication With Telco Module
(Telco module). There are several software programmable functions available here. In chapter 14 you can find detailed information about the programmable options of the Airlab. ALIGNMENT OF THE CHANNEL With the fader closed (or muted channel) the CUE switch will be activated; the CUE to CRM function in the master section must be activated. -
Page 29: Module Connectors
Connector type is jack: REED RELAY MAX VOLTAGE 24VOLT/50mA Center contact Ring Normally open Sleeve = Normally closed MIC INSERT Connector type is jack: Channel SEND Ring Channel RETURN Sleeve = Ground Airlab from D&R Phone +31 294 418014, email: info@d-r.nl Page 29... -
Page 30: Master Section
This input source switch lets you listen to the stereo Aux. outputs. (FROM) AIR This is the input select for the CRM/phones output. Either the program mix is heard in the CRM/phones or the 'from air' signal. Airlab from D&R Phone +31 294 418014, email: info@d-r.nl Page 30... - Page 31 The control room monitor controls the outgoing level to the control room monitors. The level is +6dBu on a cinch connector. A mute LED indicates when the CRM is muted. This is the case when the Airlab is used as “self op” mixer. The DJ channel forces the CRM to mute when the Microphone is active in the control room itself.
- Page 32 A COM(munication) LED is placed nearby the Announcer control to indicate that the talk back is activated. This is accomplished by pressing the Cough switch on the SiCo remote box, when installed. Airlab from D&R Phone +31 294 418014, email: info@d-r.nl...
-
Page 33: Timer And System-Setup
9.2 7.2 AIRLAB METERING The Airlab is shipped with 4 VU meters. The 2 meters on the left always follow the main program material and the 2 meters on the right side of the meter hood follow the CRM selectors. - Page 34 A mild compression such as 2:1 with slow attack and a threshold of -6 dB to limiting around +8 dB will improve the relationship between different broadcast materials. NOTE: These are average settings only, presentation of modern pop music will certainly require alternative settings. Airlab from D&R Phone +31 294 418014, email: info@d-r.nl Page 34...
-
Page 35: Back Panel Connectors
Figure 3: The connections on the Master Section ================================================== The mains input is set for 230 volt 50/60 Hz. The Airlab can be set to 115 volt only by qualified technicians ================================================== Airlab from D&R Phone +31 294 418014, email: info@d-r.nl... - Page 36 12-volt DC power supply. Connector: Center contact (maximum 24V/50mA) Ring Normally open Sleeve = Normally closed NOTE: These signaling outputs are only to be used for low voltage applications! Airlab from D&R Phone +31 294 418014, email: info@d-r.nl Page 36...
- Page 37 Output level is +6 dBu at 47 Ohm. (Transformers are optional) RS232 This computer type connector is the interface between the Airlab and a PC. Through this connector and the delivered software it is possible to program the Airlab on your PC.
-
Page 38: Airlab Master Back Panel Wiring
Connector type: Cinch, Unbalanced Level: +6dBu / 47 Ohm SUB OUTPUTS Connector type: Male XLR Pin1 = ground Level: +6dBu Pin2 = in phase Pin3 = out of phase Airlab from D&R Phone +31 294 418014, email: info@d-r.nl Page 38... - Page 39 Level is: +6 dBu Pin 2 = in phase Pin 3 = out of phase PHONES OUT STEREO Connector type: Jack Left Level: +20dBu/330 Ohm Ring Right Sleeve = Ground Airlab from D&R Phone +31 294 418014, email: info@d-r.nl Page 39...
-
Page 40: Airlab Jumper Settings
1+2 / 3+4 = ON 2+3 / 4+5 = OFF Table 1: Airlab Triple Module Jumper settings Figure 5: Triple Module AUX Jumpersettings Figure 6: Triple Module MIC LC Jumpersettings Airlab from D&R Phone +31 294 418014, email: info@d-r.nl Page 40... -
Page 41: Figure 7: Triple Module Phantom Power Jumpersettings
NOTE: An optional R.I.A.A. phono pre amp can be plugged in here. The 'B' input of the channel can thus be connected directly to a phono cartridge. Jumpers should be removed from the channel completely. Figure 9: R.I.A.A connection on Triple module Airlab from D&R Phone +31 294 418014, email: info@d-r.nl Page 41... - Page 42 Airlab Jumper Settings 12.2 TRIPLE DIG INPUT MODULE Figure 10: Airlab Triple Dig Module Jumper Locations Options Jumpers Settings Settings Default AUX PRE/POST J8 and J9 1 + 2 = POST 3 + 4 = PRE POST LC MIC only...
-
Page 43: Telco Module
Figure 16: Telco Module C-Balance Setting OPTIONAL It's optional to install High quality transformers on the PROGRAM outputs and on the SUB outputs. Please contact your dealer for further information. Airlab from D&R Phone +31 294 418014, email: info@d-r.nl Page 43... -
Page 44: Installing/Servicing The Airlab
Please check that the local mains supply corresponds with the voltage selected on the Airlab mains inlet. The Airlab can be factory set for voltages between 100 - 120 Volts or 220 - 240 Volts. The Airlab is fused with a 2 Amp slow blow fuse for 110 Volt or 1.0 Amp slow blow fuse for 220 Volt. DO NOT use any other value, as this would be hazardous and the Airlab guarantee will be voided. - Page 45 Ask your dealer or any radio shop for details. *IMPORTANT* SAFETY PRECAUTION - All 'outside' connections to the Airlab, even from the same building, must be connected via a transformer. This avoids the possibility of ground loops and 'hums'. The shielding must be connected to the source side.
- Page 46 NOTE: This alignment has already taken place at the factory, however if you later on extend the AIRLAB with another TELCO module you need to follow the next steps for a correct alignment of the N-1 signal for every new installed TELCO module.
- Page 47 A direct connection with the incoming phone company gives best results. NOTE: INSTALLATION OF NEW (EXTRA) MODULES When installing new (extra) modules in your Airlab it's necessary to re-adjust the internal power supply voltages to guarantee a stable performance at all times.
-
Page 48: How To Program The Airlab
This is the menu that's normally active. But before we go into this menu we need to program the Airlab conform to your requirements. This can be done without opening the frame. Very convenient, isn't it? BEFORE YOU START TAKE NOTICE OF THE FOLLOWING INFORMATION To save all the work you've done you simply hit the ENTER switch and all settings are stored in the internal memory of the Airlab. - Page 49 If you have already programmed several modules, the moment you enter this menu again the LED’s located near the SELECT switch will light up on the modules that are enabled to trigger the fader start. Airlab from D&R Phone +31 294 418014, email: info@d-r.nl Page 49...
- Page 50 If you have already programmed several modules, the moment you enter this menu again the LED’s located near the SELECT switch will light up on the modules that are enabled to generate a fader start. Airlab from D&R Phone +31 294 418014, email: info@d-r.nl Page 50...
- Page 51 If you have already programmed several modules, the moment you enter this menu again the LED’s located near the SELECT switch will light up on the modules that are giving a Pulse on the start jack. Airlab from D&R Phone +31 294 418014, email: info@d-r.nl Page 51...
- Page 52 LED’s located near the SELECT switch will go on, on those modules that are capable of activating the CUE by a remote switch when the MIC input is selected. Airlab from D&R Phone +31 294 418014, email: info@d-r.nl Page 52...
- Page 53 If you have already programmed several modules, the moment you enter this menu again the LED’s located near the SELECT switch will light up on the modules that are programmed to handle the Studio MIC input. Airlab from D&R Phone +31 294 418014, email: info@d-r.nl Page 53...
- Page 54 If you had already programmed several modules, the moment you enter this menu again the LED’s located near the SELECT switch will go on, on those modules that are toggling the ON-AIR 1 relay when MIC is selected. Airlab from D&R Phone +31 294 418014, email: info@d-r.nl Page 54...
- Page 55 LED’s located near the SELECT switch will light up on the modules that are toggling the ON-AIR 2 relay when MIC is selected. Airlab from D&R Phone +31 294 418014, email: info@d-r.nl...
- Page 56 If you have already programmed several modules, the moment you enter this menu again the LED’s located near the SELECT switch will light up on the modules that are assigned for MIC-mode in LINE B. Airlab from D&R Phone +31 294 418014, email: info@d-r.nl Page 56...
- Page 57 If you have already programmed several modules, the moment you enter this menu again the LED’s located near the SELECT switch will light up on the modules that are capable of Switch Start. Airlab from D&R Phone +31 294 418014, email: info@d-r.nl Page 57...
- Page 58 Pressing the ESC switch instead will discard all the changed settings in the last session. You have now completed the modules set-up and it is now time to go to the Master settings. Airlab from D&R Phone +31 294 418014, email: info@d-r.nl...
-
Page 59: Master Settings
RS232 Enable RS 232? The RS232 option enables you to connect the Airlab to a PC. Basically The Airlab software is a graphical user interface version of the software structure inside the Airlab. -
Page 60: System Setup
CONFIGURATION Config The first item in the System menu is the configuration screen. This screen displays the current configuration of the Airlab. XX represents the number of Stereo modules available on the StMod:XX Telco:YY console and YY represent the number of Telco modules available on the console. - Page 61 All the above explained programming and storing of data can be performed on a Windows PC. You need to connect the RS232 SubD9 connector of the Airlab to the RS232 connector of your PC and load the Airlab software. All module and master programming can be dealt with on one PC screen. In this way you will have a total view of your settings on one screen.
-
Page 62: Timer
14.4 TIMER As earlier mentioned the Airlab has a built in Timer, which is practical and easy to use.The Timer menu is the basic menu that the Airlab always shows. To activate the timer it is necessary to first program the modules and make up your mind which modules and in which mode they should trigger the Timer. -
Page 63: Menu Diagram
How to program the Airlab 14.5 MENU DIAGRAM The menu diagram displays the menu structure as it is programmed in the Airlab. Timer Module Settings Master Settings System LineA Timerstrt? Auto Cue Reset? Config LineB Timerstrt? CUE to CRM? Recall Mic. -
Page 64: Windows Software
15.2 GETTING STARTED Before you run the software be sure to connect the Airlab to the PC correctly. If this isn't the case you'll see the following error message: Clicking the OK button continues to startup the Airlab application but without any software control. -
Page 65: Figure 15: Airlab Main Screen
Figure 20: Status bar As you can see we can have a total of 16 modules in the Airlab. The configuration, as shown in the second column, consists from 12 triple line modules and 2 Telco modules. The last two slots aren't used in this case. -
Page 66: Figure 18: Triple Module Settings
For a detailed overview off all module settings you can read section 14.1 of this manual. The Master settings in the application are nearly identical to the Master setting of the Airlab. The main difference is the fourth option. -
Page 67: Specifications
590 mm Depth When inserting the Airlab in its mounting hole first position the armrest side in the hole and slowly lower the back side holding the wood ends on either side of the console. Mount the back panel after installation to finish the job neatly. -
Page 68: Sico Remote Unit
AIR signaling outputs 1 and 2 offer the option of driving external red light indicators in the studio by way of a relay. The input jack of the Sico Remote unit needs to be wired to the master of the Airlab, Guest or Announcer outputs or whatever suits your purpose mostly. -
Page 69: Director Unit (Discontinued)
XLR connector is provided for the headset. A separate Mic input and headphone output is also available. Figure 28: Director Two large On-Air LEDS are indicating that the Airlab console is ON-Air. Level control for Headphone, Mic input and internal speaker are provided for. The back panel has 4 adjustments for the Telco levels and all interfacing with the Airlab. -
Page 70: List Of Figures
Figure 2: The Master Section ........................ 30 Figure 3: The connections on the Master Section ................. 35 Figure 4: Airlab Triple Module Jumper Locations .................. 40 Figure 5: Triple Module AUX Jumpersettings..................40 Figure 6: Triple Module MIC LC Jumpersettings ................... 40 Figure 7: Triple Module Phantom Power Jumpersettings.............. -
Page 71: List Of Tables
List of tables 20 LIST OF TABLES Table 1: Airlab Triple Module Jumper settings ..................40 Table 2: Airlab Telco Module Jumper settings ..................43 Airlab from D&R Phone +31 294 418014, email: info@d-r.nl Page 71... -
Page 72: Airlab User Questionnaire
(Dealer / Advertisement / Exhibition / Other user / Other) WHAT JOURNALS DO YOU TAKE ON A REGULAR BASIS? .............................. WHAT IS YOUR OPINION OF THE PRICE/QUALITY OF THE 'AIRLAB'? .............................. WHAT PRICE WOULD YOU CONSIDER SUITABLE FOR THE 'AIRLAB'? .............................. -
Page 73: Product Safety
And last but not least be careful not to touch a person being shocked as you, yourself could also be shocked. Once removed from the shock, have someone send for medical help immediately Airlab from D&R Phone +31 294 418014, email: info@d-r.nl... - Page 74 D&R ELECTRONICA B.V. WEESP HEAD OFFICE D&R Electronica Weesp b.v. Rijnkade 15B 1382 GS WEESP THE NETHERLANDS Phone: +31 (294) 418 014* Fax: +31 (294) 416 987 Website: http//www.d-r.nl E-mail: info@d-r.nl Airlab from D&R Phone +31 294 418014, email: info@d-r.nl Page 74...
-
Page 75: Declaration Of Conformity
CE Marking Directive 93/68/EEC (1993). D&R Electronica Weesp b.v. Rijnkade 15 B 1382 GS WEESP The Netherlands President of Engineering July 5, 2006 Duco de Rijk Compliance Program Manager Signature Date Name Title Airlab from D&R Phone +31 294 418014, email: info@d-r.nl Page 75... -
Page 76: Disclaimer
(collectively "Indemnified Parties") from and against any and all liability incurred by or made against the Indemnified Parties in connection with any claim arising from or related to your use. Airlab from D&R Phone +31 294 418014, email: info@d-r.nl Page 76...
Need help?
Do you have a question about the Airlab and is the answer not in the manual?
Questions and answers