Enviro 2100 Freestanding Owner's Manual
Enviro wood stove
Hide thumbs
Also See for 2100 Freestanding:
- Owner's manual (22 pages) ,
- Owner's and operator's manual (19 pages)
Table of Contents
Advertisement
Quick Links
SHERWOOD INDUSTRIES IS AN ENVIRONMENTALLY RESPONSIBLE COMPANY. THIS MANUAL IS PRINTED ON RECYCLED PAPER.
PLEASE KEEP THESE INSTRUCTIONS FOR FUTURE REFERENCE
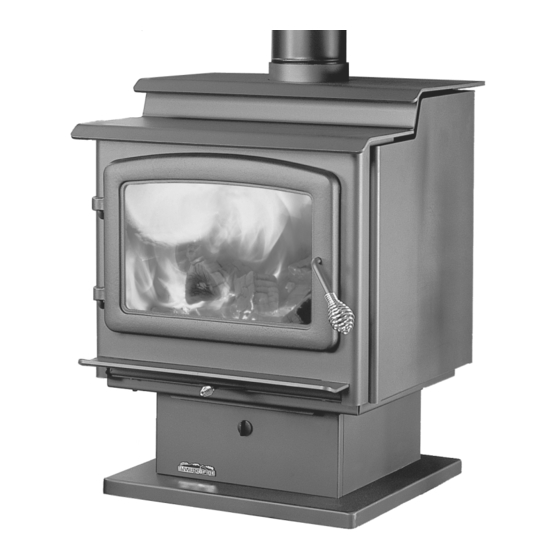
Wood Stove
2100 Freestanding
B Y : S H E R W O O D I N D U S T R I E S L T D
OWNER'S MANUAL
Contact your local building or fire officials, or the authority having jurisdiction
about restrictions and installation inspection requirements in your area.
PLEASE READ THIS ENTIRE MANUAL BEFORE INSTALLATION AND USE OF THIS
WOOD BURNING ROOM HEATER. FAILURE TO FOLLOW THESE INSTRUCTIONS
COULD RESULT IN PROPERTY DAMAGE, BODILY INJURY OR EVEN DEATH.
This heater meets the U. S. Environmental Protection Agencies
emission limits for wood heaters sold after July 1st, 1988.
Under specific conditions this heater has been shown to deliver
heat at rates ranging from 11,800 to 34,000 BTU per hour.
50-1084
Version Française: www.enviro.com/fr.html
Advertisement
Table of Contents

Subscribe to Our Youtube Channel
Related Manuals for Enviro 2100 Freestanding


Summary of Contents for Enviro 2100 Freestanding
-
Page 1: Wood Stove
SHERWOOD INDUSTRIES IS AN ENVIRONMENTALLY RESPONSIBLE COMPANY. THIS MANUAL IS PRINTED ON RECYCLED PAPER. PLEASE KEEP THESE INSTRUCTIONS FOR FUTURE REFERENCE Wood Stove 2100 Freestanding B Y : S H E R W O O D I N D U S T R I E S L T D OWNER’S MANUAL... -
Page 2: Safety Precautions
Safety Precautions FOR SAFE INSTALLATION AND OPERATION OF YOUR “ENVIRO” WOODSTOVE, PLEASE CAREFULLY READ THE FOLLOWING INFORMATION: ● Please read this entire manual before you install and use your new heater. Failure to follow these instructions may result in property damage, personal injury, and even death. ●... -
Page 3: Table Of Contents
Table of Contents Safety Precautions......................2 Table of Contents......................3 Operating Instructions....................4 Building Your Fire......................5 How It Works......................8 Specifications........................9 Woodstove Specifications..................9 Clearances To Combustibles - Freestanding..............9 Installation........................10 Pedestal Installation....................10 Legs And Ash Pan Installation..................10 Chimney Installation Through Wall................11 Installation......................12 Outside Air......................13 Installation Of A Listed, Factory Built Chimney............13 Brick Placement......................14 Door Installation.....................15 Optional Fan Installation..................16... -
Page 4: Operating Instructions
Operating Instructions FIRST START When first installed, the chimney, firebricks and steel are cold and it usually takes several hours on a fairly high burn for them to become hot and dry enough for the stove to function well. The paint will smell a little for the first time or two as it cures. -
Page 5: Building Your Fire
Operating Instructions CHIMNEY OR RUN AWAY FIRE: 1. Call local fire department (or dial 911) 2. Close the draft fully 3. Examine flue pipes, chimney, attic, and roof of the house, to see if any part has become hot enough to catch fire. - Page 6 Operating Instructions 3. Refueling the Stove: Use a long pair of gloves (barbecue gloves) when feeding the fire because these stoves burn at the front they are clean and efficient, but they are also very hot and gloves are useful. Keep a small steel shovel and whisk nearby for moving a log or lifting a fallen ember and for keeping the hearth clean.
- Page 7 Operating Instructions 2. What type of wood is best to use as firewood? Both hardwood and softwood burn well in this stove. Both woods contain about 8,000 BTU/lb (18,570 KJ/Kg), but hardwood is generally denser, will weigh more per cord, and burns a little slower and longer. Cutting firewood so that it will fit horizontally, front to back, makes it easier loading and less likely for the fuel to roll on the glass.
-
Page 8: How It Works
Operating Instructions 8. What can cause a poor draft? The most common factors for poor draft are: a) Air supply b) Environmental conditions c) Cold chimney temperature d) Poor chimney installation and maintenance e) Atmospheric pressure a) Air supply – Inside the home, normal household appliances such as clothes dryers and forced-air furnaces compete for air, resulting in air starvation to the fire. -
Page 9: Specifications
Specifications ood stove peciFications Model 2100 Freestanding Width x Depth 24” x 30” (610 mm x 762 mm) Height with pedestal or legs 33” (838 mm) Height of body 22” (559 mm) Fire box size (depth x width x height) 21½”... -
Page 10: Installation
Installation Please read and understand these instructions before installing pedestal or ash pan and leg option. Failure to follow these instructions carefully could cause personal injury or property damage.All screws are pre installed on the base of the unit. edestal nstallation •... -
Page 11: Chimney Installation Through Wall
Installation HimneY nstallation HrougH Here are four methods of combustible wall chimney connector pass-throughs. This information was provided from NFPA 211. Method A. 12” (304.8 mm) Clearance to Combustible Wall Member: Using a minimum thickness 3.5” (89 mm) brick and Minimum chimney clearance to brick and combustibles 2 inches (50.8 mm) a ⅝”... -
Page 12: Installation
Installation nstallation A non-combustible floor protector is required under all freestanding units, refer to “Clearances To Combustibles - Freestanding”. When venting into a masonry chimney the floor protector must be installed directly below the chimney vent and 2” (50.8 mm) on either side of the chimney vent. Vent the stove into a clean, lined, approved masonry chimney in good condition, conforming to local building codes or a listed 6”... -
Page 13: Outside Air
Installation utside A 4” (10.2 cm) fresh air adapter kit is available. This adapter can be installed either on the back pedestal or through the floor under the pedestal. Rear of pedestal Place the ¼” mesh screen between the fresh air adapter and the body of the pedestal (as shown to right). -
Page 14: Brick Placement
Installation rick lacement COMPLETE THE STOVE AND SMOKE PIPE INSTALLATION BEFORE PLACING THESE BRICKS. 3” 3” 3” 3” 3” 3” 3” 3” 1. Place the bottom layers of the sides and back of the firebox. 2. Place the floor bricks. The spaces between the bricks will soon fill with ashes. 3. -
Page 15: Door Installation
Installation nstallation Remove the door from the packaging. Inspect the door assembly for damage. DO NOT USE DOOR IF GLASS IS BROKEN. Place the door assembly on the two (2) hinge pins mounted on the body of the unit. Open and close the door, applying pressure down, to ensure the door assembly is properly seated on the hinges. -
Page 16: Optional Fan Installation
Installation ptional nstallation This appliance when installed, must be electrically connected and grounded in accordance with local codes or in the absence of local codes, with the current CSA C22.1 CANADIAN ELECTRICAL CODE. Part 1, SAFETY STANDARDS FOR ELECTRICAL INSTALLATIONS, or THE NATIONAL ELECTRICAL CODE ANSI / NFPA 70 in the USA. -
Page 17: Parts List
Parts List Reference Number Description Part Number 120ºF (49ºC) Ceramic Fan Temperature Sensor EC-001 Domestic Power Cord - 115V EC-042 Convection Blower - 115V EC-069 Fan Controller With Knob - 115V EF-045 Door Gasket - 7 feet (2.1 m) EF-168 Brick - 3”... -
Page 18: Parts Diagram
Parts Diagram... -
Page 19: Warranty
In the event of a defect of material or workmanship during the specified warranty period, ƒ Damage as a result of improper usage or abuse. Sherwood reserves the right to make repairs or to assess the replacement of a defective product at Sherwood’s factory. The shipping costs are to be paid by the consumer. -
Page 20: Installation Data Sheet
NAME OF INSTALLER: SERIAL NUMBER:___________________________ _________________________________________ DATE OF PURCHASE: ______________ (dd/mm/yyyy) ADDRESS: DATE OF INSTALLATION:___________ (dd/mm/yyyy) _________________________________________ INSTALLER’S SIGNATURE: _________________________________________ _________________________________________ _________________________________________ PHONE:___________________________________ MANUFACTURED BY: SHERWOOD INDUSTRIES LTD. 6782 OLDFIELD RD. SAANICHTON, BC, CANADA V8M 2A3 www.enviro.com May 7, 2013 C-13836...
Need help?
Do you have a question about the 2100 Freestanding and is the answer not in the manual?
Questions and answers