Enviro 2100 Freestanding Owner's Manual
Enviro - sherwood industries ltd. wood stove owner's manual
Hide thumbs
Also See for 2100 Freestanding:
- Owner's and operator's manual (19 pages) ,
- Owner's manual (20 pages)
Table of Contents
Advertisement
SHERWOOD INDUSTRIES IS AN ENVIRONMENTALLY RESPONSIBLE COMPANY. THIS MANUAL IS PRINTED ON RECYCLED PAPER.
PLEASE KEEP THESE INSTRUCTIONS FOR FUTURE REFERENCE
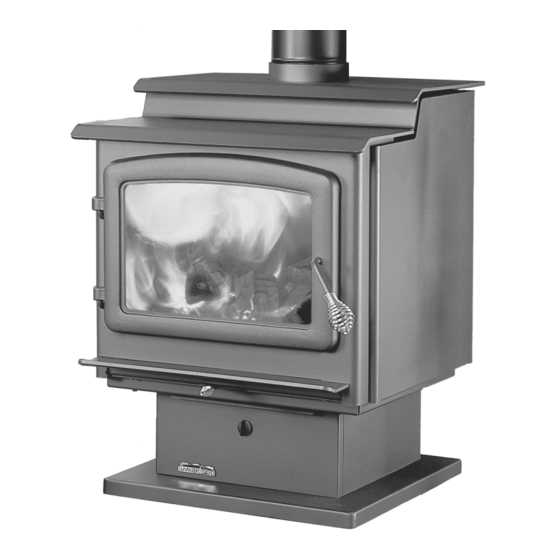
Wood Stove
2100 Freestanding
B Y : S H E R W O O D I N D U S T R I E S L T D
OWNER'S MANUAL
Contact your local building or fire officials, or the authority having jurisdiction
about restrictions and installation inspection requirements in your area.
PLEASE READ THIS ENTIRE MANUAL BEFORE INSTALLATION AND USE OF THIS
WOOD BURNING ROOM HEATER. FAILURE TO FOLLOW THESE INSTRUCTIONS
COULD RESULT IN PROPERTY DAMAGE, BODILY INJURY OR EVEN DEATH.
This heater meets the U. S. Environmental Protection Agencies
emission limits for wood heaters sold after July 1st, 1988.
Under specific conditions this heater has been shown to deliver
heat at rates ranging from 11,800 to 34,000 BTU per hour.
50-1084
Advertisement
Table of Contents

Related Manuals for Enviro 2100 Freestanding


Summary of Contents for Enviro 2100 Freestanding
- Page 1 SHERWOOD INDUSTRIES IS AN ENVIRONMENTALLY RESPONSIBLE COMPANY. THIS MANUAL IS PRINTED ON RECYCLED PAPER. PLEASE KEEP THESE INSTRUCTIONS FOR FUTURE REFERENCE Wood Stove 2100 Freestanding B Y : S H E R W O O D I N D U S T R I E S L T D OWNER’S MANUAL Contact your local building or fire officials, or the authority having jurisdiction about restrictions and installation inspection requirements in your area.
-
Page 2: Safety Precautions
● Operate only with the door and ash pan tightly closed and burn wood directly on the stove floor. Do not operate if the door glass is broken or a gasket is missing or damaged. Do not alter the combustion air control valves. -
Page 3: Table Of Contents
Table of Contents Safety Precautions...2 Table of Contents...3 Operating Instructions...4 Building Your Fire...5 How It Works...8 Specifications...9 Woodstove Specifications...9 Clearances To Combustibles - Freestanding...9 Installation...10 Pedestal Installation...10 Legs And Ash Pan Installation...10 Chimney Installation Through Wall...11 Installation...12 Outside Air...13 Installation Of A Listed, Factory Built Chimney...13 Brick Placement...14 Door Installation...15 Optional Fan Installation...16... -
Page 4: Operating Instructions
Located on the front of the stove just below the ash sill is the Slider Air Damper. This damper will control the amount of air to the fire. Pull this control all the way out when first starting the stove. Once the fire has been established you may adjust this control to set the burn rate of the fire. -
Page 5: Maintenance
NOTE: Until the fire is burning well, leave the draft controls fully open. d) Regulate the heat output of the stove by adjusting the draft controls to allow a larger fire and vice versa. A short period of experimentation with the control settings will allow you to regulate the heat output to keep your home comfortable. - Page 6 Before attempting to add fuel to the stove, OPEN the damper control fully by pulling it all the way out. This allows the chimney to carry away the additional smoke, which occurs when the door is open.
- Page 7 6. Is it normal for soot to cover the glass at the beginning of a fire? Your stove has been built with an air-wash system that will help keep the glass clear when the firebox has reached a good operating temperature and has a good draft. Normally a hot stove will keep the glass clean, but if you must clean the glass, use a soft cloth with no abrasive and clean only when cold.
-
Page 8: How It Works
Cold Chimney Temperature - Avoid cold chimney temperatures by burning a hot fire for the first fifteen to forty minutes, being careful not to over-fire the stove. If any part of the chimney or parts of the stove starts to glow, you are over-firing the stove. Where possible, install a temperature gauge on the chimney so temperature drops can be seen. -
Page 9: Specifications
† FLOOR PROTECTION: If a stove is installed on a combustible floor, it must have a pedestal attached and be on a NON COMBUSTIBLE hearth pad. -
Page 10: Installation
• Secure all four (4) legs, push the leg towards the center of the stove and align the legs with the outer edges of the firebox. • Stand the unit on the legs and set the unit in the... -
Page 11: Chimney Installation Through Wall
HIMNEY NSTALLATION HROUGH Here are four methods of combustible wall chimney connector pass-throughs. This information was provided from NFPA 211. Minimum chimney clearance to brick and combustibles 2 inches (50.8 mm) Minimum 12 inches Masonry (304.8 mm) to combustibles chimney Minimum chimney clearance from masonry to sheet steel supports and combustibles 2 inches (50.8 mm) Non-soluble... -
Page 12: Installation
6” (150 mm) factory built chimney suitable for use with solid fuels and conforming to, ULC-S629 in CANADA or UL-103HT in the U.S.A.. Connect the stove to this chimney with a short and straight 6” (150 mm), 25 gauge or heavier, single wall black or blued steel smoke pipe. Connection to all masonry chimneys must be a metal or masonry thimble cemented in place. -
Page 13: Outside Air
11. Install the smoke pipe with the lower (crimped) edge of the pipe inside the smoke collar. Any creosote formed will then run back down into the stove. All connections must be tight and secured with three sheet metal screws equally spaced. -
Page 14: Brick Placement
Place a full width brick next, and then place another full width brick on the top so that all the joints are staggered. -
Page 15: Door Installation
Installation NSTALLATION Remove the door from the packaging. Inspect the door assembly for damage. DO NOT USE DOOR IF GLASS IS BROKEN. Place the door assembly on the two (2) hinge pins mounted on the body of the unit. Open and close the door, applying pressure down, to ensure the door assembly is properly seated on the hinges. -
Page 16: Optional Fan Installation
PTIONAL NSTALLATION This appliance when installed, must be electrically connected and grounded in accordance with local codes or in the absence of local codes, with the current CSA C22.1 CANADIAN ELECTRICAL CODE. Part 1, SAFETY STANDARDS FOR ELECTRICAL INSTALLATIONS, or THE NATIONAL ELECTRICAL CODE ANSI / NFPA 70 in the USA. -
Page 17: Parts List
Parts List Reference Number 120ºF (49ºC) Ceramic Fan Temperature Sensor Domestic Power Cord - 115V Convection Blower - 115V Fan Controller With Knob - 115V Door Gasket - 7 feet (2.1 m) Brick - 3” X 9” Brick - 41⁄2” X 9” Brick - 41⁄2”... -
Page 18: Parts Diagram
Parts Diagram... -
Page 19: Warranty
Industries, our commitment to the highest level of quality and customer service is the most important thing we do. Each Enviro stove is built on a tradition of using only the finest materials and is backed by our Exclusive Lifetime Limited Warranty to the original purchaser. With Enviro, you’re not just buying a stove, you’re buying a company with years of unequalled performance and quality. - Page 20 If you are not satisfied with the service provided by the Enviro dealer, write to Sherwood Industries Ltd. at the address listed on the last page of the Owner’s Manual. Include the date you bought the product and a description of the problem.
- Page 21 If the stove is used for commercial purposes, it is excluded from the Limited Warranty. 23. No dealer, distributor, or similar person has the authority to represent or warrant Enviro products beyond the terms contained within the Limited Warranty. Sherwood Industries Ltd. assumes no liability for such warranties or representations.
-
Page 22: Installation Data Sheet
INSTALLER’S SIGNATURE: _________________________________________ NAME OF DEALER: _________________________________________ ADDRESS: _________________________________________ _________________________________________ _________________________________________ PHONE:___________________________________ NAME OF INSTALLER: _________________________________________ (dd/mm/yyyy) ADDRESS: (dd/mm/yyyy) _________________________________________ _________________________________________ _________________________________________ PHONE:___________________________________ MANUFACTURED BY: SHERWOOD INDUSTRIES LTD. 6782 OLDFIELD RD. SAANICHTON, BC, CANADA V8M 2A3 www.enviro.com December 28, 2006 C-11243...
Need help?
Do you have a question about the 2100 Freestanding and is the answer not in the manual?
Questions and answers