
Related Manuals for Marshall Electronics V-LCD70XP-HDMI


Summary of Contents for Marshall Electronics V-LCD70XP-HDMI
-
Page 1: Operating Instructions
Marshall Electronics V-LCD70XP-HDMI 7” High Resolution Field Monitor Operating Instructions... - Page 2 This page intentionally left blank.
-
Page 3: Table Of Contents
Contents Product Overview.................................. 4 Features ....................................4 Installation and Initial Setup ..............................5 Unpacking......................................5 Mounting........................................ 5 Changing the Battery Adapter ................................5 Connections and Power-On................................... 5 Front and Side Panel Features ............................6 Power Button ......................................6 Input Select Buttons....................................6 User-Definable Function Buttons ................................ -
Page 4: Product Overview
Focus-Assist, False Color filter, Aspect ratio settings, underscan mode, blue-only mode, monochrome mode, and H/V delay are a few of the advanced features which make the V-LCD70XP-HDMI at home in any broadcast environment. The HDMI Input allows display of incoming video in either RGB or YCbCr color space. Pixel-to-Pixel mode also allows native display of any incoming image format. -
Page 5: Installation And Initial Setup
The monitor will draw no more than 1.0 Amps at 12 Volts in operation (12 Watts). Connect the required cables for video signal input and output. (Power must be applied to the V-LCD70XP-HDMI for the active loop-through outputs to be activated.) All BNC connectors are rated at 75Ω. -
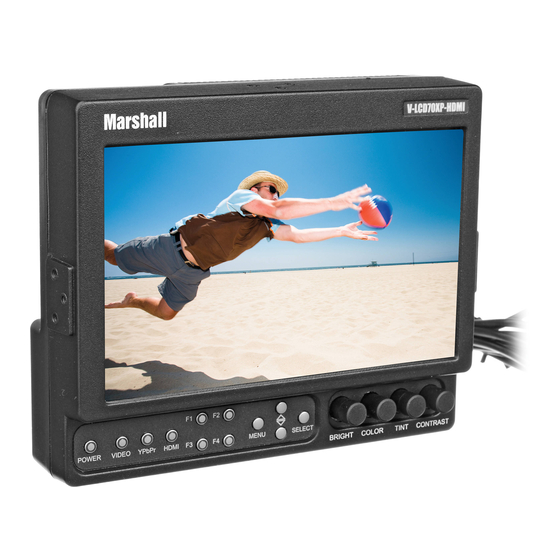
Page 6: Front And Side Panel Features
Front and Side Panel Features Power Button Image Adjustment Knobs Use the power button to toggle between ON and Use the image adjustment knobs to adjust color STANDBY modes. In the STANDBY state, the LED saturation, brightness and contrast of the image. on the button will illuminate bright green. -
Page 7: Rear Panel Features
Pin 4: +12VDC Connect HDMI Sources here. Accepted input formats can be found on page 8. Battery Adapter The V-LCD70XP-HDMI can be powered from a variety of batteries. Several user-interchangeable Power Input Connect 12VDC to the 4-Pin XLR power input battery adapters are available. -
Page 8: Compatible Input Formats
Compatible Input Formats Format Composite YPbPr HDMI ☺ NTSC ☺ ☺ 480i ☺ 576i ☺ ☺ 480p / 59.94 ☺ ☺ 576p / 50 ☺ ☺ 720p / 60 ☺ ☺ 720p / 59.94 ☺ ☺ 720p / 50 ☺ ☺... -
Page 9: On-Screen Menu
On-Screen Menu STRUCTURE OVERVIEW Color Temperature D93, D65, D55, Linear, User Gamma Correction 2.2, 2.0, 1.8, 1.6, 2.4 RGB Bias and Gain R, G, B Bias (0-100) / R, G, B Gain (0-100) Check Field Off, Mono, Blue, Green, Red Video Configuration Ratio Full Screen, 4:3, 16:9... -
Page 10: Video Configuration Submenu
On-Screen Menu (continued) VIDEO CONFIGURATION SUBMENU ■ Color Temperature Video Configuration Submenu Use this setting to choose one of the color temperature presets: • D55 (5500K) • D65 (6500K) • D93 (9300K) • Linear (no correction) • USER (Adjustable Color Bias and Gain) ■... -
Page 11: Check Field
■ Ratio Use to switch between Full Screen, 4:3 and 16:9 aspect ratios. As the V-LCD70XP-HDMI monitor has a native resolution of 800 x 480 RGB pixels, incoming images are automatically scaled to fit the screen: •... -
Page 12: H/V Delay
On-Screen Menu (continued) VIDEO CONFIGURATION SUBMENU (continued) • For incoming formats smaller than the native resolution of the LCD panel (800 x 480), the image will be displayed in the center of the screen using only the necessary LCD pixels. For example, NTSC images will occupy exactly 720 x 480 pixels. -
Page 13: Marker Enable
On-Screen Menu (continued) MARKER CONFIGURATION SUBMENU (Continued) ■ Marker Enable Use this setting to enable or disable all on-screen markers. This setting affects the center marker, full screen markers, 16:9 markers, and 4:3 markers. ■ Center Marker Use this setting to display a center marker on the screen. ■... -
Page 14: Marker Background
On-Screen Menu (continued) MARKER SETUP SUBMENU (continued) ■ Marker Background Use this setting to choose how selected markers are blended with the picture on the screen: • 100% The area masked by the marker is black. • 75% • 50% The area masked by the marker is mixed with video picture •... -
Page 15: Filter Configuration Submenu
On-Screen Menu (continued) FILTER CONFIGURATION SUBMENU ■ False Colors This monitor has a false color filter to aid in the setting of camera exposure. As the camera Iris is adjusted, elements of the image will change color based on the luminance or brightness values. This enables proper exposure to be achieved without the use of costly, complicated external equipment. -
Page 16: Peaking Filter (Focus Assist)
When the input is lost, or if no signal is present, the Curtain is displayed. Curtain color can be assigned Blue, Back, or Green. ■ Splash Screen When monitor is first turned on, the “Marshall Electronics” Splash Screen is displayed. This menu item allows the Splash Screen to be disabled upon power-up. -
Page 17: Contrast/Backlight
On-Screen Menu (continued) SYSTEM CONFIGURATION SUBMENU (continued) ■ Contrast/Backlight This monitor has an adjustable LED Backlight. Switching this menu item to Backlight, changes the function of the Contrast Knob to control the backlight level. Range is from 0-100% of the adjustable range. *Note* Backlight will remain ON with at the minimum setting. -
Page 18: Specifications
Specifications ■ PANEL ■ BATTERY ADAPTER Screen Size 7.0” Diagonal Display Area (h x v) 152.40 x 91.44 mm Field-Interchangeable Battery Adapter Options Aspect Ratio 15:9 (16:9 / 4:3 Selectable) (Sold Separately): Pixels 800 x 480 Color Depth 18-bit (262,144 Colors) Marshall Battery Battery... -
Page 19: Maintenance
Specifications (continued) Maintenance ■ Screen Cleaning Periodically clean the screen surface using ammonia-free cleaning wipes (Marshall Part No. V-HWP-K). A clean micro- fiber cloth can also be used using only non-abrasive and ammonia-free cleaning agents. Do not use paper towels. Paper towel fibers are coarse and may scratch the surface of the polycarbonate faceplate or leave streaks on the surface. -
Page 20: Warranty Information
This warranty is extended to the first consumer only, and proof of purchase is necessary to honor the warranty. If there is no proof of purchase provided with a warranty claim, Marshall Electronics reserves the right not to honor the warranty set forth above.
Need help?
Do you have a question about the V-LCD70XP-HDMI and is the answer not in the manual?
Questions and answers