Table of Contents
Advertisement
Quick Links
Advertisement
Table of Contents

Related Manuals for Martin SynchroZap QX250


Summary of Contents for Martin SynchroZap QX250
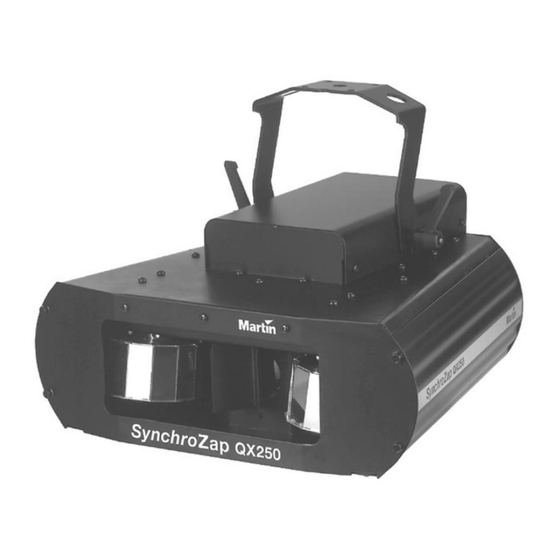
- Page 1 SynchroZap QX250 User Manual...
- Page 2 © 1998, 1999 Martin Professional A/S, Denmark. All rights reserved. No part of this manual may be reproduced, in any form or by any means, without permission in writing from Martin Professional A/S, Denmark. Printed in Denmark. P/N 35000025, Rev. B...
- Page 3 If you have questions about how to operate the fix- ture safely, please contact your Martin dealer or call the Martin 24-hour service hotline at +45 70 200 201.
- Page 4 • The exterior of the fixture can reach temperatures up to 65° C (150° F). Allow the fixture to cool for at least 5 minutes before handling. • Do not modify the fixture or install other than genuine Martin parts. • Do not operate the fixture if the ambient temperature (Ta) exceeds 40° C (104° F).
- Page 5 I n s t a l l i n g o r c h a n g i n g t h e l a m p The SynchroZap QX250 is designed to use the Philips MSD-200 or MSD-250/2 discharge lamp.
- Page 6 W A R N I N G ! Disconnect the fixture from AC power before proceeding. The lamp operates under high temperature and pressure and can explode when hot. Always allow a hot lamp to cool for at least 5 minutes before removing it from the fixture and wear safety goggles to protect your eyes.
- Page 7 P r e p a r e t h e p o w e r c a b l e The SynchroZap QX250 has a 3-pin IEC power inlet. To use the supplied power cable, you must install a grounding-type cord cap that fits your supply. Following the manufacturer’s instructions, connect the yellow/green wire to the ground (earth) pin, the blue wire to the neutral pin, and the brown wire to the live pin.
- Page 8 Verify that the structure can support at least 10 times the weight of all installed fixtures, clamps, cables, auxiliary equipment, etc. If hanging the fixture with a rigging clamp, verify that the clamp is undam- aged and is designed for the fixture’s weight. Bolt the clamp securely to the bracket with a grade 8.8 (minimum) M12 bolt and lock nut, or as rec- ommended by the clamp manufacturer, through the clamp hole in the mounting bracket.
- Page 9 S e l e c t D M X m o d e The SynchroZap QX250 has 2 DMX modes: a 6-channel mode that provides full control of all effects and a 1-channel mode in which the SynchroZap performs a random sequence at 3 trigger rates.
- Page 10 For independent control, each fixture must have its own address as in example 1. If inde- pendent control is not required, 2 or more SynchroZaps may share the same address: they will receive the same instructions and behave identically. In example 2, units 1 and 2 will behave the same, as will units 3 and 4.
-
Page 11: Operation
S t a n d - a l o n e o p e r a t i o n The SynchroZap QX250 may be operated without a controller in a stand-alone mode in which it performs a random sequence triggered by the beat of the music. Two or more Syn- chroZap QX250s may be connected for synchronized stand-alone “master/slave”... - Page 12 C h a n n e l 3 : g o b o w h e e l The SynchroZap QX250 has 19 gobos plus an open position. The gobo wheel can be rotated at varying speeds and scrolled using the music trigger.
- Page 13 C h a n n e l s 4 a n d 5 : m i r r o r d r u m s The SynchroZap has 2 asymmetrically mounted mirror drums with independently controlla- ble rotation. Each drum can rotate in both directions at varying speeds, stand still, or be set for musically triggered random or synchronized action.
-
Page 14: Basic Service
A d j u s t i n g t h e l a m p The SynchroZap QX250 lamp assembly is adjusted at the factory. Due to differences between lamps, however, fine adjustment may be improve performance. - Page 15 Wait for the lamp to reach full brightness. Position the fixture so the light shines on a flat, white surface. If there is an off-center “hot spot,” the lamp is not centered in the reflec- tor. Pull the hot spot into the center of the field with small adjustments of one or more of the lamp-adjustment screws.
- Page 16 A d j u s t i n g E U m o d e l v o l t a g e s e t t i n g s Local AC Supply Transformer Ballast Freq. Voltage Setting Terminal Setting Terminal 50 Hz...
- Page 17 A d j u s t i n g U S m o d e l v o l t a g e s e t t i n g s Local AC Voltage Transformer Setting 95 - 105 V 100 V, 50/60 Hz 105 - 115 V 110 V, 50/60 Hz...
-
Page 18: D M X 5 1 2 P R O T O C O L
a p p e n d i x a D M X 5 1 2 P R O T O C O L 6 - c h a n n e l D M X p r o t o c o l Channel DMX Values Percent... - Page 19 Channel DMX Values Percent Effect Gobos 0 - 8 0 - 3 Open 9 - 17 4 - 7 Gobo 1 18 - 26 8 - 10 Gobo 2 27 - 35 11 - 14 Gobo 3 36 - 44 15 - 17 Gobo 4 45 - 53...
- Page 20 1 - c h a n n e l D M X p r o t o c o l Channel DMX Values Percent Effect Random sequence 0 - 50 0 - 19 Blackout 51 - 101 20 - 39 2.0 second trigger 102 - 152 40 - 59...
-
Page 21: Specifications
• Rated life....................... 2000 hours • Color temperature ....................5600K • Martin part number.................. P/N 97010100 P h i l i p s M S D 2 0 0 l a m p • Power ....................... 200 watts • Rated life....................... 2000 hours •... - Page 22 C o n s t r u c t i o n • Housing.................... aluminum and steel • Finish ................. electrostatic powder coating T h e r m a l • Maximum ambient temperature (T ) ............40° C (104° F) •...
-
Page 23: D I P - S W I T C H Ta B L E
a p p e n d i x c D I P - S W I T C H TA B L E This table shows DIP-switch settings for channels 1- 511. Note: Pin 10 is always OFF in the 6-channel DMX mode. - Page 24 SynchroZap QX250 6-Channel DMX Protocol &K1# /DPS# #6KXWWHU#RSHQ #6WUREH #%22 5DQGRP#VWUREH 5DQGRP#VWUREH %ODFNRXW 5HVHW /DPS Z2PXVLF#WULJJHU 2II- ← <3 ZKLWH SLQN OLJKW# \HOORZ PDJH OLJKW# JUHHQ RUDQJH EOXH GHHS# ZKLWH #FRQWLQXRXV#URWDWLRQ ZKLWH JUHHQ EOXH RUDQJH → RSHQ *#< *#43 *#44...
Need help?
Do you have a question about the SynchroZap QX250 and is the answer not in the manual?
Questions and answers