Table of Contents
Advertisement
Advertisement
Table of Contents
Troubleshooting

Related Manuals for Martin Exterior 600


Summary of Contents for Martin Exterior 600
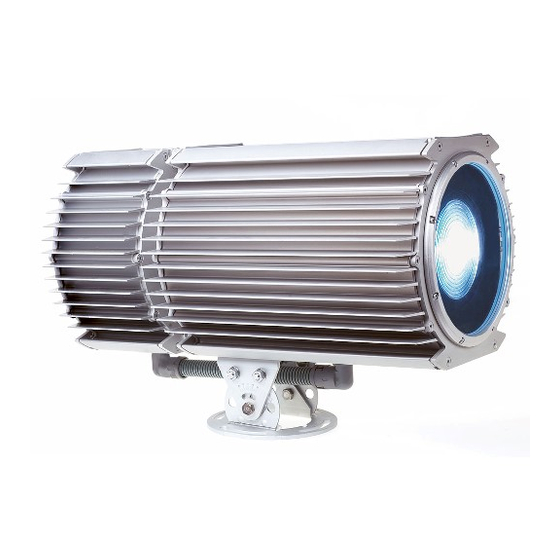
- Page 1 Exterior 600...
- Page 2 Martin Professional A/S, Denmark. Information subject to change without notice. Martin Professional A/S and all affiliated companies disclaim liability for any injury, damage, direct or indirect loss, consequential or economic loss or any other loss occasioned by the use of, inability to use or reliance on the information contained in this manual.
-
Page 3: Table Of Contents
PCB layout ..........76 Exterior 600 specifications ........77 Exterior 600 Maintenance schedule . -
Page 5: Section 1. Getting Started
1. G ECTION ETTING STARTED This section contains the following chapters: • “Introduction” on page 6 • “Installation” on page 10 • “AC power” on page 13 • “Data link” on page 18 • “Fixture settings” on page 21 • “General operation” on page 26... -
Page 6: Introduction
• 22-38° • 65° • 100° (An optional beam shaper lens (20° x 77°) is available for Exterior 600, 12° models. This is in addition to the built-in beam shaper effect that is available to DMX-controlled Exterior 600s.) Each optical configuration is available in four power supply configurations: •... - Page 7 S o f t w a r e n o t e The functions described in this manual are valid from Version 2 of the Exterior 600 software. When running earlier versions of the software, refer to an earlier revision of this user manual. These are available from http://www.martin.com.
- Page 8 • Do not illuminate surfaces within 1 meter (39 inches) of the fixture. • Install the fixture outdoors or in a well ventilated area. • Do not place filters or other materials over the lens. Use only Martin accessories to modify beam shape.
- Page 9 Preventing injury due to falls • Ensure that all external covers, components and installation fittings are securely fastened. • Ensure that all supporting structures, surfaces, fasteners and lifting equipment can bear the weight of all the devices they are intended to support plus an adequate safety margin, and that they conform to local building and safety regulations.
-
Page 10: Installation
Location and orientation The Exterior 600 may be installed outdoors, in any orientation. It must be located at least 1 meter (39 in.) away from the surface to be illuminated and any combustible materials. The aluminum housing reaches temperatures up... - Page 11 • Immersion in water (or any other fluid) The Exterior 600 requires free-circulating air for cooling. Do not bury the Exterior 600, install it in a well or sunk into a recess, or otherwise locate it in an unventilated space.
-
Page 12: Base
circle, so that one bolt passes through each curved slot in the foot of the base. The specific hardware will depend on the installation. Consult a qualified engineer to determine a suitable anchoring method and to verify that the structure can safely bear the fixture’s weight. Use high quality corrosion- resistant fasteners such as zinc-plated steel, grade 8.8 or better, together with either self-locking nuts or nuts and lock-washers. -
Page 13: Ac Power
Important! Do not connect the Exterior 600 to an electrical dimmer system. Doing so can damage the electronics. The Exterior 600 is supplied with a 3 meter (9.8 ft.) length of 3-conductor 0.75 mm (~18 AWG) electrical cable, neoprene jacket type, for connection to AC power. - Page 14 • Use Hypalon or neoprene rubber-jacket cable. The conductor size must be 1.5 mm (approx. 16 AWG) minimum. • Verify that the power supply in the Exterior 600 is tapped for the local AC voltage and frequency. The factor- supplied rating can be found on the fixture serial number label.
- Page 15 4. Remove the 2 screws from the aluminum circuit-board bracket (A) and pull the circuit board out. 5. Unplug the power cable’s brown lead from the back of the main fuse holder (B). The lead is connected with a spade plug and can be pulled off.
- Page 16 13. Install a 6.3 mm (1/4 in.) insulated female spade terminal on the live lead (brown), and plug the lead into the back of the main fuse holder (B). SERIAL DATA LINK MAINS INPUT MAINS INPUT Cold Gnd. Gnd. Neut. LIVE (Green) (Green)
- Page 17 Following the plug manufacturer’s instructions, connect the yellow and green wire to ground (earth), the brown wire to live, and the blue wire to neutral. Consult an electrician if you have any doubts about proper installation. AC power...
-
Page 18: Data Link
C a b l e a n d ju n c t i o n s The Exterior 600 is supplied with a dual 3 meter (10 ft.) 24 AWG cable tail with two IP65-rated locking 3-pin XLR connectors for data connection. The male connector is for data input and the female connector is for data output. - Page 19 A d a p t o r s Adaptors may be required to connect the Exterior 600 to the controller or other 5-pin devices. Adaptor cables for indoor use are available from Martin. The adaptor cables are wired as shown below.
- Page 20 terminals on the main circuit board, or across the corresponding terminals on the connection block (at position D). SERIAL DATA LINK MAINS INPUT MAINS INPUT Cold Gnd. Gnd. Neut. LIVE (Green) (Green) (Red) (Red) (Blue) (Blue) (Yellow) (Yellow) (Blue) (Brown) If you terminate the data link internally then you will need to change the supplied dual cable (with male and female XLR connectors) to a single cable with a male connector.
-
Page 21: Fixture Settings
Fixture settings This section describes how to set the control address, clock, and other fixture personalities. There are three ways to define fixture settings: Multi- Multi-Utility Manager (MUM) is a PC software application Utility supplied with a DABS1 USB-to-XLR communications Manager adaptor. - Page 22 Refer to the respective MP-2 user manual for more information. DMX Address Device (DAD) is a hardware device that can Address be used to set the DMX address of one Exterior 600 at a Device time. If you need to set other fixture settings - such as the internal clock - then you will also need to use an MP-2 Uploader or MUM to completely set-up the fixture.
- Page 23 DABS1 adaptor. It will also retrieve the current settings on the fixture and display them. Clock The Exterior 600 has a battery operated 24-hour clock that can start and stop stand-alone operation. To set the clock:...
- Page 24 1. Using MUM, click on the Fixture information button: 2. Using the two Fixture time spin buttons set the fixture to the current time (expressed in the 24-hour clock in hours and minutes). The time will be updated in the fixture in real-time. Fixture settings To set the additional fixture settings, click on the Fixture settings button: In most situations the default settings will be appropriate.
- Page 25 D M X P r o t o c o l s e t t i n gs These are described in “Preparing a fixture for DMX control” on page 46. Refer to this section if you will be operating the Exterior 600 with a DMX control device.
-
Page 26: General Operation
F r o n t g l a s s c a r e Masking or covering the front glass in the Exterior 600 will cause undue heat buildup, and this may result in damage that is not covered by the product warranty. -
Page 27: General Operation
Exterior 600 barn doors accessories shape the beam by masking the edge of the front glass. This solution is problem-free and is recommended if beam shaping is required. - Page 28 Generally speaking, the relatively: • Higher-powered lamps used in the Exterior 600 result in deeper colors in the cold colors of the spectrum. • Lower-powered lamp used in the Exterior 200 will give deeper colors in the warm colors of the spectrum.
- Page 29 Exterior 600 Exterior 200 Color (with MSD 575 lamp) (with CDM lamp) Full magenta Full yellow Full yellow Magenta 215 Green Cyan 241 Full cyan Yellow 241 Full yellow Blue Full cyan Cyan 255 Full magenta Magenta 191 General operation...
- Page 30 General operation...
-
Page 31: Section 2. Stand-Alone Operation
2. S ECTION TAND LONE OPERATION This section contains the following chapters: • “Stand-Alone programming overview” on page 32 • “Programming from a PC using MUM” on page 35 • “Stand-Alone show playback” on page 41 • “Synchronous triggering during Stand-Alone operation” on page 43 General operation... -
Page 32: Stand-Alone Programming Overview
The term stand-alone is used to mean that the Exterior 600 is not connected to a control device, but is pre- programmed with a series of up to 20 scenes that play continuously in a loop. -
Page 33: About Scene Timing
About scene timing Each scene has a dynamic part - the fade - during which effects move to the scene’s programmed positions, and a static part - the wait - where effects do not change. The duration of the fade and wait is programmed individually for each scene. - Page 34 P r o g r a m m i n g m e t h o d s The Exterior 600 provides two stand-alone programming methods; using the: • Martin MUM application from a personal computer (recommend because it provides an intuitive, easy-to-use, graphical user interface), or an •...
-
Page 35: Programming From A Pc Using Mum
1. Connect a DABS1 adaptor to your PC. 2. Connect the DABS1 adaptor to your Exterior 600. 3. Power on the Exterior 600 and start the MUM application. The application will automatically detect an Exterior 600 if it is powered-on and connected to your computer via a DABS1 adaptor. - Page 36 S t a n d - A l o n e S e t t i n g s The fixture needs to be configured to know if and when to activate a stand- alone program: Click Stand-alone settings to display the following window. The following options are available: Stand-alone Activates or deactivates stand-alone operation.
- Page 37 Synchr oni z ing s cene change s fo r mult iple fixture s In situations where you are running multiple fixtures on a data link it is possible to synchronize scene changes (for fixtures that support this functionality - see “Stand-Alone programming overview” on page 32). Read this section if this applies in your case.
-
Page 38: Magenta
Zoom The lens may be driven forwards or backwards to vary the size of the beam. The zoom function only has a noticeable effect in the following Exterior 600 models: • Exterior 600, 18-25° • Exterior 600, 22-38° The zoom function has little effect with models containing other beam angles. -
Page 39: Frost
The two buttons are used to set the frost effect on and off. The frost filter has little effect when used with the 65° or 100° Exterior 600 models. Scene fade The fade time, anything from 0 to 120 seconds, is the time time it takes to change from one color to another. - Page 40 When the program is run, scenes execute in a continuous, ascending loop. Note that, if a “slave” fixture has: • Fewer scenes than the master fixture, it will run these in a cycle continuously, until the master fixture signals that the program should start from the beginning again.
-
Page 41: Stand-Alone Show Playback
S c e n e e x e c u t i o n u s i n g t h e o p t i o n a l M C - X The MC-X is an optional remote control unit that is available from Martin. Once the remote controller is connected, 7 scenes can be conveniently called up on the MC-X's buttons. - Page 42 - a l o n e s h o w p l a y b a c k If an Exterior 600 is connected to a DMX controller and receives DMX signals during show playback, the Stand-Alone show will stop running and the fixture will respond to the DMX controller.
-
Page 43: Synchronous Triggering During Stand-Alone Operation
2. Scenes are numbered from 0 to 19. 3. A scene contains a fade-section, followed by a wait-section. 4. When running "synchronous triggering" one Exterior 600 issues commands to the other Exterior 600s to "go to scene xx", where xx is the scene number that the master will execute next. - Page 44 6. If a slave has more scenes than the master calls, the last scenes in the slave will never be executed, as is the case with scene S4 in the following example. F=fade, W=wait Timeline => Programmed in Master Programmed in Slave Result -- F 7.
-
Page 45: Section 3. Dmx Control
3. DMX ECTION CONTROL This section contains the following chapters: • “Preparing a fixture for DMX control” on page 46 • “DMX controller operation” on page 49 • “DMX protocol” on page 54 Synchronous triggering during Stand-Alone operation... -
Page 46: Preparing A Fixture For Dmx Control
There are a range of DMX specific settings that you need to set. These are described in this chapter. You can use a personal computer (via the MUM application), an MP-2 or a DAD to prepare your Exterior 600. We recommend using the MUM because it has a graphical user interface that is easy to use (see the following illustration). - Page 47 The Exterior 600 uses eight (mode 1) or nine (mode 2) channels of control data. When operating in mode 1, the fixture reads the data on the start channel and the next seven channels. If the control address is set to 100, the fixture uses channels 100, 101, 102, 103, 104, 105, 106, and 107.
- Page 48 “tracks.” The Exterior 600 has a digital filter algorithm that averages several updates to ensure smooth movement. • Vector control provides a way to program fades on controllers without programmable fade times or cross-faders. With vector control, instead of breaking up the movement into many small positions, the controller sends one position value along with a speed value that is programmed on a separate channel.
-
Page 49: Dmx Controller Operation
• “Zoom” on page 52 • “Beam shaper and frost” on page 53 Important: If an Exterior 600 is connected to a DMX controller and receives DMX signals during stand-alone show playback, the stand-alone show will stop running and the fixture will respond to the DMX controller. - Page 50 The effects reset to their “home” position when the Exterior 600 is powered on. The Exterior 600 can also be reset from the controller on channel 1. If the DMX Reset personality is off (see “DMX reset option” on page 47), the reset command only works if each of the CMY channels is set to a DMX value from 230 to 232.
-
Page 51: Color Wheel
L a m p Lamp on With the default setting, the lamp remains off until a “lamp on” command is sent from the controller. To have the lamp strike automatically within 90 seconds of powering on, activate the Automatic Lamp On personality (see “Fixture settings”... -
Page 52: Zoom
Z o o m The lens may be driven forwards or backwards to vary the size of the beam. The zoom function only has a noticeable effect in the following Exterior 600 models: • Exterior 600, 18-25° • Exterior 600, 22-38°... - Page 53 • Frost filter softens the beam. These two effects are on the same wheel so they cannot be combined. The beam shaper and frost have little effect when used with the 65° or 100° Exterior 600 models. DMX controller operation...
-
Page 54: Dmx Protocol
DMX protocol Start code = 0 Value Percent Function channel Shutter, Strobe, Reset, Lamp On/Off 0 - 19 0 - 7 Shutter closed 20 - 49 8 - 19 Shutter open * If the 50 - 112 20 - 44 Strobe, fast slow command is... -
Page 55: Beam Shaper
Start code = 0 Value Percent Function channel Color Wheel Continuous Scroll 0 - 40 0 - 16 White Color 1 40 - 80 16 - 31 Color 1 Color 2 80 - 120 31 - 47 Color 2 Color 3 120 - 160 47 - 63 Color 3... - Page 56 DMX protocol...
-
Page 57: Section 4. Service And Troubleshooting
4. S ECTION ERVICE AND TROUBLESHOOTING This section contains the following chapters: • “Seal maintenance” on page 58 • “Cleaning” on page 60 • “Firmware updates” on page 61 • “Lamp maintenance” on page 64 • “Maintaining the electrical system” on page 69 •... -
Page 58: Seal Maintenance
Seal maintenance The Exterior 600 has an IP rating of 65: it is protected against dust and can withstand low pressure water jets. To maintain protection against dust and water: • Verify that cable glands are tightened both to the casing and the cable. - Page 59 • Tighten the screws that hold the end plates, lamp access plate and retaining ring for the front glass (or PC lens on 12° beam angle models) gradually in stages to a torque of 2 Nm (1.5 ft.-lbs.). At this torque, the seals will be compressed by about one-third.
-
Page 60: Cleaning
C l e a n i n g t h e h o u s i n g The Exterior 600’s aluminum housing can be cleaned with mild detergents such as those for washing cars. -
Page 61: Firmware Updates
Firmware updates The latest Exterior 600 firmware is available from the support area of the Martin web site at http://www.martin.com. It can be installed using an MP-2, or via a PC serial data link using a hardware interface supported by the Software Uploader shareware (also available from the Martin web site). - Page 62 If all else fails, the fixture is responding erratically or not at all, or when the software update notes call for a boot sector update or boot mode upload: 1. Make sure the Exterior 600 is isolated from AC power and has been allowed to cool for at least 20 minutes.
- Page 63 8. When the upload is complete, disconnect the fixture from power and allow to cool. 9. Remove the two screws from the aluminum bracket and pull the PCB out. 10. Move the jumper at PL121 back to the “normal” position (pins 2 and 3). 11.
-
Page 64: Lamp Maintenance
• “Installing the lamp” on page 66 C o m p a t i b l e l a m p s The Exterior 600 is designed to use the lamps listed below. Installing other lamps may damage the fixture. - Page 65 R es et ti n g o r c h e ck i n g th e l a m p h o ur s co u n te r u s i n g M U M The Exterior 600 has a built-in counter that you can check or reset using the MUM application on a personal computer. When you install a new lamp we recommend that you reset the fixture’s “Total lamp hours”...
- Page 66 I n s t a l l i n g t h e l a m p WARNING! Always disconnect the fixture from AC power and allow it to cool for 20 minutes before installing the lamp. 1. Isolate the fixture from AC power. If it is hot, allow it to cool for at least 20 minutes before proceeding.
- Page 67 6. Remove the old lamp from the socket. 7. Holding the new lamp by its ceramic base - do not touch the glass - insert it firmly and squarely into the lamp socket. 8. Clean the glass bulb with the wipe supplied with the lamp, particularly if your fingers touched the glass.
- Page 68 14. Reset the lamp-hours counter using a MUM or MP-2 Uploader. See “Resetting or checking the lamp hours counter using MUM” on page 65. Lamp maintenance...
-
Page 69: Maintaining The Electrical System
R e p l a c i n g f u s e s The Exterior 600 has 4 fuses: a slow-blow main fuse - 6.3 AT (Martin P/N 05020020) - and three fuses on the PCB, one for each of the fixture’s low- voltage power supplies: •... - Page 70 F u s e s o n t h e P C B To replace any of the fuses on the PCB: 1. Make sure the Exterior 600 is isolated from AC power and has cooled for at least 20 minutes.
- Page 71 Adjusting power (on models other than 277 volts) This procedure applies to all models except those factory wired for 277 V supply (see the serial number label on the fixture). If the Exterior 600 model Maintaining the electrical system...
- Page 72 Warning! Disconnect the fixture from AC power before removing any cover. 1. Make sure the Exterior 600 is isolated from AC power and has cooled for at least 20 minutes. 2. Remove the 10 Allen screws from the rear cover plate. Carefully remove the plate and seal.
- Page 73 Adjusting power on 277 volt models This procedure only applies to models factory wired for 277 V supply (see the serial number label on the fixture). If the Exterior 600 model is factory wired for another voltage, see “Adjusting power (on models other than 277 volts)”...
- Page 74 I n s t a l l i ng a b at t e r y o n t h e P C B The Exterior 600’s built-in clock, which can be used to start and stop operation in stand-alone mode, requires a 3V battery (P/N 05801001) on the PCB in order to keep time when the fixture is powered off.
-
Page 75: Troubleshooting
Troubleshooting Problem Probable cause(s) Remedy One or more of the Fixture not powered on. Check that power is switched on and fixtures is completely cables are plugged in. dead. Primary fuse blown Disconnect fixture and replace fuse. (located besides the ballast). - Page 76 Problem Probable cause(s) Remedy Lamp does not Ballast and transformer Disconnect fixture. Check ballast strike. settings do not match and transformer settings and correct local AC voltage and if necessary. frequency. Lamp missing or blown. Install new lamp. Lamp is too hot. Allow lamp to cool for at least 8 minutes.
-
Page 77: Section 5. Reference
5. R ECTION EFERENCE This section contains the following chapters: • “PCB layout” on page 78 • “Exterior 600 specifications” on page 79 Troubleshooting... - Page 78 PCB layout Brown Fan Front / Fan Front / Temp sensor Temp sensor Brown Fan Rear Fan Rear Switch LED Display LED Display Enable PL 104 PL 104 Zoom Flash Write Flash Write Hall Sensor Hall Sensor Disable PL 121 PL 121 Enable Hard Boot Jumper...
- Page 79 Exterior 600 specifications P h y s i c a l Length....................636 mm (25 in.) Width ....................375 mm (14.8 in.) Height ....................421 mm (16.6 in.) Weight ....................48 kg (106 lb) L a m p Type....................575 W metal halide Approved lamps............
-
Page 80: Exterior
I n s t a l la t io n Orientation ......................Any Horizontal aiming....................+/- 25° Vertical aiming (pedestal mounted) ..............+/- 40° Minimum distance to combustible materials ..........1 m (39 in.) Minimum distance to illuminated surfaces ..........1 m (39 in.) C o n n e c t i o n s Power cable entry................IP68 cable gland Power connection ............ - Page 81 Sealing kit ....................P/N 91611017 O r d e r i n g i n f o r m a t i o n Exterior 600, 12°, 208 V, 60 Hz ............P/N 90505024 Exterior 600, 12°, 230 V, 50 Hz ............P/N 90505020 Exterior 600, 12°, 245 V, 50 Hz ............
- Page 82 WEEE (Waste Electrical and Electronic Equipment), as amended by Directive 2003/108/EC, where applicable. Help preserve the environment! Ensure that this product is recycled at the end of its life. Your supplier can give details of local arrangements for ® the disposal of Martin products.
-
Page 83: Maintenance Schedule
(frequent and rapid effects changes and/or high ambient temperatures), service and mechanical part replacement intervals should be reduced. The Exterior 600 should be overhauled after 18 000 hours of operation or 6 years, whichever comes first. To ensure that service is correctly carried out and that only genuine Martin spare parts and materials are used, refer all service to authorized Martin technicians only. - Page 84 • Olof Palmes Allé 18 • 8200 Aarhus N • Denmark Tel: +45 8740 0000 • Fax +45 8740 0010...
Need help?
Do you have a question about the Exterior 600 and is the answer not in the manual?
Questions and answers