Table of Contents
Advertisement
Advertisement
Table of Contents

Related Manuals for Suntek HC-300


Summary of Contents for Suntek HC-300
- Page 1 Infrared Mobile HD Digital Trail Camera HC-300 Users Manual...
-
Page 3: Table Of Contents
Table of Contents 1 Instructions..............1 1.1 General Description ..........1 1.2 Camera Body Interfaces ........1 1.3 Camera Components And Features…………...…….…2 1.4 Remote Control………………………………..…...……...3 1.4.1 Navigating ............4 1.4.2 Characters............4 1.5 Shooting Information Display ........4 1.6 MMS function............5 1.7 Supported Format..........5 2 Cautions................6 3 Easy Operations.............7 3.1 Power Supply............7 3.2 Insert the SD-card and the SIM-card......7... - Page 4 4.1.10 Set Date and Time ........15 4.1.11 Set Photo Burst...........15 4.1.12 Set Video Length ........16 4.1.13 Set Video Sound..........16 4.1.14 Set PIR Triggering Interval Time....16 4.1.15 Set PIR Sensitivity........17 4.1.16 Set Timer............ 17 4.1.17 MMS Settings..........18 4.1.18 Set GSM Mode........... 18 4.1.19 Enter Password..........
-
Page 5: Instructions
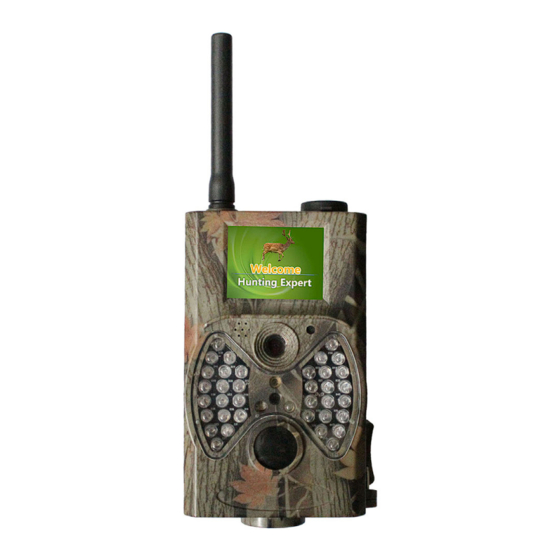
1 Instructions 1.1 General Description This camera, a digital trail camera with MMS function, is a surveillance camera working automatically. It can be triggered at once by any movement of human (or animals) in a certain region of interested (ROI) monitored by a high sensitive Passive Infrared (PIR) motion sensor, and then automatically captures high quality pictures (up to 12M pixels) or records HD video clips (1080P or 720P). -
Page 6: Camera Overview
bookmark this section and refer to it as you read through the rest of the manual. 1.3 Camera components and features 1) Bottom Cover 9) GSM Antenna 2) SD-Card Slot 10) 2 inch color LCD Display 3) USB Connector 11) Sound recorder 4) TV Out connector 12) SIM card slot 5) PIR... -
Page 7: Remote Control
1.4 Remote Control The remote control is an input device of the camera and is primarily used for customer settings and password input. This is an infrared type wireless remote control. The maximum remote distance is 9 meters. There are fifteen buttons on the remote control. -
Page 8: Navigating
1.4.1 Navigating Press UP or DOWN to select or highlight the menu item, while press LEFT or RIGHT to select the option of each item and press OK to make selection. Select Item(UP) Display Menu/ Selection (OK) Exit (MENU) Select option Select Option (RIGHT) (Left) -
Page 9: Mms Function
1.6 MMS function This camera can send pictures instantly to your mobile device via the GPRS network. You’ll be alerted only when something has happened; The MMS through GPRS to send, so before using this function you need to make the settings in the txt file for mms. Review to related information, please refer to section 4.1 setting menu table “MMS mode”... -
Page 10: Cautions
2 Cautions The working voltage of the camera is 6V. The camera is supplied by four or eight AA batteries. Please install batteries according to shown polarity. Please unlock the write-protect before inserting the SD-card. Please insert the SD-card when the power switch is at OFF position before testing the camera. -
Page 11: Easy Operations
3 Easy Operation 3.1 Power Supply To supply power for the camera, four or eight AA size batteries are needed. Open the bottom cover. Confirm that the power switch is at the OFF (Right) position, pull out the battery depot. Load the fully charged batteries into the depot according the polarities sign shown below. -
Page 12: Power On And Enter Into The On Mode
card slot with angle in the upper left. 3.3 Power on and Enter into the ON Mode Before switching on, please pay attention to the following: 1. Avoid temperature and motion disturbances that could be construed as animals or humans such as trees that are exposed to direct sunlight for much of the day or any other heat source. -
Page 13: Custom Settings
3.4 Enter into the TEST Mode Slide the power switch to the TEST position (Middle) to enter into the TEST mode. There are some functions in TEST mode: Custom settings, manual capture, preview or send MMS manually. 3.4.1 Custom Settings Press MENU on the remote control to enter into menu setting. -
Page 14: Advanced Operations
4 Advanced Operations From the basic operations of the camera in previous chapter, we know that the camera has three basic operation modes: 1. OFF mode: Power switch is at OFF position (Right). 2. ON mode: Power switch is at ON position (Left). 3. -
Page 15: Camera Setting
4.1.1 Photo Setting: 4.1.2 Video Setting:... -
Page 16: System Settings
4.1.3 System Setting:... -
Page 17: Default Settings
4.1.4 Default Default Settings are listed as below: Setting Default Items Mode Camera C a m e r a , Vi d e o , C a m e r a & Video Resolution (Camera) 12M 12M,8M,5M Delay 5 Seconds 5-30 Seconds,1-30 Minute Multi Single... -
Page 18: Format Sd-Card
display. 4.1.7 Format SD-Card The system will delete all images or videos stored in the SD-card after formatting, make sure that you have made a backup of important data. a) Press MENU to display the setting menu. b) Press RIGHT to select System setting. c) Press DOWN to select Format. -
Page 19: Set Date And Time
a) Press MENU to display the setting menu. b) Press DOWN to select Resolution. c) Press RIGHT to select 720P. d) Press OK to save the current setting, then press menu to return to info display. Press MENU to cancel setting and return to info display. -
Page 20: Set Video Length
press MENU to return to info display Press MENU to cancel setting and return to info display 4.1.12 Set Video Length The following shows how to set video length to 30 Seconds, provided that the previous value is 10 Seconds: a) Press MENU to display the setting menu. -
Page 21: Set Pir Sensitivity
seconds. a) Press MENU to display the setting menu. DELAY b) Press DOWN to select Delay. c) Press RIGHT to enter in to the interval setting. d) Press DOWN to select 1 minute. e) Press OK to save the current setting, then press MENU to return to info display. -
Page 22: Mms Settings
time the device is shut off. The effective value of the hour ranges from 0 to 23 while the minute ranges from 0 to 59. Provided that the camera should work from eight a.m. to five p.m., the steps are as follows: a) Press MENU to display the setting menu. -
Page 23: Enter Password
b) Press DOWN to select GSM Mode. c) Press RIGHT to select Off. d) Press OK to save the current setting, then press MENU to return to info display. Press MENU to cancel setting and return to info display. If you choose “Instant”, you need to select how many MMS you want to send for economy consideration. -
Page 24: Delete Photo Or Video
d) Press Left again to stop playing the video. e) Press UP to view the previous picture (or video) and DOWN for the next. f) Press OK to return to info display. When viewing images, the total number of all images in the SD-card and the index of the displaying image will be shown respectively. -
Page 25: Firmware Upgrade
PTDC0001.AVI.Through the suffix you can distinguish whether the file is an image(with suffix.jpg)or a video(with suffix.avi). 4.5 Firmware Upgrade This camera is equipped with an automatic upgrade function for you. Upgrading is needed only when an improved firmware is available. The operations are as following: 1.Unzip the update file 2.Copy the FW18NA.bin to SD card. -
Page 26: Appendix I : Technical Specifications
Appendix I : Technical Specifications Image sensor 5MP Color CMOS Lens F/NO=3.0, FOV(Field of View)=60° IR Flash 65feet/20m LCD Display 2” TFT Memory Card From 20 MB to 32 GB Picture Resolution 12M = 4000x3000 , 8M = 3200x2400, 12M = 4000x3000 , 8M = 3200x2400, 5M = 2592×1944 , , 5M = 2592×1944 Video Resolution... -
Page 27: Appendix Ii : Parts List
Appendix II : Parts List Part Name Quantity Digital Camera Wireless Remote USB Cable TV cable Belt One User Manual Antenna One SD card Optional Black 940NM IR flash Optional Battery Not included Solar power supply Optional...
Need help?
Do you have a question about the HC-300 and is the answer not in the manual?
Questions and answers