Table of Contents
Advertisement
Advertisement
Table of Contents

Subscribe to Our Youtube Channel
Related Manuals for Suntek HT-002LI


Summary of Contents for Suntek HT-002LI
- Page 1 VISIOn DIGITal InfrareD TraIl Camera HT-002lI User’s manual...
-
Page 2: Table Of Contents
Table of Contents 1 Instructions..........................................1 1.1 General Description ......................................1 1.2 Camera Body Interfaces ....................................1 1.3 Camera Components and Features…................................1 1.4 Shooting Information Display ...................................2 1.5 Supported Format......................................2 2 Cautions..........................................3 3 Easy Operations.........................................4 3.1 Power Supply........................................4 3.2 Insert the SD-card......................................4 3.3 Power on and Enter into the ON Mode ................................4 3.4 Enter into the TEST Mode....................................4 3.4.1 Custom Settings......................................4 3.4.2 Manual Capturing......................................4... -
Page 3: Instructions
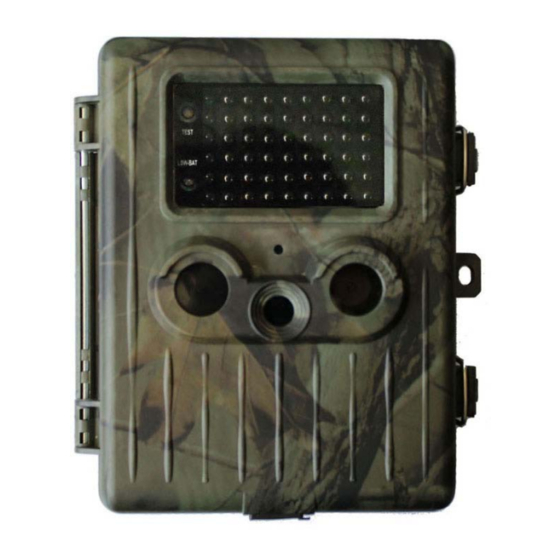
1. Instructions 1.1 General Description This camera, a digital trail, is a surveillance camera working automatically. It can be triggered at once by any movement of human (or animals) in a certain region of interested (ROI) monitored by a high sensitive Passive Infrared (PIR) motion sensor, and then automatically captures high quality pictures (up to 12M pixels) or records 1080p HD video clips (WVGA or QVGA). -
Page 4: Shooting Information Display
1) 2.5 inch Color LCD Display 2) Power Switch 3) Distance Switch 4) Menu Switch 5) SHUTTER Switch 6) Select Switch 7) SD-Card Slot 8) USB Connector 9) TV Out Connector 10) Battery Depot 1.4 Shooting Information Display When the camera is turned on (the power switch is slid to TEST position), the shooting information will bedisplayed in the monitor. 1.5 Supported format Item Format... -
Page 5: Cautions
2. Cautions The working voltage of the camera is 7.5v to 9.0V. The camera is supplied by the rechargeable lithium battery. Please unlock the write-protect before inserting the SD-card. Please insert the SD-card when the power switch is at OFF position before testing the camera. Please do not insert or take out the SD-card when the power switch is at ON position. -
Page 6: Easy Operations
3. easy Operation 3.1 Power Supply Open the battery cover. Confirm that the power switch is at the OFF position, load the fully charged lithium battery into the depot. Push back the battery cover. When in Test Mode, camera will be automatically shut down to save power if without any operation within 3 minutes; it could be waked up by any movement detection. -
Page 7: Advanced Operations
4. advanced Operations From the basic operations of the camera in previous chapter, we know that the camera has three basic operation modes: 1. OFF mode: Power switch is at OFF position (Down). 2. ON mode: Power switch is at ON position (Up). 3. -
Page 8: System Setting
4.1.3 System Setting 4.1.4 fix the setting by software on the computer You can fix all the 3 setting parts by software on the computer. Run the MMSCONFIG.exe file from MMSCONFIG folder in CD. Note: pls move all the files in the root directory of MMSCONFIG folder to keep the setting available if you need. Page6... - Page 9 The following window prompts: Fix Menu Setting on PC: Clink on Camera and model as you have, then you will see the following interface: Fix the Menu setting based on your need. Last, lick on Save to save your settings into the root directory of the SD card (You need to insert the SD card into your computer.)Then one file named Parameter.dat will be created and saved in the directory you just selected.
-
Page 10: Default
other directory in the computer, you need to move the Parameter.dat file to the root directory of the SD card before inserting the card in the camera. If you like, you can use the manufacturer default settings by clicking on Default. Retrieve the SD card from the computer and insert it in the camera. -
Page 11: Set Date And Time
The default value is 1080P,the following shows how to set 720P video size as provided that the previous option is at WVGA : a) Press MENU to display the setting menu. b) Press DOWN to select Resolution. c) Press RIGHT to select WVGA d) Press down the select switch to save the current setting, then press menu to return to info display. -
Page 12: Enter Password
4.1.18 enter Password If the password setting is selected as On, after switching on the camera, the LCD screen on camera will prompt to enter password. The default password is off. It can be changed where the steps are as following: a) Press MENU to display the setting menu. -
Page 13: Appendix I: Technical Specifications
Appendix I: Technical Specifications Image Sensor Type(True Megapixels) 12 Mega Pixels Color CMOS Memory SD Card 8MB~32GB Lens F=3.1; FOV=60° Size 160mm ﹡ 120mm ﹡ 50 mm IR Filter Full Automatic IR Filter TFT Display Screen 48x35.69mm (2.36");480(RGB)﹡234DOT; 16.7M color PIR Sensitivity DUAL PIR with 3 sensitivity levels: High/ Normal/Low...
Need help?
Do you have a question about the HT-002LI and is the answer not in the manual?
Questions and answers