Table of Contents
Advertisement
Advertisement
Table of Contents

Related Manuals for Suntek HC-300A


Summary of Contents for Suntek HC-300A
- Page 1 Digital Infrared Trail Camera User’s Manual HC-300A...
-
Page 2: Table Of Contents
Table of Contents Instructions....................2 General Description ..................2 Camera Body Interfaces ................2 Camera Components and Features…............2 Remote control ...................2 Shooting Information Display ..............3 Supported Format..................3 Easy Operation....................3 Power Supply....................3 Insert the SD-card…………………..............4 Enter into the TEST Mode ................4 2.3.1 User Settings....................4 2.3.2 Manual Capturing..................4 2.3.3... -
Page 3: Instructions
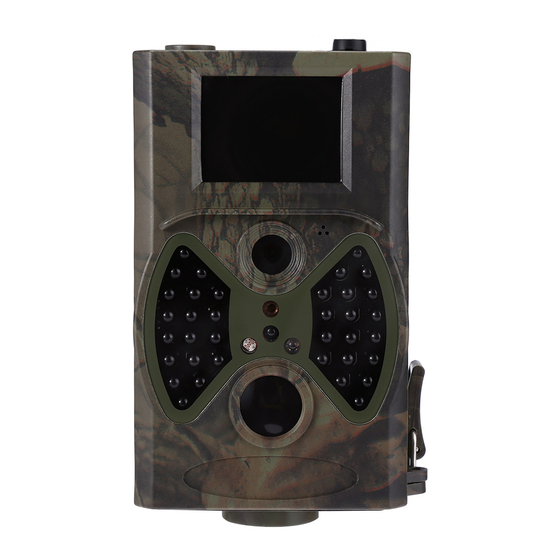
1. Instructions 1.1 General Description This digital trail camera is a surveillance camera working automatically. It can be triggered at once by any movement of human (or animals) in a certain region monitored by motion sensor, and then automatically captures high quality pictures (up to 12M pixels) or records 1080p HD video clips (WVGA or QVGA). -
Page 4: Shooting Information Display
Press the punctuation “*” for laser pointer. 1.5 Shooting Information Display When the camera is turned on (the power switch is slid to TEST position), the shooting information will be displayed in the monitor. 1.6 Supported Format Item Format Photo Video 2 Easy Operation 2.1 Power Supply... -
Page 5: Insert The Sd-Card
2.2 Insert the SD card Insert SD-card into the card slot. 2.3 Enter into the TEST Mode Turn the power switch to the TEST position to enter into the TEST mode. There are some functions in TEST mode: user settings, manually capture, preview. 2.3.1 User Settings Press the MENU button. -
Page 6: Photo Setting
the LCD or the external TV monitor. 3.1.1 Photo Setting 3.1.2 Video Setting... -
Page 7: System Settings
3.1.3 System Setting 4. Cautions The working voltage of the camera is 6.0V. Please unlock and format the SD-card. Please insert the SD-card when the power switch is at OFF position. Please do not insert or take out the TF-card when the power switch is at ON position. Please ensure full power when having firmware upgrade, otherwise the upgrade process could be stopped. -
Page 8: Appendixⅰ: Technical Specifications
AppendixⅠ: Technical Specifications Image Sensor 5 Mega Pixels Color CMOS Memory SD Card to 32GB Lens F=3.1; FOV=60 ° Size 145mm * 80mm * 55 mm IR Filter Full Automatic IR Filter TFT Display Screen 2.0 inch Black Invisible 940nm or 850nm PIR Distance High/Normal/Low PIR Sensor Sight Angle...
Need help?
Do you have a question about the HC-300A and is the answer not in the manual?
Questions and answers