
Related Manuals for Suntek HC800LTE


Summary of Contents for Suntek HC800LTE
- Page 1 1080P FULL HD SCOUTING CAMERA HC800LTE Support 4G LTE /3G WCDMA / 2G GSM &GPRS Network USER’S MANUAL Hunting Trail Camera...
-
Page 2: Table Of Contents
Table of Contents 1. General Information…………………………………………………….…….……..3 1.1 Applications …………………………………………..……………………………….…4 1.2 Main Features ………………………………………………………..…….…….…..…4 1.3 Power Supply ……………………………………………………………………..…….5 1.4 Memory card Selection ………………………………………………………...…...….6 1.5 Transmitting picture of 4G /3G/ 2G camera ………………………………………….6 2. Whole View and Details of camera ……………………………………………...7 2.1 Front View of Camera …………………………………….………………………….…7 2.2 Internal, Side View of Camera ……………….………………………………………...8 3. -
Page 3: General Information
Passive Infra-Red (PIR) sensor, HC800LTE can sends original size pictures of 16MP & 1080P FHD video file to your mobile phone and E-mail via high communication speed 4G LTE network, Furthermore, the latest version HC800LTE supports FTP function, is able to upload the videos &... -
Page 4: Applications
3G CDMA frequency: B2 / B4 / B5 1.1 Applications This digital camera can be used to take photographs and short time videos automatically, is an ideal product for wildlife hunting & trail, wireless home &outdoor monitoring, property’s security etc., with its stealth appearance and mini shape. It is easy to deploy but hard to find out. -
Page 5: Power Supply
► Tough and water-resistant body design. ► Low power consumption, extremely long time standby life (up to 4~6 months with 8X AA batteries.) ► T ime-lapse recording, period time shooting, with timer setting on, the camera can be programmed to only work on specified period time every day. ►... -
Page 6: Memory Card Selection
1.4 Memory Card Selection A memory card(Micro SD card) is required to operate the camera, when the camera switch is at“TEST” and no memory card is used, the screen will display “no File”. The memory card slot of camera has 32GB memory capacity. Before insert or remove the memory card, the camera must be turned to “OFF”. -
Page 7: Transmitting Picture Of 4G /3G/ 2G Camera
1.5 Transmitting picture of 4G /3G/ 2G camera SMTP <40MB (Picture or <40MB (Picture √ <100kb(default) Video) or Video) Options: <1MB (Picture only) √ 200kb/100kb/50kb <100KB (default) (depend on the limit of (Picture Only) √ the mms server) Options: 200kb/100kb/50kb 2. -
Page 8: Internal, Side View Of Camera
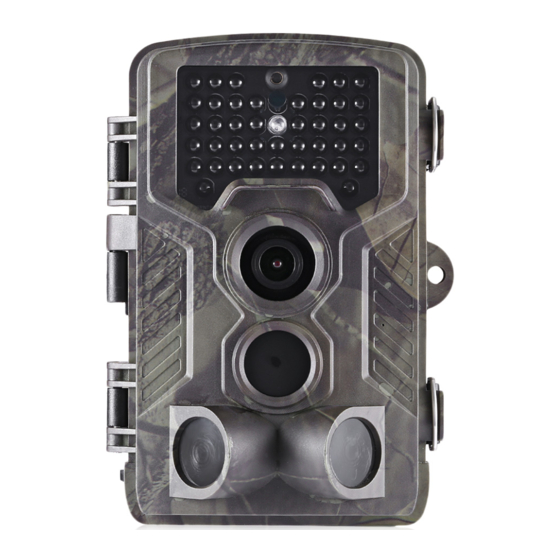
2.1 Front View of Camera 2.2 Internal, Side View of Camera... -
Page 9: Quick Start
3. Quick Starting 3.1 Insert SIM card A SIM card is needed for HC800LTE (basic model HC800A, does not need SIM card) Make sure your SIM card supports Short Messaging Service (SMS), Multimedia Messaging Service (MMS) and data traffic service. -
Page 10: Enter To Test Mode
3.3 Enter to TEST Mode After camera connect a power supply, switch camera to the “TEST” position and its display will light up. Cautions: Please don’t switch from OFF to ON directly, only from Off to TEST, will the camera display light up. There is a control panel with 8 buttons when you open the camera. - Page 11 Press the key to choose the system menu or Exist from system menu. Press the key to choose the next option. Press the key to manually trigger the shutter. A photo or video (depending on the mode) will be taken and saved to the memory card. Press the key to save the menu setting.
-
Page 12: Enter To On Mode
Press directly to get the IMEI (in the TEST mode). 3.4 Enter to ON Mode After finish or check all the setting, switch power button to the ON to enter to the ON mode. The motion indicator will flash red for about 5 seconds and the camera starts working after flash. - Page 13 ► Camera, when you choose Camera mode, your camera will take pictures only. ► Video, when you choose Video mode, your camera will take videos only. ► Camera & Video, when you choose Camera & Video mode, your camera will firstly take picture then take a video.
- Page 14 4.1.3 Image size Select a photo size: 16 MP, 12 MP (preset) or 8 MP. The larger the file size, the more detailed the image. but the maximum number of high-resolution images that can be stored on the memory card is much fewer. 4.1.4 Video resolution Select the screen resolution: 1080 FHD, 720P, WVGA, VGA.
- Page 15 4.1.5 Date & time Use control panel to set up date and time. They will be displayed on the photos and video. 4.1.6 Sequence Shooting...
- Page 16 Your camera can take 1/3/6/9 pictures, when the camera is activated in Camera or Camera + Video mode. 4.1.7 Video length You can choose Video length 5s / 10s / 30S / 60S / 90s when video recording is activated. The longer the video length selected, the shorter the battery life.
- Page 17 4.1.8 Interval You can choose 1s / 5s / 10s /30s / 1min / 5min / 10min / 30min, during the selected interval, your camera will not record any images or videos, which prevents the memory card from be filled up with too many pics / videos at same event and save your batteries life and memory capacity.
- Page 18 4.1.10 Timer. Select Timer if the camera only need to be active during a certain time period. In the sub- menu, you can set the start and end time for PIR mode and time lapse mode. Press the key to set the hour for the start of the active phase, then press the right button to the next field.
- Page 19 active phase. Press the key to exit this sub-menu. 4.1.11 Password Setting Select “On” if you want to use a password to protect the camera from unwanted access. In the following screen menu, you can set a 4-digit combination: Press the button to select the first digit between 0–9.
- Page 20 useful if you want to observe the blooming of plants. Menu Mode Time lapse Time-lapse interval 30/60/240 minutes 4.1.13 Default Settings Select Default Setting, switch to “OK” and press the key , camera will be factory setting and all previously settings including password will be deleted. Note: the pictures and videos of memory card will not be deleted.
- Page 21 When you use a new memory card or a card that has previously been used in other device, we suggest that you format the memory card. select “Format”, choose “SD card” and press the key The formatting process starts. When the card is being formatted, there will be a message “Please wait”.
-
Page 22: Setup Camera On Pc
Select “Version” and press the key , there will be Software Version, which will help manufacturer to find the reason when your camera has problem. 4.2 Setup Camera On PC After format the memory card, retrieve the memory card and insert it into PC. The SD card reader is needed if your PC can’t read SD card directly. - Page 23 ► Menu Image Resolution: 16M/12M/8M. Delay/Interval: 1/5/10/30 seconds, 1/5/10/30 Minutes Multi-shot: 1/3/6/9 ISO: Auto/100/200/400 Camera ID: CAM000 or set your own camera name Video: 1080P/720P/VGA Video Length: 10/30/60/90 seconds Voice: On/Off...
- Page 24 Mode: Camera/Video/Camera &Video/Time-lapse Language: English / French / German / Spanish / Russian / Portuguese / Italian / Dutch/ Italian / Polish / Danish /Swedish / Finnish Motion Detection: High / Normal / Low TV mode: PAL / NTSC Date/Time: will automatic timing from computer system Date Format: DD/MM/YY, MM/DD/YY, YY/MM/DD Password: ON/OFF ►...
- Page 25 MMS ON/OFF: OFF/ON MMS Mode: Auto/Manual ON Auto mode, we have preset some countries operators and its data such as APN, Server Setting, so you just need to choose your SIM card operator and fill your receiving phone number or E-mail. If your SIM card operator not in this list, you can choose MMS Mode: Manual contact your operator for APN / MMSC / account (Username &...
- Page 26 Cautions: ► When you turn on MMS, camera will send photos to your phones/ E-mail. If MMS is with wrong information entered, then phones/ email accounts will not be able to receive photos from camera. ► Email box also can receive photos by MMS. ►...
- Page 27 ► SMTP SMTP sub-menu is similar with MMS sub-menu. There are also 2 modes when you turn on SMTP sub-menu: Auto / Manual On Auto mode, we have preset some countries info, you just need to choose your SIM card operator and fill your receiving E-mail. You can choose Manual mode if your SIM card operator not included and fill in your SIM card operator info manually.
-
Page 28: Camera To On Mode
2. On Manual mode, if you are not sure SIM card specifications,please contact your SIM card operator to get APN/ Server/ Port. ► FTP Please fill in your FTP address, port, account and password, the original video or pictures will be upload to your server automatically. Note: The GRRS data setting of FTP will Synchronize with SMTP data. -
Page 29: Sms Command Code
Switch to TEST mode, when camera display light up, you can check the configure by key panel, and switch to “ON “mode, after Red flash for 5 seconds, then the camera will start to work. Cautions: camera display and control panel will be useless when camera at “ON” mode, you can switch back to “TEST”... -
Page 30: Camera Stops Taking Images
2. Try to set your camera up in an area where no heat resources are in the camera’s field of view. 3. In some cases, set the camera near to water will make the camera take images with no subject in them. 4. -
Page 31: Camera Take Images But Won't Send Them To Mobile Phone /E-Mail
2. make sure that batteries are fully charged or left power is enough. 3. High-quality 1.5V NIMH or Lithium rechargeable AA batteries can offer much better Infra flash range than alkaline batteries. 4. To ensure accuracy and quality of night image, please try to mount camera on dark environment without obvious light sources. - Page 32 Image Sensor 5 Mega Pixels Color CMOS Memory Micro SD Card up to 32GB Lens F=3.1; FOV=120 ° Size 135mm * 90mm * 86 mm TFT Display Screen 2.0 inch Black 940nm PIR Distance High/Normal/Low PIR Sensor Sight Angle 120 Degrees Number of IR LED 42LEDs Max Night Vision Lighting Distance...
-
Page 33: Packing Info
8. Packing Info 9. Warranty With great pride and full confidence in products, we always keep our words which are given to our customers as specified warranty terms and services below. Based on a strict QC system, we initially offer all our customers one-year long time limited warranty. Our products are warranted against defects in materials and workmanship for a period of one year from the date of original purchase.
Need help?
Do you have a question about the HC800LTE and is the answer not in the manual?
Questions and answers