Table of Contents
Advertisement
Quick Links
Advertisement
Table of Contents

Related Manuals for Suntek HC-300


Summary of Contents for Suntek HC-300
- Page 1 Wildlife Digital Infrared Trail Camera User’s Manual HC-300...
-
Page 2: Table Of Contents
Table of Contents Instructions....................1 General Description ................1 Camera Body Interfaces ................1 Camera Components and Features…............1 Remote control ..................1 1.4.1 Navigating ..................2 1.4.2 Characters ..................2 Shooting Information Display ..............2 Supported Format...................3 Cautions.....................4 Easy Operations..................5 Power Supply..................5 Insert the SD-card...................5 Power on and Enter into the ON Mode ..........5 Enter into the TEST Mode..............6 3.4.1 Custom Settings..................6... -
Page 3: Instructions
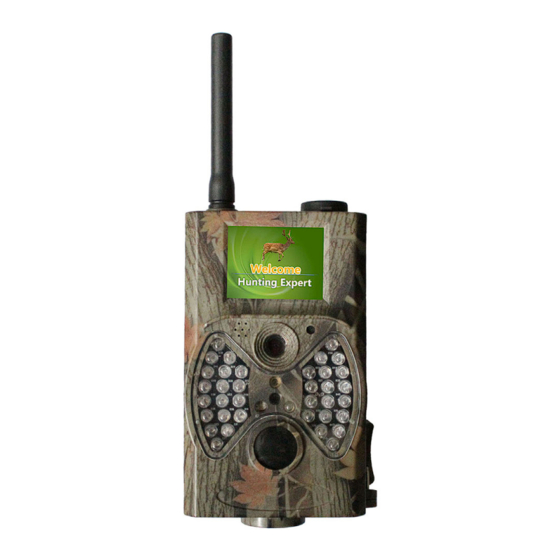
1. Instructions 1.1 General Description This digital trail camera is a surveillance camera working automatically. It can be triggered at once by any movement of human (or animals) in a certain region of interested (ROI) monitored by a high sensitive Passive Infrared (PIR) motion sensor, and then automatically captures high quality pictures (up to 12M pixels) or records 1080p HD video clips (WVGA or QVGA). -
Page 4: Navigating
1.4.1 Navigating Press UP or DOWN to select or highlight the menu item, while press LEFT or RIGHT to select the option of each item and press OK to make selection. 1.4.2 Characters Press the punctuation “*” for laser pointer. 1.5 Shooting Information Display When the camera is turned on (the power switch is slid to TEST position), the shooting information will be displayed in the monitor. -
Page 5: Supported Format
1.6 Supported Format Item Format Photo Video File Format FAT32 Here are some important notices. You don’t need to concern about the file system format of the camera unless you have problems with reading the SD-card by your other equipment. If this happened, please format the SD-card in the camera or in a computer at first and then reinsert the card into your camera to make a try. -
Page 6: Cautions
2. Cautions The working voltage of the camera is 6.0V. The camera is supplied by four or eight AA batteries. Please unlock the write-protect before inserting the SD-card. Please insert the SD-card when the power switch is at OFF position before testing the camera. -
Page 7: Easy Operations
3. Easy Operation 3.1 Power Supply To supply power for the camera, four or eight AA size batteries are needed. Open the bottom cover. Confirm that the power switch is at the OFF (Right) position, pull out the battery depot. Load the fully charged batteries into the depot according the polarities sign shown below. -
Page 8: Enter Into The Test Mode
3.4 Enter into the TEST Mode Slide the power switch to the TEST position to enter into the TEST mode. There are some functions in TEST mode: Custom settings, manual capture, preview. 3.4.1 Custom Settings Press the MENU switch to enter into menu setting. The camera can be taken over control to manually customize the camera settings which display on the camera or external TV monitor. -
Page 9: Advanced Operations
4. Advanced Operations From the basic operations of the camera in previous chapter, we know that the camera has three basic operation modes: 1. OFF mode: Power switch is at OFF position (Right). 2. ON mode: Power switch is at ON position (Left). 3. -
Page 10: System Settings
4.1.3 System Setting SYSTEM Date/Time Set Date/Time Distance Set Distance Language Set Language Timer Set working time Internal Memory Format SD Card NTSC TV MODE Password Set Password Default Default Setting 4.1.4 Default Default Settings are listed as below: Page 8... -
Page 11: General Settings
Setting Default Items Mode Camera Camera, Video, Camera&Video Resolution (Camera) 12M,8M,5M Delay 5 Seconds 5-30 Seconds,1-30 Minute Multi Single Single,3,6,9 Pictures 100,200,400 Resolution (Video) 1080P 1080P,720P,WVGA,QVGA Video Length 10s,30s,60s,90s YY/MM/DD,MM/DD/YY,DD/MM/YY Date/Time Same as last time Adjust Distance High High, Normal, Low English, French, Germany, Spanish and Language English... -
Page 12: Set Video Size
c) Press Right to select 12M Pixel d) Press down the select switch to save the current setting, then press menu to return to info display. Press MENU to cancel setting and return to info display. 4.1.9 Set Video Size This parameter also has four values: 1080P,WVGA,QVGA. -
Page 13: Set Video Sound
4.1.14 Set Video Sound The following shows how to turn off the sound of the video: a) Press MENU to display the setting menu. b) Press DOWN to select Voice. c) Press RIGHT to display the VOICE setting Interface. 4.1.15 Set Delay This parameter means that how long the PIR (Passive Infrared motion sensor) will be disabled after each triggering in ON mode. -
Page 14: Delete Photo Or Video
e) Press UP to view the previous picture (or video) and DOWN for the next. f) Press down the select switch to return to info display. When viewing images, the total number of all images in the SD-card and the index of the displaying image will be shown respectively. -
Page 15: Appendixⅰ: Technical Specifications
AppendixⅠ: Technical Specifications Image Sensor Type(True 8 Mega Pixels Color CMOS Megapixels) Memory SD Card 8MB~32GB Lens F=3.1; FOV=60 ° Size 145mm * 80mm * 55 mm IR Filter: Full Automatic IR Filter TFT Display Screen: 2.0 inch PIR Sensitivity 3 sensitivity levels: High/Normal/Low PIR Sensor Sight Angle 100 Degrees... -
Page 16: Appendixⅱ: Parts List
AppendixⅡ: Parts List Part Name Quantity Digital Camera Wireless controller USB Cable TV cable User’s Manual Solar power supply Optional Page 14...
Need help?
Do you have a question about the HC-300 and is the answer not in the manual?
Questions and answers