Table of Contents
Advertisement
Quick Links
Advertisement
Table of Contents

Subscribe to Our Youtube Channel
Related Manuals for Neopost Printer 830


Summary of Contents for Neopost Printer 830
- Page 1 PRINTER 830/930 USER'S GUIDE...
- Page 2 Products presented in this guide are conform to requirements of directives nbr 73/23/CEE and 89/336/CEE. Neopost has implemented a program for the recycling of worn machines and machines at the end of their lifetime. Contribute in a responsible way to the environmental protection by consulting your retailer internet site, or by contacting him.
- Page 4 PRINTER 830/930 Operating Manual...
- Page 5 © Copyright 2008 All rights reserved. This manual may not be reproduced in whole or in part, trans- ferred, stored in a telemetry system or translated into any language, in whatsoever form, without prior written permission. The manufacturer assumes no liability for damages occurring as a result of misuse, repairs and modifications, which are carried out by unauthorized third parties.
-
Page 6: Table Of Contents
Table of Contents Table of Contents ..................3 Illustration Directory.................. 6 Introduction..................8 Pictograms ....................8 Notes for the Use of this Manual ..............9 Important Terms and Abbreviations ............. 9 System Requirements ................9 Safety Notes ..................10 General Safety Notes ................11 Handling Ink Cartridges................ - Page 7 5.2.5 Adding a New Printer ..............28 Inserting the Ink Cartridge ............... 32 5.3.1 Correctly Inserting the Ink Cartridge..........33 5.3.2 Resetting the Ink Counter ............34 5.3.3 Display for the Change of Ink Cartridge .......... 34 5.3.4 Set the ink Counter ..............35 5.3.5 Cleaning the Ink Jets ..............
- Page 8 8.2.1 Centronics Parallel Interface ............67 8.2.2 RS-232-C Serial Interface............. 69 Fonts ..................... 71 8.3.1 Terminology ................71 8.3.2 Character Set ................75 8.3.3 Selection of the Fonts for Printing ..........76 Character Sets ..................77 8.4.1 7-Bit Character Sets ..............77 8.4.2 8-Bit Character ................
-
Page 9: Illustration Directory
Illustration Directory Illustration 3-1: PRINTER 830/930 assembly.............. 15 Illustration 4-1: PRINTER 830/930 back side.............. 16 Illustration 4-2: PRINTER 830/930 front side.............. 17 Illustration 4-3: Control panel .................. 18 Illustration 4-4: Display indications................20 Illustration 5-1: Changing the fuses ................22 Illustration 5-2: USB Compound device setup............. - Page 10 Illustration 6-4: Test print with defective jets ............. 59 Illustration 8-1: Cleaning the cartridge ..............66 Illustration 8-2: Parallel interface connector socket ............. 67 Illustration 8-3: Parallel interface pulse diagram ............69 Illustration 8-4: Serif and sans serif ................71 Illustration 8-5: Fixed character spacing ..............
-
Page 11: Introduction
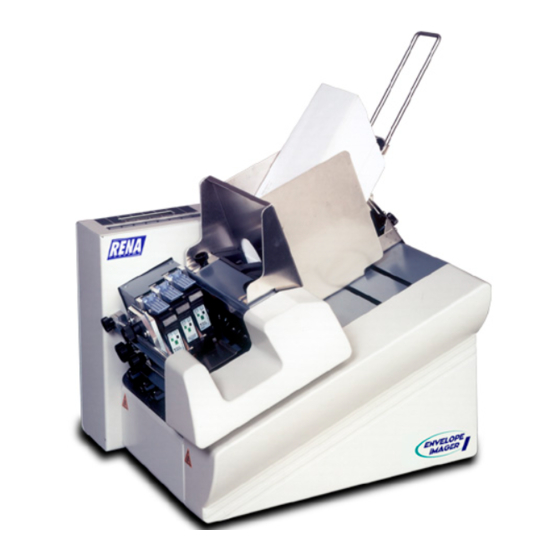
Introduction With the PRINTER 830/930 you have an innovative digital printer with HP ink jet technology for printing variable data - for printing mass mailings, for example, with addresses, serial numbers or other variable information and graphic elements. The machine has been designed for professional use with high performance. -
Page 12: Notes For The Use Of This Manual
The print object is the medium to be printed. • System Requirements The PRINTER 830/930 is designed for use on a PC (at least Pentium 200 MHz) with parallel interface. It can be run with the Windows 2000 or Windows NT4 or Win- dows XP operating systems. -
Page 13: Safety Notes
The address PRINTER 830/930 is a state-of-the-art construction and reliable in op- eration. Nevertheless, the device may present hazards when operated by untrained personnel. The same applies to use that is inappropriate and not in keeping with its intended purpose. -
Page 14: General Safety Notes
Electrical Depending upon the country-specific version, the address Hazards PRINTER 830/930 may only be connected to either a voltage of 230 V/50 Hz or 115 V/60 Hz. The mains plug may only be connected with a socket having an installed protective contact! The protective effect may not be compromised by the use of an extension line without a protective grounding conductor. - Page 15 For safety reasons, your own reworking and modifications are not permitted. The PRINTER 830/930 is a Class A device. This device may cause radio frequency disturbances in residential areas; in this case, the operator may be required to implement the necessary...
-
Page 16: Handling Ink Cartridges
Handling Ink Cartridges Store ink cartridges out of the reach of children. Normally, no ink leakage can occur. Immediately wash off sprays of ink from the skin under running water. Should ink get into the eyes, rinse it out im- mediately with sufficient water. -
Page 17: Transport And Packaging
Transport and Packaging Shipping The PRINTER 830/930 is shipped in packaging designed for the purpose of delivery at its intended destination, via regular transportation, in undamaged condition. The forwarding agent is liable for damages occurring in transit. Transport and stor- age should take place under normal conditions, i.e. -
Page 18: Assembly
1. Set the side guide in the lower metal opening and lock in place with a quarter turn of the bayonet coupling. 2. In the same manner, set the guide bracket in the upper metal opening. Illustration 3-1: PRINTER 830/930 assembly... -
Page 19: Printer Description
Printer Description Machine Overview Illustration 4-1: PRINTER 830/930 back side 1. USB Connection 4. Printer Parallel Cable Connection 2. Serial Status Connection 5. Power cord Connection 3. ON/OFF Switch 6. Fuse holder... -
Page 20: Range Of Application
14. Discharge brush cpl, optional Range of Application The PRINTER 830/930 is a high speed & high quality ink jet printer. It prints cor- rectly positioned addresses on various print objects such as letter envelopes, let- terheads, cards, prospectuses and newspapers up to: Minimum •... -
Page 21: Operation
Operation The PRINTER 830/930 is designed for operation on an IBM-compatible PC. Printing can be carried out from most word processing, database and address processing programs. The printer has a printing unit with three HP ink cartridges. This allows the printing of addresses with no movement of the printing unit itself. -
Page 22: Key Combinations
LED Functions Green LED = Online Blue LED = Offline Orange LED= Warning Red LED = Error In online mode the printer can only be switched to offline by pressing the “Offline” (7) button. 4.4.2 Key Combinations The key combinations have, in connection with the switching on of the machine, the following functions: Power Home Quick... -
Page 23: The Display
The Display Meaning of the display information: This is just an example and could looks different, depending on the printer setup. C o u n t. P o w r. O N : I n k C o s t s / J o b : 0 . -
Page 24: Online Mode
4.5.2 Online Mode In this type of operation, you can start the machine via command sequences from your computer. Printing is carried out in this type of operation. Brief Instructions In order to be able to quickly carry out a test print with no previous experience, you should follow the operational steps listed in the table below, in the correct order. -
Page 25: Start-Up And Operation
Setting Up and Connecting the Printer Install the printer as described in chapter 2.3 - “Location of the Printer“. Power Cord See Illustration 4-2: PRINTER 830/930 front side on page 17 Caution! The PRINTER 830/930 is a device of class 1! -
Page 26: Installing The Driver
Switching on the Printer Switch the printer on with the ON/Off switch at the back. The following will be dis- played on the printer: Loader 01 Version#1.1.XX# Starting Application X.X.XX –PPC Printer Initialisation The printer is online with following display: C o u n t P w r O n :... -
Page 27: Installation Of The Parallel Virtual Connection
5.2.1 Installation of the parallel virtual connection 1. Call up Setup.exe in the corresponding driver directory. 2. Follow the instructions in the setup window. Press Install to install the driver. To cancel the installation, press Exit. Illustration 5-2: USB Compound device setup 3. -
Page 28: Check The Correct Device Recognition
Note: When several user accounts will be used on the system, you must make cer- • tain that you call up the Setup.exe with Administrator authorization. Ac- cording to the Windows security model, only the Administrator can install the driver. Windows XP: After calling up the Setup.exe and connecting the printer, a •... -
Page 29: Removal Of Already Installed Driver
5.2.3 Removal of Already Installed Driver Sometimes it is necessary or desirable to remove an already installed driver, in or- der to be able to carry out a new, clean installation. Drivers on the media carriers could have been damaged. When this has occurred, then the installation cannot be carried out correctly. -
Page 30: Installation Of The Connected Printer
5.2.4 Installation of the Connected Printer Connect the printer to the computer. A new parallel connection is installed in the system. You can view the new connection in the Device Manager under connec- tions (COM and LPT). Note the name of the connection. •... -
Page 31: Adding A New Printer
5.2.5 Adding a New Printer Click Start > Control Panel > Printer and other hardware • Illustration 5-9: Add printer Printer and fax machines • Illustration 5-10: Add printer... -
Page 32: Illustration 5-11: Add Printer
Double-click on “Add Printer“ • Illustration 5-11: Add printer Then press Next to resume the procedure with the installation assistant. • Illustration 5-12: Printer installation assistant Illustration 5-13: Printer installation assistant... -
Page 33: Illustration 5-14: Printer Installation Assistant
Illustration 5-14: Printer installation assistant Illustration 5-15: Printer installation assistant 1. Connect the printer with the connection that was newly added with the USB driver. (Hardware > Device Manager) Illustration 5-16: Printer installation assistant... -
Page 34: Illustration 5-17: Printer Installation Assistant
Then select the printer according to manufacturer and type. When necessary, • use the driver CD. Illustration 5-17: Printer installation assistant Select your preferred printer: • Select the printer name. • Illustration 5-18: Printer installation assistant When needed, a test page can be printed. •... -
Page 35: Inserting The Ink Cartridge
The print is made with a commercially available ink cartridge. After the ink has been used up, the ink cartridge should be replaced. The PRINTER 830/930 is equipped with an ink cartridge. Ink cartridges of the fol- lowing types may be used: Standard Black •... -
Page 36: Correctly Inserting The Ink Cartridge
Spot Colour Blue • Spot Colour Red • Spot Colour Green • Be aware of the notes in chapter 2.2, page 13: „Handling Ink Cartridges“ as well as the notes of the ink cartridge manufacturer. 5.3.1 Correctly Inserting the Ink Cartridge First, you must have access to the cartridge holder. -
Page 37: Resetting The Ink Counter
Illustration 5-22: Inserting the ink cartridge Illustration 5-23: Close locking lever 5.3.2 Resetting the Ink Counter If you are online, change to offline mode with the Offline button. Press the Home button. Change to the Printer Configuration menu and confirm with the Arrow Right button. -
Page 38: Set The Ink Counter
If less than 5% ink is in the cartridge the ink level bars are not displayed and you get an error message: NO INK !! CHANGE PRINTHEAD In the menu “Error Level” you can select: STOP: Printer should stop if “No Ink” is displayed IGNORE: Printer should print if “No Ink”... -
Page 39: Cleaning The Ink Jets
For time to time, the ink jets need to be cleaned or unclogged. 1. Insert a single sheet of paper into the feeder. 2. Switch the PRINTER 830/930 into the Offline mode. 3. At the same time, activate the Quick and Arrow down keys. -
Page 40: Illustration 5-25: Set Printer
Illustration 5-25: Set printer 1. To do this, loosen the thumb screws (1) of the printing unit. 2. Use the scale button (2) to set the width of the print object. The button has a millimetre scale. 3. Screw the thumb screw of the printing unit in tightly. 5.4.1.2 Setting the Media Width for the Sheet Separating System Height adjustment of the pickup rollers Up to a print object width from 1.5 mm to 2 mm, the rollers can remain in the low-... -
Page 41: Illustration 5-27: Setting The Separating Finger
Both sheet separators must always be set, even when – for example – a small format print object only lies on one separator. When this is not done, the free separator may drag on the transport rollers. This leads to increased wear on the transport rollers; entry may cause damage. Illustration 5-27: Setting the separating finger 1. -
Page 42: Setting The Print Format
Failure to comply with these steps can lead to premature wear on the separation rollers. 3. Allow both separators (1), without exerting pressure, to fall upon the print object and again fix the knurled screws (2) in position. 5.4.2 Setting the Print Format 5.4.2.1 Setting the Print Position of the Address Before setting the desired address position, you must know in which area printing is possible. - Page 43 5.4.2.2 Positioning the Address in Height The PRINTER 830/930 is a WYSIWYG printer with limitations. The limitations lie in the vertical position of the address. Heeding the following note is important for your document: 1. In your page layout, set your document to the portrait format.
-
Page 44: Illustration 5-30: Setting The Print Object Format
Illustration 5-30: Setting the print object format If the lines run parallel to the shorter side, the intake occurs using the longer side. Illustration 5-31: Setting the print object format 1. Push the rear side guide completely to the side wall of the machine. 2. -
Page 45: Checking The Paper Transport
OK key. Test Print 1. Switch on the PRINTER 830/930 using the ON/OFF switch and wait until the start-up routine has been completed. 2. Change from the Online mode to the Offline mode by using the Offline... -
Page 46: Machine Counters
Printing the Test Picture 1. Place as many media in the feeder as you would like to use for a test print, e.g. 1 medium. 2. Confirm with the Quick +Arrow Up keys. The test print is carried out. Press the key again, in order to stop the procedure. -
Page 47: Counting Of Job
5.6.3 Counting of Job Pages A job page count contains the number of data printouts received by the computer with the accompanying paper ejection. This count is carried out with the machine in the online condition. When you continue data transmission with printouts, counting is resumed. All counters are reset when the machine is switched off! To change the view of the 3 counters you have to be in the Offline mode. -
Page 48: The Programming Mode
The Programming Mode Purpose of the Programming Mode The programming mode is used for setting manually a number of parameters via the control panel. Parameters are definitions of set point values for font settings, print quality, papers settings, as well as special and test functions. Since the printer is operated, as a general rule, from a text or address processing program, the factory settings have been optimized for this, and normally no changes are necessary. -
Page 49: Keyboard Layout In The Programming Mode
Keyboard Layout in the Programming Mode Illustration 6-1: Keyboard layout for the programming mode In online mode, the printer can only be switched to offline mode by pressing the „Offline“ button. Quick Button The Quick button can only be used in offline mode. Function when singly applied: By pressing the Quick button, the quick menu can be directly called up at any time;... - Page 50 Quick – Arrow Left = Run Paper (Supply Paper) • If you press the button shortly, only one sheet is transported; afterwards you re- turn to the previous display. If you press the button for a prolonged time, a con- tinuous paper run is started.
-
Page 51: Menu Overview
Menu Overview If the printer is Offline, press the H O M E - k e y and the display will show the main menu from the printer. With the Arrow up and Arrow down keys you can navi- gate through this menu. With the O K o r A r r o w r i g h t y o u a r e a b l e t o c o n f i r m t h e s u b m e n u . - Page 52 Main menu Submenu Options Job Parameter Quality 6x6D, 6x3D, 3x6D, 3x3D, 2x6D, 2x3D, 1x6D, 1x3D Transport Param. Paper Speed Auto. Pap. Speed Paper Time Out Layout Orientation Paper Size Left Margin (mm) Offs. Edge (mm) Font Parameter Font Character Spacing Character Set Typ of Barcode Zip, bpo4, Kix,2/5i, EAN,...
-
Page 53: Explanation Of The Individual Menus
Correction Pattern Cart. Print Pattern Check Cartridges LED/ Beeper Configuration Info Firmware: (X.X.XX) SerNr.: (XXXXXXXXXXX) Page Cnt.: (XXXX) RAM: (64 MB) Hardware: (V16-0) DC: (x A) Printing Setting Dump Printing Input Dump Print Character Set Main menu Submenu Options Englisch, Deutsch Language Franz., Ital., Esp Main menu... -
Page 54: Printer Configuration
Language Different languages can be selected. Settings Selection of a configuration. Printer Configuration Maintenance Auto Clean Heads Off is the factory setting. In the setting „1st“, prior to each print job, a page with a black bar is printed to purge the cartridges. Auto Prime off = no cleaning of the jets before printing or by means of a test print on = Jets are cleaned before printing, when no paper lies beneath the light barrier... - Page 55 Cartridge Optimizing Optimizing the cartridge temperature (TTOE) Selection possibilities: • all: all three cartridges are optimized Crt1: only cartridge 1 is optimized Crt2: only cartridge 2 is optimized Crt3: only cartridge 3 is optimized no action is carried out Check: Testing and display of the condition for each cartridge For the optimization, no paper may lie underneath the cartridges.
-
Page 56: Job Parameter
Transport Param. Paper Speed The PRINTER 830/930 has 10 speed settings. The easiest way to set the speed is to use the PRINT QUALITY menu (see page 48). As soon as you select a certain qual- ity there, PRINTER 830/930 automatically sets the maximum speed possible for this quality. - Page 57 PRINT QUALITY Speed Level Max. Speed in mm/s / inch/s 2x3, 2x6 1520 / 59.84 1320 / 51.97 3x3, 3x6 1080 / 42.5 920 / 36.2 720 / 28.3 6x6, 6x3 540 / 21.26 420 / 16.5 270 / 10.6 120 / 4.72 Auto.
- Page 58 DIN A4 Paper 8 1/4 x 11 11/16 210 x 297 DIN A5 Paper 5 13/16 x 8 1/4 148 x 210 MONA Monarch Envelope 3 7/8 x 7 1/2 98 x 190,5 Com-10 (Business) Envelope 4 1/8 x 9 1/2 105 x 241 INTD International DL...
- Page 59 Font Parameter Font 13 fonts or font sized have been built into the machine. A font selection can be made here. Character Spacing Increase the character spacing in dots of 0 to 90. Character Set National character sets with some special symbols for the applicable foreign lan- guage.
-
Page 60: Service
Dos Mode Linemode This makes possible address separation, through a certain number of line breaks. HEX to ASCII Conversion from HEX to ASCII. When the conversion is switched on, then the printer interprets the percent sign “%“ as an unprintable control character. Both characters following the % character will be interpreted as HEX values, e.g. -
Page 61: Illustration 6-2: Test Print Of All Cartridges
Alignment Vertic. = Printing a special test page to test the vertical alignment. Correction Pattern = Printout to determine the correction value in order to calibrate the car- tridges. Cart. Print Pattern In several test prints for the cartridges. The contacts to the jets are shown in a grid. (See following page) Illustration 6-2: Test Print of all cartridges The contacts for all jets are controlled sequentially and made visible in a continuous slanting line. -
Page 62: Illustration 6-4: Test Print With Defective Jets
Illustration 6-4: Test print with defective jets a.1 = no connection at contact “K“ (with printhead H1) • a.2 = no connection at contact “B“ (with printhead H3) b.1 = no connection at contact “10“ (with printhead H1) • b.2 = no connection at contact “16“ (with printhead H3) c = these jets are not clean •... -
Page 63: Language
print. The required data is now at the front of the buffer. Stop the procedure using the end key. Print Character Set Printout of the character set. 6.8 Language The displayed text can be shown in different languages: English, German, French, Italian and Spanish. -
Page 64: Initialization Of The Machine
In order to restore all changed values and configurations, switch off the machine. When restarting the machine, press and hold down the "Quick" key. The following appears on the display: PRINTER 830/930 PPC Default Reset The machine now has the factory settings, and all configurations are those of the... -
Page 65: Troubleshooting
Troubleshooting The Meaning of Some of the Display Notes ??? blinks • Data/Addresses were transmitted, but there is no print object. NoD blinks. • The last data/addresses are incomplete (FormFeed is missing) Wait blinks. • Printing has halted, because the control character EOT was sent. Printing can be resumed with the start key. -
Page 66: Error Messages
Error Messages Error Messages Cause Remedy No paper Insert paper NO PAPER !! PAPER JAM OR Paper jam Check paper width WRONG PAPER LENGTH! Insert a new cartridge and NO INK !! The cartridge is empty. CHANGE CARTRIDGE reset the counter. Factory setting CHECKSUM ERROR! Error in the buffered RAM... - Page 67 Error Messages Cause Remedy Error of the HP PEN Check plug connection ERROR PEN BOARD# U# CALL SERVICE board# #=1,2,3 Replace PEN board RAM ERROR CPU board with small RAM Replace CPU board. memory CALL SERVICE PRINTER ERROR Install correct board and firmware WRONG BOARD/FIRMWARE Reload firmware;...
-
Page 68: Warning Messages
Warning Messages Warning Message Cause Remedy Warning:Non-Existent Selected font does not Printer is switched off and Font Selected! exist in the printer the PC sends remaining data Warning:Non-Existent Selected macro does not After the job has ended, Macro Selected! exist in the printer the addresses cannot be repeated. -
Page 69: Appendix
After printing, store the cartridges in an upright position in a sealed plastic con- tainer, in order to prevent the ink from drying. Interfaces The PRINTER 830/930 is equipped with two standard print-data interfaces. They both offer the possibility of connecting the printer to a computer. USB 1.1 •... -
Page 70: Centronics Parallel Interface
8.2.1 Centronics Parallel Interface The PRINTER 830/930 is equipped with a standard Centronics parallel interface. This interface is most frequently used as a connection to a personal computer. Unlike the RS-232-C serial connection, there are usually no special commands or configurations for the printer or computer necessary here. - Page 71 8.2.1.2 Signal Description Corresponding Signal Signal- Meaning STROBE This pulse 0.5µs) reports that data bits are valid 20-27 DATA 1-8 Data bits D0-D7 ACKNOWLEDGE Printer reports: Data has been processed (is ready to receive) BUSY Printer reports: Data received, data being processed PE (Paper Printer reports to the com- empty)
-
Page 72: Rs-232-C Serial Interface
8.2.2 RS-232-C Serial Interface This segment describes the RS-232-C serial plug connection and the concept of a serial interface connection. The PRINTER 830/930 has a standard RS-232-C serial interface, which is compatible with most computers and terminals. 8.2.2.1 Connector Socket... - Page 73 8.2.2.2 Plug Assignment Signal Signal Meaning Input/Output free R x d Received data T x d Transmitted data Data Terminal Ready Signal Ground free +12V Clear to Send free Pin 2 Received Data (RxD): Serial transfer of data from the computer to the printer. Pin 3 Transmitted Data (TxD): Serial transfer of data from the printer to the computer system or the terminal (e.g.
-
Page 74: Fonts
Fonts 8.3.1 Terminology A font is a collection of characters and symbols having the same typeface, spacing size (height), line width and font slant. 8.3.1.1 Typeface Typeface is a set of characters and symbols with a certain design. 8.3.1.2 Serif or Sans Serif Typefaces Serifs are small lines on the top or bottom of a character (so-called “feet”... -
Page 75: Illustration 8-5: Fixed Character Spacing
Fixed Spacing With fixed character spacing, every letter of a font takes up the same width space and has the same spacing as neighbouring letters. Cour and LetGot are fonts with fixed character spacing. Illustration 8-5: Fixed character spacing Proportional Spacing With proportional character spacing, the spacing depends upon the width of the let- ter. -
Page 76: Illustration 8-7: Character Size
8.3.1.6 Character Size Character size (character height) refers to the height of a printed capital letter. It is measured in pica points. A point is 1/72 of an inch. The height for both fonts, with fixed and proportional character spacing, is meas- ured in pica points. -
Page 77: Illustration 8-8: Print Direction
1x3 corresponds to 150x300 1x6 corresponds to 150x600 2x3 corresponds to 200x300 2x6 corresponds to 200x600 3x3 corresponds to 300x300 3x6 corresponds to 300x600 6x3 corresponds to 600x300 6x6 corresponds to 600x600 8.3.1.11 Print Direction The print direction refers to the (readable) address position on the print object. It can be turned around 180°. -
Page 78: Character Set
8.3.2 Character Set A character set consists of characters and symbols, which contain all elements of a language or discipline (country-specific characters), including punctuation marks and numbers. 8.3.2.1 7-Bit Character Set A 7-Bit character set corresponds to definitions of the ”International Standards Or- ganisation“... -
Page 79: Selection Of The Fonts For Printing
Fonts can be used with great precision, in order to lend a print object a specific ap- pearance. Select the fonts that suit best the content of your text. 8.3.3.1 Serif Typefaces The following example shows an address with the Cour12 typeface: Test print ADDRESS PRINTER 830/930 PRINTER LAND... -
Page 80: Character Sets
Note for the depiction of character sets: Character set name: The information in parentheses (e.g. USA7) corresponds • to the options field in PRINTER 830/930. With the ASCII printer command (e.g. E ( 0 U) you can call up the character •... - Page 81 England (= UK7) ( 1 E ASCII: Decimal: 27 40 49 69 Hexadecimal: 1B 28 31 45 France (= Fra7) ( 1 F ASCII: Decimal: 27 40 49 70 Hexadecimal: 1B 28 31 46...
- Page 82 Germany (= Ger7) ( 1 G ASCII: Decimal: 27 40 49 71 Hexadecimal: 1B 28 31 47 Italy (= Ita7) ( 0 I ASCII: Decimal: 27 40 48 73 Hexadecimal: 1B 28 30 49...
- Page 83 Spain (= Spa7) ( 2 S ASCII: Decimal: 27 40 50 83 Hexadecimal: 1B 28 32 53 Denmark (= Den7) ( 1 D ASCII: Decimal: 27 40 49 68 Hexadecimal: 1B 28 31 44...
- Page 84 Norway (= Nor7) ( 0 D ASCII: Decimal: 27 40 48 68 Hexadecimal: 1B 28 30 44 Sweden (= Swe7) ( 3 S ASCII: Decimal: 27 40 51 83 Hexadecimal: 1B 28 33 53...
- Page 85 Sweden/Names (= SwN7) ( 0 S ASCII: Decimal: 27 40 48 83 Hexadecimal: 1B 28 30 53 Portugal (= Por7) ( 4 S ASCII: Decimal: 27 40 52 83 Hexadecimal: 1B 28 34 53...
-
Page 86: 8-Bit Character
8.4.2 8-Bit Character PC-8 (= PC8) ( 10 U ASCII: Decimal: 27 40 49 48 85 Hexadecimal: 1B 28 31 30 55 Roman8 (= Rom8) ( 8 U ASCII: Decimal: 27 40 56 85 Hexadecimal: 1B 28 38 55... - Page 87 PC-850 (= P850) ( 12 U ASCII: Decimal: 27 40 49 50 85 Hexadecimal: 1B 28 31 32 55 ECMA-94 Latin 18 (= ECMA) ( 0 N ASCII: Decimal: 27 40 48 78 Hexadecimal: 1B 28 30 4E...
- Page 88 PC-8 Denmark/Norway (= P8DN) ( 11 U ASCII: Decimal: 27 40 49 49 85 Hexadecimal: 1B 28 31 31 55 ICEL (= ICEL) ( 33 O ASCII: Decimal: 27 40 51 51 79 Hexadecimal: 1B 28 33 33 4F...
- Page 89 PC-852 (= P852) ( 17 U ASCII: Decimal: 27 40 49 55 85 Hexadecimal: 1B 28 31 37 55 PC-860 (= P860) ( 20 U ASCII: Decimal: 27 40 50 48 85 Hexadecimal: 1B 28 32 30 55...
-
Page 90: Side Guide
Side Guide Side guide short (2x) (standard) • Side guide middle (standard) • Side guide long (accessory) • Adjustable width of the Side guide The data (in mm/inches) refers to the print object width crosswise to the transport direction. Rear + frontal side guides, short x 2 •... -
Page 91: Accessories
Accessories The following accessories are available (must be purchased separately): Illustration 8-11: Divert mechanism Pos. Description Pieces Divert mechanism The divert mechanism changes the transport direction of the ejected print object 90° on the conveyor belt. -
Page 92: Technical Data
Technical Data Throughput For Printer 830: max. 11,000 postcards /hour at 1x3, 1x6 For Printer 930: max. 39,000 post cards /hour at 1x3, 1x6 Printheads Printing speed For the Printer 830: 0.54 m/s For the Printer 930: Minimum 0.15 m/s Maximum 1.84 m/s... -
Page 93: Glossary
Glossary ASCll: ASCll is the abbreviation for "American Standard Code for Informa- tion Interchange". The printer commands used in this manual have been entered with ASCII characters. Decimal and hexadecimal char- acters can also be used. Barcode: Data for a print object is converted to a one-line, language- and symbol-neutral barcode. - Page 94 inch for the in character density. Data transfer: Data transfer is the transfer of information between the computer and the printer. Character size: The character size is measured in pica points. A point is 1/72 of an inch. DPl: DPI (= Dots Per Inch) is the measuring unit of dots per inch for the image definition.
- Page 95 LPI: LPI (= Lines Per Inch) is a unit measuring lines per inch for the ver- tical line spacing. Printing is most frequently in 6 lpi line spacing. Offline: In the offline condition, the printer cannot receive data from the computer.
- Page 96 "sans serif" font. Serial interface: With a serial interface, the data is sequentially transferred (bit by bit), from the computer to the printer. The connection is made by a RS-232-C socket. Serif font: Serifs are "feet" on Bodoni book type. The typeface Cour is a "serif" font, for example.
-
Page 97: Index
Index Barcode ........ 56, 65, 90 Left Margin........65 Baud Rate ........90 Offline Mode ..... 18, 20, 42, 61 CARTR. RESET ........36 Orientation ........74 Character Density ....72, 90, 92 Paper Run without Printing ....21 Character Height......73, 90 Paper Size........
Need help?
Do you have a question about the Printer 830 and is the answer not in the manual?
Questions and answers