Table of Contents
Advertisement
Quick Links
Advertisement
Chapters
Table of Contents

Related Manuals for Denso BHT-825QW


Summary of Contents for Denso BHT-825QW
- Page 1 2D Code Handy Terminal BHT-825QW/BHT-825QB BHT-825Q User’s Manual...
- Page 2 3) The modification of DENSO WAVE's products by parties other than DENSO WAVE. • If it is judged by DENSO WAVE INCORPORATED that malfunction of the product is due to the product having been dropped or subjected to impact, repairs will be made at a reasonable charge even within the warranty...
- Page 3 2D Code Handy Terminal Customer Registration and Inquiries Customer Registration To allow us to provide our customers with comprehensive service and support, we request that all customers complete a Member Registration Form. Registered members will be offered the following privileges. •...
-
Page 4: About This Manual
• Every attempt has been made to ensure that the content of this manual is thorough and up to date, however, we kindly ask that any questionable content, mistakes, or omissions be reported to DENSO WAVE. • The copyright for this User’s Manual belongs to DENSO WAVE INCORPORATED. - Page 5 2D Code Handy Terminal Viewing this Manual − About the Bookmark The PDF Bookmark function can be used to jump to the Contents page. <Procedure> Click the “Bookmark” tab. Click to search for the desired item. Click the item to be read. Click the “Bookmarks”...
- Page 6 BHT-825Q series − Searching by Word The PDF search function can be used to jump to the target page by entering words or characters related to the item being searched. (1) Click the Search icon. (Or select “Edit” – “Search”.) (2) Enter the word(s) or character(s) to be searched for.
- Page 7 This is an instruction manual used to create handy terminal programs with BHT-BASIC. This manual can be found in the BHT-BASIC Compiler CD-ROM. This manual can also be downloaded from the DENSO WAVE member’s Web site (QBdirect). • BHT-BASIC 4.0 Transfer Utility User’s Guide This is an instruction manual for software relating to data transfer between the computer and BHT-800 and comes bundled with the BHT-BASIC 4.0 Transfer Utility.
-
Page 8: Safety Precautions
BHT-825Q series SAFETY PRECAUTIONS Be sure to observe all these safety precautions. Please READ through this manual carefully. It will enable you to use the BHT and CU correctly. Always keep this manual nearby for speedy reference. Strict observance of these warnings and cautions is a MUST for preventing accidents that could result in bodily injury and substantial property damage. - Page 9 2D Code Handy Terminal Handling the battery cartridge • Never disassemble or heat the battery cartridge, nor put it into fire or water; doing so could cause battery-rupture or leakage of battery fluid, resulting in a fire or bodily injury. •...
- Page 10 BHT-825Q series Handling the CU • If smoke, abnormal odors or noises come from the CU, immediately unplug the AC adapter from the wall socket or CU and contact your nearest dealer. Failure to do so could cause fire or electrical shock. •...
- Page 11 2D Code Handy Terminal To System Designers: • When introducing BHTs in those systems that could affect human lives (e.g., medicines management system), develop applications carefully through redundancy and safety design which avoids the feasibility of affecting human lives even if a data error occurs. Handling the battery cartridge •...
- Page 12 BHT-825Q series • If the BHT has been stored in a hot (50°C to 60°C, 122°F to 140°F) and humid place, allow it to sit at room temperature and humidity for at least one day before use. Using the BHT with its inside being hot will fail to scan or result in a machine failure.
- Page 13 2D Code Handy Terminal Handling the CU • Never disassemble or modify the CU; doing so could result in an accident such as fire or malfunction. • Never put the CU in places where there are excessively high temperatures, such as inside closed-up automobiles, or in places exposed to direct sunlight.
-
Page 14: Declaration Of Conformity
(tüüp: DWWL002) / Bluetooth -süsteemi (tüüp: DWBT011), mis vastavad direktiivi 1999/5/EÜ põhinõuetele ja nimetatud direktiivist tulenevatele muudele asjakohastele sätetele. Español: Por medio de la presente, DENSO WAVE INCORPORATED, declara que el BHT-825QB/QW/QWB incluye ® módulo de red inalámbrica (tipo: DWWL002) / tarjetas Bluetooth (tipo: DWBT011), las cuales cumplen con los requisitos esenciales y otras disposiciones aplicables o exigibles de la Directiva 1999/5/CE. - Page 15 2D Code Handy Terminal Português: DENSO WAVE INCORPORATED declara que este BHT-825QB/QW/QWB inclui um Módulo LAN sem fios ® (tipo: DWWL002) / uma Placa Bluetooth (tipo: DWBT011), que estão conforme aos requisitos essenciais e a outras disposições da Directiva 1999/5/CE.
-
Page 16: Table Of Contents
BHT-825Q series Chapter 1 Outline This chapter describes the BHT system and provides an overall outline of the BHT. 1 .1 System Configuration·················································································· 0 0 0 7 7 7 1 .1.1 Hardware Configuration ··············································································· 1 1 1 8 8 8 1 .1.2 Software Configuration·················································································... -
Page 17: System Configuration
BHT-825Q series 1.1 System Configuration This section describes the hardware required for the code data collection system used by the BHT and the BHT software. 1.1.1 Hardware Configuration In addition to the BHT, the following hardware and software are required for the code data collection system used by the BHT. -
Page 18: Wireless Communication
2D Code Handy Terminal Host Computer Allows you to edit, manage and download user programs and data, as well as downloading system programs. Models : PC/AT Compatible Operating Systems and Optional Application Programs Windows XP Windows Vista Windows NT Windows 2000 Operating Systems (OS) Windows 98 3.51/4.0... -
Page 19: Software Configuration
BHT-825Q series 1.1.2 Software Configuration This section describes the software used for BHT Series application development and application in addition to the software used at the BHT unit. Please note that the above-mentioned software can be downloaded (Certain versions may be for trial use.) from the QBdirect service discussed at “Customer Registration”... - Page 20 2D Code Handy Terminal Software Used at the BHT Unit The BHT unit FLASH memory has a system area and user area, with the system program stored in the system area and font files and user programs stored in the user area. The BHT unit is shipped with the system program and font files stored in their respective areas.
- Page 21 BHT-825Q series • System Mode This program is used to operate files, make system environment settings, and perform various types of tests. Refer to “Chapter 4 System Operation” –“4.4 System Mode” for further details. Font File These files are required to display JIS 1 and 2 standard Kanji characters at the BHT unit LCD display. By using font files, the BHT unit is able to display 16 to 40 dot Kanji in application programs (*.PD4).
-
Page 22: Components And Functions
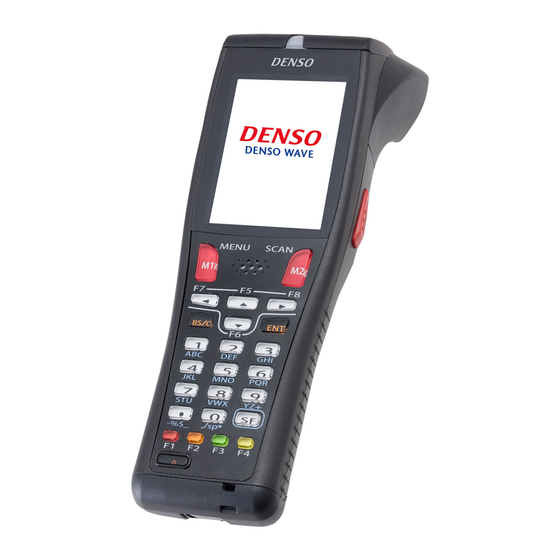
2D Code Handy Terminal 1.2 Components and Functions 1.2.1 BHT Front/Rear (10) (11) (12) Name Function and Description LCD (Liquid crystal display) Displays the characters and graphic patterns. Indicator LED Indicates the code read status. Illuminates in blue when the BHT has successfully read a code. Press when scanning a code. -
Page 23: Keypad
BHT-825Q series 1.2.2 Keypad The BHT key functions can be set at user programs. The diagram below shows an example of settings for each key function. (10) (11) Name Function and Description Used to move the cursor and select menus. Cursor keys Magic •... - Page 24 2D Code Handy Terminal Name Function and Description Used to enter data. Numerical keys Press to finalize entered data or execute operations. Enter key Used to select functions. *Function key functions are assigned at user programs. Refer to Function keys the “BHT-BASIC Programmer’s Manual (For BHT-800 Series)”...
-
Page 25: Bht Screen
BHT-825Q series 1.2.3 BHT Screen If the system display is set to ON at the system settings or in the user program, icons display at the bottom of the screen (default) indicating the key shift status, alphabet entry status, and status of the link with the CU-811. Connection status with the Bluetooth®... - Page 26 BHT-825Q series Chapter 2 BHT Preparation This chapter describes inserting and charging the battery cartridge, turning the BHT power ON and OFF, and use of the hand strap. “BHT Preparation” Procedure ···································································12 Loading and Charging the Battery Cartridge ···········································12 2.2.1 Battery Power Level Indicator ····································································18 Attaching the Hand Strap ········································································19 2.3.1...
-
Page 27: Bht Preparation" Procedure
High-temperatures may activate the charger’s protective device, preventing from charging, and lead to protective device damage, overheating, blowout or combustion. • Terminate charging if not completed even after the specified time has elapsed. • Do not use battery cartridges other than that specified by DENSO WAVE. - Page 28 − Point − Do not use battery cartridges other than that specified by DENSO WAVE. Insert the battery cartridge cover tab (1), and then close the battery cartridge cover (2) to lock the cover in position. Press the battery cover into...
- Page 29 BHT-825Q series Connect the dedicated AC adapter to the DC input connector on the charger and plug the adapter into the wall socket. The charger Power LED (green) turns ON. Power for the CU-821 can be obtained from a USB connection port (host computer or hub), −...
- Page 30 2D Code Handy Terminal Charging with the battery charger (CH-201A and CH-704) Terminal Check the battery cartridge terminals and insert the cartridge. Connect the power cable to the CH-201A and Red LED ON connect the plug to a commercial AC power source (230 V AC).
- Page 31 Do not use battery cartridges other than − Point − that specified by DENSO WAVE. Insert the battery cartridge cover tab (1), and then close the battery cartridge cover (2) to lock the cover in position. Press the battery cover into place until a click is heard.
- Page 32 2D Code Handy Terminal Mishandling of the charger may result in charger overheating, smoke generation, blowout or combustion. Please read the following items prior to use. Never disassemble or modify the battery cartridge. Never connect the battery cartridge (+) and (-) terminals with a metal object such as a piece of wire.
-
Page 33: Battery Power Level Indicator
BHT-825Q series 2.2.1 Battery Power Level Indicator Confirming at the Power Level Icon The battery power level can be confirmed at the battery icon ( ) that displays in the bottom left of the LCD display. The battery power displays in four levels. The battery power level indicator is a guideline to notify the operator to charge the battery promptly when discharged. -
Page 34: Attaching The Hand Strap
2D Code Handy Terminal 2.3 Attaching the Hand Strap Attach the hand strap to prevent the BHT from being accidentally dropped during use. 2.3.1 Attaching the Hand Strap Attach the hand strap as shown below. 2.3.2 Holding the BHT Attach the hand strap to your wrist and hold the BHT as shown below. -
Page 35: Initial Setup
BHT-825Q series 2.4 Initial Setup Turn ON the power after inserting the fully charged battery cartridge into the BHT. The clock will not have been set at the time of purchase, and therefore it is necessary to set the date and time when turning ON the power for the first time. -
Page 36: Turning Off The Power
2D Code Handy Terminal 2.5 Turning OFF the Power Use one of the following three methods to turn OFF the BHT power. Methods Operation Data Backup Timing 1) Normal power OFF Press the Power key. After 20 minutes from turning off 2) Turning the power Hold down the Power key for at least 3 When the power turns off... -
Page 37: If The Bht Is Shut Down Abnormally
BHT-825Q series 2.5.4 If the BHT Is Shut Down Abnormally If the BHT is shut down abnormally* and is left without a battery cartridge or with a discharged battery cartridge loaded, then unsaved data may be lost. (*"Normally shut down" refers to "2.5 Turning OFF the Power.") The right message will appear when you load a charged battery cartridge and turn the BHT on. - Page 38 2D Code Handy Terminal If Scandisk finds a broken file(s), the right screen will appear. (As long as a broken file exits, the screen displays every time the BHT System is started up.) (Refer to “About “$$BRKLST.SYS” on the following page.) Scandisk when the resume function is enabled If Scandisk runs when the resume function is enabled, the screen given right may appear.
-
Page 39: If Broken Files Are Found
BHT-825Q series About “$$BRKLST.SYS” If Scandisk finds a broken file(s), it will automatically create the "$$BRKLST.SYS" file. To check the contents of the file, upload the file in System Mode to the host computer. (Refer to “Chapter 4 System Operation" – “4.5.3 Uploading Files (UPLOAD MENU).") Contents of the “$$BRKLST.SYS”... - Page 40 BHT-825Q series Chapter 3 Basic Operation This chapter describes basic operations such as barcode scanning, numerical data entry and item selection using the BHT, basic changes to settings, and BHT data transmission. 3 .1 Reading Barcodes or 2D Codes ······························································· 3 .2 Numeric Data Entry ·················································································...
-
Page 41: Reading Barcodes Or 2D Codes
BHT-825Q series 3.1 Reading Barcodes or 2D Codes Follow the procedure below to scan barcodes. Turn the BHT power ON. Power key Press the trigger switch. The BHT emits a guide marker (laser light) and the light for reading. The trigger switch is assigned to magic −... - Page 42 2D Code Handy Terminal When unable to successfully read codes… Cause Countermeasure Change the BHT reading angle and try again. When the light is focused on the printed Specular surface of the code from directly above, reflection the BHT may not read the code due to specular reflection.
-
Page 43: Numeric Data Entry
BHT-825Q series 3.2 Numeric Data Entry Enter numeric data such as product volume with the numeric keys and Enter ( ) key. If numeric data is entered incorrectly, use the backspace/clear key ( ) to delete the data and then reenter with the numeric keys. -
Page 44: Changing The Default Settings
2D Code Handy Terminal 3.4 Changing the Default Settings The volume, vibrator, LCD display brightness and power save settings can be changed at the MENU screen. Item Details Setting Used to set the volume of the speaker that notifies the user when barcode scanning is complete. - Page 45 BHT-825Q series Use the [▲] and [▼] cursor keys to select the item to be changed. The selected item is highlighted. Use the [◄] and [►] cursor keys to select the setting. Press any of the following keys to exit the settings screen. ●...
-
Page 46: Transmitting Data
2D Code Handy Terminal 3.5 Transmitting Data Data gathered by the BHT can be transmitted to the host computer by infrared communication, wireless communication and Bluetooth® wireless communication . The data transmission method and BHT setting method will differ depending on the system used, and therefore the system administrator should be contacted for details of operation. - Page 47 BHT-825Q series 3.5.1 Infrared Communication When performing data communication between BHT units Point the BHT infrared communication ports toward each other and perform communication. Requests • Ensure that the light path between the BHT and any target stations is not obstructed. •...
-
Page 48: Communication
2D Code Handy Terminal 3.5.2 Wireless Communication Transmit data to host computer via the wireless LAN access point. To perform wireless communication, it is necessary to configure the wireless local area network (wireless LAN) at the BHT and access point. The BHT-BASIC 4.0 Development Pack (Option) and BHT-BASIC 4.0 Transfer Utility (Option) software is required. - Page 49 BHT-825Q series ® 3.5.3 Bluetooth Communication ® This interface permits wireless communications with other Bluetooth devices. ® Bluetooth ® PC equipped Bluetooth ® Bluetooth ® Bluetooth device (ex. Printer) Requests • Point the antenna on top of the BHT toward the access point to improve communication performance. •...
- Page 50 BHT-825Q series Chapter 4 Chapter 4 System Operation System Operation This chapter describes how to initialize and update the system, start up a user This chapter describes how to initialize and update the system, start up a user program, and operate System Mode. program, and operate System Mode.
-
Page 51: Initializing The Bht System
BHT-825Q series 4.1 Initializing the BHT System By initializing the system, program files and data files downloaded to the BHT user area are deleted, and system settings are returned to the default status when shipped from the factory. The system must be initialized when: •... -
Page 52: Selecting The Memory Area To Be Initialized
2D Code Handy Terminal 4.1.1 Selecting the Memory Area to be Initialized Press the Power key ( ) while holding down the SF, M1 and 0 keys together. The screen on the right displays. Select the memory area to be initialized. (1) To exempt font files from deletion: Ensure that “1:USER AREA EXCEPT FONTS”... -
Page 53: Selecting The Message Version (English Or Japanese)
BHT-825Q series 4.1.2 Selecting the Message Version (English or Japanese) When the screen on the right displays, select the message display language with the numerical keys. “1: Japanese” Changes the message language to Japanese. “2: English” Changes the message language to English. Press the ENT key. -
Page 54: Performing System Initialization
2D Code Handy Terminal 4.1.4 Performing System Initialization The screen on the right displays during system initialization. Upon completion of system initialization, the BHT displays the screen on the right for a second and then turns OFF automatically. • Never turn OFF the BHT power during system initialization. Turning the power OFF too early - Point - will interrupt the process, requiring initialization to be performed again. -
Page 55: Updating The System
FTP (FTP MENU)”, and download the BHT system update file to the BHT. The BHT system update file can be downloaded from the following Web site. - Note - http://www.denso-wave.com/en/ BHT System Update Refer to section “4.5.16 Updating the System (MODIFY MENU)” and update the BHT system. -
Page 56: System Update
(F)” check box at the Transfer Utility Options screen and then download. The CU-811 system update file can be downloaded from the following Web site. - Note - http://www.denso-wave.com/en/ CU-811 System Update Refer to section “4.5.16 Updating the System (MODIFY MENU)” and update the CU-811 system. -
Page 57: Executing User Programs
BHT-825Q series 4.3 Executing User Programs User programs (application programs) can be executed using the following methods. Select the most appropriate method to meet the objective. 4.3.1 Executing from the SYSTEM MENU “EXECUTE PROGRAM” Select the program to be executed at the SYSTEM MENU “EXECUTE PROGRAM” menu. In such a case, the selected program will always be executed from the start. - Page 58 2D Code Handy Terminal Several directory management program examples are given below. The names of the files used in these examples are as follows. MAIN.PD4 Program to be executed by pressing the Power key ( ) only SUBMAIN.PD4 Program chained from MAIN.PD4 using the BHT-BASIC CHAIN statement USER.PD4 New program...
-
Page 59: Executing By Wake-Up
BHT-825Q series (Example 3) Recommended download method After system initialization, first download the program to be executed simply by pressing the Power key ( ). In this case, this program is always registered at the beginning of the system directory management unless the program has been deleted and another file downloaded. -
Page 60: System Mode
2D Code Handy Terminal 4.4 System Mode By starting up the BHT in System Mode and selecting each menu, the following operations can be performed individually. • Setup initialization • Executing user programs • File download/upload • System environment setting •... -
Page 61: System Mode Basic Operation
BHT-825Q series 4.4.2 System Mode Basic Operation Menu Selection and Display Use the following procedure to select and display each menu. Operation example Press numerical corresponding to the menu to be selected. [4]キー、または[ ]キーか Select [4: SET SYSTEM] with Alternatively, press the cursor [ ]キーで[4:SET SYSTEM]を... - Page 62 2D Code Handy Terminal Setting Value Selection Operation example Use the following procedure to select setting values. Press the numerical key corresponding to the item to be selected. Alternatively, press the cursor keys ([▲] [▼]) to select the item. The selected item will be highlighted. Select the setting value with the cursor keys ([◄] [►]).
-
Page 63: System Menu Configuration
BHT-825Q series 4.4.3 SYSTEM MENU Configuration Menu Configuration for Items Displayed at the SYSTEM MENU Screen Select the item with the numerical keys or cursor keys ([▲] [▼]) and press the ENT key. SYSTEM MENU Setup Menu Refer to section “4.5.1 Excuting Setup”. 0 and ENT keys Executing Programs Refer to section “4.5.2 Executing User Programs”. - Page 64 2D Code Handy Terminal Uploading Refer to section “4.5.4 Uploading Files”. 3 and ENT keys System Environment Setting Refer to section “4.5.6 System Environment Setting”. 4 and ENT keys BS/C Testing Refer to section “4.5.7 BHT Operation Test”. 5 and ENT keys System Information Display Refer to section “4.5.8 System Information”.
- Page 65 BHT-825Q series DEVICE MENU Refer to section “4.5.10 Wireless Communication Settings”. BS/C 8 and ENT keys...
- Page 66 2D Code Handy Terminal Menu Configuration for Items Not Displayed at the SYSTEM MENU Screen Press the corresponding numerical key while holding down the SF key. SYSTEM MENU Deleting Program/Data Files Refer to section “4.5.11 Deleting Program/Data Files”. 0 with SF held down BS/C Deleting Font Files...
- Page 67 BHT-825Q series Setting Remote Wake-up Refer to section “4.5.14 Setting the Remote Wake-up”. 4 with SF held down BS/C Downloading/Uploading the System Message File Refer to section “4.5.15 Downloading/Uploading the System Message File”. 6 with SF held down Updating the System Refer to section “4.5.16 Updating the System”.
-
Page 68: System Menu
2D Code Handy Terminal 4.5 SYSTEM MENU 4.5.1 Executing Setup (SETUP Menu) The BHT setup can be effectively executed using the BHT Setting and clone functions. The following explains setup using two BHTs with the clone function. Use the procedure below for BHT setup. - Page 69 BHT-825Q series Execute the master-side setup. Setup is performed with the BHT Setting and other SYSTEM MENU functions. Perform the settings for the master-side clone using “2: CLONE” and “3:OPTION” from the SETUP menu. Use the “OPTION” menu to perform settings such as the clone number, and authentication key. “OPTION”...
- Page 70 2D Code Handy Terminal Align the BHTs as shown below, and then press ENT on the transmitting device. Data 15 cm or less Slave Side Master Side (Test Use) The data transmission progress status is shown as per the screens below. •...
- Page 71 BHT-825Q series When communication is complete, the screen will return to the CLONE MENU (the previous screen.) In the event of a communication error, “Screen 2” below will appear. Screen 1: Error occurrence Screen 2: Error/correctly completed List of possible errors when cloning Processing Outline Displayed Message...
-
Page 72: Executing User Programs (Execute Program Menu)
2D Code Handy Terminal 4.5.2 Executing User Programs (EXECUTE PROGRAM Menu) Individually select and execute user programs downloaded to the BHT. Use the following procedure to execute user programs. Select “1: EXECUTE PROGRAM” at the SYSTEM MENU and then press the ENT key. The screen on the right displays. -
Page 73: Downloading Files (Download Menu)
BHT-825Q series 4.5.3 Downloading Files (DOWNLOAD Menu) Download files to the BHT user area from other devices such as the host computer. • If a file with the same name as one already used in the user area of the target memory in - Point - the BHT is downloaded, the newly downloaded file replaces the old one. - Page 74 2D Code Handy Terminal Select either “1: FILE” or ”2: HT<-->HT COPY” and press the ENT key. The screen on the right displays indicating that the BHT is waiting for the file to be downloaded. The screen on the right displays only when “1: FILE” is selected. If “2: HT<-->HT COPY”...
- Page 75 BHT-825Q series When downloading is complete, the speaker sounds once and the screen on the right displays. When the number of received records equals the total number of records, downloading is complete. (When using the Ymodem protocol, the received file size equals the total file size.) Press the BS/C key to return to the DOWNLOAD menu.
-
Page 76: Uploading Files (Upload Menu)
2D Code Handy Terminal 4.5.4 Uploading Files (UPLOAD Menu) Upload files stored in the BHT user area to another device. Use the following procedure to upload files. Select “3: UPLOAD” at the SYSTEM MENU and then press the ENT key. The screen on the right displays. - Page 77 BHT-825Q series Select “1: FILE”, ”2: ALL FILES” or ”3: HT<-->HT COPY” and press the ENT key. When “1: FILE” is selected: The screen on the right displays. Select the file to be uploaded and press the ENT key. Next, proceed to step 3. When “2: ALL FILES”...
- Page 78 2D Code Handy Terminal By executing the BHT-BASIC 4.0 Transfer Utility or similar program, the screen on the right displays and file uploading is commenced. (Refer to the “BHT-BASIC4.0 Transfer Utility User’s Guide.”) The screen on the right displays during uploading. The screen on the right displays indicating the file name and the number of sent records/the total number of records.
-
Page 79: Copying Files Between 2 Bht Units
BHT-825Q series 4.5.5 Copying Files between 2 BHT Units Copy “all files (excluding font files)”, “setting data”, and the “date and time” stored in the BHT user area to another BHT. Use the following procedure to copy files between 2 BHT units. Set the same interface at both BHT units. - Page 80 2D Code Handy Terminal The following setting data is copied when copying between BHT units. - Note - LCD contrast level Volume Switching between speaker and vibrator Program to be executed automatically when the BHT is turned ON Message version (English or Japanese) Backlight brightness of the LCD display Backlight brightness of the LCD display during power save mode Display font size...
- Page 81 BHT-825Q series FTP option, Line delimiters (CR/LF) FTP option, Handling of line delimiters FTP option, Handling of trailing spaces in data fields FTP option, Upload mode FTP option, Verbose mode IP address of host computer for ping-test Data size of echo request Echo request intervals Timeout period for echo request No.
-
Page 82: System Environment Settings (Set System Menu)
2D Code Handy Terminal 4.5.6 System Environment Settings (SET SYSTEM Menu) Use the following procedure to set the system environment. Select “4: SET SYSTEM” at the SYSTEM MENU and then press the ENT key. The SET SYSTEM menu screen on the right displays. SYSTEM MENU 1/2 “1: EXECUTE PROGRAM”: Sets the auto-start execution program to be executed when the power is... - Page 83 BHT-825Q series [1] Setting the auto-start execution program Use the following procedure to set the auto-start execution program. Select “1: EXECUTE PROGRAM” at the SET SYSTEM menu and then press the ENT key. The SET EXECUTE PROGRAM menu screen on the right displays. The highlighted program will be the program currently set as the auto-start execution program.
- Page 84 2D Code Handy Terminal [2] Setting the message version, system status indication and screen display compatible mode Use the following procedure to set the display language, system status indication and screen display compatible mode. Use the cursor keys ([▲] [▼]) or numerical keys ([1] [2] [3] [4]) to highlight ”1: MESSAGE”, ”2: STATUS”, “3: BOOT LOGO”, or “LOGO DISPLAY TIME”.
- Page 85 “2: COMPATIBLE MODE”: Sets compatible mode for screen display with the BHT-100, BHT-300, or BHT-7500. This allows BHT-100 Series, BHT-300 Series, or BHT-7500 Series application programs to run at the BHT-825QW without changing or correcting the font size. BHT-300 BHT-7500...
- Page 86 2D Code Handy Terminal BHT-825Q series BHT-300 BHT-7500 BHT-100 Normal Mode Mode Mode Mode Standard 22 x 16 char. 26 x 26 char. 20 x 26 char. 20 x 20 char. font (10 x 20 dots) (9 x 12 dots) (12 x 12 dots) (12 x 16 dots) mode...
- Page 87 BHT-825Q series System Status Indication Turning ON the system status indication displays the following icons at the bottom of the screen. Indication Icon Description Key Shift status Displays when the keys on the keypad are in Shift mode. Alphabet Displays when the BHT is set to alphabet entry mode. entry mode (If the alphanumeric entry system has been selected in user programs, pressing the SF key switches from the numeric entry mode to alphabet...
- Page 88 2D Code Handy Terminal [4] Setting the code scanning parameters Use the following procedure to set the code scanning conditions. Select “4: QRCODE” at the SET SYSTEM menu and then press the ENT key. The SET QRCODE screen on the right displays. The highlighted display and displayed values will be the current settings.
- Page 89 BHT-825Q series “3: DECODE LEVEL” Set the decode level (code reading tolerance level). Press [ ] to decrease the setting value and [ ] to increase the setting value. Decode level entry range: 1 - 9 (default: 4) Setting a lower value improves the reading rate but increases the risk of incorrectly reading poor quality codes (split or dirty codes).
- Page 90 “7: CODEMARK”: Setting the types of Code mark Set the types of Code mark. “0”:CODE MARK Type1 CODE MARK system is defined by DENSO Corporation. “1”:CODE MARK Type2 CODE MARK system is compliant with “Guidelines on Symbology Identifiers” by AIM USA.
- Page 91 BHT-825Q series “2: DEVICE SETTINGS”: Device settings during reading Use the cursor keys ([▲] [▼]) or numerical keys ([1] [2] [3]) to highlight the item to be set, highlight the setting value using the cursor keys ([◄] [►]) and press the ENT key. Press the BS/C key to return to the SET QRCODE menu.
- Page 92 2D Code Handy Terminal “3: OPEN BAR SEETTINGS”: Setting “The FUNCTION TO ASSIGN SCAN SETTINGS WITH THE SYSTEM SETTINGS” Select “3:OPEN BAR SEETTINGS” at SET QRCODE and then press the ENT key. OPEN BAR SETTING screen displays. 1: READ MODE: Read mode The READ MODE screen displays 2: BUZZER/LED: Speaker/LED control The SPEAKER/LED screen displays...
- Page 93 BHT-825Q series Use the cursor keys ([▲] [▼]) or numerical keys ([1] [2] [3] [4]) to select the item to be set and press the ENT key. Press the ENT key or BS/C key for the settings value to be valid and then return to the OPEN BAR SETTING screen.
- Page 94 2D Code Handy Terminal [3] Read code Select “3: READ CODE” at OPEN BAR SETTING and then press the ENT key. SET READ CODE screen displays. “1:BARCODE”: The BARCODE screen displays. “2:2D CODE”: The 2D CODE screen displays. “3:MULTI-LINE”: The MULTI-LINE screen displays Refer to the following section for details of the above items.
- Page 95 BHT-825Q series Press ENT key for the detailed settings of the bar code beign selected. Refer to the following section for the details. Press the BS/C key for the settings value to be valid and then return to the SET READ CODE screen. 「1:EAN/UPC」and 「7:RSS」have different types of code readings, which allows code - Point - readings to be set enable /disable at the detailed settings according to types of code...
- Page 96 2D Code Handy Terminal “1:EAN/UPC”:Detailed settings for EAN/UPC Select “1: EAN/UPC” at SET BARCODE menu and then press the ENT key. SET EAN/UPC screen displays. EAN/UPC 1/3 (EAN-13/UPC-A set) “1:READING”: Enable/Disable EAN-13/UPC-A “2:1ST CHARACTER”: “3:2ND CHARACTER”: Allocate 「?, 0~9」 to the first and second characters of EAN-13/UPC-A Changeover (country flags) .
- Page 97 BHT-825Q series Use the cursor keys ([▲] [▼]) or numerical keys ([1] [2] [3] [4]) to select the item to be set and press the ENT key. Use the cursor keys ([ ] [ ]) to select settings value. Press the ENT key or BS/C key for the settings value to be valid and then return to the SET BARCODE screen.
- Page 98 2D Code Handy Terminal “3:CODABAR”:Detailed settings for Codabar (NW-7) Select “3: CODABAR” at SET BARCODE menu and then press the ENT key. SET CODABAR screen displays. “1:MIN”: Set minimum number of digits of Codabar Setting range: 3~99 “2:MAX”: Set maximum number of digits of Codabar Setting range:...
- Page 99 BHT-825Q series “4:CODE39”:Detailed settings for Code 39 Select “4: CODE39” at SET BARCODE menu and then press the ENT key. SET CODE39 screen displays. “1:MIN”: Set minimum number of digits of Code 39 Setting range: 1~99 “2:MAX”: Set maximum number of digits of Code 39 Setting range:...
- Page 100 2D Code Handy Terminal “1:MIN”: Set minimum number of digits of Code 93 Setting range: 1~99 “2:MAX”: Set maximum number of digits of Code 93 Setting range: 1~99 Set the value of minimum number of digits to less than that of maximum number of digits. If ━...
- Page 101 BHT-825Q series Press the ENT key or BS/C key for the settings value to be valid and then return to the SET BARCODE screen. “7:RSS”:Detailed settings for RSS (GS1 Databar) Select “7: RSS” at SET BARCODE menu and then press the ENT key. SET RSS screen displays.
- Page 102 2D Code Handy Terminal Use the cursor keys ([▲] [▼]) or numerical keys ([1] [2] [3] [4] [5] [6] [7]) to select the item to be set. Use the cursor keys ([◄] [►]) to select settings value. Press the ENT key or BS/C key for the settings value to be valid and then return to the SET BARCODE screen.
- Page 103 BHT-825Q series “2:2D CODE”:2D Code Select “2:2D CODE” and press ENT key at SET READ CODE to display SET 2D CODE screen, allowing the code to be set to enable/disable. The highlighted settings are the current settings. To change the settings, use the cursor keys ([▲] [▼]) or numerical keys ([1][2][3][4][5][6])to select the item to be set and then select the setting value using the cursor keys ([◄] [►]).
- Page 104 2D Code Handy Terminal “1:QRCODE”:Detailed settings for QR Code Select “1:QRCODE” at SET 2D CODE menu and then press the ENT key. SET QRCODE screen displays. QR Code 1/2 (Concatenated QR code set) “1:READING”: Enable/disable concatenated QR Code. Changeover For QR Codes, there is a function where data is coded after being spilit into with[ ▲...
- Page 105 BHT-825Q series (QR Code model1 setting) “3:READING”: Enable/disable QR Code model 1 “4:MIN”: Set the minimum code version of QR Code model 1. Setting ragne: 1~22 “5:MAX”: Set the maximum code version of QR Code mode1. Setting range: 1~22 (QR Code model 2 setting) “6:READING”:...
- Page 106 2D Code Handy Terminal Use the cursor keys ([▲] [▼]) or numerical keys ([1] [2] [3] [4] [5] [6] [7] [8]) to select the item to be set. Use the cursor keys ([◄] [►]) to select settings value. Press the ENT key or BS/C key for the settings value to be valid and then return to the SET 2D CODE screen.
- Page 107 BHT-825Q series (Square iQR Code setting) “3:READING”: Enable/disable Square iQR Code “4:MIN”: Set the minimum code version of Square iQR Code. Setting range: 1~61 “5:MAX”: Set the maximum code version of Square iQR Code. Setting range: 1~61 (Rectangular iQRCode setting) “6:READING”:...
- Page 108 2D Code Handy Terminal “3:MAX”: Set the maximum code version of square Data Matrix Code. Setting range: 1~24 (Recatangular Data Matrix setting) “4:READING”: Enable/disable recatangular Data Matrix “5:MIN”: Set the minimum code version of recatangular iQR Code. Setting range: 1~6 “6:MAX”:...
- Page 109 BHT-825Q series “3:MULTI-LINE”:Multi-line code Select “3:MULTI-LINE” at SET READ CODE menu and then press the ENT key. SET MULTI-LINE screen displays, allowing the multi-line code to be set to enable/disable and the reading code can be set. “1:READING” : Enable/disable multi-line code. “2:1ST LINE”:Set the first line of the barcode to be set.
- Page 110 2D Code Handy Terminal If “0~9” is allocated at the menu, limitation can be set to read only when allocated numeric characters matchs to the first and second numeric characters of EAN-13/UPC-A. It can read umlimitedly when “?” is allocated. Use the cursor keys ([▲] [▼]) or numerical keys ([1] [2]) to select the item to be set.
- Page 111 BHT-825Q series “UPC-E”:Detailed settings of UPC-E for the Multiline code Select “UPC-E” at SET MULTI-LINE menu and then press the ENT key. SET MULTI-LINE [UPC-E] screen displays. “1:1ST CHARACTER”: “2:2ND CHARACTER”: Allocate “?,0~9” to the first and second characters of UPC-E (country flags).
- Page 112 2D Code Handy Terminal Set the value of minimum number of digits to less than that of maximum number of digits. If ━ Point ━ the value of minimum number of digits is larger than that of maximum number of digits, error occurs when reading.
- Page 113 BHT-825Q series “5:CD CHECK”: “ON” :It reads only when check digits are correct. It doesn’t read when check digits are not corrct or no check digits are found. “OFF”:It reads whether check digits are found or not. Use the cursor keys ([▲] [▼]) or numerical keys ([1] [2] [3] [4] [5]) to select the item to be set. Use the cursor keys ([◄] [►]) to select settings value.
- Page 114 2D Code Handy Terminal Press the ENT key or BS/C key for the settings value to be valid and then return to the SET MULTI-LINE screen. “CODE93”:Detailed settings of Code 93 for the Multiline code Select “CODE93” at SET MULTI-LINE menu and then press the ENT key.
- Page 115 BHT-825Q series “CODE128”:Detailed settings of Code 128 for the Multiline code Select “CODE128” at SET MULTI-LINE menu and then press the ENT key. SET MULTI-LINE [CODE128] screen displays. “1:1ST CHARACTER”: “2:2ND CHARACTER”: Allocate “?,0~9” to the first and second characters of Code 128. If “0~9”...
- Page 116 2D Code Handy Terminal [5] Setting the communication environment The communication environment settings following system initialization are follows. Do not change these settings unless necessary. Item Default Interface port Optical (infrared interface port) Communication protocol Ymodem protocol Infrared interface port TRANSMIT SPEED Baud rate 115200 bps...
- Page 117 BHT-825Q series “1: PARAMETER”: Setting the communication parameters Select “1: PARAMETER” to display the screen shown on the right. The highlighted setting will be the current setting. “1: TRANSMIT SPEED”: Setting the transmission speed To change the setting, highlight the transmission speed with the cursor keys ([◄] [►]) and press the ENT key.
- Page 118 2D Code Handy Terminal “2: PROTOCAL TYPE”: Setting the communication protocol type Select “2: PROTOCOL TYPE” at the SET COMMUNICATION menu and then press the ENT key. The PROTOCOL TYPE menu screen on the right displays. The highlighted setting will be the current setting. “1: Ymodem”: Selects Ymodem when uploading/downloading in System Mode or for the execution of the XFILE statement in BHT-BASIC.
- Page 119 BHT-825Q series Select “1: Ymodem” at the PROTOCOL TYPE menu to display the screen on the right. The highlighted settings will be the current settings. “1: CR/LF”: Specifies line delimiters. “2: CR/LF CODE”: Specifies handling for line delimiters in records when data files are downloaded.
- Page 120 2D Code Handy Terminal Select “3: BHT-Ir Protocol” at the PROTOCOL TYPE menu to display the screen on the right. Enter the ID number of the BHT using the numerical keys and then press the ENT key. If there is no need to edit the current setting, press the ENT key only.
- Page 121 BHT-825Q series [6] Defining the functions of the Shift key and Magic keys Use the following procedure to change the key settings. Select “6: KEY” at the SET SYSTEM menu and then press the ENT key. The SET KEY menu screen on the right displays. Use the cursor keys ([▲] [▼]) or numerical keys ([1] [2] [3] [4] [5] [6] [7]) to highlight the item to be set, and then press the ENT key.
- Page 122 2D Code Handy Terminal “2: M1 KEY” - ”5: M4 KEY”: Defining the Mx key functions Select “2: M1 KEY” to “5: M4 KEY” at the SET KEY menu and then press the ENT key. The SET Mx KEY menu screen on the right displays. (In the example on the right, “2: M1 KEY”...
- Page 123 BHT-825Q series Defining the backspace/clear key (BS/C key) function The BS/C key deletes the last entered character (backspace), and when pressed and held, cancels entry and returns the LCD display to the previous screen (clear). This menu sets the key hold time for “clear”. Select “6: BS/C KEY”...
- Page 124 2D Code Handy Terminal [7] Setting the TCP/IP, FTP and DHCP Use the following procedure to change the TCP/IP, FTP and DHCP settings. Select “7: TCP/IP” at the SET SYSTEM menu and then press the ENT key. The SET TCP/IP menu screen on the right displays. Use the cursor keys ([▲] [▼]) or numerical keys ([1] [2] [3]) to highlight the item to be set, and then press the ENT key.
- Page 125 BHT-825Q series “2: IP ADDRESS”: Setting the IP address Select “2: IP ADDRESS” at the SET TCP/IP menu to display the screen on the right where the current settings are displayed. To change the setting: (1) Use the cursor keys ([▲] [▼]) or numerical keys ([1] [2] [3]) to highlight the item to be set and press the ENT key.
- Page 126 2D Code Handy Terminal Setting the FTP Select “2: SET FTP” at the SET TCP/IP menu and then press the ENT key. The SET FTP menu screen on the right displays. Use the cursor keys ([▲] [▼]) or numerical keys ([1] [2]) to highlight the item to be set, and then press the ENT key.
- Page 127 BHT-825Q series “2: OPTION”: Setting the FTP options Select “2: OPTION” at the SET FTP menu to display the screen on the right where the current settings are displayed. “1: CR/LF”: Specifies line delimiters that should match ones used in the server OS. “2: CR/LF CODE”: Specifies the treatment of line delimiters in records when data files are downloaded.
- Page 128 2D Code Handy Terminal Setting the DHCP Select “3: DHCP” at the SET TCP/IP menu and then press the ENT key. The SET DHCP screen on the right displays. The highlighted setting will be the current setting. Press the BS/C key to return to the SET TCP/IP menu. Press the dot key while holding down the SF key at the SET DHCP menu to display the NETWORK (DHCP) screen (acquisition check screen for IP address at DHCP).
- Page 129 BHT-825Q series [8] Setting the resume function Use the following procedure to set the resume function. Select “1: RESUME” from the SET SYSTEM Menu 2/2 and then press the ENT key. The SET RESUME screen on the right displays. The highlighted setting will be the current setting. Use the cursor keys ([▲] [▼]) or numerical keys ([1] [2]) to change the setting, and then press the ENT key.
- Page 130 2D Code Handy Terminal [BLOCK ERASE ICON] Select “2: DRIVE TOOL” from the SET SYSTEM Menu 2/2 and then press the ENT key to display the screen on the right. Select the “2: BLOCK ERASE ICON” ([◄] [►]) from the DRIVE TOOL screen and use the the cursor keys to select ON/OFF.
- Page 131 BHT-825Q series [11] Setting the operation log The BHT-800 series is compliant with the BHT Manager software (host-side tool). The OPERATION LOG sets wheter of not create log data that the BHT Manager collects. For details, refer to the “BHT Manager User’s Manual”. The following explains only the operation of this menu and an outline of the settings.
-
Page 132: Bht Operation Test (Test Menu)
2D Code Handy Terminal 4.5.7 BHT Operation Test (TEST Menu) Use the following procedure to perform a BHT operation test. Select “5: TEST” at the SYSTEM MENU and then press the ENT key. The TEST menu screen on the right displays. “1: QRCODE”: Selects the code scanning test. - Page 133 BHT-825Q series [1] Code scanning test Use the following procedure to perform a barcode scanning test. Select “1: QRCODE” at the TEST menu and then press the ENT key. The screen on the right displays. Scan a barcode or 2D with the BHT Upon completion of barcode or 2D scanning, the speaker beeps once, and the indicator LED turns blue.
- Page 134 2D Code Handy Terminal Code Type and Corresponding Characters Didplayed on the Screen Code type Displayed characters Code mark Code mark Type1 Type2 QR Code QR Code(Codes concatenated with unedited modes) Micro QR Code SQRC i QR Code I QR Code(Codes concatenated with unedited modes) PDF417 MaxiCode Data Matrix...
- Page 135 BHT-825Q series *1: The codes with more than 4 digits are read for ITF. *2: CODE MARK Type 2 is the Code Mark system that is compliant with “Guidelines on Symbology Identifiers” by AIM USA . Suffix “m” differs from the data format of bar code system, as shown in the table below.
- Page 136 2D Code Handy Terminal Setting the Code Scanning Test Options When performing the code scanning test, press the F1 key to display the screen on the right, allowing code scanning test options to be set. The highlighted setting will be the current settting. To make changes, use the cursor keys ([▲][▼])...
- Page 137 BHT-825Q series [2] Memory test Use the following procedure to perform a memory test. Select “2: MEMORY” at the TEST menu and then press the ENT key. The screen on the right displays, and the BHT reads and writes data to and from all areas of the RAM and performs an address check.
- Page 138 2D Code Handy Terminal [3] Scale test Use the following procedure to perform a scale test. Select “3: BEEPER” at the TEST menu and then press the ENT key. The screen on the right displays, and the beeper sounds at the three octaves listed below.
- Page 139 BHT-825Q series [5] LCD and indicator LED tests Use the following procedure to perform an LCD and indicator LED test. Select “5: LCD” at the TEST menu and then press the ENT key. The TEST BEEPER screen on the right displays. The indicator LED is OFF at this time.
- Page 140 2D Code Handy Terminal Press the ENT key. The entire screen turns a lighter shade of gray. Press the BS/C key to return to the previous screen. Press and hold the BS/C key, or press the SF key and BS/C key simultaneously to return to the TEST menu.
- Page 141 BHT-825Q series Press the ENT key. The entire screen turns red, and at the same time, the indicator LED turns red. Press the BS/C key to return to the previous screen. Press and hold the BS/C key, or press the SF key and BS/C key simultaneously to return to the TEST menu.
- Page 142 2D Code Handy Terminal Press the ENT key. A 1-dot thick frame displays around the screen. Press the BS/C key to return to the previous screen. Press and hold the BS/C key, or press the SF key and BS/C key simultaneously to return to the TEST menu.
- Page 143 BHT-825Q series [6] File test The file test allows detailed information on program files, data files, audio files (*.WAV), and image files(*.JPG) to be checked. In addition, pressing the M1 key sorts the files. Select “6: FILE” at the TEST menu and then press the ENT key.
- Page 144 2D Code Handy Terminal ◆ Media files (*.WAV) Use the cursor keys ([▲] [▼]) to select a *.WAV file, and then press the ENT key. The screen to the right will appear, displaying the file size and creation date. Press the F1 key to play the file. Press the F1 key while the file is playing to stop the file, and return to the previous screen.
- Page 145 BHT-825Q series ◆ Media files (*.JPG) Use the cursor keys ([▲] [▼]) to select a *.JPG file, and then press the ENT key. The screen to the right will appear, displaying the file size, creation date, and a preview image. Press the F1 key to display the image in full screen.
- Page 146 2D Code Handy Terminal ◆ Font files (*.FN3/FN4) Use the cursor keys ([▲] [▼]) to select a *.FNT file, and then press the ENT key. Press the BS/C key to return to the previous screen. BASIC User Program (*.PD3/PD4) ◆ Use the cursor keys ([▲] [▼]) to select a *.PD3/PD4 file, and then press the ENT key.
- Page 147 BHT-825Q series ◆ Other files (*.DAT, *.TXT, etc.) Use the cursor keys ([▲] [▼]) to select a file, and then press the ENT key. If field information is available, press the F1 key to display the next screen. To return to the previous screen, press the F1 key again, or press the BS/C key. In addition, when there are four or more fields, “MORE FIELD LEN”...
- Page 148 2D Code Handy Terminal [7] Communication test Use the following procedure to perform a communication test. Select “7: COMMUNICATION” at the TEST menu and then press the ENT key. The TEST COMMUNICATION screen shown on the right displays. “1: OPTICAL”: Performs an infrared communication test.
- Page 149 BHT-825Q series At the slave BHT to be tested, select “1: SLAVE”, and at the master BHT, select “2: MASTER”. Then press the ENT key. The screen on the right displays during the test, and an infrared communication test is performed. If an error occurs, the tested slave BHT speaker beeps three times and displays the screen on the right.
- Page 150 2D Code Handy Terminal [8] Key-entry, speaker and vibrator test Use the following procedure to perform a key entry, speaker and vibrator test. Select “8: KEY & VIBRATION” at the TEST menu and then press the ENT key. The screen on the right displays, and the BHT waits for key entry. Press the ENT key.
- Page 151 BHT-825Q series [9] PING test Use the following procedure to perform a PING test. Select “9: PING” at the TEST menu and then press the ENT key. The TEST PING screen displays as shown on the right. “1: RUN PING”: Runs the PING test.
- Page 152 2D Code Handy Terminal Upon completion of the PING test, the screen on the right displays. The PING result may include the following: Displays the number of echo replies. [XXXXX]: Echo reply time in milliseconds Displays the number of errors found during the PING test. TIMEOUT: Displays the number of timeouts (for echo replies) that took place during the PING test.
- Page 153 BHT-825Q series “2: SET PING” (PING Options Setting Screen) Select “2: SET PING” at the TEST PING menu and then press the ENT key. The current settings are displayed. [1: DESTINATION IP]: Specifies the IP address of the host computer to be pinged. [2:DATA SIZE]: Specifies the data size of the echo request.
- Page 154 2D Code Handy Terminal PING Echo Request Transmission Timing (SEND TYPE) Two types of echo request send timings are available: TYPE 1 and TYPE 2. ν TYPE1 After sending an echo request, PING waits for the period specified at INTERVAL and then sends an echo request again.
- Page 155 BHT-825Q series “3: SET DEVICE” (PING Device Setting Screen) Select “3: SET DEVICE” at the TEST PING menu and then press the ENT key. The TCP/IP communication device, link layer, and transmission speed display. Press the BS/C key to return to the TEST PING menu.
-
Page 156: System Information (System Information Menu)
2D Code Handy Terminal 4.5.8 System Information (SYSTEM INFORMATION Menu) [1] Displaying the BHT system information Use the following procedure to display the BHT system information. Select “6: VERSION” at the SYSTEM MENU and then press the ENT key. The SYSTEM INFORMATION screen on the right displays. [SYSTEM Ver.]: System program version [ROM SIZE]:... - Page 157 BHT-825Q series [1] Functions for which licenses have been registered (∗) Use the cursor keys ([▲] [▼]) to highlight the name of a function that has been registered, and then press the ENT key to display a screen similar to that shown on the right containing the license registration details.
- Page 158 2D Code Handy Terminal [2] CU-811 System Information Display Use the following procedure to display CU-811 system information. Place the BHT on the CU-811. Select “6: VERSION” at the SYSTEM MENU and then press the ENT key. The SYSTEM INFORMATION screen on the right displays. Press the M2 key.
-
Page 159: Downloading/Uploading Files By Ftp (Ftp Menu)
BHT-825Q series 4.5.9 Downloading/Uploading Files by FTP (FTP MENU) Use the following procedure to download and upload files by FTP. Select “7: FTP” at the SYSTEM MENU and then press the ENT key. The FTP MENU screen on the right displays. “1: DOWNLOAD”: Downloads a file by FTP. - Page 160 2D Code Handy Terminal Use the cursor keys ([▲] [▼]) to highlight the item to be set, and then press the ENT key. The mode changes to entry mode and the cursor displays. Enter a setting value with the numerical keys and dot key. Press the SF and the BS/C key to change the entry mode (numerical entry (no guidance display) and alphabet entry).
- Page 161 BHT-825Q series [2] Uploading by FTP Select “2: UPLOAD” at the FTP MENU and then press the ENT key. The screen on the right displays if uploadable files exist. [1: DIR/FILE]: Entry box for the directory and/or file name [2: FIELDS]: File name currently selected (Nothing is displayed at the FTP client initial status.) A message indicating the status displays at the bottom of the screen.
- Page 162 2D Code Handy Terminal Enter the directory and file name, or select a file, and then press the ENT key. Press the BS/C key to return to the FTP MENU screen. DIR/FILE entry box: The FTP client will interpret a character string entered into this box as a directory name at first, and will therefore send a Change Directory request to the FTP server.
- Page 163 BHT-825Q series FTP Download/Upload Messages When the BHT is uploading or downloading files by FTP, the following messages will appear at the bottom of the screen: Aborted. Uploading or downloading has been interrupted. Connection error The communication pathway is disconnected. Device error Failed to open a device.
- Page 164 2D Code Handy Terminal Response Messages from the FTP server The messages that FTP servers send during and after FTP operations vary, but servers all use the same reply codes as listed below. 110 : Restart marker reply 120 : Service ready in approx. nnn minutes. 125 : Data connection has been established.
-
Page 165: Wireless Communcation Settings (Device Menu)
BHT-825Q series 4.5.10 Wireless Communcation Settings (DEVICE MENU) Use the following procedure to set up wireless communication. Select “8: DEVICE” in the SYSTEM MENU and then press the ENT key. The DEVICE MENU screen on the right is displayed. Select “WLAN” in the DEVICE MENU and then press the ENT key. - Page 166 2D Code Handy Terminal Wireless Network Parameter Settings Select “1: NETWORK PARAMETER” in the SET RF NETWORK menu and then press the ENT key. The screen on the right is displayed. [1: SSID]: Displays the current Service Set ID. Refer to “Chapter 5 Communication” – “5.2 Wireless Communication” for details on the Service Set ID.
- Page 167 BHT-825Q series Wireless Security Settings Select “2: SECURITY” in the SET RF PARAMETER menu and then press the ENT key. The screen on the right is displayed. [1:SECURITY MODE]: Sets up the wireless security mode. [2:CONFIGURATION]: Sets up the wireless security parameters. Refer to the following section for details of the above items.
- Page 168 2D Code Handy Terminal Wireless Security None Mode WEP can be used with the Wireless security None mode. To enable WEP, WEP and WEP KEY settings are required. The first WEP KEY setting is the encryption key, which can be set from WEP KEY 1 to 4. After setting the encryption key, the encryption key used is specified by setting the TRANSMIT KEY.
- Page 169 BHT-825Q series Use the cursor keys ([▲] [▼]) or numerical keys ([2] [3] [4] [5]) to highlight a WEP KEY from 1 to 4, and then press the ENT key. The screen on the right displays. [1: KEY SIZE]: Select 40 (40 bits) or 128 (128 bit). The highlighted setting is the current setting.
- Page 170 2D Code Handy Terminal Press the BS/C key to return to the SECURITY CONFIG menu. It is not possible to read a written WEP key, and therefore the WEP key setting must always - Point - be stored in a safe location. When not setting a WEP key, the WEP key will be the same as the previous setting.
- Page 171 BHT-825Q series Wireless Security 1x Supplicant Mode EAP authentication can be used with wireless security 1x Supplicant mode. Select “2: CONFIGURATION” at the SET SECURITY menu and then press the ENT key. The screen on the right displays. [1: AUTH PARAM (EAP)]: EAP authentication parameter setting Press the BS/C key to return to the SET SECURITY menu.
- Page 172 2D Code Handy Terminal Use the numerical keys to enter an ID and press the ENT key. Press the SF and the BS/C key to change the entry mode (numerical entry (no guidance display) and alphabet entry). To delete a single character, press the BS/C key. To delete the entire entry, press and hold the BS/C key, or press the SF key and BS/C key simultaneously.
- Page 173 BHT-825Q series Wireless Security WPA-1x Mode EAP authentication and an encryption system can be used with wireless security WPA-1x mode. Select “2: CONFIGURATION” at the SET SECURITY menu and then press the ENT key. The screen on the right displays. [1: AUTH PARAM (EAP)]: EAP authentication parameter setting [2: WPA CIPHER]: Encryption system setting...
- Page 174 2D Code Handy Terminal Use the numerical keys to enter an ID and press the ENT key. Press the SF key to change the entry mode (numerical entry (no guidance display) and alphabet entry). To delete a single character, press the BS/C key. To delete the entire entry, press and hold the BS/C key, or press the SF key and BS/C key simultaneously.
- Page 175 BHT-825Q series Use the cursor keys ([▲] [▼]) or numerical key ([2]) to highlight [2: WPA CIPHER] and then press the ENT key. The screen on the right displays. [1: CIPHER MODE]: Selects TKIP or AES. Ensure that [1: CIPHER MODE] is highlighted and then select TKIP or AES.
- Page 176 2D Code Handy Terminal Ensure that [1: PRE SHARED KEY] is highlighted and then press the ENT key. The mode changes to entry mode and the cursor displays. Use the numerical keys to enter a shared key and press the ENT key. Press the SF key to change the entry mode (numerical entry (no guidance display) and alphabet entry).
- Page 177 BHT-825Q series Wireless Security WPA2-1x Mode EAP authentication and an encryption system can be used with wireless security WPA2-1x mode. Select “2: CONFIGURATION” at the SET SECURITY menu and then press the ENT key. The screen on the right displays. [1: AUTH PARAM (EAP)]: EAP authentication parameter setting [2: WPA CIPHER]:...
- Page 178 2D Code Handy Terminal Use the numerical keys to enter an ID and press the ENT key. Press the SF key to change the entry mode (numerical entry (no guidance display) and alphabet entry). To delete a single character, press the BS/C key. To delete the entire entry, press and hold the BS/C key, or press the SF key and BS/C key simultaneously.
- Page 179 BHT-825Q series Wireless Security WPA2-PSK Mode PSK authentication and an encryption system can be used with wireless security WPA2-PSK mode. Select “2: CONFIGURATION” at the SET SECURITY menu and then press the ENT key. The screen on the right displays. [1: AUTH PARAM (PSK)]: PSK authentication parameter setting [2: WPA CIPHER]: Encryption system setting...
- Page 180 2D Code Handy Terminal Wireless Parameter Initialization Select “3: INITIALIZE” at the SET RF PARAMETER menu and then press the ENT key. The screen on the right displays. To initialize wireless parameters: Use the cursor keys ([▲] [▼]) or numerical key ([1]) to highlight [1: Yes] and then press the ENT key.
- Page 181 BHT-825Q series Site Survey Menu Select “2: SITE SURVEY” at the RF MENU and then press the ENT key. The SITE SURVEY screen on the right displays. Press the BS/C key to return to the RF MENU screen. Press the ENT key. The current communication status displays in real time.
- Page 182 2D Code Handy Terminal Use the following procedure to set Bluetooth wireless communications. Select “BLUETOOTH” in the DEVICE MENU and then press the ENT key. The BLUETOOTH MENU screen on the right is displayed. [1: INFORMATION]: ® Displays the Bluetooth interface information.
- Page 183 ® The Bluetooth device name can be up to 16 characters long. The default setting is DENSO-BHT. To swicth the entry mode (between numeric and alphabet entries), press the SF key. ® ® Refer to “Chapter 5 Communication” – “5.3 Bluetooth wireless communications”...
- Page 184 2D Code Handy Terminal Setting up the device detection parameters Select “2: INQUIRY” in the SET BLUETOOTH menu and then press the ENT key. The current settings are displayed. [1: INQUIRY TIME]: Sets up the duration of device detection in seconds. [2: NUM RESPONSES]: Sets up the number of devices to detect.
- Page 185 BHT-825Q series Setting up the master station Select “3: MASTER” in the SET BLUETOOTH menu and then press the ENT key. The current settings are displayed. [1: PEER BD_ADDR]: Sets up the remote device address of the connection target. ® [2: PASSKEY]: Sets up the Bluetooth passkey for the master...
- Page 186 2D Code Handy Terminal Setting up the serial port profile (SPP) service for the connection target Press numeric key [7] and the SF key simultaneously in the SET MASTER menu to display the screen on the right. [1: SPP SERVICE]: Sets up the serial port service name for the connection target.
- Page 187 BHT-825Q series Setting up the slave station Select “4: SLAVE” in the SET BLUETOOTH menu and then press the ENT key. The current settings are displayed. ® [1: PASSKEY]: Sets up the Bluetooth passkey for the slave station. [2: TIMEOUT]: Sets up the timeout limit in seconds.
- Page 188 2D Code Handy Terminal Setting up the file transfer protocol options Select “5: SPP PARAMETER” in the SET BLUETOOTH menu and then press the ENT key. The current settings are displayed. “1: SERIAL No.”: “ON”: Adds serial numbers to data blocks. “OFF”: Does not add serial numbers to data blocks “2: H.PARITY”:...
- Page 189 BHT-825Q series [3] Detecting remote devices Select “3: BROWSE DEVICE” in the BLUETOOTH MENU and then press the ENT key. The screen on the right is displayed. [1: INQUIRY]: Sets up the device detection. [2: BROWSE SERVICE]: Searches the bluetooth services. [3: AUTH BD_ADDR]: Displays a list of authenticated remote device addresses.
- Page 190 2D Code Handy Terminal Use the cursor keys ([▲] [▼]) or numeric key ([3]) to highlight the [3: NUM RESPONSES] and then press the ENT key. Entry mode is activated and the cursor is displayed. Use the numeric keys to enter the desired value. Set up the number of devices to detect.
- Page 191 BHT-825Q series The confirmation screen on the right is displayed. To set the selected address as a remote device address, select “1: Yes” and press the ENT key. To cancel the new setting, select the “2: No” and press the ENT key. The screen returns to the BROWSE DEVICE menu.
- Page 192 2D Code Handy Terminal Searching for services Select “2: BROWSE SERVICE” in the BROWSE DEVICE menu and then press the ENT key. The screen on the right is displayed. [1: DO IT]: Starts service inquiry. [2: TIMEOUT]: Sets up the services inquiry time. Press the Backspace/clear key to return to the BROWSE DEVICE menu.
- Page 193 BHT-825Q series When the service inquiry is completed or the service inquiry time has ® elapsed, the Bluetooth device address of the destination remote device and the provided service names are displayed as shown on the screen on the right. Press the Backspace/clear key to return to the BROWSE DEVICE menu.
- Page 194 2D Code Handy Terminal Displaying the authenticated remote device addresses Select “3: AUTH BD_ADDR” in the BROWSE DEVICE menu and then press the ENT key. A list of the authorized remote device addresses is displayed. A maximum of three authorized remote device addresses is displayed. Press the BS/C key to return to the BROWSE DEVICE menu.
- Page 195 BHT-825Q series [4] File transfer with serial port profile Select “4: SERIAL PORT” in the BLUETOOTH MENU and then press the ENT key. The screen on the right is displayed. [1: DO IT]: Connects via the serial port profile for transferring files. [2: MODE]: Sets up the connection mode.
- Page 196 2D Code Handy Terminal Use the cursor keys ([▲] [▼]) or numeric key ([1]) to highlight the [1: DO IT] and then press the ENT key. A serial port connection is started. Press the Backspace/clear key to return to the SERIAL PORT MENU. When the connection is established, the screen on the right is displayed.
-
Page 197: Deleting Program/Data Files (Deleete File Menu)
BHT-825Q series 4.5.11 Deleting Program/Data Files (DELEETE FILE Menu) Delete program files or data files stored in the FLASH ROM. Use the following procedure to delete files. Press the 0 key while holding down the SF key at the SYSTEM MENU. The DELETE FILE menu screen on the right displays. -
Page 198: Deleting Font Files (Delete File Menu)
2D Code Handy Terminal 4.5.12 Deleting Font Files (DELETE FILE Menu) Delete font files stored in the FLASH ROM. If there is insufficient user area, by deleting font files, a user area equal to the size of the deleted font files can be secured. - Page 199 BHT-825Q series To delete font files: Use the cursor keys ([▲] [▼]) or numerical key ([1]) to highlight [1: Yes] and then press the ENT key. The selected file is deleted and the screen on the right displays. Press the BS/C key to return to the DELETE FILE menu. To cancel: Use the cursor keys ([▲] [▼]) or numerical key ([2]) to highlight [2: No] and then press the ENT key.
-
Page 200: Parameter Menu)
2D Code Handy Terminal 4.5.13 Downloading/Uploading the BHT System Parameter File (SYSTEM PARAMETER Menu) The system parameter file (file name: ”_BHT.SYS”) is a file containing settings such as values, LCD contrast and speaker volume set at section “4.5.6 Setting Environment Settings”. The same settings can be set at another BHT by copying the system parameter file to that BHT. - Page 201 BHT-825Q series [1] Downloading the BHT system parameter file Use the cursor keys ([▲] [▼]) or numerical key ([1]) to highlight [1: DOWNLOAD] and then press the ENT key. The screen on the right displays indicating that the BHT is waiting for the system parameter file to be downloaded.
- Page 202 2D Code Handy Terminal [2] Uploading the BHT system parameter file Use the cursor keys ([▲] [▼]) or numerical key ([2]) to highlight [2: UPLOAD] and then press the ENT key. The screen on the right displays indicating that the BHT is waiting for the system parameter file to be uploaded.
-
Page 203: Setting The Remote Wake-Up (Set Remote Wakeup Menu)
BHT-825Q series 4.5.14 Setting the Remote Wake-up (SET REMOTE WAKEUP Menu) Use the following procedure to perform remote wake-up settings. Press the 4 key while holding down the SF key at the SYSTEM MENU. The SET REMOTE WAKEUP menu displays as shown on the right. [1: REMOTE WAKEUP]: Enables or disables remote wake-up. -
Page 204: Downloading/Uploading The System Message File (System Message Menu)
2D Code Handy Terminal 4.5.15 Downloading/Uploading the System Message File (SYSTEM MESSAGE Menu) The system message file is a file (file name: “_B80MSG.FN3”) used by the system to display messages such as “Shutdown in progress. Do not remove the battery.” or “Charge the battery!”. Downloading/Uploading the System Message File (1) Upload the system message file to the host computer and so on. - Page 205 BHT-825Q series [1] Downloading the system message file Use the cursor keys ([▲] [▼]) or numerical key ([1]) to highlight [1: DOWNLOAD] and then press the ENT key. The screen on the right displays indicating that the BHT is waiting for the system message file to be downloaded.
- Page 206 2D Code Handy Terminal [2] Uploading the system message file Use the cursor keys ([▲] [▼]) or numerical key ([2]) to highlight [2: UPLOAD] and then press the ENT key. The screen on the right displays indicating that the BHT is waiting for the system message file to be uploaded.
-
Page 207: Updating The System (Modify Menu)
BHT-825Q series 4.5.16 Updating the System (MODIFY MENU) Use the following procedure to update the system. Press the dot key while holding down the SF key at the SYSTEM MENU. The MODIFY MENU screen on the right displays. [1: SYSTEM MODIFY]: Updates the BHT system. [2: CU-F/W MODIFY]: Updates the CU-811 system. - Page 208 2D Code Handy Terminal ♦ When the Displayed File Name Differs from the BHT System Update File If the name of the file displayed at [2: FILENAME] differs from the name of the BHT system update file to be used for updating the system, enter the correct file name. Use the cursor keys ([▲] [▼]) or numerical key ([2]) to highlight [2: FILENAME] and then press the ENT key.
- Page 209 BHT-825Q series [2] Updating the CU-811 system Update the CU-811 system after downloading the CU-811 system update file. (Refer to section ”4.2.2 CU-811 System Update” for details.) Use the cursor keys ([▲] [▼]) or numerical key ([2]) to highlight [2: CU-F/W MODIFY] and then press the ENT key. The CU-F/W MODIFY menu screen on the right displays.
- Page 210 2D Code Handy Terminal ♦ If the System Update File Does not Exist when Updating the CU-811 System The screen on the right displays if the CU-811 system update file does not exist when updating the CU-811 system. Download the CU-811 system update file and update the CU-811 system again.
- Page 211 BHT-825Q series...
- Page 212 BHT-825Q series Chapter 5 Communication This chapter describes technical information relating to the infrared communication, wireless communication, Bluetooth wireless communication functions with which the BHT is equipped. Infrared Communication··········································································198 5.1.1 Infrared Communication Port Transmission Speed ·································199 5.1.2 BHT Hardware (Physical Layer) and Communication Protocols ·············199 Wireless Communication·······································································200 5.2.1 Usage Precautions ···················································································200...
-
Page 213: Infrared Communication
BHT-825Q series 5.1 Infrared Communication The BHT has a built-in infrared communication device that enables wireless transfer of programs and data both between the BHT and the host computer, and between BHTs without the need for a cable. Infrared communication offers the following benefits over other forms of communication. •... -
Page 214: Infrared Communication Port Transmission Speed
2D Code Handy Terminal 5.1.1 Infrared Communication Port Transmission Speed Communicating Device Transmission Speed BHT-800 Series 9600, 19200, 38400, 57600, 115200, 460800bps CU-801 9600, 19200, 38400, 57600, 115200bps CU-821 115200, 460800bps CU-811 4 Mbps 5.1.2 BHT Hardware (Physical Layer) and Communication Protocols BHT Hardware (Physical Layer) (Exclude Transmission Speed : 460800 bps) The BHT complies with IrDA Ver1.3 Low Power physical layer compliant by IrDA (Infrared Data Association). -
Page 215: Wireless Communication
3. If other problems arise due to reasons such as electromagnetic interference from this device to a specified low-power wireless station being used for mobile identification, please contact DENSO WAVE through QBdirect (see page ii). -
Page 216: Setting Parameters
2D Code Handy Terminal 5.2.2 Setting Parameters Programs written in BHT-BASIC control wireless communication with commands between the BHT and access points which are connected each other by a wireless LAN. For the setting procedure of RF-related parameters, refer to “Chapter 4 System Operation” – “Wireless Communication Settings (RF MENU).”... - Page 217 BHT-825Q series EAP TYPE This is the EAP authentication method setting used for 802.1x authentication. Select PEAP or EAP-TLS. This is valid only when the Security mode is 1x Supplicant, WPA-1x or WPA2-1x. IDENTITY This is the user ID used for 802.1x authentication. A format that includes the domain name (<domain name>\<user name>) may be specified for the identity.
-
Page 218: Bluetooth ® Wireless Communication
2D Code Handy Terminal ® 5.3 Bluetooth Wireless Communication 5.3.1 Usage Precautions • It may be possible to avoid the easy occurrence of communication errors by pointing the right side of the BHT (equipped with builtin antenna) toward the access point. This is because the radio waves of the 2.4 GHz waveband on which the BHT operates are emitted straight ahead and do not easily pass through the human body and so on. -
Page 219: Setting Parameters
BHT-825Q series 5.3.2 Setting Parameters ® Bluetooth Device Address ® ® Remote devices return these addresses, uniquely assigned to each Bluetooth device by the Bluetooth SIG, during device detection. ® Bluetooth Device Name ® Bluetooth devices can distinguish themselves using user-friendly names--Robert or Sandra, for example. ®... -
Page 220: Basic Communication Specifications And Parameters
2D Code Handy Terminal 5.4 Basic Communication Specifications and Parameters 5.4.1 Basic Communication Specifications The table below lists the basic infrared communication specifications for the BHT-825Q series. IrDA Interface Synchronization Start-stop (Note1) (Note2) Transmission speed 9600, 19200, 38400, 57600, 115200, 460800 or 4M Transmission code ASCII 8-bit code... - Page 221 BHT-825Q series Transmission Code and Bit Order • All characters should be coded to 7 or 8-bit code for data transmission. • The standard code at the BHT is ASCII 7-bit or 8-bit code. • The transmission bit order is LSB (Least significant bit) first. The example below is for the transmission of an ASCII 8-bit code A (41h or 01000001b, b: binary) with even vertical parity and a single bit each for the start and stop bits.
-
Page 222: Communications Parameters
2D Code Handy Terminal 5.4.2 Communications Parameters In System Mode and user programs written in BHT-BASIC, you can set the communications parameters listed below. Port IrDA Interface 9600, 19200, 38400, 57600, 115200, Transmission speed (Note1) (Note2) 460800 or 4M Character length 8 bits Vertical parity None... - Page 223 BHT-825Q series...
- Page 224 BHT-825Q series Chapter 6 Maintenance This chapter describes battery cartridge and daily procedures for taking care of the BHT and CU/CH. Replacing the Battery Cartridge ······························································210 6.1.1 Battery Cartridge Service Life ··································································210 6.1.2 Battery Cartridge Replacement Method···················································210 Using the BHT after Long Periods·························································212 Daily Maintenance·················································································213 6.3.1 Proper Care of the BHT············································································213...
-
Page 225: Replacing The Battery Cartridge
(Refer to “Chapter 2 BHT Preparation” – “2.2 Loading and Charging the Battery Cartridge”.) Do not use battery cartridges other − Point − than that specified by DENSO WAVE. - Page 226 2D Code Handy Terminal Insert the battery cartridge cover tab (1), and then close the battery cartridge cover (2) to lock the cover in position. Press the battery cover into place until a click is heard. Battery Cartridge Recycling Request ・...
-
Page 227: Using The Bht After Long Periods
BHT-825Q series 6.2 Using the BHT after Long Periods Data stored in the BHT may be lost and the calendar clock may stop if the BHT is left unused for long periods of time. Take appropriate measures in accordance with the procedure below. Insert a fully charged battery cartridge. -
Page 228: Daily Maintenance
2D Code Handy Terminal 6.3 Daily Maintenance 6.3.1 Proper Care of the BHT Wipe any dirt from the BHT housing, charge terminals, and BHT or battery cartridge terminals with a dry, soft cloth. Ensure to turn OFF the BHT before cleaning. Never use substances such as benzene or alcohol, as this may cause the housing to be marred or −... - Page 229 BHT-825Q series...
- Page 230 BHT-825Q series Chapter 7 Error Messages This chapter describes causes and countermeasures for error messages that display during BHT use. 0 7 .1 System Errors ・・・・・・・・・・・・・・・・・・・・・・・・・・・・・・・・・・・・・・・・・・・・・・・・・ 216 1 7 .2 System Mode Errors・・・・・・・・・・・・・・・・・・・・・・・・・・・・・・・・・・・・・・・・・・・ 220...
-
Page 231: System Errors
BHT-825Q series 7.1 System Errors The error messages that display on the screen and the causes and countermeasures to be taken if an error occurs when the power is turned ON or while running a program are shown below. Message BHT Response Cause Countermeasure... - Page 232 2D Code Handy Terminal Message BHT Response Cause Countermeasure The date and time settings calendar clock Set the current date and screen displays, awaiting integrated in the BHT has time. (Refer to “Chapter 2 BHT Preparation” – “2.4 entry. stopped because: - the battery cartridge had Initial Setup”) been removed for a...
- Page 233 BHT-825Q series Message BHT Response Cause Countermeasure If this error occurs, the During execution of Unload reload warning tone beeps five System Program, the battery cartridge, then turn times. System Program has the BHT on. received an invalid If this error occurs command code.
- Page 234 2D Code Handy Terminal Message BHT Response Cause Countermeasure After displaying this error Your settings made in Contact your system message, the BHT may start System Mode contain an administrator. a user program other than error. (If this error occurs, the preset auto-start System Mode settings revert...
- Page 235 BHT-825Q series 7.2 System Mode Errors When error messages display while running System Mode, refer to the following table and take appropriate measures. Message BHT Response Countermeasure You attempted to execute a user Press the BS/C key to return to the program in the EXECUTE PROGRAM SYSTEM MENU, then download user menu, but no user program files had...
- Page 236 2D Code Handy Terminal Message BHT Response Countermeasure The current download will exceed the Press the 2 key to return to the SYSTEM maximum allowable number of files (420 MENU, then delete unnecessary files in the files) in the memory. memory (or decrease the number of files to downloaded attempted...
- Page 237 BHT-825Q series Message BHT Response Countermeasure The memory is insufficient for setting up Press the BS/C key to return to the the BHT system parameter file or system SYSTEM MENU and delete unnecessary message file to be uploaded. files. The memory already contains 420 files, Press the BS/C key to return to the so the BHT system parameter file or SYSTEM MENU and delete unnecessary...
- Page 238 BHT-825Q series Chapter 8 Specifications This chapter describes the BHT-825Q series specifications. 8 .1 BHT-825Q series Specifications ····························································· 2 24 8 .1.1 Hardware Specifications··········································································· 2 24 8 .1.2 Code Specifications·················································································· 2 25 8 .1.3 Scanning Performance············································································· 2 27 8 .1.4 Interface Specifications ············································································...
-
Page 239: Bht-825Q Series Specifications
BHT-825Q series 8.1 BHT-825Q series Specifications 8.1.1 Hardware Specifications Power supply (main power): Rechargeable lithium-ion battery cartridge (3.7 V DC) Dimensions (W) x (L) x (H): 67 x 182 x 55 mm Weight: Approx. 230 g (including battery cartridge BT-20LB) Ambient operating temperature: -20 to 50°... -
Page 240: Code Specifications
Barcode 8.1.2 Code Specifications Supported Code Types QR code (Model 1, Model 2), Micro QR code Code size Cell pitch QR code 117 cells x 117 cells(360° Skew) 0.2 mm 69 cells x 69 cells(360° Skew) 0.33 mm Micro QR code 17 cells x 17 cells(360°... - Page 241 BHT-825Q series COMPOSITE Read digits Module dimensions RSS, EAN128, Universal product codes, PDF417, 0.25 mm min Micro PDF, all codes within limits Barcodes Supported Barcode Types Bar Dimensions Scan Magnification Universal product codes EAN-13 0.26 to 0.53 mm 0.8 to 1.6 times EAN-8 0.26 to 0.66 mm 0.8 to 2.0 times...
-
Page 242: Scanning Performance
Barcode 8.1.3 Scanning Performance Scanning Reference Position 90 mm As illustrated at left, align the reading Label window with the center of the label (code) to be scanned. Reading Distance and Area Scanning reference position(90 mm) 0.2mm 0.25mm 0.33mm 0.5mm QR code cell pitch dimensions and valid scanning range 0.15mm 0.25mm... - Page 243 BHT-825Q series QR code cell pitch dimensions Valid reading distance 0.20 mm 45 to 95 mm *1 0.25 mm 40 to 120 mm *1 0.33 mm 35 to 150 mm *1 0.50 mm 30 to 195 mm *2 PCS value: 0.9 min., White reflection intensity: 85% min Under the following conditions: Under the following conditions: QR code model 2...
-
Page 244: Interface Specifications
460,800 bps is only possible when communicating from one BHT-800 unit to another or with the CU-821. 4 Mbps is only possible for communication with the dedicated CU-811 unit. The maximum transmission speed in all other cases is 115,200 bps. Wireless Interface (BHT-825QW) IEEE802.11b Communication method:... - Page 245 BHT-825Q series...
- Page 246 BHT-825Q series Chapter 9 Appendices This chapter describes the CU-800 Series (option) specifications, and describes causes and countermeasures when unable to transfer files. 9 .1 CU-800 Specifications············································································· 2 32 0 0 0 0 7 7 7 7 9 .1.1 Hardware Specifications··········································································· 2 32 1 1 1 1 8 8 8 8...
- Page 247 BHT-825Q series 9.1 CU-800 Specifications 9.1.1 Hardware Specifications CU-801 CU-811 CU-821 Power supply: 100/230 V AC 100/230 V AC Powered from the USB (Using dedicated AC (Using dedicated AC interface * adapter) adapter) Max. power consumption: 6.5 VA 7 VA 5V 500 mA Dimensions (W) x (L) x (H): 110 x 134 x 81.7 mm...
- Page 248 2D Code Handy Terminal 9.1.3 Interface Specifications CU-801 The CU-801 RS-232C interface connector uses Dsub-9P. Signal Direction Pin. No. Signal Name Function CU-801 ↔ External Device ← Receipt data → Transmission data Data terminal ready → Signal ground — Data set ready —...
- Page 249 BHT-825Q series CU-811 The CU-811 has an IEEE802.3-compliant Ethernet interface port (100Base-TX). Ethernet Interface Port (RJ45 jack) on the CU-811 Pin No. Signal Functions Send data Send data Receive data N.C. No connection N.C. No connection Receive data N.C. No connection N.C.
- Page 250 2D Code Handy Terminal 9.2 When File Transfer is Not Possible Using the Transfer Utility This section describes the causes and remedies when file transfer is not possible using the Transfer Utility. Error No. Cause Details Remedy Illegal field information specification option Set a correct value for the field information option.
- Page 251 BHT-825Q series Error No. Cause Details Remedy The Transfer Utility “Communication port” Specify the communication port to which the BHT is option specification is illegal. connected for the “Communication port” option. The transmission speed at the BHT and PC Ensure that the transmission speed at the BHT and does not match.
- Page 252 2D Code Handy Terminal Error No. Cause Details Remedy An attempt was made to download a Use BHT-BASIC 4.0 format program files (*.PD4). BHT-BASIC 3.6 format program file (*.PD3). Note 1: “Customer Registration” is required to use QBdirect (free of charge). When using for the first time, complete “Customer Registration”...
- Page 253 2D Code Handy Terminal BHT-825Q BHT-825QB BHT-825QW User’s Manual First Edition November 2011 DENSO WAVE INCORPORATED...
Need help?
Do you have a question about the BHT-825QW and is the answer not in the manual?
Questions and answers