Table of Contents
Advertisement
Advertisement
Table of Contents

Subscribe to Our Youtube Channel
Related Manuals for Look Solutions Viper NT


Summary of Contents for Look Solutions Viper NT
- Page 1 Operating manual Viper nt a Look Solutions product...
- Page 2 Set of Equipment supplied – 1 Viper nt – 1 tank lid with Quick Connector – 1 XLR remote and 25 ft cable – 1 manual Please check whether all the products you ordered are supplied.
-
Page 3: Table Of Contents
2. Safety instructions 3. Description of the parts 4. Fluid 4.1 General Notes 4.2 Changing the fluid container 5. Operating the Viper nt 5.1 Selecting the location 5.2 Putting into operation 5.3 Switching the device off 5.4 Control choices 5.4.1 Control via DMX 512 5.4.1.1 Adjusting the DMX start address... -
Page 4: Introduction
1. Introduction The Viper nt originates from the continued development and improvement of the Viper fog machine. It unites the current digital technology with the proven technique and power of its predecessor. New features guarantee a much more simple operation – place and fog, reducing... -
Page 5: Safety Instructions
• Spilled fluid or splashed fluid droplets can cause slip hazard. Mop up the fluid and dispose of it according to regulations. • Fog may activate smoke detectors. • Use only Look Solutions Quick-Fog, Regular-Fog or Slow-Fog fluid in this machine. Artificially-made fog can be produced in many different ways. The method used here to produce fog, with a device which works according to the vaporizer principle, is the most harmless one. -
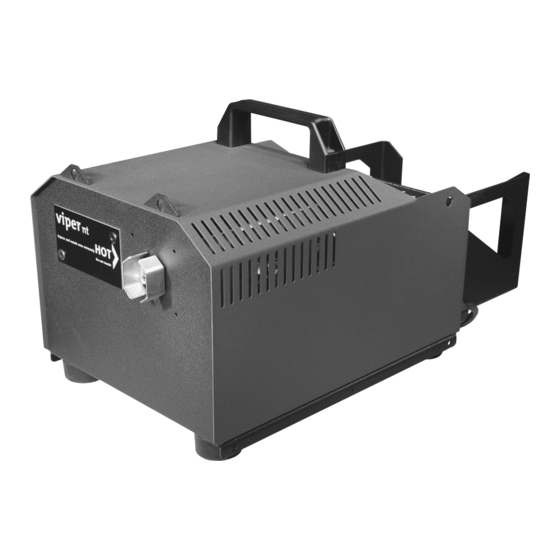
Page 6: Description Of The Parts
3. Description of the parts Front view viper Vapour and nozzle area extremely Do not touch! 1: · Nozzle Rear view 2: · Fluid tube 3: · Fluid tube inlet 4: · Mains cable... - Page 7 3. Description of the parts Top view 5: · Air vents 6: · DMX in/out 7: · Control panel for adjusting analog in This machine has been designed the DMX start address and to be used with waterbased glycol-fluid. viper Use of other liquids will void the manufacturer's warranty and can the output...
-
Page 8: Fluid
4. Fluid 4.1 General Notes The Viper nt has been designed to be used with Look fog fluids. If other fluid is used, the safety of the fog can‘t be guaranteed. The following Look fog fluids are available: Quick-Fog thick, quick disappearing fog fluid... -
Page 9: Putting Into Operation
60 Hz). A „P” and two figures appear on the display. P 2 5 b. After a warm up time of approx. seven minutes the Viper nt is ready to start. The green Ready-Led [20] blinks if the working temperature is reached. As soon as the final temperature is reached, the LED lights solid. - Page 10 5. Operating the Viper nt Control panel (Standard-Menu) 20: Ready-LED, green 19: Timer-LED, red P 1 5 18: LED display 17: DMX-LED, yellow 16: Enter-button 15: Up/Down-buttons 14: Mode-button Fig. 1: Display shown at adjusting the pump output 2 7 5 Fig.
-
Page 11: Control Choices
DMX 512 this data takes priority over 0-10 V (+) DC and Stand alone operation. 5.4.1 Operating via DMX 512 Connecting the Viper nt to a DMX-desk use the 5pin XLR socket [8] on the back of the machine. As soon as the machine receives a correct DMX signal, the yellow DMX-LED [17] shines. -
Page 12: Stand Alone Mode
5. Operating the Viper nt 5.4.3 Stand alone The Viper nt can be used in the Stand alone mode. In this mode the control of the pump must be adjusted at the machine. a) Press and release the Mode-button [14] until a „P” and two figures appear on the display [18]. -
Page 13: Operating With Internal Timer
If the timer is in operation and you disconnect the machine from the mains cable, the Viper nt will re-start in the Timer-Mode as soon as it‘s reconnected to the mains. To stop this press and hold the Mode-button [14] for more than 2... -
Page 14: Wiring Of The Connectors
– Take care that the machine can not get overheated. – Do not run the Viper nt without any fluid, as the pump will run dry. – Wipe up spiled Fluid immediately. Moisture – also fluid – can destroy the electric parts of the machine. -
Page 15: Troubleshooting
7. Troubleshooting The fog machine does not fog • Check external control signals • Check mains supply • Check fluid tank (empty?) • Check for correct connections at the fluid bottle • Check for fluid in the fluid tube • Check if fluid filter is clogged •... -
Page 16: Specifications
8. Specifications Procedure: vaporizing fog generator Power requirement: 1300 Watt Voltage: 230 V/ 50 Hz or 120 V / 60 Hz Fluid consumption: at max. output 120 ml/min at cont. output 35 ml/min Fluid tank capacity: 5 Liter Fog output: adjustable in 99 steps, steps à... -
Page 17: Warranty Conditions
9. Warranty Conditions For the fog machine Viper nt Look‘ guarantee is: 1. Free of charge, subject to the following conditions (No. 2 - 6) we will repair any defect or fault in the unit if it is caused by a proven factory fault and has been advised immediately after appearance and within 12 months of delivery to the end user. - Page 18 Timer-Menu Pumpeneinstellung Pxx (1-99%) Pump output Nebeln aus Nebeln an/aus + 1% – 1% Output stop Timer aus Output start/stop Timer stop nein länger als 2 Sek. more than 2 sec. Timer-Menu Pausenzeit P.xx (0.1-99) Pause Timer start/stop + 0.1 –...
- Page 20 Look Solutions product...
Need help?
Do you have a question about the Viper NT and is the answer not in the manual?
Questions and answers