Table of Contents
Advertisement
Quick Links
Advertisement
Table of Contents

Related Manuals for Janam XM66


Summary of Contents for Janam XM66
- Page 1 XM66 User Guide Version 9 May, 2011...
-
Page 2: Table Of Contents
Install/charge the battery Turn on the XM66 Understanding the today screen What do the status icons mean? Chapter 3: Set Up Your Janam XM66 Recalibrate the screen Customize the today screen Change language and regional settings Change the date and time display... - Page 3 XM66 User Guide Chapter 8: WLAN 802.11 Wireless Configuration Wireless local area network access Chapter 9: Bluetooth Overview Turn Bluetooth on/off Make a device visible Bluetooth partnerships Bluetooth beam Bluetooth virtual COM ports overview Chapter 10: Regulatory and Maintenance...
- Page 4 XM66 User Guide Hardware overview Front view numeric keypad Power on/off Indicator LED LCD Left Right trigger trigger Programmable Scan trigger Backspace ...
-
Page 5: Top View
XM66 User Guide Top view Bottom view Syncing/charging Barcode scan connector Power on/off window Back view Stylus tether connection port (in) Stylus tether connection port (out) ... -
Page 6: Chapter 1: Introduction
(DDR) memory, the XM66 brings impressive horsepower to the point of activity. Features designed for the front line and a price that drives the bottom line set Janam’s XM Series ahead of its class. Janam’s XM Series mobile computers are sculpted to fit in the hand and are the only products in the category that weigh less than 10 ounces and still have a full 3.5”... -
Page 7: Chapter 2: Get Started
Janam XM Series rugged barcode scanners running the Microsoft Windows Mobile 6.1 operating system. It contains all necessary details and instructions for developing applications that use Janam XM Series libraries, including scanning, imaging and hardware utilities. ® The development kit is designed for use with Microsoft eMbedded Visual C++ 4.0 (SP4 or above) or... -
Page 8: Attach The Handstrap
To charge the battery using the USB Cable or Serial Cable: 1. Connect the power supply to the USB cable or serial cable. 2. Connect snap-on end of USB cable or serial cable to bottom of XM66, making sure the word TOP on the cable connector faces front. -
Page 9: Turn On The Xm66
2. Press down and forward with index finger to lift battery edge. Turn the XM66 on After installing the battery in the XM66, press the power button at the top of the device. The first time the device is turned on, calibrate the screen using the stylus. -
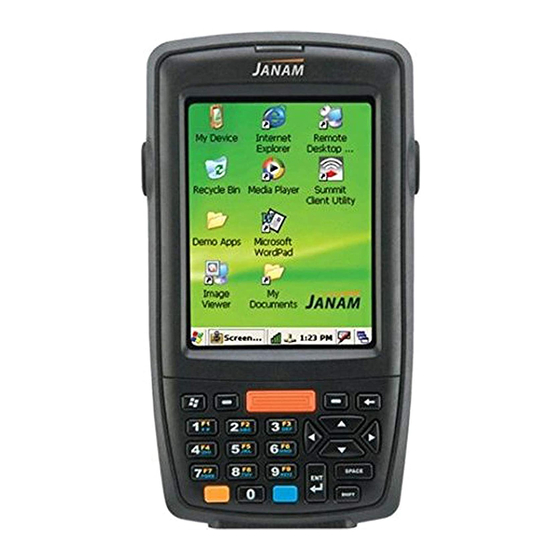
Page 10: Understanding The Today Screen
XM66 User Guide Understanding the Today Screen What do the Status Icons Mean? Janam Technologies LLC ... -
Page 11: Chapter 3: Set Up Your Janam Xm66
DO NOT use a pen, pencil or any other object on the touch screen display. Recalibrate the Screen The first time you start the Janam XM66 handheld computer, setup instructions will appear on screen. These instructions include a calibration screen, or digitizer. Calibration aligns the internal circuitry of the handheld computer with its touch-sensitive screen so the handheld can detect tapping selected elements on the screen. - Page 12 XM66 User Guide To choose a background/theme: On the Appearance tab, select the desired theme for the background. To add a custom background image: Check the use this picture as the background check box, and tap Browse button to view a list of your picture files.
-
Page 13: Change Language And Regional Settings
Change the order by tapping the item and then tap move up or move down. Change Language and Regional Settings Your Janam XM66 ships with pre-set regional, language and input settings. To change these settings, follow the directions below. The style in which numbers, currency, dates and times are displayed is specified in regional settings. -
Page 14: Change The Date And Time Display
XM66 User Guide Change the Date and Time Display To set the time and date: 1. Tap Start menu> Settings > System tab > Clock & Alarms. 2. Select the correct Time Zone, and change the Date or Time. 3. Choose Alarms tab to set regular reminders. -
Page 15: Owner Identification And Password Protection
XM66 User Guide Owner Identification and Password Protection 1. Tap Start menu > Settings > Personal tab > Owner Information. 2. On the identification tab, enter your personal information. To display owner information on the today screen: 1. Tap Start menu > Settings > Personal tab > Owner Information. -
Page 16: Backlight And Brightness Preferences
5. Tap OK. You will be prompted to enter your password the next time you turn on your Janam XG100WM. IMPORTANT NOTE! Each time a wrong password is entered, the time the device takes to respond will get longer and longer until the device appears to be not responding. -
Page 17: Battery Power
XM66 User Guide Battery Power To make the battery last longer: 1. Tap Start menu > Settings > System tab > Power. 2. On the Advanced tab, specify when your device turns off to conserve battery power. For optimum conservation, specify 3 minutes or less. -
Page 18: Adjust Volume
XM66 User Guide To adjust the speed for scrolling: 1. Tap Start menu > Settings > Personal tab > Buttons > Up/Down Control tab. 2. Do one of the following: • Under delay before first repeat, move the slider to... -
Page 19: Device Name
XM66 User Guide Device Name Your XM66 may already be named, which is used to identify the device in the following situations: • Synchronizing with a PC • Connecting to a network • Restoring information from a backup IMPORTANT NOTE! If you synchronize multiple devices with the same PC, each device must have a unique name. -
Page 20: Open Applications
XM66 User Guide Open Applications To open an application: 1. Tap Start menu > Programs. 2. Select the application you want to open. Remove Applications To remove a program: 1. Go to Start menu > Settings > System > Remove Program. - Page 21 XM66 User Guide Display Locked/Unlocked To lock the display: 1. Tap Start menu > Today. 2. Tap Device unlocked. The lock icon will change to a closed lock. 3. When the device is locked, keypad and touch screen will not receive user input.
-
Page 22: Chapter 4: Reset The Xm66
Janam logo appears on the display, release both the blue key and the power button. Blue Key To hard reset: A hard reset returns the XM66 to factory settings, removing ALL Power applications and data from the device. Be sure that all data is backed up before performing a hard reset. To perform a hard reset, do the following: 1. - Page 23 Keypad Type Choose setting to match device’s keypad type. Factory default is “Numeric”. Note: XM66 Panel settings will revert to default settings after a cold boot. Please refer to XM Series SDK for more information on how to make settings persistent.
-
Page 24: Chapter 5: Barcode Scanning Demonstration And Setup
4. Tap OK to save. 5. Select Scan 6. Point the scanner at a barcode, and press any of the barcode scan trigger buttons on the XM66. The results will display after a successful scan. Janam Technologies LLC... -
Page 25: Enable The Scanwedge Feature
API or by using the Janam Barcode Test program. Unlock 2D scanning All of Janam’s mobile computers can be upgraded in the field to read both 1D and 2D barcodes with a simple firmware upgrade (Part Number 2D-XP-1). With each upgrade, a key code is provided that unlocks 2D scanning capability on the device. -
Page 26: Enable Scancapture Feature
Tap ScanCapture icon. To take a single image: 1. Click Single button. 2. Aim the XM66 at the subject, hold the device steady and press the Single button. The unit will function as a digital camera and take a single picture. - Page 27 XM66 User Guide To use continuous preview: 1. Select Cont or continue button. 2. Aim the scanner at the subject, hold the device steady and press the Cont button. This will start video record. 3. Press the Cont button again to stop video recording and display a single image.
- Page 28 XM66 User Guide 5. Enter image name and save to a memory storage location. 6. Click OK. 7. The below image is captured. Janam Technologies LLC...
-
Page 29: Chapter 6: Enter Data
Enter Data Entering information on the XM66 You can enter data into your Janam mobile computer several ways: Using the Barcode Scanner You can capture data and images by scanning barcodes into the handheld computer. See chapter 5 for details. -
Page 30: Keyboard Shortcuts
XM66 User Guide Keyboard Shortcuts When you use the onscreen keyboard, you can use shortcut keys as an alternative to menu commands when working in programs on your device. Using the Onscreen Keyboard To enter text: You can enter text by tapping keys on the keyboard that is displayed on the screen. The onscreen keyboard is available when text entry is possible. - Page 31 XM66 User Guide (a) Using Input Selector arrow (b) Using Input on Settings screen Janam Technologies LLC...
- Page 32 XM66 User Guide To use ClearType for screen text: 1. Tap Start menu > Settings > System tab > Screen > ClearType tab. 2. Select the enable ClearType check box. To increase or decrease the size of text on the screen: 1.
- Page 33 XM66 User Guide To change word completion options: 1. Tap Start menu > Settings > Personal tab > Input. 2. Tap the Word Completion tab, select the Suggest words when entering text check box, and specify the settings. 3. Tap OK.
-
Page 34: Using Block Recognizer
XM66 User Guide To change input panels: 1. The standard alpha keyboard is the default. 2. For numeric, tap on 123 keyboard in the upper left corner of the main keyboard. 3. For international, tap on áü key in the lower left corner of the alpha keyboard. -
Page 35: Using Letter Recognizer
XM66 User Guide Using Letter Recognizer With letter recognizer, you can write individual letters, numbers and punctuation and have them converted into typed text. To enter text using letter recognizer: 1. From a program, tap the Input Selector arrow and then Letter Recognizer. - Page 36 XM66 User Guide To set transcriber startup options: 1. From a program, tap on the transcriber toolbar. 2. On the Quick Settings tab, set any of the following options: • In recognition, the language transcriber recognizes Standard English (Default). •...
- Page 37 XM66 User Guide To write with transcriber: Transcriber allows you to write in cursive, print or a combination of both. 1. Within a program, position the cursor where you want text to appear. 2. Use the stylus to write anywhere on the screen. The writing will be converted to text shortly after you lift the stylus from the screen.
- Page 38 XM66 User Guide To create shorthand for entering words: 1. From a program, tap on the transcriber toolbar. 2. On the Advanced tab, under Shorthand, tap Settings. 3. In the Transcriber: Shorthand dialog box, tap Add. 4. Tap Text expansion, and tap Next.
- Page 39 XM66 User Guide To create shorthand that will open a program: 1. From a program, tap on the transcriber toolbar. 2. On the Advanced tab, under Shorthand, tap Settings. 3. In the Transcriber: Shorthand dialog box, tap Add. 4. Tap Run Program, and tap Next.
- Page 40 XM66 User Guide To use handwriting recognition alternates: 1. From a program, draw a line across the word you want to correct or add to the dictionary. 1. After you lift the stylus, the line will disappear and the word will be highlighted.
- Page 41 XM66 User Guide To match letter shapes to handwriting: Use the letter shapes feature to match your handwriting to a series of letter shapes recognized by transcriber or to learn methods of writing characters that transcriber will recognize more easily.
-
Page 42: Import Data
If you have data stored in computer applications such as spreadsheets and databases, or if you want to import data from another device, you can transfer the data to your Janam XM66 handheld computer without having to key it in manually. See chapter 6 for more details on how to transfer files and applications. -
Page 43: Chapter 7: Exchange And Update Data Using Activesync
XM66 and PC directly using a cable or cradle or use a modem or network. Create a User Profile You can create a user profile to load data into a Janam XM66 without associating that data with a user name. - Page 44 1. On your PC, select Start menu > Programs > ActiveSync. Microsoft ActiceSync Version 4.5.0 (Build 5096) is used in this manual. 2. Connect your Janam XM66 to your PC. 3. Microsoft ActiveSync dialog box prompts. Tap OK to proceed.
- Page 45 XM66 User Guide 6. Select the Files you want to automatically sync between your mobile device and your computer. Then tap Next. 7. Note: when you select Files, an additional screen appears (shown below) with further information. Read carefully before proceeding, because your files may be converted.
- Page 46 Setup Wizard window appears. Tap Finish. 11. Your partnership setup is completed. Microsoft ActiveSync window appears with the device name XM66 (in this example) and status shows as Synchronized. File synchronization will be carried out automatically when there is file added or remove from the \My Document folder of the device.
- Page 47 XM66 User Guide 12. To add/remove files to the device, tap on the Microsoft ActiveSync window. File Synchronization Settings window appears. Tap on Add button to add files to \My Documents folder of the device and Remove button to delete files \My Documents folder of the device.
- Page 48 Click Yes to proceed. 5. Microsoft ActiveSync window shows No partnerships. 6. You will need to re-establish the partnership when you connect your Janam XM66 to your PC, or you will need to connect as a guest. Janam Technologies LLC...
- Page 49 XM66 User Guide To set up a guest partnership: 1. Connect your Janam XM66 to your PC. 2. Microsoft ActiveSync dialog box prompts. Tap OK to proceed. 3. Synchronization Setup Wizard window appears. Tap Cancel to setup a Guest connection.
-
Page 50: Partnership Settings
XM66 User Guide Partnership Settings To change partnership connection settings: 1. Click the ActiveSync icon in your Windows system tray (bottom right corner of taskbar). 2. Choose File > Connection Settings from the ActiveSync manager menu. 3. The Connection Settings window appears. Tap OK. -
Page 51: Wireless Local Area Network Access
XM66 User Guide 802.11 Wireless Configuration The following section details the basic 802.11 wireless configuration for your Janam XM66. Wireless local area network access By default, Wi-Fi is set to ON: 1. Tap Start menu > Settings > Connections tab > Wireless Manager 2. - Page 52 XM66 User Guide Active Profile is set to Default 4. Tap Admin Login. 5. Enter the password SUMMIT and tap OK. Note: Use all uppercase letters for the password. Click Profile tab and double tap Scan button to search for nearby AP’s.
- Page 53 XM66 User Guide 8. Click Yes button to complete the new profile configuration. 9. On the Main tab change active profile to the new profile created in the last step. Eg: SOFTWARE 10. Click tab Status tab to check the connection status.
-
Page 54: Chapter 9: Bluetooth
4. Check or uncheck the turn on Bluetooth check box. NOTE: By default, Bluetooth is turned off. If you turn Bluetooth on and then turn off the XM66, Bluetooth also turns off. To make a device visible Other devices with Bluetooth capabilities can detect your device and attempt to beam information to it, establish a partnership, or use a Bluetooth service. -
Page 55: Bluetooth Partnerships
XM66 User Guide Bluetooth partnerships A partnership is a relationship that you create between your XM66 and another Bluetooth device to securely exchange information. Creating a partnership involves entering the same Bluetooth passcode on both devices. Once a partnership is created, the devices need only have Bluetooth turned on to exchange information; they do not need to be visible. - Page 56 XM66 User Guide To Rename a Bluetooth Partnership 1. Tap Start menu > Settings > Connections tab. 2. Tap Bluetooth > Devices tab. 3. Tap the partnership to be renamed. A pop-up menu appears. Select Edit. 4. Enter a new name for the partnership and tap Save.
-
Page 57: Bluetooth Beam
XM66 User Guide Bluetooth Beam To Send a File Via Bluetooth Beam 1. Tap and hold on the file you want to beam to other device. 2. A pop-up menu appears. Select Beam File. 3. Nearby Bluetooth devices are displayed on the list. -
Page 58: Bluetooth Virtual Com Ports Overview
XM66 User Guide Bluetooth virtual COM ports overview Some programs can connect only though a serial (COM) port. This can be true even if the device itself is Bluetooth-enabled. To make it possible for such programs to use a Bluetooth connection, you must set up a virtual COM port. - Page 59 XM66 User Guide To set up an outgoing Bluetooth COM port The list item new outgoing port will be available only if one or more Bluetooth-connected devices supports serial (COM) connections. 1. Make sure that your device is currently connected to the other device via Bluetooth.
-
Page 60: Chapter 10: Regulatory And Maintenance
Regulatory information © Copyright 2010 Janam Technologies LLC. All rights reserved. XM Series, XM66, Janam and the Janam logo are trademarks of Janam Technologies LLC. Other product and brand names may be trademarked or registered trademarks of their respective owners. -
Page 61: Xm Series Batch Terminal
XM66 User Guide XM Series batch terminal Regulatory and safety approvals Parameter Specification U.S.A. FCC Part 15, Subpart B Canada ICES-003 Issue 4 European EN55022:1998+A1: 2000+A2:2003 Community EN55024:1998+A1: 2000+A2:2003 Australia AS/NZS CISPR 22:2004 This Class B digital apparatus complies with the Canadian ICES-003. -
Page 62: Rf, Regulatory And Safety Approvals
EN 60950-1:2001+A11 EN 50371:2002 AS/NZS CISPR 22:2004 Hereby, Janam Technologies LLC declares that this product is in compliance with the essential requirements and other relevant provisions of Directive 100/5/EC. The equipment is intended for use throughout the European Community. Care and cleaning of terminals When needed, clean the image engine window and the LCD display with a clean, non-abrasive, lint-free cloth. -
Page 63: Battery Warning
RISK OF EXPLOSION IF BATTERY IS REPLACED BY AN INCORRECT TYPE. DISPOSE OF USED BATTERIES ACCORDING TO THE INSTRUCTIONS. Use only Janam-approved batteries such as the BA-XP-1 and recharge batteries using only Janam- approved chargers. Use only easily accessible wall outlets that are reached with the length of the supplied power cables.
Need help?
Do you have a question about the XM66 and is the answer not in the manual?
Questions and answers