Table of Contents

Related Manuals for Super Circuits 4CH


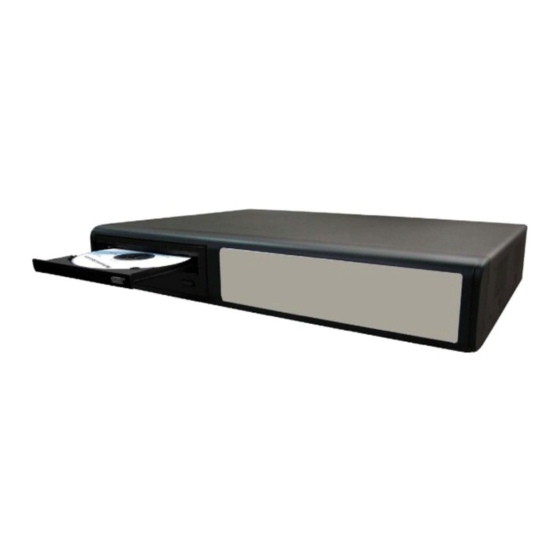
Summary of Contents for Super Circuits 4CH
- Page 1 USER’S MANUAL Please read instructions thoroughly before operation and retain it for future reference. The image shown above may differ from the actual product appearance. ENGLISH 782, 781, 760, 761, 782A / 502, 501, 560, 561, 502A_V1.4...
- Page 2 IMPORTANT SAFEGUARD CAUTION: To reduce the risk of electric shock, do not expose this apparatus to rain or moisture. Only operate this apparatus from the type of power source indicated on the label. The company shall not be liable for any damages arising out of any improper use, even if we have been advised of the possibility of such damages.
-
Page 3: Table Of Contents
TABLE OF CONTENTS 1. OVERVIEW ............................1 1.1 Product Description..............................1 1.2 Features..................................1 1.3 Specification................................2 1.4 Package Contents..............................3 2. FRONT AND REAR PANELS ......................4 2.1 Front Panels................................4 2.2 Rear Panels ................................6 3. CONNECTIONS AND SETUP......................8 3.1 Install HDD................................8 3.2 Camera Connection ..............................8 3.2.1 Normal Camera Connection .........................8 3.2.2 PTZ Camera Connection ..........................8 3.3 External Device Connections ..........................8... - Page 4 6.5 Search ..................................28 6.6 Additional Operation..............................29 6.6.1 Key Lock and Unlock ..........................29 6.6.2 Switch NTSC / PAL System ........................29 6.6.3 Upgrade ..............................29 (1) Firmware / Multilanguage OSD Upgrade....................29 (2) AP and JAVA Software Upgrade......................29 6.6.4 Audio Backup and Playback ........................29 6.6.5 PTZ Camera Setup and Control .........................30 6.6.6 R.E.T.R.
-
Page 5: Overview
‧ Allow you to upgrade DVR functions without any charges Long-Recording Hours ‧ Model 1 & 2 & 5: 500GB can record more than 18 days. (4CH, Frame Best Quality, 30IPS) ‧ Model 3 & 4: 500GB can record more than 5 days. (4CH, Frame Best Quality, 30IPS) Backup Function ‧... -
Page 6: Specification
‧ Support VGA output to monitor (optional) General ‧ Support multi-language OSD ‧ Model 4 & 5 support IR remote control (Other models are optional) ‧ System auto recovery after power reconnected ‧ Support PTZ camera operations through RS-485 signals ‧... -
Page 7: Package Contents
SPECIFICATION Model 1 Model 2 Model 3 Model 4 Model 5 Web Interface Support licensed software AP and IE browser Remote Alarm Notification E-mail images, and upload images to FTP site’s specific account Network Connection Support TCP/IP, PPPOE, DHCP and DDNS functions PTZ control Support PELCO-D protocol IR Transmitter... -
Page 8: Front And Rear Panels
FRONT AND REAR PANELS 2. FRONT AND REAR PANELS 2.1 Front Panels LED Indication The following LEDs will be on when: HDD: HDD is reading or recording HDD Full: HDD is full. ALARM: Once the alarm is triggered TIMER: When timer recording is turned on PLAY: Under playing status REC: Under recording status MENU... - Page 9 FRONT AND REAR PANELS / - Press “ ” button to show the 4 channel display modes. Press “-” button to change the setting in the menu. SEQ /+ Press “SEQ” button to activate the call monitor function, and press again to quit. Press ”+”...
-
Page 10: Rear Panels
FRONT AND REAR PANELS 2.2 Rear Panels ‧ MODEL 1 MONIT O R CA LL LOOP INP UT LOOP INP UT LOOP INP UT LOOP INP UT LINK ACT . EXT ERNAL I/O DC 19V ‧ MODEL 2 MONIT OR CA LL LOO P INP UT... - Page 11 FRONT AND REAR PANELS 1) 75Ω / HI-IMPEDANCE When using LOOP function, please switch to HI-IMPEDANCE. Otherwise, please switch to 75Ω. LOOP / INPUT (For channel 1~4) LOOP: Video output connector. INPUT: Connect to video sources, such as cameras. Note: If you want to playback the video with audio, please connect an audio camera to the correct channel. Model 1, 2 &...
-
Page 12: Connections And Setup
BASIC OPERATION 3. CONNECTIONS AND SETUP 3.1 Install HDD The HDDs must be installed before the DVR is turned on. For detailed installation instructions, please refer to section "APPENDIX 1 INSTALL HDD" at page 50. 3.2 Camera Connection The cameras must be connected and power-supplied before the DVR is turned on. For detailed DVR video input / output ports, please refer to section “2.2 Rear Panels”... -
Page 13: Dvr Power Setup
BASIC OPERATION 3.4 DVR Power Setup This device should be operated only with the type of power source indicated on the manufacturer’s label. Connect the indicated AC power cord to the power adapter, and plug into an electrical outlet. “POWER” LED will be on as red. Press “POWER”... -
Page 14: Ddns Apply
BASIC OPERATION 3.6.2 DDNS Apply You need to apply a DDNS account before setting PPPoE or DHCP connection. DDNS is a service for transforming the dynamic IP corresponding to a specific “Hostname”. For DDNS setup, please refer to the steps below. ‧... -
Page 15: Dynamic Ip - Dhcp
BASIC OPERATION 3.6.4 Dynamic IP - DHCP Get a router and use the default IP address provided by your router to login to the router. Enable the DHCP server and set the starting IP address, ending IP address and lease time. The DHCP Server of the router will automatically allocate an unused IP address from the IP address pool to the requesting computer. -
Page 16: Password And User Name Setting
BASIC OPERATION 3.7 Password and User Name Setting 3.7.1 DVR Password Setting The menu path is as following: MENU → ADVANCE → SYSTEM → PASSWORD → SETUP → ADMIN PASSWORD / GUEST PASSWORD. You can use the following buttons for menu setting: BUTTON FUNCTION UP, DOWN, LEFT, RIGHT... -
Page 17: Basic Operation
BASIC OPERATION 4. BASIC OPERATION 4.1 Recording This device offers three recording modes: manual record, event record and timer record. If the power is off accidentally, the recorded video data will not be lost and is safely stored in the HDD. The device will return to the original recording status after the power is on again. -
Page 18: Playback
BASIC OPERATION 4.2 Playback Press “ ” or “PLAY” button on the front panel, and the device will display the last recorded video. Note: There must be at least 8192 images of recorded data for playback to work properly. If not, the device will stop playback. -
Page 19: Main Menu
MAIN MENU 5. MAIN MENU 5.1 Menu Tree You can use the following buttons for menu setting: BUTTON FUNCTION UP, DOWN, LEFT, RIGHT Move the cursor. + , - Choose numbers / selections. ENTER Go to the submenu / confirm the selection. MENU Go to the menu list / confirm the change / exit the menu list. -
Page 20: Menu Function
MENU FUNCTION 6. MENU FUNCTION 6.1 Record In this menu list, you can set record settings. Press “MENU” button on the front panel to enter the main menu list. The default admin password is 0000. Enter the default password, and press “ENTER”. Users can change the password later. Please refer to the section “6.4.6 System”... -
Page 21: Timer
MENU FUNCTION 6.2 Timer Press “MENU” button on the front panel to enter the main menu list. Move the cursor to “TIMER”, and press ”ENTER”. The screen will show the following options. RECORD DATE START MENU 00 : 00 00 : 00 RECORD DAILY 08 : 00... -
Page 22: Advance
MENU FUNCTION 6.4 Advance Press “MENU” button on the front panel to enter the main menu list. Move the cursor to “ADVANCE”, and press ”ENTER”. The screen will show the following options. ADVANCE CAMERA MENU DETECTION RECORD DISPLAY TIMER ALERT DATE REMOTE ADVANCE... -
Page 23: Detection Setup
MENU FUNCTION (1) Detection Setup Move the cursor to “DETECTION SETUP”, and press ”ENTER”. You will see a similar screen as the following: DETECTION DETECTION TITLE AREA ALARM DETECTION SETUP DETECTION TIMER SETUP SETUP SETUP SETUP HIGH PREV NEXT The submenu items are described below: 1) TITLE: Show the camera title of each channel set in “CAMERA”. -
Page 24: Detection Timer
MENU FUNCTION (2) Detection Timer Move the cursor to “DETECTION TIMER”, and press ”ENTER”. You will see a similar screen as the following: DETECTION DETECTION TIMER DETECTION SETUP DATE START 00 : 00 00 : 00 DETECTION TIMER DAILY 08 : 00 18 : 00 06 : 00 23 : 00... -
Page 25: Alert
MENU FUNCTION Move the cursor to “OSD”, and press ”ENTER” to go to the setup view. You will see a similar screen as the following: DISPLAY OSD SETUP TITLE DISPLAY MENU TITLE BACKGROUND GREEN DATE DISPLAY MENU BACKGROUND YELLOW HDD INFO CURSOR YELLOW LOSS SCREEN... -
Page 26: Remote
MENU FUNCTION ALARM DURATION (SEC) Press “ENTER” or “+” / “-” button to set the duration time of alarm recording in second (5 / 10 / 20 / 40). 10) PRE-ALARM Select to enable or disable the pre-alarm function (ON / OFF). When pre-alarm and event recording functions are both activated, the DVR will record 8MB data before any alarm / motion is triggered. - Page 27 MENU FUNCTION The submenu items are described below: SERIAL TYPE Press “ENTER” or “+” / “-” button to set the serial type of the DVR (RS-485 / RS-232). BAUD RATE Press “ENTER” or “+” / “-” button to set the baud rate of the DVR (2400 / 9600 / 19200 / 57600). HOST ID Press “ENTER”...
-
Page 28: Network
MENU FUNCTION 6.4.7 Network In this menu list, you can set up the network. For detailed network setup, please refer to the section “3.6 LAN or Internet Setup” at page 9. Move the cursor to “NETWORK”, and press ”ENTER”. You will see a similar screen as the following: ADVANCE NETWORK CAMERA... -
Page 29: Backup
MENU FUNCTION 6.4.8 Backup The backup file can be played directly in your PC via the supplied licensed software AP, or via other media players (ex: Windows Media Player or RealPlayer) after the file is converted to “AVI” format. For detailed AP playback, please refer to the section “7.4 Playback Operation”... - Page 30 MENU FUNCTION Select channels by pressing “ENTER” button to change the symbol in front of the channel number. Symbol “X” means that this channel is not selected to backup. Symbol “●” means that this channel is selected to backup. ‧ HDD NUM Press “ENTER”...
-
Page 31: Hdd Info
MENU FUNCTION 6.4.9 HDD Info In this menu list, you can view the remaining capacity of all the connected HDDs in this device. Move the cursor to “HDD INFO”, and press ”ENTER”. You will see a similar screen as the following: ADVANCE HDD INFO CAMERA... -
Page 32: Search
MENU FUNCTION 6.5 Search In this menu list, you can view the time for all the events recorded under different situations and play the file you want, or search any specific events by event or time and directly play the file you find. Press “SEARCH”... -
Page 33: Additional Operation
MENU FUNCTION 6.6 Additional Operation 6.6.1 Key Lock and Unlock ‧ Key Lock On: Press “MENU” + “ENTER” buttons on the DVR front panel to lock keys. ‧ AUTO KEYLOCK: Set the time-out after which the key lock function is activated (Never / 10 SEC / 30 SEC / 60 SEC). Please refer to section “6.4.6 System”... -
Page 34: Ptz Camera Setup And Control
MENU FUNCTION SLOW ZOOM To select live or playback sounds of the 2 audio channels, please press these two buttons on the AUDIO DVR front panel at the same time. For detailed playback instructions, please refer to section “4.2 Playback” at page 14. For detailed playback instructions on the remote PC side, please refer to section “7.4 Playback Operation”... -
Page 35: Licensed Software Ap
LICENSED SOFTWARE AP 7. LICENSED SOFTWARE AP 7.1 Installation 1) Install the software: Place the attached licensed software AP disk into the CD-ROM drive, and install the application programs into your PC (Including AP and JAVA programs). After setup, users will see an AP shortcut icon on the desktop. For the latest software AP, please check with your distributor, or download from the Internet. -
Page 36: Control Panel
LICENSED SOFTWARE AP 7.3 Control Panel 7.3.1 DVR Control Panel a. Data Transfer Rate b. Image Transfer Rate Per Second c. Connect / Disconnect d. Resolution: NTSC: 320 × 228; 640 × 450; PAL: 320 × 276; 640 × 552 e. - Page 37 LICENSED SOFTWARE AP i. Number of Online Users j. CH 1 ~ 4 k. 4 Channel Display l. Search : Press this button to enter the DVR search menu. m. Record n. Stop / Fast Rewind / Fast Forward / Pause / Slow Playback / Play o.
-
Page 38: Ptz Camera Control Panel
LICENSED SOFTWARE AP 7.3.2 PTZ Camera Control Panel a ~ j: Same as the DVR control panel a ~ j. k. Preset 1 ~ 16 A preset position is a pre-defined camera view that can quickly and easily been viewed. l. -
Page 39: Playback Operation
LICENSED SOFTWARE AP 7.4 Playback Operation 7.4.1 AP Playback Functions: a. Playback Information: Display the information, such as “Date”, “Time”, “Resolution”, “ Rewind / Forward Speed”, “Status” and “Functions”, etc. b. Time Progress Bar: Show the playback progress status. c. Functions: : Reduce the vibration of the paused picture. -
Page 40: Convert The Recorded File To Avi Format
LICENSED SOFTWARE AP 7.4.2 Convert the recorded file to AVI format The backup file can be played directly in your PC via the supplied licensed software AP, or via other media players (Ex: Windows Media Player or RealPlayer) after the file is converted to “AVI” format. To convert the entire recorded file to AVI format, press button. -
Page 41: Ddns
LICENSED SOFTWARE AP ‧ PPPOE PPPOE stands for Point-to-Point Protocol over Ethernet. Users can easily have Internet services as long as they’re ready for the following things: 1) Insert an Ethernet card into the PC. 2) Obtain ADSL service via any ISP. 3) Obtain and install PPPoE software CD. -
Page 42: Mail
LICENSED SOFTWARE AP ‧ Enable DDNS Function: a. DDNS: Choose “Enable”. b. User Name: Type your DDNS account. c. Password: Type your DDNS password. d. Domain: Type the “Host Name” you applied previously (EX: securityanytime.dyndns.org). e. System Name: Choose the DDNS server where you applied the domain name (EX: dyndns). f. -
Page 43: Dvr
LICENSED SOFTWARE AP 7.5.2 DVR Each camera channel can be adjusted independently. Select the desired camera channel and press “Edit” to enter the setting box. ‧ DVR-Camera Function: a. Title: Enter the camera channel name up to 6 characters. b. Adjustment: Adjust the BR (brightness) / CT (contrast) / ST (saturation) / HUE / COV / REC values of a camera. c. -
Page 44: Detection
LICENSED SOFTWARE AP (2) Detection Select the desired channel, and press “Edit” button to enter the motion detection sensitivity and area-setting page. ‧ The submenu items are described below: a. DETECT (motion diction): Select motion detection function ON / OFF. b. - Page 45 LICENSED SOFTWARE AP ‧ Making backup to your PC: After pressing “Start”, the backup will be proceeded and a status bar will be displayed. “DVR Network Backup” pop-up window will show the message “Download process is finished” when the backup is succeeded. Press “PLAY”...
-
Page 46: Search List
LICENSED SOFTWARE AP When CD writing is completed, the CD will be ejected, and “DVR Network Backup” pop-up window will show the message “Download process is finished”. Press “PLAY” button to directly convert and play the file, or “Exit” to quit. ‧... -
Page 47: Timer Record
LICENSED SOFTWARE AP (5) Timer Record In “DVR” “Timer Record”, you can schedule up to 7 sets of time for recording. Note: The same settings can also be made in the DVR. Refer to the section “6.2 Timer” at page 17 for details. ‧... -
Page 48: Record Setting
LICENSED SOFTWARE AP (7) Record Setting In “DVR” “Record Setting”, you can set DVR record settings. Note: The same settings can also be made in the DVR. Please refer to the section “6.1 Record” at page 16. ‧ MANUAL RECORD Specify whether to use manual recording (YES / ON), and set IPS number from the drop-down menu. -
Page 49: Alarm List (For Model 5 Only)
LICENSED SOFTWARE AP Press “Alarm”, and you will see the following options: ‧ Alarm Trigger Select to turn the alarm-trigger function on (Enable) or off (Disable). ‧ Alarm Method Select the notification methods when any alarm is triggered: Email and / or FTP. a) Email When this option is checked, MJPEG pictures will be saved in the path assigned in “General”... -
Page 50: General
LICENSED SOFTWARE AP 7.5.4 General In “General” and its sub-menus, “Account”, “Online User Info” and “File Path”, you can view and set up some general information about this software and your DVR. ‧ Firmware Version Show the current DVR firmware version information. ‧... -
Page 51: Online User Info
LICENSED SOFTWARE AP Note: If the number of current accounts already reaches the maximum number, you will not be able to create an account unless any account is removed. ‧ To edit an account, select one current account you want to modify, and press “EDIT”. Modify the setting you want to change. -
Page 52: Operation Via Ie Browser
LICENSED SOFTWARE AP 7.6 Operation via IE Browser You can view the images or operate your DVR with IE web browser. Please install the licensed software AP first. Note: The supported PC operation systems are Windows 2000 and Windows XP. Step 1: Key in the IP address used by your DVR in the URL address box, such as 60.121.46.236, and press Enter. -
Page 53: Troubleshooting
8. TROUBLESHOOTING 8.1 FAQ Please refer to the table below for easy troubleshooting. The table describes some typical problems and also their solutions. Please check them before calling your DVR dealer. Problem Solution No power Check power cord connection. Confirm that there is power supplied from the outlet. DVR is not working when pressing any button You might be under “Key Lock”... -
Page 54: Appendix 1 Install Hdd
APPENDIX 1 INSTALL HDD ◎ HDD Installation for Model 1 and 5 Step 1: Loosen the screws on the upper cover and open the upper cover of the DVR Step 2: Screw out the HDD bracket. For the positions of the HDD bracket screws, please refer to the figure below. Step 3: Get suitable brand HDD and set the HDD mode (master / slave) according to the indication. -
Page 55: Appendix 2 Pin Configuration
APPENDIX 2 PIN CONFIGURATION Siren: When the DVR is triggered by alarm or motion, the COM connects with NO and the siren with strobe starts wailing and flashing. Magnetic Contact: When the magnetic contact is opened, the alarm will be triggered and the recording is on. -
Page 56: Appendix 3 Rs-232 Protocol
APPENDIX 3 RS-232 PROTOCOL Use your PC keyboard to simulate your DVR keypad. Data: REMOTE PROTOCOL use 8 bit data, 1 start bit, 1 stop bit. FUNCTION STOP (FFH) (7FH) FUNCTION CODE ASCII FUNCTION CODE ASCII 0x4D 0x65 KEY_MENU KEY_DWELL 0x0D ENTER 0x31... -
Page 57: Appendix 4 Recording Time Table
APPENDIX 4 RECORDING TIME TABLE The recording time varies depending on the following factors: ‧ Different camera quality ‧ Different picture composition (such as frequency of the object movement) Recording Time For Model 1, 2 and 5 RECORD TIME RECORD MODE QUALITY FOR 500GB RECORD DAY... - Page 58 Recording Time For Model 3 and 4 RECORD TIME RECORD MODE QUALITY FOR 500GB RECORD DAY (HOUR) FRAME 127.78 236.11 BEST 511.11 21.3 980.65 40.9 159.72 305.55 12.7 HIGH 633.89 26.4 1209.72 50.4 179.17 352.78 14.7 NORMAL 626.11 28.6 1263.88 52.7 222.22 405.56...
-
Page 59: Appendix 5 Compatible Usb Flash Drive Brand
APPENDIX 5 COMPATIBLE USB FLASH DRIVE BRAND Please upgrade the firmware of the DVR to the latest version to ensure the accuracy of the following table. If the USB flash drive is not supported by the DVR, the "USB ERROR" message will be shown on the screen. Note: Please use your PC to format the USB flash drive as "FAT 32". -
Page 60: Appendix 6 Compatible Hdd Brand
APPENDIX 6 COMPATIBLE HDD BRAND Please upgrade the firmware of the DVR to the latest version to ensure the accuracy of the following table. Compatible HDD BRAND MANUFACTURER MODEL CAPACITY ROTATION Deskstar 7K250, HDS722516VLAT20 160GB 7200 rpm HDS722516VLAT80 160GB 7200 rpm HITACHI HDS722516DLAT80 160GB...
Need help?
Do you have a question about the 4CH and is the answer not in the manual?
Questions and answers