
Subscribe to Our Youtube Channel
Related Manuals for Moxa Technologies E Series


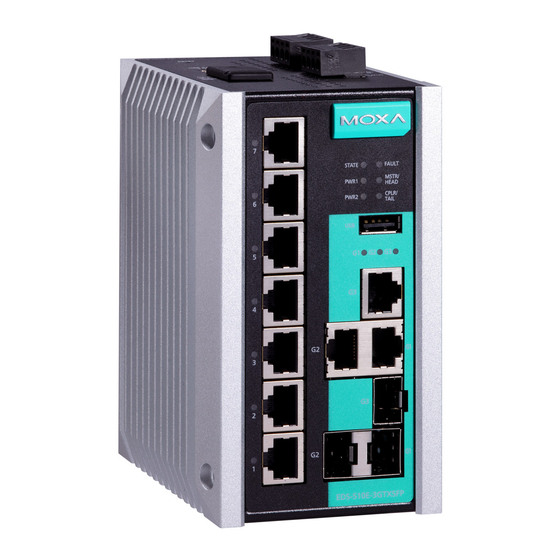
Summary of Contents for Moxa Technologies E Series
- Page 1 Moxa E Series Managed Ethernet Switch User’s Manual First Edition, June 2013 www.moxa.com/product © 2013 Moxa Inc. All rights reserved.
-
Page 2: Copyright Notice
Information in this document is subject to change without notice and does not represent a commitment on the part of Moxa. Moxa provides this document as is, without warranty of any kind, either expressed or implied, including, but not limited to, its particular purpose. Moxa reserves the right to make improvements and/or changes to this manual, or to the products and/or the programs described in this manual, at any time. -
Page 3: Table Of Contents
Restart ............................. 3-22 Factory Default ......................... 3-22 VLAN ............................... 3-22 The Virtual LAN (VLAN) Concept ....................3-22 Sample Applications of VLANs Using Moxa Switches ............... 3-25 Configuration Virtual LAN ......................3-26 802.1Q VLAN Settings ........................ 3-26 Port-Based VLAN Settings......................3-28 VLAN Table .......................... - Page 4 Diagnostics ............................3-63 LLDP ............................3-63 Ping ............................3-64 Port Mirror ..........................3-65 Monitoring ............................3-65 System Utilization ........................3-65 Statistics ..........................3-66 SFP DDM ..........................3-68 Event Log ..........................3-69 MIB Groups ............................A-1...
-
Page 5: About This Manual
About this Manual Thank you for purchasing a Moxa managed Ethernet switch. Read this user’s manual to learn how to connect your Moxa switch to Ethernet-enabled devices used for industrial applications. The following two chapters are covered in this user manual: ... -
Page 6: Getting Started
Getting Started In this chapter we explain how to install a Moxa switch for the first time. There are three ways to access the Moxa switch’s configuration settings: USB console, command line interface, or web-based interface. If you do not know the Moxa switch’s IP address, you can open the USB console by connecting the Moxa switch to a PC’s USB port with a USB cable. -
Page 7: Usb Console Configuration (115200, None, 8, 1, Vt100)
Before running PComm Terminal Emulator, please install the USB console driver to your PC then connect the Moxa switch’s USB console port to your PC’s USB port with USB cable. After installing PComm Terminal Emulator, open the Moxa switch’s USB console as follows: 1. - Page 8 4. On the Terminal tab, select VT100 for Terminal Type, and then click OK to continue. 5. In the terminal window, the Moxa switch will prompt you to select a terminal type. Enter 1 to select ansi/vt100 and then press Enter.
-
Page 9: Configuration By Command Line Interface(Cli)
Configuration by Command Line Interface(CLI) Opening the Moxa switch’s Telnet or web console over a network requires that the PC host and Moxa switch are on the same logical subnet. You may need to adjust your PC host’s IP address and subnet mask. By default, the Moxa switch’s IP address is 192.168.127.253 and the Moxa switch’s subnet mask is 255.255.255.0 (referred to... - Page 10 Moxa E Series Managed Ethernet Switch Getting Started NOTE To connect to the Moxa switch’s Telnet or web console, your PC host and the Moxa switch must be on the same logical subnet. NOTE When connecting to the Moxa switch’s Telnet or web console, first connect one of the Moxa switch’s Ethernet ports to your Ethernet LAN, or directly to your PC’s Ethernet port.
-
Page 11: Configuration By Web Browser
You can open the Moxa switch’s web console using a standard web browser, such as Internet Explorer. NOTE To connect to the Moxa switch’s Telnet or web console, your PC host and the Moxa switch must be on the same logical subnet. NOTE If the Moxa switch is configured for other VLAN settings, you must make sure your PC host is on the management VLAN. - Page 12 NOTE The Moxa switch’s default IP address is 192.168.127.253. After making sure that the Moxa switch is connected to the same LAN and logical subnet as your PC, open the Moxa switch’s web console as follows: 1. Connect your web browser to the Moxa switch’s IP address by entering it in the Address or URL field.
-
Page 13: Disabling Telnet And Browser Access
Disabling Telnet and Browser Access If you are connecting the Moxa switch to a public network but do not intend to manage it over the network, we suggest disabling both the Telnet and web consoles. This is done from the USB console by navigating to System Identification under Basic Settings. -
Page 14: Featured Functions
These functions can be accessed by serial, Telnet, or web console. The USB console can be used if you do not know the Moxa switch’s IP address and requires that you connect the Moxa switch to a PC COM port. The Telnet and web consoles can be opened over an Ethernet LAN or the Internet. -
Page 15: Home
Featured Functions Home The Home page shows the summary of the Moxa switch information including System Information, Redundancy Protocol, Event log and Device virtualization panel. With the organized key summary, the operators can easily understand the system and port link status at a glance. -
Page 16: User Account
User Account The Moxa switch supports the management of accounts, including establishing, activating, modifying, disabling and removing accounts. There are two levels of configuration access, admin and user. The account belongs to admin privilege has read/write access of all configuration parameters, while the account belongs to user authority has read access to view the configuration only. - Page 17 Moxa E Series Managed Ethernet Switch Featured Functions Create New Account Input the user name, password and assign the authority to the new account. Once apply the new setting, the new account will be shown under the Account List table.
-
Page 18: Network
Featured Functions Network Network configuration allows users to configure both IPv4 and IPv6 parameters for management access over the network. The Moxa switch supports both IPv4 and IPv6, and can be managed through either of these address types. IP Setting The IPv4 settings include the switch’s IP address and subnet mask, as well as the IP address of the default... -
Page 19: Date And Time
The Moxa switch does not have a real time clock. The user must update the Current Time and Current Date to set the initial time for the Moxa switch after each reboot, especially when there is no NTP server on the LAN... -
Page 20: Daylight Saving Time
Specifies the time zone, which is used to determine the local GMT (Greenwich time offset from GMT (Greenwich Mean Time). Mean Time) Daylight Saving Time The Daylight Saving Time settings are used to automatically set the Moxa switch’s time forward according to national standards. Start Date Setting Description... -
Page 21: Ieee 1588 Ptp
The IP or domain address (e.g., 192.168.1.1, None time server time.stdtime.gov.tw, or time.nist.gov). IP address or name of The Moxa switch will try to locate the secondary NTP server if secondary time server the first NTP server fails to connect. Enable NTP/SNTP Server Setting... - Page 22 Moxa E Series Managed Ethernet Switch Featured Functions Can Ethernet switches be designed to avoid the effects of these fluctuations? A switch can be designed to support IEEE 1588 while avoiding the effects of queuing. In this case two modifications to the usual design of an Ethernet switch are necessary: 1.
- Page 23 Moxa E Series Managed Ethernet Switch Featured Functions Clock Mode (sets the switch’s clock mode) Setting Description Factory Default v1 BC Operates as an IEEE 1588 v1 boundary clock. v1 BC v2 E2E 2-step TC Operates as an edge-to-edge IEEE 1588 v2 transparent clock with 2-step method.
- Page 24 Moxa E Series Managed Ethernet Switch Featured Functions priority2 Setting Description Factory Default 0 to 255 Set second priority value; 0 = highest priority, 255 = lowest priority. Clock Class Setting Description Factory Default 0 to 255 The clockClass attribute denotes the traceability of the time or frequency distributed by the grandmaster clock.
-
Page 25: Warning Notification
The Moxa switch supports different approaches to warn engineers automatically, such as email, trap, syslog and relay output. It also supports two digital inputs to integrate sensors into your system to automate alarms by email and relay output. - Page 26 System Events Description Cold Start Power is cut off and then reconnected. Warm Start Moxa switch is rebooted, such as when network parameters are changed (IP address, subnet mask, etc.). Configuration Change Any configuration item has been changed. Power Transition (OnOff) Moxa switch is powered down.
- Page 27 The EDS E series will send notification to the trap server when event is triggered E-Mail The EDS E series will send notification to the email server defined in the Email Setting Syslog The EDS E series will record a syslog to syslog server defined in Syslog Server Setting Relay The EDS E series support digital inputs to integrate sensors.
-
Page 28: Email Settings
The EDS E series will send notification to the trap server when event is triggered E-Mail The EDS E series will send notification to the email server defined in the Email Setting Syslog The EDS E series will record a syslog to syslog server defined in Syslog Server Setting Relay The EDS E series support digital inputs to integrate sensors. - Page 29 Moxa E Series Managed Ethernet Switch Featured Functions Send Test Email After you complete the email settings, you should first click Apply to activate those settings, and then press the Test button to verify that the settings are correct. NOTE...
-
Page 30: Mac Address Table
Moxa E Series Managed Ethernet Switch Featured Functions NOTE The following events will be recorded into the Moxa switch’s Event Log table, and will then be sent to the specified Syslog Server: • Cold start • Warm start • Configuration change activated •... -
Page 31: System Files
This field shows the port that this MAC address belongs to. System Files Firmware Upgrade Moxa switch supports 3 ways to upgrade the up-to-date firmware including local database, remote TFTP server, and Auto-backup-configurator(ABC-02). Local 1. Download the updated firmware (*.rom) file from Moxa’s website (www.moxa.com). -
Page 32: Configuration Backup And Restore
Auto-Backup-Configurator(ABC-02) 1. Download the updated firmware (*.rom) file from Moxa’s website (www.moxa.com). 2. Save the file to ABC-02’s Moxa folder. The file name can’t be longer than 8 characters and make sure the extension file name is (.rom) 3. Browse the firmware from ABC-02 and press the Upgrade button... -
Page 33: Tftp Server
Featured Functions Auto-Backup-Configurator(ABC-02) 1. Click Backup to save the configuration file to the ABC-02. The file will be saved in the Moxa folder of the ABC-02. The file name is “Sys.ini”. The configuration file will be saved into ABC-02-USB’s “Moxa” folder, with 2 files independently. Named by “Sys.ini”... -
Page 34: Turbo Ring Dip Switch
Moxa E Series Managed Ethernet Switch Featured Functions Auto-Backup-Configurator(ABC-02) Click Backup to save the configuration file to the ABC-02. The file will be saved in the Moxa folder of the ABC-02. The file name is “Sys.ini”. Auto backup of event log to prevent overwrite This function is designed to maintain a long-term record the switch log files. -
Page 35: Restart
Telnet console connection with the Moxa switch. VLAN Setting up Virtual LANs (VLANs) on your Moxa switch increases the efficiency of your network by dividing the LAN into logical segments, as opposed to physical segments. In general, VLANs are easier to manage. -
Page 36: Benefits Of Vlans
On a single VLAN defined in the Moxa switch • On several VLANs simultaneously using 802.1Q tagging The standard requires that you define the 802.1Q VLAN ID for each VLAN on your Moxa switch before the switch can use it to forward traffic: 3-23... -
Page 37: Communication Between Vlans
VLANs, tagged membership must be defined. A typical host (e.g., clients) will be untagged members of one VLAN, defined as an Access Port in a Moxa switch, while inter-switch connections will be tagged members of all VLANs, defined as a Trunk Port in a Moxa switch. -
Page 38: Sample Applications Of Vlans Using Moxa Switches
Moxa E Series Managed Ethernet Switch Featured Functions Sample Applications of VLANs Using Moxa Switches In this application, Port 1 connects a single untagged device and assigns it to VLAN 5; it should be configured as Access Port • with PVID 5. -
Page 39: Configuration Virtual Lan
802.1Q VLAN Settings The EDS E series support quick setting panel for VLAN setting. Administrator can configure VLAN by ports group and add the setting to the VLAN ID Configuration Table. Once the configuration is finalized, then activate the final setting to system by pressing Apply button. - Page 40 Moxa E Series Managed Ethernet Switch Featured Functions Port Type Setting Description Factory Default Access Port type is used to connect single devices without tags. Access Trunk Select Trunk port type to connect another 802.1Q VLAN aware switch Hybrid Select Hybrid port to connect another Access 802.1Q VLAN aware switch or another LAN that combines tagged and/or untagged devices and/or other switches/hubs.
-
Page 41: Port-Based Vlan Settings
Moxa E Series Managed Ethernet Switch Featured Functions Port-Based VLAN Settings Check each specific port to assign its VLAN ID in the table. The maximum VLAN ID is the same as your number of switch ports. NOTE When Port-based VLAN configured, IGMP will be automatically disabled. -
Page 42: Port
Moxa E Series Managed Ethernet Switch Featured Functions Port Port Settings Port settings are included to give the user control over port access, port transmission speed, flow control, and port type (MDI or MDIX). Enable Setting Description Factory Default Checked Allows data transmission through the port. -
Page 43: Port Status
Port trunking can be used to combine up to 8 ports between two Moxa switches. If all ports on both switches are configured as 100BaseTX and they are operating in full duplex, the potential bandwidth of the connection will be 1600 Mbps. -
Page 44: The Port Trunking Concept
Moxa switches. Each Moxa switch can set a maximum of 3 port trunking groups. When you activate port trunking, certain settings on each port will be reset to factory default values or disabled: •... -
Page 45: Link-Swap Fast Recovery
The Trunking Status table shows the Trunk Group configuration status. Link-Swap Fast Recovery The Link-Swap Fast Recovery function, which is enabled by default, allows the Moxa switch to return to normal operation extremely quickly after devices are unplugged and then re-plugged into different ports. The recovery time is on the order of a few milliseconds (compare this with standard commercial switches for which the recovery time could be on the order of several minutes). -
Page 46: Multicast
Featured Functions Multicast Multicast filtering improves the performance of networks that carry multicast traffic. This section explains multicasts, multicast filtering, and how multicast filtering can be implemented on your Moxa switch. The Concept of Multicast Filtering What is an IP Multicast? A multicast is a packet sent by one host to multiple hosts. - Page 47 IGMP device, such as a router, to find those ports that want to join a multicast group, and then configures its filters accordingly. Query Mode Query mode allows the Moxa switch to work as the Querier if it has the lowest IP address on the subnetwork to which it belongs. NOTE IGMP Snooping Enhanced mode is only provided in Layer 2 switches.
-
Page 48: Igmp Multicast Filtering
IGMP is used by IP-supporting network devices to register hosts with multicast groups. It can be used on all LANs and VLANs that contain a multicast capable IP router, and on other network devices that support multicast filtering. Moxa switches support IGMP version 1, 2 and 3. IGMP version 1 and 2 work as follows:: •... -
Page 49: Igmp Snooping
Moxa E Series Managed Ethernet Switch Featured Functions IGMP Snooping IGMP Snooping provides the ability to prune multicast traffic so that it travels only to those end destinations that require that traffic, thereby reducing the amount of traffic on the Ethernet LAN. -
Page 50: Igmp Group Status
If a router or layer 3 switch is connected to the network, it will act as the Querier, and consequently this Querier option will be disabled on all Moxa layer 2 switches. If all switches on the network are Moxa layer 2 switches, then only one layer 2 switch will act as Querier. IGMP Group Status The Moxa switch displays the current active IGMP groups that were detected. -
Page 51: Static Multicast Address
Moxa E Series Managed Ethernet Switch Featured Functions Stream Group: Multicast group IP address Stream Source: Multicast source IP address Port: Which port receives the multicast stream Member ports: Ports the multicast stream is forwarded to Static Multicast Address NOTE 01:00:5E:XX:XX:XX on this page is the IP multicast MAC address. -
Page 52: Gmrp
Service for your network. The rules define different types of traffic and specify how each type should be treated as it passes through the switch. The Moxa switch can inspect both IEEE 802.1p/1Q layer 2 CoS tags, and even layer 3 TOS information to provide consistent classification of the entire network. The Moxa switch’s QoS capability improves the performance and determinism of industrial networks for mission critical applications. - Page 53 Moxa E Series Managed Ethernet Switch Featured Functions Traffic prioritization uses the four traffic queues that are present in your Moxa switch to ensure that high priority traffic is forwarded on a different queue from lower priority traffic. Traffic prioritization provides Quality of Service (QoS) to your network.
-
Page 54: Configuring Traffic Prioritization
• A packet received by the Moxa switch may or may not have an 802.1p tag associated with it. If it does not, then it is given a default 802.1p tag (which is usually 0). Alternatively, the packet may be marked with a +new 802.1p value, which will result in all knowledge of the old 802.1p tag being lost. - Page 55 Moxa E Series Managed Ethernet Switch Featured Functions Type 1 The Moxa switch supports inspection of layer 3 TOS and/or layer 2 CoS tag information to determine how to classify traffic packets. Queuing Mechanism Setting Description Factory Default Weight Fair The Moxa switch has 4 priority queues.
- Page 56 Description Factory Default Weight Fair The Moxa switch has 4 priority queues. In the weight fair Weight Fair scheme, an 8, 4, 2, 1 weighting is applied to the four priorities. This approach prevents the lower priority frames from being starved of opportunity for transmission with only a slight delay to the higher priority frames.
-
Page 57: Cos Mapping
Moxa E Series Managed Ethernet Switch Featured Functions COS Overwriting Setting Description Factory Default Enable/Disable Enables or disables the Moxa switch for inspecting 802.1p COS Enabled tags in the MAC frame to determine the priority of each frame. Priority Setting Description Factory Default Port priority The port priority has 4 priority queues. -
Page 58: Dscp Mapping
For example, so-called “broadcast storms” could be caused by an incorrectly configured topology, or a malfunctioning device. Moxa industrial Ethernet switches not only prevents broadcast storms, but can also be configured to a different ingress rate for all packets, giving administrators full control of their limited bandwidth to prevent undesirable effects caused by unpredictable faults. - Page 59 Moxa E Series Managed Ethernet Switch Featured Functions Type 1 Ingress Rate Limit – Normal Control Mode Description Factory Default Normal Set the max. ingress rate limit for different packet types Normal Port Disable When the ingress multicast and broadcast packets exceed the ingress rate limit, the port will be disabled for a certain period.
- Page 60 Moxa E Series Managed Ethernet Switch Featured Functions Ingress Rate Limit – Port Disable Setting Description Factory Default Port disable duration When the ingress multicast and broadcast packets exceed the 30 second (1~65535 seconds) ingress rate limit, the port will be disabled for this period of time.
-
Page 61: Security
37203, 52084, 74405 Security Security can be categorized in two levels: the user name/password level, and the port access level. Moxa switches provide many kinds of security functions, including Login Authentication, Management Interface, Trusted Access, Authentication Certificate, IEEE 802.1A, Port Security, and Loop Protection. -
Page 62: Login Authentication
Featured Functions Login Authentication Moxa switches provide two different user login options: Terminal Access Controller Access-Control System Plus (TACACS+) and Remote Authentication Dial In User Service (RADIUS). The TACACS+ and RADIUS mechanism is a centralized “AAA” (Authentication, Authorization and Accounting) system for connecting to network services. -
Page 63: Management Interface
Moxa E Series Managed Ethernet Switch Featured Functions Management Interface Enable HTTP Setting Description Factory Default Select/Deselect Checkmark the appropriate check boxes to enable HTTP. Select Port: 80 Enable SSL Setting Description Factory Default Select/Deselect Checkmark the appropriate check boxes to enable SSL. -
Page 64: Trusted Access
The Moxa switch uses an IP address-based filtering method to control access. You may add or remove IP addresses to limit access to the Moxa switch. When the accessible IP list is enabled, only addresses on the list will be allowed access to the Moxa switch. Each IP address and netmask entry can be tailored for different situations: •... -
Page 65: Authentication Certificate
The Moxa switch acts as an authenticator in the 802.1X environment. A supplicant and an authenticator exchange EAPOL (Extensible Authentication Protocol over LAN) frames with each other. We can either use an external RADIUS server as the authentication server, or implement the authentication server in the Moxa switch by using a Local User Database as the authentication look-up table. -
Page 66: Ieee 802.1X Setting
Moxa E Series Managed Ethernet Switch Featured Functions IEEE 802.1X Setting Authentication Option Setting Description Factory Default Local Select this option when setting the Local User Database as the Local (Max. of 32 users) authentication database. Radius Select this option to set an external RADIUS server as the authentication database. -
Page 67: Local Database
Moxa E Series Managed Ethernet Switch Featured Functions Local Database When setting the Local User Database as the authentication database, set the database first. Local User Database Setup Setting Description Factory Default User Name User Name for the Local User Database None (Max. -
Page 68: Radius Server Settings
Specifies the IP/name of the server None Server Port Specifies the port of the server 1812 Server Shared Key Specifies the shared key of the server None Port Security The Moxa switch supports adding unicast groups manually if required. 3-55... -
Page 69: Port Access Control Table
Moxa E Series Managed Ethernet Switch Featured Functions Static Unicast MAC Address Setting Description Factory Default Port Associates the static address to a dedicated port. 1 or 1-1 MAC Address Adds the static unicast MAC address into the address table. -
Page 70: Loop Protection
Moxa E Series Managed Ethernet Switch Featured Functions Loop Protection Enable Loop Protection Setting Description Factory Default Enable Enable the loop protection function Disable Disable Disable the loop protection function DHCP IP-Port Binding Designated IP Address Setting Description Factory Default IP Address Set the desired IP of connected devices. -
Page 71: Dhcp Relay Agent
Moxa E Series Managed Ethernet Switch Featured Functions The Option 82 information contains 2 sub-options, Circuit ID and Remote ID, which define the relationship between the end device IP and the DHCP Option 82 server. The Circuit ID is a 4-byte number generated by the Ethernet switch—a combination of physical port number and VLAN ID. -
Page 72: Dhcp Option
Moxa E Series Managed Ethernet Switch Featured Functions Server IP Address 1st Server Setting Description Factory Default IP address for the 1st Assigns the IP address of the 1st DHCP server that the switch None DHCP server tries to access. -
Page 73: Snmp
Featured Functions SNMP The Moxa switch supports SNMP V1, V2c, and V3. SNMP V1 and SNMP V2c use a community string match for authentication, which means that SNMP servers access all objects with read-only or read/write permissions using the community strings public and private by default. SNMP V3 requires that you select an authentication level of MD5 or SHA, and is the most secure protocol. -
Page 74: Snmp Read/Write Settings
For SNMP V3, two levels of privilege are available accessing the Moxa switch. Admin privilege provides access and authorization to read and write the MIB file. User privilege allows reading of the MIB file only. -
Page 75: Trap Settings
Moxa E Series Managed Ethernet Switch Featured Functions Trap Settings SNMP traps allow an SNMP agent to notify the NMS of a significant event. The switch supports two SNMP modes, Trap mode and Inform mode. SNMP Trap Mode—Trap In Trap mode, the SNMP agent sends an SNMPv1 trap PDU to the NMS. No acknowledgment is sent back from the NMS so the agent has no way of knowing if the trap reached the NMS. -
Page 76: Industrial Protocol
Moxa E Series Managed Ethernet Switch Featured Functions Industrial Protocol The Moxa switch supports 3 industrial protocols, EtherNet/IP, Modbus TCP and PROFITNET I/O. Those 3 protocols can be enable/disabled by checkbox selection. NOTE 1. IGMP Snooping and IGMP Query functions will be enabled automatically to be properly integrated in Rockwell systems for multicast Implicit (I/O) Messaging for efficient EtherNet/IP communication. -
Page 77: Ping
The function’s most unique feature is that even though the ping command is entered from the user’s PC keyboard, the actual ping command originates from the Moxa switch itself. In this way, the user can essentially sit on top of the Moxa switch and send ping commands out through its ports. -
Page 78: Port Mirror
Select the number of the port that will be used to monitor the activity of the monitored port. Monitoring You can monitor statistics in real time from the Moxa switch’s/DSL extender’s web console and USB console. System Utilization System Utilization display the system resource utilized status. By monitoring the information can easy and... -
Page 79: Statistics
Access the Monitor by selecting Monitoring from the left selection bar. Monitor by System allows the user to view a graph that shows the combined data transmission activity of all of the Moxa switch’s 18 ports. Click one of the four options—Total Packets, TX Packets, RX Packets, or Error Packets—to view transmission activity of specific types of packets. - Page 80 Moxa E Series Managed Ethernet Switch Featured Functions Monitor by Port Access the Monitor by Port function by selecting FE or GE Ports or Port i, in which i = 1, 2, …, G2, from the left pull-down list. The Port i options are identical to the Monitor by System function discussed above, in that users can view graphs that show All Packets, TX Packets, RX Packets, or Error Packets activity, but in this case, only for an individual port.
-
Page 81: Sfp Ddm
Optical fiber is commonly used for long distance data transmission. However, when link issues occur, it is very costly to trouble shoot the fiber cable and fiber transceiver at remote sites. To solve this problem, Moxa industrial Ethernet switches provide digital diagnostic and monitoring functions on Moxa SFP optical fiber links and allow users to measure optical parameters and its performance from center site. -
Page 82: Event Log
Event index assigned to identify the event sequence. Bootup Number This field shows how many times the Moxa switch has been rebooted or cold started. Date The date is updated based on how the current date is set in the Basic Setting page. -
Page 83: Mib Groups
MIB Groups The Moxa switch comes with built-in SNMP (Simple Network Management Protocol) agent software that supports cold/warm start trap, line up/down trap, and RFC 1213 MIB-II. The standard MIB groups that the Moxa switch supports are as follows: MIB II.1—System Group sysORTable MIB II.2—Interfaces Group... - Page 84 The Moxa switch also provides a private MIB file, located in the file Moxa-[switch’s model name]-MIB.my on the Moxa switch utility CD-ROM. Public Traps • Cold Start • Link Up • Link Down •...
Need help?
Do you have a question about the E Series and is the answer not in the manual?
Questions and answers