Table of Contents
Advertisement
Learn more about
user manual at Moneualusa.com
RYDIS H68 Pro
Thank you for purchasing the Moneual RYDIS H68 Pro.
Before using the product, please read this User Manual carefully, and keep it for future reference.
Depending on your model, some contents of this User Manual may differ from the actual product.
The contents of this User Manual are subject to change without notice.
Robot Vacuum Cleaner
RYDIS Hybrid
User Manual
Ver 1.2
Advertisement
Table of Contents

Related Manuals for Moneual RYDIS Hybrid H68 Pro


Summary of Contents for Moneual RYDIS Hybrid H68 Pro
- Page 1 Moneualusa.com RYDIS H68 Pro Thank you for purchasing the Moneual RYDIS H68 Pro. Before using the product, please read this User Manual carefully, and keep it for future reference. Depending on your model, some contents of this User Manual may differ from the actual product.
- Page 3 RYDIS Hybrid Robot Vacuum Cleaner User Manual RYDIS H68 Pro...
-
Page 4: What Do You Want To Clean
What do you want to clean? The H68 Pro provides 3 basic cleaning mode (Hybrid Cleaning, Vacuum Cleaning and Mop Cleaning) in which you need to choose one. Hybrid Cleaning performs mop + vacuum at the same time. Vacuum Cleaning performs vacuum only. Mop Cleaning performs mopping only. -
Page 5: Special Cleaning Modes
Special Cleaning modes Cleaning Mode Function For Where How to Select Intensive Clean in a 3 x 3 ft area Heavy Dust Select Intensive with the Mode button on Cleaning where the H68 Pro Particles or Heavy the Control Panel or press the Intensive mode located Traffic Area... -
Page 6: Features
Features Hybrid Cleaning Full utilization of the 5-in-1(Twin Side Brush + Main Brush + BLDC Suction (vacuum) + Big Mop + H2O Tank) cleaning technology for spotless hard floors. Mop Cleaning Utilizing the attachable full sized mop, the Mop Cleaning mode is optimized for cleaning even the finest dusts that are harmful to your health. - Page 7 Various Cleaning Modes The various cleaning modes provide different cleaning functions and levels of performance, which are optimized for the user environment. Shadow Cleaning Intensive Cleaning Manual Cleaning Reservation Cleaning High Performance BLDC Motor The cleaning performance is excellent due to the powerful BLDC (suction) motor. The BLDC motor is 30% more powerful than a DC motor, and the lifetime is approximately 10 times as long (estimated: 5,000 hours).
-
Page 8: Table Of Contents
Remote Control Voice Guidance Charging Error Message Description Product Before You Start Customer Operation Troubleshooting What do you want to clean? Support Specifications Hybrid Cleaning Moneual Robot Vacuum Cleaner Vacuum Cleaning Limited Warranty Mop Cleaning Special Cleaning modes Intensive Cleaning... -
Page 9: Safety Information
Before Use Safety Information Please read and follow the instructions in this manual to ensure your safety and the safe use of your RYDIS H68 Pro. Safety symbols In this manual, various Warnings, Cautions and Notes are provided to help you to avoid potential hazards that can hurt you and/or damage your RYDIS H68 Pro. - Page 10 RYDIS H68 Pro Install the charging station in a location that can be easily accessed by the RYDIS H68 Pro. If you install the charging station in a corner or if there are many obstacles around the charging station, it may prevent the RYDIS H68 Pro from automatically charging.
- Page 11 Before Use Do not press strongly or impact the bumper. This may cause damage to the bumper sensors and malfunction. Do not use the RYDIS H68 Pro in a place where the temperature is too low or too high (lower than 23F (-5°C) and higher than 120F (49°C)).
- Page 12 RYDIS H68 Pro Do not touch the plug or wall socket with wet hands. Doing so may cause electric shock. If you spill water into the RYDIS H68 Pro, unplug the power cord immediately. Water can bring the risk of fire and electrical shock. Immediately remove the power cord from the outlet and contact our service center.
- Page 13 MONEUAL Inc. assumes no responsibility for technical or editorial errors or omissions contained herein, nor for any incidental or consequential damages and failures of the appliance caused by not following the precautions and instructions. MONEUAL Inc. assumes no responsibility for damages resulting from the use of the product that is not approved by the company.
-
Page 14: What's In The Box
RYDIS H68 Pro (2800mA built-in battery) Side Brushes (1 set) Cleaning Brush User Manual Call Moneual Support Card Quick Start Guide Mop Kit H68 Pro Big Mop with H2O Tank 1. H2O Tank 2. Big Mop (Reusable x 2) The appearance and specifications may be changed without notice in order to improve functions or performance. -
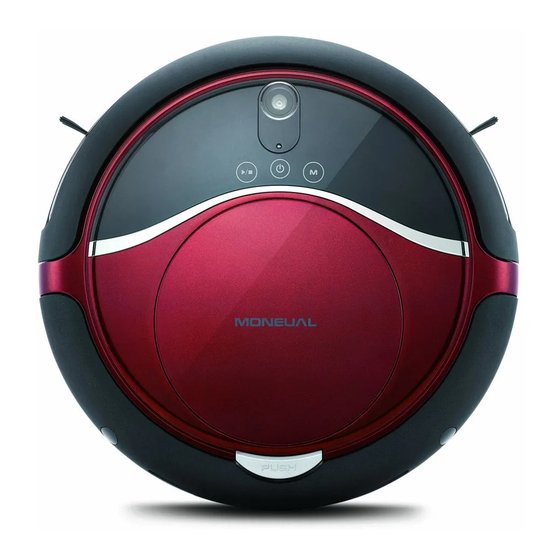
Page 15: Overview
Before Use Overview RYDIS H68 Pro Control Panel Rear Camera Dust Bin Cover Bumper Obstacle and Signal Detection Sensor Air Outlet Adaptor Jack System Power Switch Signal Receiving Sensor Bottom Cliff Detection Sensors Charging Terminals Wheels Side Brush Installation Pins Dust Inlet Main Brush Mop Pad Installation Holes... - Page 16 RYDIS H68 Pro Big Mop with H2O Tank H2O Tank Big Mop (Reusable x 2) Control Panel Start/Stop Button Reservation (Every Day) Indicator Main Power Button Reservation (One Hour) Cleaning Mode Selection Indicator Button Double Deep Cleaning Vacuum Cleaning Indicator Option Indicator Charging Indicator Threshold Option...
-
Page 17: Remote Control
Before Use Remote Control You can conveniently access the various functions of the RYDIS H68 Pro with your remote control. Functions that can be controlled through the remote control: Hybrid Cleaning, Vacuuming Cleaning, Mop Cleaning, Shadow Cleaning, Intensive Cleaning, Reservation Cleaning, Double Deep Cleaning Option, Turbo Option, Threshold Option, Charging. Power Button Press to turn the power on/off. -
Page 18: Installing The Charging Station
RYDIS H68 Pro Installing the Charging Station Connect the power adaptor. Set the RYDIS H68 Pro detection distance [16ft (5m) or 26ft (8m)]. Place the power adaptor inside of the charging station. Check the power connection and make sure blue lamp is on. Make sure the location of the charging station is an open area as illustrated. -
Page 19: Installing The Side Brushes
Installing Installing the Side Brushes Rear side Check for the L mark Check for the R mark under the side brush. under the side brush. Front side Align with the R mark under the Align with the L mark under the RYDIS H68 Pro and install the R RYDIS H68 Pro and install the L brush. -
Page 20: Installing The Big Mop With H2O Tank
RYDIS H68 Pro Installing the Big Mop with H2O Tank We recommend moistening the Big Mop before attaching it for longer wet cleaning performance. Turn the system power switch Supply water into the H2O Tank then attach off (on the rear side of the the mop to it. - Page 21 Installing Flip it over and turn the system power switch on. After cleaning, remove the H2O Tank from the RYDIS H68 Pro. Remove the Big Mop from the H2O Tank. Remove the water from the H2O Tank and leave the cover open to dry the inside of the H2O Tank. Wash and dry the Big Mop for the next use.
-
Page 22: Big Mop Recommendation
RYDIS H68 Pro Big Mop Recommendation RYDIS H68 Pro’s specially designed Big Mop can be rewashed and reused. Dampen the Big Mop before attaching it to the H2O Tank. Make sure the Big Mop is not excessively wet to avoid the wheels from slipping. You may add cleaning solution to the Big Mop, but it may create wheel slippage. -
Page 23: Wet/Dry Disposable Mop Pad Recommendation
Installing Wet/Dry Disposable Mop Pad Recommendation (Optional, can be purchased separately) RYDIS H68 Pro is compatible with most disposable dry and pre-moistened cleaning cloths if you buy. Always follow the use and care instructions included with any dry or wet cleaning cloths to care for your floors. The RYDIS H68 Pro with the Disposable Mop is designed to clean hard surface floors including wood, tile, vinyl, linoleum and laminate. -
Page 24: Remote Control
RYDIS H68 Pro Remote Control Make sure to properly orient the + and – poles of the batteries when inserting the battery. If you insert batteries incorrectly, there is a risk of fire or damage to the remote control. Only use standard AAA 1.5V batteries. Do not use any non standard batteries. If your batteries have had a leakage, immediately replace them. -
Page 25: Charging
Installing Charging If you have prepared the charging station, main body, and remote control, you must then charge the RYDIS H68 Pro to use it. To charge the RYDIS H68 Pro, follow these steps: Turn the system power switch on. Hold the RYDIS H68 Pro with both hands and put it on the charging station. - Page 26 RYDIS H68 Pro Auto Charging After it is finished cleaning, the RYDIS H68 Pro automatically returns to the charging station and starts charging. When the battery is low during the cleaning, the battery indicator will be blinking rapidly. The RYDIS H68 Pro automatically returns to the charging station for charging.
-
Page 27: Product Operation
Product Operation Before You Start Check the following before you start the RYDIS H68 Pro. Be careful not to break the RYDIS H68 Pro when you pull the RYDIS H68 Pro out of the box. For information of installing the RYDIS H68 Pro, see page 16. Check the location (L/R) of the brushes and install them. -
Page 28: What Do You Want To Clean
RYDIS H68 Pro What do you want to clean? The H68 Pro provides 3 basic cleaning mode (Hybrid Cleaning, Vacuum Cleaning and Mop Cleaning) in which you need to choose one. Hybrid Cleaning performs mop + vacuum at the same time. Vacuum Cleaning performs vacuum only. Mop Cleaning performs mopping only. -
Page 29: Hybrid Cleaning
Product Operation Hybrid Cleaning In Hybrid Cleaning, the RYDIS H68 Pro performs the Vacuum Cleaning and Mop Cleaning at the same time. Hybrid Cleaning offers a comprehensive floor care solution because of the use of the twin side brushes, the main brush, the BLDC suction, and the reusable microfiber Big Mop with the H2O Tank all together. -
Page 30: Vacuum Cleaning
RYDIS H68 Pro Vacuum Cleaning Vacuum cleaning is used where the needs are vacuum suction only without mop cleaning. It can be used on hard floor or carpet. Turn the system power switch on. Turn the main power button on. The LED light will blink top to bottom. -
Page 31: Mop Cleaning
Product Operation Mop Cleaning Mop Cleaning mode is used for when you need mopping only without vacuuming with Sweep Pattern that Back-and-forth motion cleans the floor three times in a straight line. It can be used only on hard floor. For H68 Pro Big Mop with H2O Tank, we recommend moistening the Big Mop before attaching it for longer wet cleaning performance. -
Page 32: Special Cleaning Modes
RYDIS H68 Pro Special Cleaning modes Cleaning Mode Function For Where How to Select Intensive Clean in a 3 x 3 ft area Heavy Dust Select Intensive with the Mode button on Cleaning where the H68 Pro Particles or Heavy the Control Panel or press the Intensive mode located... -
Page 33: Intensive Cleaning
Product Operation Intensive Cleaning Intensive Cleaning is used for heavy dust area. The RYDIS H68 Pro intensively cleans the surrounding area relative to its current location. It cleans in a 3 x 3 ft area where the H68 Pro located. Turn the system power switch on. -
Page 34: Shadow Cleaning
RYDIS H68 Pro Shadow Cleaning You can clean areas under your bed, sofa, or furniture that are difficult to clean with an upright vacuum cleaner or by hand. To use Shadow Cleaning mode, turn the room light on. In a dark room, the RYDIS H68 Pro can’t detect the space under the bed or furniture. -
Page 35: Manual Cleaning
Product Operation Manual Cleaning You can control the RYDIS H68 Pro directly using the remote control to cover anywhere you want to be cleaned. Turn the system power switch on. Turn the main power button on. The LED light will blink top to bottom. It will show its ready to operate after 2 seconds. -
Page 36: Reservation Cleaning (Scheduled Cleaning)
RYDIS H68 Pro Reservation Cleaning (Scheduled Cleaning) For daily efficient hands free cleaning, the H68 Pro provides 2 Reservation Cleaning Modes. One starts cleaning after 1 hour from the time you set it and the other starts at the same time everyday. Reservation Cleaning only works from the charging station after you set the Reservation Cleaning. -
Page 37: Turbo Option
Product Operation Turbo Option While you are using the Hybrid / Vacuum / Intensive / Shadow / Manual Cleaning, the Turbo Option is on by default (Turbo Option is disabled during Mop Cleaning)Though, you can turn off the Turbo Option to increase cleaning time by following the steps below: Turn the system power switch on. -
Page 38: Threshold Option
RYDIS H68 Pro Threshold Option For safety reasons, the RYDIS H68 Pro was designed not to climb over a threshold higher than 0.4 inch (1cm). For less than a 0.4inch threshold height, the user is able to choose threshold climbing over ON/OFF option by the remote control. -
Page 39: Double Deep Cleaning Option
Product Operation Double Deep Cleaning Option The Double Deep Cleaning Option performs 2 cleaning sessions of the vertical pattern overlapped by the horizontal pattern. Deep Cleaning Mode Double Deep Cleaning Mode Vertical pattern overlapped by Performs 2 cleaning sessions of the vertical the horizontal pattern pattern overlapped by the horizontal pattern. - Page 40 RYDIS H68 Pro Press the Double CL button on the remote control. The RYDIS H68 Pro will perform 2 cleaning The Double Deep Cleaning Option indicator is sessions of the vertical pattern overlapped now turned on. by the horizontal pattern. Double Deep Cleaning Option is available for Hybrid Cleaning, Mop Cleaning, Vacuum Cleaning, Intensive Cleaning, and Shadow Cleaning.
-
Page 41: Maintenance Language Setting
Maintenance Language Setting You can select a language for voice guidance from the ones available in the system. First, turn the power switch on. Then press and hold the Mode button for 2~3 seconds until the display appears Turn the system power switch off. with a beep sound. -
Page 42: Cleaning The Dust Bin
RYDIS H68 Pro Cleaning the Dust Bin Remove the dust bin cover. Remove the dust bin. Empty the dust bin. Remove the dust filter. Input the dust bin in the RYDIS H68 Pro. Input the dust filter. Make sure to follow the directions carefully when installing the dust bin. -
Page 43: Cleaning The Dust Filter
Maintenance Cleaning the Dust Filter The dust filter can be easily cleaned by gently scraping off the surface or compressed air. The dust filter is reusable. It is recommended not to clean with water. We recommend that you clean the dust filter whenever the bin is more than 2/3 full. If you do not clean the dust filter, the suction power of the RYDIS H68 Pro can be reduced. -
Page 44: Sensors
RYDIS H68 Pro Cleaning Side Brushes, Wheels and Sensors Cleaning side brushes Clean the two side brushes. To clean the side brushes, pull out the side brushes from the RYDIS H68 Pro. Cleaning wheels Clean wheels using the brush. To clean the front wheel, remove the screws and remove the wheel, and clean it with the brush. To clean the two main wheels, clean them with the brush while rotating slightly by hand. - Page 45 Maintenance Cleaning sensors Clean (blow or wipe) the three sensors with the included cleaning brush or a cotton swab. If sensors are severely contaminated, wipe with a moistened cotton swab. Do not use benzene or alcohol to clean sensors. Cleaning the camera sensor Clean the camera sensor with a dry cloth.
-
Page 46: Cleaning The Dust Inlet
RYDIS H68 Pro Cleaning the Dust Inlet Remove the dust inlet cover. Remove the main brush. First, insert the main brush’s hexagonal head to the matching hexagonal socket on the RYDIS H68 Pro. Second, install the main brush by inserting the Clean the removed main brush with bearing to the housing. -
Page 47: Using And Managing The Battery
Maintenance Using and Managing the Battery The battery is a consumable item. The more you use the battery, the shorter the battery’s lifetime. Battery lifetime We guarantee 12 months of use in a normal environment. Always charge the battery fully for the best use experience. The battery lifetime may vary depending on the use environment. -
Page 48: Battery Replacement
If you notice that the operating time has been significantly reduced, you may need to replace the battery. You must use a battery that is manufactured by Moneual. Remove the battery from the RYDIS H68 Pro when the system power is off. - Page 49 If you leave the fully discharged battery for a long time, the battery may become damaged and you may not be able to use it. If you use a battery other than Moneual’s for use with the RYDIS H68 Pro, the RYDIS H68 Pro or the battery may be damaged.
-
Page 50: Voice Guidance
RYDIS H68 Pro Voice Guidance Following voices are the basic voice list. Depending on your model, some contents of these voices may differ from the actual voices. Voice Guidance Starting Hybrid cleaning. The RYDIS H68 Pro will start Hybrid cleaning. Starting Vacuum Cleaning. - Page 51 Maintenance Maintenance Messages Out of battery. The battery has been discharged. Dust Bin is missing. The dust bin has been removed. Please place the cleaner on the floor. The RYDIS H68 Pro has been lifted from the floor. Please check the wheels. The wheels are jammed.
-
Page 52: Error Message Description
RYDIS H68 Pro Error Message Description The RYDIS H68 Pro will display a combination of numbers and icons to inform the users of what the issue is. Using the information below, it is important to resolve the issue first as pressing any button will clear the error message. - Page 53 Maintenance Cause You operated the RYDIS H68 Pro without the dust bin. Voice Dust bin is missing. Solution Replace the dust bin. Cause Both main wheels have been lifted. Voice Please place the cleaner on the floor. Solution Put the RYDIS H68 Pro on the floor or move it to another place. Cause Escape rough road mode continually occurred in excess of the limit while moving.
-
Page 54: Troubleshooting
RYDIS H68 Pro Troubleshooting Problem Solution If the RYDIS H68 Pro does not work or Turn on the system power switch at the lower-rear side of the RYDIS H68 Pro. if the power is not turning on. Check the battery level lamp on the control panel. Charge the battery if the battery level is low. - Page 55 Confirm that the RYDIS H68 Pro is fully charged by checking the battery status lamp on the display. Three solid bars indicate that the battery is fully charged. Contact Moneual support to replace or repair the battery if it does not solve the issue above. I cannot select the Turbo Option The Turbo Option is supported by the Hybrid Cleaning, Vacuum Cleaning, (suction power).
- Page 56 RYDIS H68 Pro Problem Solution If the Hybrid Cleaning or Mop Cleaning If the Big Mop with H2O Tank is not attached, the voice guidance will say mode have an error message. Attach the mop pad. Please attach the mop pad. If the Vacuum Cleaning mode has an If the Big Mop with H2O Tank is attached, the voice guidance will say error message.
-
Page 57: Specifications
Customer Support Specifications RYDIS H68 Pro Model H68 Pro Dimensions 13.7 inches (34.8 cm) (Diameter) x 3.4 inches (8.6 cm) (Height) Weight 5.9 lbs (2.674 kg) Speed Cleaning mode: 12.6 inches/sec. (32 cm/sec.) Driving mode: 11.8 inches/sec. (30 cm/sec.) Operating noise Max. - Page 58 RYDIS H68 Pro Remote Control Model MRC6500 Dimensions 5.5 inches (14 cm) (W) x 0.9 inch (2.3 cm) (H) x 2 inches (5.1 cm) (D) Weight 0.15 lbs (66 g) Battery AAA Size x 2 Signal Transmission Distance(IR) 16.4 ft (5 m)
-
Page 61: Moneual Robot Vacuum Cleaner Limited Warranty
All exchanged parts and Products replaced under this warranty will become the property of Moneual. During the warranty period, there will be no charge for labor or parts. If, after repeated efforts, Moneual is unable to repair the Product to good working order, you may get a replacement unit from Moneual, please note the replacement model may not be the exact same model, Moneual will always replace with equal or better spec Product. - Page 62 3. After calling 1-866-399-0600 to obtain a Return Merchandise Authorization number. Mail-In Repair service is available for Products purchased and located in the continental United States, you are responsible for the shipping charge to ship the Product to the Service Center, Moneual will pay for the shipping to ship the Product back to you.
- Page 64 Moneual Customer Service On Monday - Friday, 9AM - 5PM PST Tel: 1-866-399-0600 Outside of USA: (909) 334-7500 support@moneual.com Before you call for service, please be ready to provide the following information: Model name A description of your problem Phone no. & address...
Need help?
Do you have a question about the RYDIS Hybrid H68 Pro and is the answer not in the manual?
Questions and answers
Hello, I'm interested in where I can buy a remote control for the Moneual Hybrid Rydis H68 Pro robot vacuum cleaner.
I would like to buy a remote control for my moneual hybrid rydis h68 pro because I lost it when I moved. Where can I buy it?