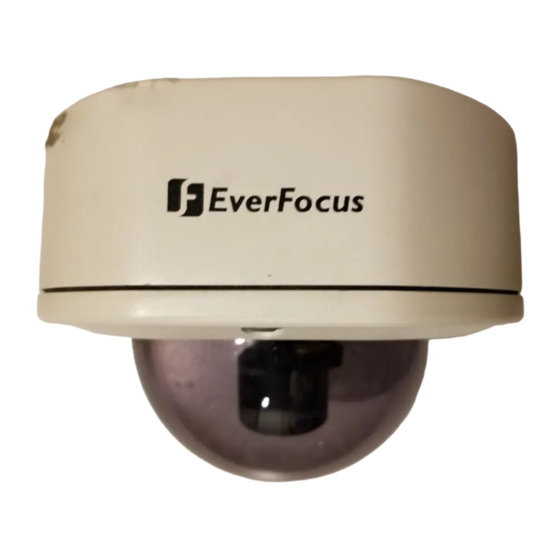
Summary of Contents for EverFocus EHD Series
- Page 1 EHD Series ” ” User’ s Manual Operation Instructions...
- Page 2 Notice This manual is presented to the users of EHD series by EverFocus Electronics Corp. With years of engineering researches, EverFocus has spared no effort to provide the high quality products to the worldwide users. For the policy of continual product improvement, EverFocus reserves the right to make changes to the product specifications and documentation without notice.
-
Page 3: Table Of Contents
Table of Contents Safety Warning … … … … … … … … … … … … … … . 1 Introduction… … … … … … … … … … … … … … … ... 2 Specification… … … … … … … … … … … … … … … .. 3 Installation Instructions…... -
Page 4: Safety Warning
Safety Warning 1. Do not install the camera near electric or magnetic fields. Installed the camera away from TV, radio transmitter, magnet, electric motor, transformer, audio speakers because the magnetic fields generate from above devices will distort the video image. 2. -
Page 5: Introduction
Introduction The most technically advanced EHD series are the newest vandal-resistant Color Rugged Dome Camera from EverFocus Electronics. The Color Rugged Dome Camera can withstand a blow from a 10-pound sledgehammer and has a built-in heater that allows for operation in low temperatures. -
Page 6: Specification
Specification Model 350HQ Pickup device: 1/3” interline transfer color CCD Picture element: NTSC :768(H) × 494(V) PAL: 752(H)×582(V) Horizontal 520 TV lines resolution: Sensitivity: 0.5lux / F=1.2, S/N ratio: >48dB(AGC off) Weatherproof IP66 Ratings: Electronic shutter: Up to 1/100,000 IRIS Control: Auto Auto white balance Auto gain control... -
Page 7: Installation Instructions
Installation Instructions 1. Loosen the 4 fix screws on the housing cover by using the attached wrench (Figure 1). Carefully uncap the housing cover as the direction shown below (Figure 2), please pay attention not to damage the lens. To remove the housing cover, push the hinges to the bottom of the bracket, the hinges can be easily removed from the bracket. - Page 8 3. Mounting the base. Side conduit entry Conduit plug setscrew Back conduit entry Mounting Setscrew Mounting Setscrew Mounting Setscrew Mounting Setscrew Figure 4 Attach the base to the wall or ceiling, fix the base by the 4 setscrews attached in the accessory pack. The dome is weighted 1.7kg, please make sure if the mounting is strengthened enough to support it, if not, please reinforce the mounting according to the environment.
- Page 9 4. Re-assemble Camera 1. If mounting COLOR RUGGED DOME CAMERA on the wall, please to aim the “Wall” in line with the triangle “? ” marked on the lead frame. (factory default) Figure 6-1 “Wall” 2. If mounting COLOR RUGGED DOME CAMERA on the ceiling, please to aim the “Ceiling”...
- Page 10 5. Wire Connection Termination Board Micro Switch for Alarm trigger Power In Alarm COM Video Power In Alarm NO V. Phase Adjustment VR Alarm NC Figure 7 Connect the power supply cable (AC24V/DC12V), video output and alarm output to the proper connectors shown as Figure 7. The V.
- Page 11 6. View Angel Adjustment The camera can be rotated 360° horizontally, 140° vertical and 60° 3’rd axis view angles (as shown in Figure 8). Adjust the proper camera view angel as needed. If a vari-focal lens is used, you may adjust the focus and zoom of the lens to bring the object in focus.
-
Page 12: Dip Switch Functions
Dip Switch Functions Vari-Focal Lens LL (Line-Lock) Off/On To select the sync mode between Internal Sync.(LL off) and Line-Lock (LL on). Set the line-lock off, the camera will synchronize to the internal time base. Set the line-lock on, the camera’s vertical synchronization can be driven by the AC signal in the power lines. - Page 13 BLC (Back Light Compensation) On/Normal When BLC is turned on, the AGC, ES and IRIS operating point is determined by averaging over the center area instead of entire field-of-view, so that a dimly-lit foreground object at center area can be clearly distinguished from brightly-lit backgrounds. BLC should not be used unless it is needed to compensate for back-lit.
-
Page 14: Simple Instructions For The Desiccant Pack
1. Adjust all settings first and place the desiccant pack on the horizontal rod, then bend the horizontal rod and fix it. 2. Install the outer cover and tighten the screws. Installation steps for the EHD series: Step 1. Horizontal rod Desiccant pack Step 2. - Page 15 EverFocus Electronics Corp. Head Office: 12F, No.79 Sec. 1 Shin-Tai Wu Road, China Office: Hsi-Chih, Taipei, Taiwan Room 609, Technology Trade Building, TEL: +886-2-26982334 Shandgdi Information Industry Base, FAX: +886-2-26982380 Haidian District, Beijing,China www.everfocus.com.tw TEL: +86-10-62971096 FAX: +86-10-62971432 USA Office: www.everfocus.com.cn...


Need help?
Do you have a question about the EHD Series and is the answer not in the manual?
Questions and answers