EverFocus EHD525EX Operation Instructions Manual
1/3” sony exview day/night rugged dome color camera
Hide thumbs
Also See for EHD525EX:
- User's manual and operation instructions (17 pages) ,
- Specifications (14 pages) ,
- Quick reference manual (4 pages)
Table of Contents
Advertisement
Quick Links
Please read this manual first for correct installation and operation. This manual should be retained
for future reference. The information in this manual was current when published. The
manufacturer reserves the right to revise and improve its products. All specifications are therefore
subject to change without notice.
PRECAUTIONS
1.
Do not install the camera near electric or magnetic fields.
Install the camera away from TV, radio transmitter, magnet, electric motor, transformer,
audio speakers since the magnetic fields generate from above devices will distort the video
images.
2.
Never disassemble the camera nor put impurities in it.
Disassembly or impurities may result in trouble or fire.
3.
Never face the camera toward the sun.
Direct sunlight or severe ray may cause fatal damage to sensor and internal circuit.
4.
Keep the power cord away from water and liquid.
Touching the wet power cord may result in electric shock.
5.
Never install the camera in areas exposed to water, oil or gas.
Water, oil or gas may result in failure, electric shock or fire.
6.
Cleaning
Do not touch the surface of sensor by hand directly. Use a soft cloth to remove the dirt from
the camera body. Use lens tissue or a cotton swab and ethanol to clean the sensor and the
camera lens.
EVERFOCUS
1/3" Sony ExView Day/Night
Rugged Dome Color Camera
Operation Instructions
EHD525EX
Model No.
Advertisement
Table of Contents

Related Manuals for EverFocus EHD525EX


Summary of Contents for EverFocus EHD525EX
-
Page 1: Operation Instructions
Do not touch the surface of sensor by hand directly. Use a soft cloth to remove the dirt from the camera body. Use lens tissue or a cotton swab and ethanol to clean the sensor and the camera lens. EVERFOCUS 1/3” Sony ExView Day/Night Rugged Dome Color Camera Operation Instructions EHD525EX Model No. -
Page 2: Package Contents
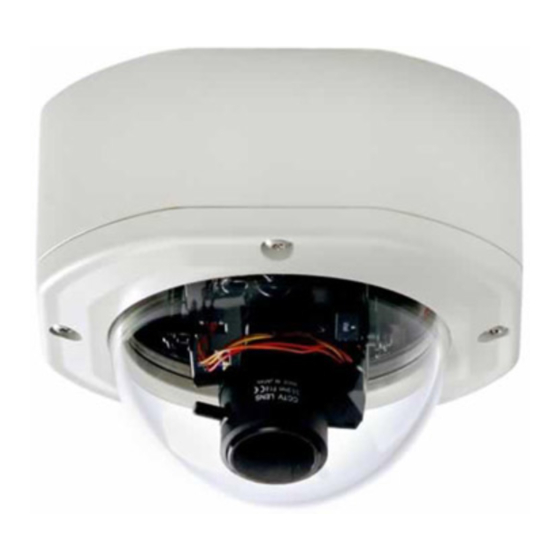
The extremely EHD series are unquestionably one of the world's toughest cameras and is your best choice for vandal resistance. EHD525EX is designed with True Day/Night function that allows removable Auto IR Cut and an enhanced B/W sensitivity, while turning the image from color to B/W. -
Page 3: Specifications
Conduit x 1 Power & Video Cable x 1 Desiccant Pack x 1 Manual x 1 Optional Accessory Wall Mount Bracket (BA-EHD) SPECIFICATIONS Pickup Device 1/3'' SONY EXView CCD Video Format NTSC or PAL NTSC: 525 TV lines, 60 fields/sec Scanning System PAL: 625 TV lines, 50 fields/sec Picture Elements... -
Page 4: Installation
Power Source 12VDC/24VAC 24VAC: 6VA max. (Heater OFF) 24VAC: 20.5VA max. (Heater ON) Power Consumption 12VDC: 4W max. (Heater OFF) 12VDC: 11.5W max. (Heater ON) 130mm(W) x 98.8mm(H) x 130mm(D); Dimensions 5.1"(W) x 3.9"(H) x 5.1"(D) Weight 1.7kg ; 3.7lbs Operating Temperature -40°C~50°C ;- 40°F~122°F (20%~80% Humidity) Certifications... - Page 5 Figure 1 2. Remove the camera. Vari-Focal Lens Heater Locking Screws Figure 3 To remove the camera, first unplug the wire connection on the back of the camera. Then loosen the 2 locking screws on the camera base, push the camera base to the right (toward heater direction, as shown in Figure 3), remove the camera from the mounting base.
- Page 6 Attach the base to the wall or ceiling, fix the base by the 4 setscrews attached in the accessory pack. The dome is weighted 1.7kg, please make sure if the mounting is strengthened enough to support it, if not, please reinforce the mounting according to the environment.
- Page 7 4. Re-assemble Camera When mounting COLOR RUGGED DOME CAMERA on the wall, please aim the “Wall” in line with the triangle “ ” marked on the lead frame. (Factory default) Figure 6-1 When mounting COLOR RUGGED DOME CAMERA on the ceiling, please aim the “Ceiling”...
- Page 8 5. Wire Connection Termination Board Micro Switch for Alarm trigger Power In Alarm COM Video Power In Alarm NO V. Phase Adjustment VR Alarm NC Figure 7 Connect the power supply cable (24VAC/12VDC), video output and alarm output to the proper connectors shown as Figure 7. The V.
- Page 9 sync mode. Make the adjustment when the vertical phase of the camera does not match with other cameras. 6. View Angle Adjustment The camera can be rotated 360° horizontally, 140° vertically and 60° 3’rd axis view angles (as shown in Figure 8). Adjust the proper camera view angle as needed.
- Page 10 7. Repositioning the adjustment stick (only for 3.6-9mm Vari-focal lens) a) The default position of adjustment stick is shown as below: b) While zooming In/Out with the adjustment stick, it may obstruct other adjustments of Iris Level and Video Output. c) In this case, you can gently take off the adjustment stick and place it to the other hole at its right-hand side.
-
Page 12: Dip Switch Function
DIP SWITCH FUNCTION LL (Line-Lock) OFF/ON To select the sync mode between Internal Sync.(LL off) and Line-Lock (LL on). Set the line-lock off, the camera will synchronize to the internal time base. Set the line-lock ON, the camera’s vertical synchronization can be driven by the AC signal in the power lines. - Page 13 BLC (Back Light Compensation) ON/OFF When BLC is turned on, the AGC, ES and IRIS operating points are determined by averaging over the center area instead of entire field-of-view, so that a dimly-lit foreground object at center area can be clearly distinguished from brightly-lit backgrounds.
-
Page 14: Simple Instructions For The Desiccant Pack
SIMPLE INSTRUCTIONS FOR THE DESICCANT PACK Due to the camera lens blurred from the humidity inside the camera. The desiccant pack absorbs the humidity; please refer to the easy instruction as follows: 1. Adjust all settings first and place the desiccant pack on the horizontal rod, then bend the horizontal rod and fix it. - Page 15 415 Oser Avenue Unit S Hauppauge, NY 11788 TEL: 631-436-5070 FAX: 631-436-5027 www.everfocus.com Your EverFocus product is designed and manufactured with high quality materials and components which can be recycled and reused. This symbol means that electrical and electronic equipment, at their end-of-life, should be disposed of separately from your household waste.
Need help?
Do you have a question about the EHD525EX and is the answer not in the manual?
Questions and answers