Table of Contents
Advertisement
Advertisement
Table of Contents

Related Manuals for Denon DN-D4500MK2


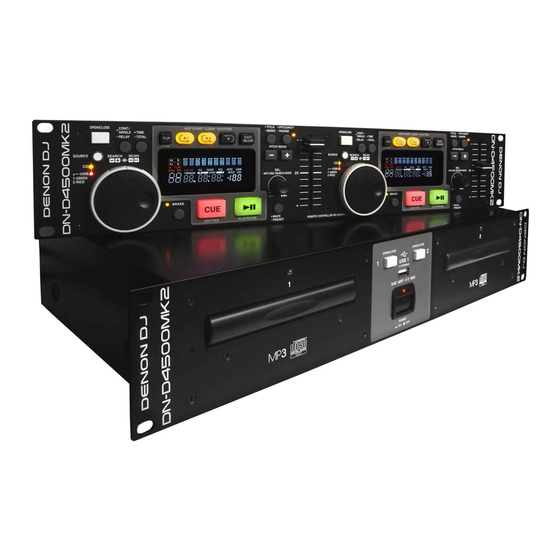
Summary of Contents for Denon DN-D4500MK2
- Page 1 Dual Digital Media Player DN-D4500MK2 Owner’s Manual...
-
Page 2: Fcc Information
This product, when installed as indicated in the instructions contained in this manual, meets FCC requirements. Modification not expressly approved by DENON may void your authority, granted by The lightning flash with arrowhead symbol, within an equilateral triangle, is intended to the FCC, to use the product. -
Page 3: Important Safety Instructions
If you are unable to insert the plug into the outlet, contact your electrician to replace your obsolete Please, record and retain the Model name and serial number of your set shown on the rating label. outlet. Do not defeat the safety purpose of the grounding-type plug. Model No. DN-D4500MK2 Serial No. - Page 4 n NOTE ON USE/HINWEISE ZUM GEBRAUCH/OBSERVATIONS RELATIVES A L’UTILISATION/ NOTE SULL’USO/NOTAS SOBRE EL USO/ALVORENS TE GEBRUIKEN/OBSERVERA WARNINGS WARNHINWEISE AVERTISSEMENTS AVVERTENZE ADVERTENCIAS WAARSCHUWINGEN VARNINGAR • Handle the power cord carefully. • Gehen Sie vorsichtig mit dem • Manipuler le cordon • Manneggiate il cavo di • Maneje el cordón de energía • Hanteer het netsnoer • Hantera nätkabeln varsamt.
- Page 5 • D ECLARATION OF CONFORMITY CAUTION: (English) (English) To completely disconnect this product from the mains, disconnect the plug from the wall socket We declare under our sole responsibility that this product, to which this declaration relates, is in conformity with the following standards: outlet.
- Page 6 A NOTE ABOUT RECYCLING: This product’s packaging materials are recyclable and can be reused. Please dispose of any materials in accordance with the local recycling regulations. When discarding the unit, comply with local rules or regulations. Batteries should never be thrown away or incinerated but disposed of in accordance with the local regulations concerning battery disposal.
-
Page 7: Table Of Contents
Getting started Contents Getting started Playback Preset function ·······································································1 ···················································································13 ······································································25 Accessories ····················································································2 Turning the power on ·································································13 Preset menu map ········································································25 About this manual ········································································2 Turning the power off ·································································13 How to adjust the various Preset settings ··································25 Main features ·················································································3 Playback ·······················································································13 Cautions on handling ····································································3 CD playback ················································································13... -
Page 8: Accessories
Check that the following parts are supplied with the product. n Symbols This symbol indicates a reference page on Owner’s Manual ..............1 which related information is described. DN-D4500MK2 Resource CD-ROM ........1 (Contents) This symbol indicates a supplementary • Owner’s manual (This manual) information and tips for operations. -
Page 9: Main Features
Main features Cautions on handling The DN-D4500MK2 is a Dual Digital Media Player equipped with a • Before turning the power switch on 6. Hot Start / Stutter variety of functions and high performance characteristics, specifically Check once again that all connections are correct and that there are Playback can be started instantaneously from points A-1 and A-2. -
Page 10: Discs
Discs Discs playable on this unit Holding discs Cautions on storing discs • Be sure to remove discs after using them. Music CDs • Be sure to store discs in their cases to protect them from dust, Discs marked with the logo at right can be Do not touch the signal surface. -
Page 11: Supported Media And Files
Supported media and files The following media and files can be played back on this unit. Supported media Disc Disc type : CD, CD-R, CD-RW, CD-ROM Format : CD-DA (CD-TEXT compatible), CD-ROM (ISO9660/Joliet format/Romeo format) USB memory device Media type : FLASH DRIVE, HDD Format : FAT16/FAT32 NOTE • When a multisession disc is used, the more sessions there are, the more time will be required to read the disc. -
Page 12: Part Names And Functions
Part names and functions Front panel... - Page 13 Part names and functions n DN-D4500MK2 Front panel n RC-D45MK2 Front panel TRACK SELECT/MP3 DISC SEARCH MODE PITCH BEND +/– button knob • The playing speed increases/decreases while POWER button ( OFF) CAUTION (SEL./ MP3 DISC SEARCH MODE) these buttons are held down.
- Page 14 Part names and functions Shuttle ring (outer ring) TITLE/ MEMO button • This control is used to select the scanning • CD TEXT: direction and speed. When there is CD text data, the CD text data The CD is scanned in the forward direction is displayed automatically or when the button when the shuttle ring is turned clockwise from is pressed.
-
Page 15: Display
Example: A1 B Track’s elapsed time is displayed. the ARTIST name search mode. The mains plug is used to completely interrupt • DN-D4500MK2 has Loop mode indicators Both arrows on: MEMO indicator Character display the power supply to the unit and must be... -
Page 16: Rear Panel
The playback level after analog conversion is set • Connect the opposite side of supplied 8 pin din to –6dB bellow the usual level to avoid digital cable to the DN-D4500MK2 (main unit). distortion. Fader input jacks 1, 2 (FADER 1, 2) • Use this when your mixer has Fader Start... -
Page 17: Connection
• Do not plug in the power cord until all connections have been they are finalized. 5. Seamless Loop • DENON does not guarantee that all USB memory devices will operate or receive power. When using a portable USB connection type HDD of completed. Note:... -
Page 18: Connecting The Power Cord
Connecting the power cord Connect the supplied power cord to this unit, and insert the plug into the wall socket. NOTE • Do not plug in the power cord until all connections have been completed. • Insert the plug fully and securely into the socket. Incomplete connection to the power supply may cause damage to the unit, or noise. -
Page 19: Playback
Playback Turning the power on Disc holder OPEN/CLOSE Disc holder POWER ON/OFF Press “DENON DN-D4500 MK2” appears on the display, and the power switches on. Turning the power off POWER ON/OFF Press The power switches off. POWER ON/OFF NOTE OPEN/CLOSE SEL. -
Page 20: Cd-Rom/Cd-R/Cd-Rw Playback
Preparation for playback CD-ROM/CD-R/CD-RW playback n Ejecting CDs n Selecting files in folder search mode Press OPEN/CLOSE on the unit to open the disc holder. For details on the files that can be played on this unit, see vpage 5. SEL. Hold down (-MP3 DISC SEARCH MODE). -
Page 21: Usb Memory Device Or Hdd Playback
Preparation for playback USB memory device or HDD playback • Connect USB memory device or HDD to the USB port on the top panel, and prepare to playback a track. • For details on the file formats that can be played on this unit, see vpage 5. Connect a USB memory device or HDD to the USB1 port or USB2 port. - Page 22 Incorrectly removing the USB memory device or HDD may damage the data stored on the device. • DENON cannot accept any responsibility whatsoever for the damage or loss of data from USB memory devices or HDDs that are used in conjunction with this device.
-
Page 23: Operations During Playback
Operations during playback Setting playback mode CONT./ CONT./ SIGNAL SIGNAL This sets how tracks are played back. -RELAY SEL. SEL. -RELAY SEL. SINGLE/CONT. Press • The playback mode is switched in the following order each time the button is pressed. SINGLE (PLAY LOCK) SINGLE CONT. -
Page 24: Fast Forward/Rewind
Operations during playback Fast forward/Rewind Setting the cue point There are four methods for fast forward/rewinding. By setting a cue point, the track can be played back from the set position. n Fast forward/Rewind using shuttle ring and jog wheel n Setting the cue point PITCH/BRAKE (2) Starting playback from the Middle of a track (Manual Search) During playback, turn the shuffle ring. -
Page 25: Adjusting The Playback Speed
Operations during playback Changing the playback speed temporarily (pitch bend function) PITCH BEND -/+ PITCH BEND -/+ PITCH/KEY PITCH/KEY This function temporarily changes the playback speed. RANGE RANGE Pitch slider Pitch slider There are 2 methods for changing the playback speed. FILP/BTRIM EXIT/RELOOP FILP/BTRIM... -
Page 26: Adjusting The Track End Time
(2) Starting playback from the Middle of a track (Manual Se Operations during playback • When the track is selected with the TRACK SELECT knob o and the PLAY n Adjusting loop points playback starts from the beginning of that track. If you wish to start from In normal playback or pause, press EXIT/RELOOP procedure described below to search for the desired position. -
Page 27: Adjusting Brake Time
Operations during playback Adjusting brake time CONT./ CONT./ SINGLE SINGLE The brake time can be adjust using Preset function. SEL. SEL. SEL. RELAY RELAY Hold down • BACK –PRESET. Press SEL. repeatedly to select the brake time. Step 1 Step 2 BACK BACK Step 4... -
Page 28: Relay Play
Operations during playback Relay play Power on play What is relay play? This mode enables playback to start automatically from the first track of the loaded CD when powering on. Playback relays between deck 1 and deck 2. Load a into the deck. -
Page 29: Others
Others Memo function Memo settings Details set in advance can be stored as memo data on a USB memory device or HDD or Flash Memory. When you need to configure settings in a short space of time, settings can be configured automatically n Memo Set TITLE TITLE... - Page 30 Memo function n Memo Call n Memo Clear This function calls saved memo data. This function clears saved memo data. Select the track that is stored with the memo data that you want to call. Select the track that is stored with the memo data that you want to clear. • When a track that has memo data stored is selected, the MEMO indicator lights in the display.
-
Page 31: Preset Function
Select the playing pitch range when the power is turned on. e Once clearing is completed, “Complete!” is displayed. (4% Range / 10% Range* / 16% Range / 24% Range) The DN-D4500MK2’s software version is displayed. Version No EOM Time Sets the notification for the time remaining until the end of the track being played back. -
Page 32: Troubleshooting
Troubleshooting If a problem should arise, first check the following: Symptom Cause/Solution 1. Are the connections correct? Data stored in a USB • Has the unit initialized the USB memory device with applicable formats? 2. Is the set being operated as described in this owner’s manual? memory device cannot be (FAT 16/FAT 32) 3. -
Page 33: Specifications
Specifications n General n Functions Instant start: Within 20 msec. Type: Compact disc player Variable pitch: ±4% (0.1% pitch), ±10% (0.1% pitch), ±16% (0.1% pitch) Standard compact disc (12 cm disc), CD-TEXT Disc type: ±24% (1.0% pitch), ±50% (1.0% pitch), ±100% (1.0% pitch) CD-R, CD-RW discs Pitch bend: Pitch range ±4% –... - Page 34 Index Accessories ·························································· 2 Hot Start ······························································· 3 Rear panel ·························································· 10 Auto Close ·························································· 25 Relay Mode ························································ 25 Auto Cue ···························································· 25 Relay play ··························································· 22 Auto loop playback ············································· 20 Relay Time ························································· 25 Jump Time ························································· 25 Bpm Disp ··························································· 25 Stutter ································································...
- Page 35 n Dimensions Unit: in. (mm) 18-31/32 (482.0) 18-5/16 (465.0) 18-5/16 (465.0) 18-31/32 (482.0) Weight: (Player unit:11 lbs (5.0 kg), Remote control unit: 4 lbs 2 oz (1.9 kg))
- Page 36 3520 10166 00AP...
Need help?
Do you have a question about the DN-D4500MK2 and is the answer not in the manual?
Questions and answers