Table of Contents
Advertisement
Advertisement
Table of Contents

Subscribe to Our Youtube Channel
Related Manuals for Denon DN-SC2900


Summary of Contents for Denon DN-SC2900
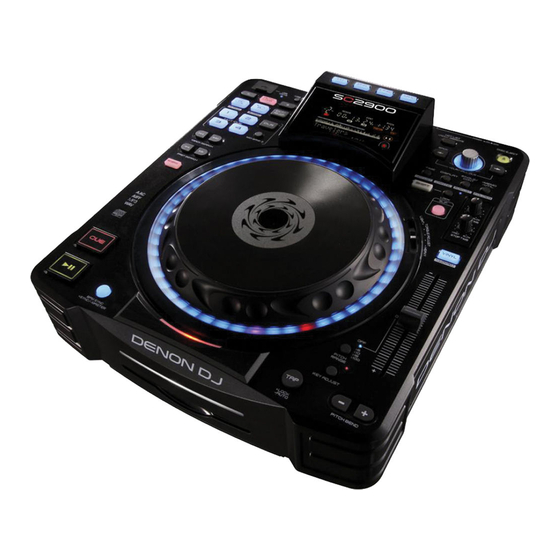
- Page 1 Digital Controller and Media Player DN-SC2900 Owner’s Manual...
-
Page 2: Important Safety Instructions
IMPORTANT SAFETY INSTRUCTIONS CAUTION READ BEFORE OPERATING EQUIPMENT RISK OF ELECTRIC SHOCK DO NOT OPEN This product was designed and manufactured to meet strict quality and safety standards. There are, however, some installation and operation precautions which you should be particularly aware of. CAUTION: TO REDUCE THE RISK OF ELECTRIC SHOCK, DO NOT REMOVE COVER (OR BACK). - Page 3 2. Do not open the rear cover In order to prevent electric shock, do not open the top cover. ADVARSEL: USYNLIG LASERSTRÅLING VED ÅBNING, NÅR If problems occur, contact your DENON DEALER. SIKKERHEDSAFBRYDERE ER UDE AF FUNKTION. 3. Do not place anything inside UNDGÅ...
- Page 4 n NOTES ON USE/HINWEISE ZUM GEBRAUCH/OBSERVATIONS RELATIVES A L’UTILISATION/ NOTE SULL’USO/NOTAS SOBRE EL USO/ALVORENS TE GEBRUIKEN/OBSERVERA WARNINGS WARNHINWEISE AVERTISSEMENTS AVVERTENZE ADVERTENCIAS WAARSCHUWINGEN VARNINGAR • Handle the power cord carefully. • Gehen Sie vorsichtig mit dem • Manipuler le cordon • Manneggiate il cavo di • Maneje el cordón de energía • Hanteer het netsnoer • Hantera nätkabeln varsamt.
- Page 5 • D ECLARATION OF CONFORMITY CAUTION: (English) (English) To completely disconnect this product from the mains, disconnect the plug from the wall socket We declare under our sole responsibility that this product, to which this declaration relates, is in conformity with the following standards: outlet.
- Page 6 n Rating label A NOTE ABOUT RECYCLING: LOCATION: BOTTOM This product’s packaging materials are recyclable and can be reused. Please dispose of any materials in accordance with the local recycling regulations. When discarding the unit, comply with local rules or regulations. Batteries should never be thrown away or incinerated but disposed of in accordance with the local regulations concerning battery disposal.
-
Page 7: Table Of Contents
Getting started Contents Network playback operations ····················································33 Getting started Connection ·······································································1 ··············································································17 Sharing tracks on the network ····················································33 Accessories ····················································································2 Cables used for connection ························································17 Relay playback ············································································34 About this manual ········································································2 Basic connections ·······································································17 Automatically adjusting BPM ······················································34 Main features ·················································································3 Network connecting ···································································18 Sharing hot list information ·························································35 Cautions on handling ····································································3... -
Page 8: Accessories
This symbol indicates a reference page on Owner’s Manual ..............1 which related information is described. Quick setup guide ..............1 DN-SC2900 Resource disc ............1 This symbol indicates items described in the (Contents) “engine Instruction manual” on the provided • Owner’s manual (This manual) -
Page 9: Main Features
• Place in a stable, flat location. 2. Network Media Player equipped with advanced functions 8. Equipped with Burr Brown 24 bit DAC processing for faithful • Tracks can be shared when two or more DN-SC2900 are connected playback and superior audio fidelity. • About condensation on the same network. -
Page 10: Discs
Supported media and files Discs The following media and files can be played back on this unit. Discs playable on this unit Cautions on loading discs Supported media • Do not get fingerprints, oil or dirt on discs. Music CDs • Take special care not to scratch discs when removing them from Discs marked with the logo at right can be Disc their cases. -
Page 11: Part Names And Functions
Part names and functions Top panel q Audio input/output part This section describes the top panel in the following sections: Audio input/output part and TRAKTOR LE 2/PRO 2. Read descriptions for your DJ software. For buttons not explained here, see the page indicated in parentheses ( ). Play/Pause button (1 ) ····························... - Page 12 Top panel NOTE SINGLE/CONT. button ······························· (26) LOCK/ AUTO button ···················· (31) PLAYLIST button Note that there are many buttons that have two different Touch sensor indicator • PLAYLIST : When this button is pressed while functions that are selected by pushing the buttons for a short Lights red when the unit detects that the top of SHIFT 5V 500mA...
-
Page 13: Traktor Le 2/Pro 2
Top panel w TRAKTOR LE 2/PRO 2 NOTE Play/Pause button (1 B button (B TRIM) Note that there are many buttons that have two different Plays back when pressed while playback is Sets the loop out point. functions that are selected by pushing the buttons for a short stopped. - Page 14 Top panel NOTE SINGLE/CONT. /PLAYLIST button PITCH RANGE button Shift modifier for sample slot 3. Switches pitch range. Note that there are many buttons that have two different functions that are selected by pushing the buttons for a short Memo/Utility ( MEMO/ UTIL.)/ PITCH BEND button (+/–)
-
Page 15: Display
Display q Audio input/output part This section describes the display in the following sections: Audio input/output part and TRAKTOR LE 2/PRO 2. Read descriptions for your DJ software. KEY ADJ. indicator PITCH mode indicator Lights when key adjustment mode is used. This indicates the pitch in the PITCH display. -
Page 16: Traktor Le 2/Pro 2
Display w TRAKTOR LE 2/PRO 2 qw e Play position indicator PITCH display Time mode indicators The track playback time is displayed. This indicator displays the playback speed TIME Each time is pressed, the indicator The normal playback time is displayed in blue, (pitch). -
Page 17: Front Panel
Connect this unit and the computer They are unbalanced RCA output terminals. to the same network in order to use “engine”. A maximum of 4 DN-SC2900 units can be connected via the network to 1 computer. FADER jack ············································ (17, 18) -
Page 18: Preparations
USB. disc drive on My Computer. The installer will guide you through the steps required to install DENON DJ ASIO Driver on your computer. z Mac, Mac OS, iPad, iTunes and Quicktime is a registered trademark or trademark of Apple Inc. in the Click “Asio Driver Installation”. - Page 19 To install in this folder, click “Next”. To install to a different folder, enter it below or click “Browse”. SOFTWARE LICENSE AGREEMENT Tell setup if you want it to create to a few icons for convenient access to the DENON DJ ASIO DENON DJ ASIO Driver Driver NOTICE TO USER: Please read this Agreement carefully.
-
Page 20: Starting Up The Asio Driver
The sampling rate selection is displayed here. NOTE The DENON DJ ASIO driver supports 44.1 kHz, 48 kHz, 88.2 kHz and 96 kHz frequencies. 44.1 DENON DJ ASIO Driver Ver.2.2.2 Select one device at a time. Multiple devices kHz is selected when this unit is connected. -
Page 21: Installing Traktor Le
Double-click the TRAKTOR LE 2 disc icon. DENON DJ mixer (DN-X1700/DN-X1600/DN-X600) to 44.1 kHz. For Computer. how to set this, see the owner’s manual of the DENON DJ mixer Files contained in the TRAKTOR LE 2 disc are displayed for (DN-X1700/DN-X1600/DN-X600). -
Page 22: Automatic Driver Installation
When the installation is completed, the following message is displayed at the bottom right of the screen. Found New Hardware Your new hardware is installed and ready to use. If your computer’s OS is Windows, on the DN-SC2900 select “Utility” – “Preset Setting” – “PC/ MAC” (vpage 45) – “PC”. The factory setting is “MAC”. -
Page 23: Connection
• Connect the cables to the correct input and output terminals. • DENON does not guarantee that all USB memory devices will operate or receive power. When using a portable USB connection type HDD of • Insert the plugs securely. Loose connections will result in the the kind to which an AC adapter can be connected to supply power, use the AC adapter. -
Page 24: Network Connecting
Network connecting • This is an example of connecting multiple DN-SC2900 units to a computer via a network and router. A maximum of four DN-SC2900 units can be connected. • Use the following type of network cable. • RJ45 category 5 (CAT5) or higher. -
Page 25: Midi Control Connections
To AC outlet Power cord (AC 230 V, 50 Hz) (supplied) DN-SC2900 To prevent the power plug from falling out, we recommend fixing the DJ mixer power cord to the AC cord holder. Use a Phillips screwdriver to fix the power cord to the AC cord holder. -
Page 26: Playback
POWER ON/OFF This section explains how to operate each type of media. Press Preparing for CD playback “DENON DJ” appears on the display, and the power switches on. Press to switch the source to CD. Turning the power off Insert a CD into the disc loading slot. -
Page 27: Preparing For Cd-Rom/Cd-R/Cd-Rw Playback
Preparation for playback Preparing for CD-ROM/CD-R/CD-RW n Ejecting CDs playback DISC 5 Press The CD is ejected from the disc loading slot. • Prepare to play tracks from a CD-ROM/CD-R/CD-RW. • For details on the files that can be played on this unit, see page 4. NOTE NOTE DISC 5... -
Page 28: Preparing For Usb Memory Device Or Hdd Playback
Preparation for playback Preparing for USB memory device or HDD n When not using a database USB 5 SHIFT SEL. FOLDER playback Connect a USB memory device or HDD to the USB LINK BACK port. • Connect USB memory device or HDD to the USB port on the top The USB DRIVE indicator flashes red, and then remains lit. -
Page 29: Preparing For Playback From A Network Connected Device
The “Network ID” list of all units connected to USB memory • When HFS+ is used, this unit may not be able to recognize the file • A maximum of four DN-SC2900 units can be connected to the name if characters other than ISO8859-1 registered characters or devices and “engine”... -
Page 30: Searching Tracks
Searching tracks This section explains how to search for tracks using a database Searching tracks by category n Searching tracks by multiple categories created using music management software “engine”. GExampleH Searching for tracks by genre and album name Tracks can be searched from the following categories. Press to switch the source to USB. -
Page 31: Searching Tracks By Crate
Searching tracks Cancelling search conditions Searching tracks by crate Searching tracks by playlist BACK Press Use the crate created by “engine” to search tracks. Use the playlist created by “engine” to search tracks. The search top menu is shown in the display. SHIFT CRATE SHIFT... -
Page 32: Operations During Playback
Operations during playback Setting playback mode Pause 6 7 VINYL SINGLE/ CONT. This sets how tracks are played back. Press during playback. SINGLE/CONT. Press flashes, and the track is paused. • Press again to resume playback from the point at which the • The playback mode is switched in the following order each time track was paused. -
Page 33: Setting The Cue Point
When playback is paused, press and move n When using “DENON” mode the cue point to the position where you want to set it. Turn the jog wheel to find the playback point. Pause the track in the position where you want to set The cue point moves 1 frame each time the button is pressed. -
Page 34: Adjusting The Playback Speed
Operations during playback Adjusting the playback speed n Using the jog wheel A, B EXIT/ VINYL SHIFT RELOOP When VINYL mode is off Use the pitch slider to adjust the playback speed (pitch). Press PITCH RANGE Press VINYL , and VINYL illumination goes out. -
Page 35: Manual Loop Playback
Operations during playback Manual loop playback Adjusting the B point (end point) When using “DENON” (vpage 27) mode SHIFT Set the starting point (A point) and end point (B point), and playback is In normal playback or pause, press EXIT/RELOOP During manual loop playback, press and hold repeated seamlessly between the two points. -
Page 36: Auto Loop Playback
Operations during playback Auto loop playback n Exiting auto loop playback AUTO LOOP +/– EXIT/ HOT LIST VINYL RELOOP ADD/REMOVE EXIT/RELOOP During auto loop playback, press AUTO LOOP SEL. This function automatically repeats playback in time with the beat. Auto loop playback exits, and normal playback resumes. n Setting auto loop playback AUTO LOOP Press... -
Page 37: Hot List
The tempo (BPM) is measured according to the interval between n Sharing hot lists repeated pressings of the When multiple DN-SC2900 units, are connected via a network, hot lists can be shared between units. When BPM is locked, repeatedly press... -
Page 38: Adjusting The Rotation Torque Of The Jog Wheel
Operations during playback Adjusting the rotation torque of the jog Reverse playback REVERSE LINK SHIFT SEL. wheel This function plays back the track in reverse. Adjusts the rotation torque of the jog wheel to the torque you want During playback, press REVERSE to set. -
Page 39: Adjusting The Track Startup/End Time
“Network ID” “1”, and (Players Link) select “engine”. • When more than one DN-SC2900 units are connected, tracks can • The unit set as “Network ID” “1” is displayed on the “engine” control panel. be shared between units. -
Page 40: Relay Playback
SEL. • When multiple DN-SC2900 units are connected on the network, When multiple DN-SC2900 units, are connected on the network, the tracks are played back in the order of the registered “Network ID” BPM value from the desired player (MASTER) is set as the BPM on all number. -
Page 41: Sharing Hot List Information
SEL. • You can connect more than one DN-SC2900 to a computer to control Press DJ software. Switch MIDI channels as needed. The MIDI indicator in the display lights, and the mode switches • Set a MIDI channel for each connected device. -
Page 42: Midi Command List
MIDI command list Send command MIDI command items Notes Command Number Value MIDI command HOT4 (MIDI BANK2) items Notes NOTE ON : 0x9n NOTE ON : 64 – Command Number Value MIDI BANK2 NOTE OFF : 0x8n NOTE OFF : 0 Reverse 63-1 Disc EJECT C#-1... -
Page 43: Reception Commands
MIDI command list Reception commands MIDI command Items Notes (Others) Command Number Value MIDI command Items Pitch slider request Return pitch slider position Notes (Lit display (LED)) Command Number Value Start Time request CC : 0xBn Stop Time request Pitch Range/OFF Key Adjust HOT1 MIDI command... - Page 44 MIDI command list MIDI command MIDI command Items Items Notes Notes (VFD Parameter) (VFD Parameter) Command Number Value Command Number Value Tr number MSB Segment 2-1 MSB 0-99 Tr number LSB Segment 2-2 MSB 100-109 : “-0” Time mini to “-9” Segment 2-3 MSB 110 : “--”, 111 Time sec...
- Page 45 MIDI command list MIDI command MIDI command Items Items Notes Notes (VFD Symbol) (VFD Symbol) Command Number Value Command Number Value Scratch Position 19 REMAIN Scratch Position 20 ELAPSED Scratch Position 21 CONT. Scratch Position 22 SINGLE Scratch Position 23 Scratch Position 24 Scratch Position 25 CC : 0xBn...
-
Page 46: Others
Others Memo function • Details set in advance can be stored as memo data on a USB memory device or HDD. n USB memory device or HDD When you need to configure settings in a short space of time, settings can be configured automatically • Memo data is created in the folder containing the track. -
Page 47: Memo Settings
Memo function Memo settings SEL. MEMO UTIL. When the playback speed is called from the memo data, the PITCH n Memo Set indicator flashes, and the pitch may be locked. Save the setting details to memo data. This is because the actual playback speed and playback speed selected by the pitch slider differ. -
Page 48: Preset Recall Function
Memo function Preset recall function n Memo Clear Using “Preset Export” (vpage 46), preset setting details saved SEL. MEMO This function clears saved memo data. on a USB memory device or HDD can be temporarily used without UTIL. Select the track that is stored with the memo data overwriting on this unit. -
Page 49: How To Make Detailed Settings
How to make detailed settings Utility menu map For details on each setting item, see the pages in the table below. Setting items Detailed items Description Page Save As Def Saves the current pitch range settings, time display settings for the display, playback mode settings and key adjustment settings as the initial settings when the power is switched on. -
Page 50: Utility Settings
Sets the number of this unit NOTE that ASIO driver recognizes when connected to a When using multiple DENON DJ devices such as DN-SC2900, change this setting so that there are no duplicate numbers. computer. Network ID 1 – 4... - Page 51 1 – 16 Switches the cue DJ products. Selects the MIDI channel to point setting mode DENON : Sets the cue point in the same way as conventional DENON DJ be used. (vpage 27). products. Jog Trans Int 1ms – 3ms – 10ms Auto Cue OFF/–60dB/–54dB/–48dB...
-
Page 52: Preset I
Utility settings Preset I/O Initialize Presets are saved and read from a USB memory device or HDD connected to this unit. Initializes the USB memory device or HDD connected to this unit and returns the preset settings of this unit to the default settings. Setting items Setting details Setting items... -
Page 53: Troubleshooting
Troubleshooting If a problem should arise, first check the following: Symptom Cause/Solution Page 1. Are the connections correct? Sound cuts out. • Exit any other applications. – 2. Is the set being operated as described in this owner’s manual? Or the sound is • When multiple WAV files are played back simultaneously, –... -
Page 54: Specifications
Specifications n Audio (0 dBu =0.775 Vrms, 0 dBV =1 Vrms) 32 bit (internal DSP process) Quantization: Sampling frequency: 44.1 kHz (at normal pitch) Total harmonic distortion: 0.05 % or less 106 dB or more Signal to noise ratio: Head room 6 dB Channel separation: 100 dB or more... -
Page 55: Index
Index AC cord holder ··················································· 19 Eclipse Res. ························································ 45 Network ID ························································· 44 Save As Def. ······················································ 44 Area Create ························································ 46 EOM Time ·························································· 45 Scratch playback ················································ 31 Area Delete ························································ 46 Searching ··························································· 24 ASIO Driver ·················································· 12, 14 SLIP function ······················································... - Page 56 Dimensions Unit: mm 326,0 55,0 38,0 250,0 38,0 Weight: 4.35 kg...
- Page 57 3525 10117 00AS...
Need help?
Do you have a question about the DN-SC2900 and is the answer not in the manual?
Questions and answers