Planet ICA-700 User Manual
Ccd box poe internet camera
Hide thumbs
Also See for ICA-700:
- Quick installation manual (20 pages) ,
- User manual (70 pages) ,
- Quick installation manual (28 pages)
Table of Contents
Advertisement
Quick Links
Advertisement
Table of Contents

Related Manuals for Planet ICA-700


Summary of Contents for Planet ICA-700
- Page 1 CCD Box PoE Internet Camera ICA-700 User’s Manual Version 2.0 Date: April, 2009...
- Page 2 PLANET. PLANET assumes no responsibility for any inaccuracies that may be contained in this User’s Manual. PLANET makes no commitment to update or keep current the information in this User’s Manual, and reserves the right to make improvements to this User’s Manual and/or to the products described in this User’s Manual, at any time without notice.
-
Page 3: Table Of Contents
2.1 Physical Installation....................10 2.2 Software Installation....................11 2.3 Software Quick Configuration................15 3. Viewing Live Video ....................20 3.1 Connecting ICA-700 via Ethernet................20 3.2 General Options ....................23 3.2.1 Directly zoom in / out the image ............... 24 3.2.2 Language....................24 3.2.3 Setting ...................... - Page 4 5.6.1 Setting ...................... 66 5.7 system Log......................67 5.7.1 Setting ...................... 67 Appendix A --- Enable ActiveX options on your PC ............ 68 Appendix B --- Bandwidth Estimation................69 Appendix C --- Mobile phone viewing ................70 ICA-700 User Guide...
-
Page 5: Introduction
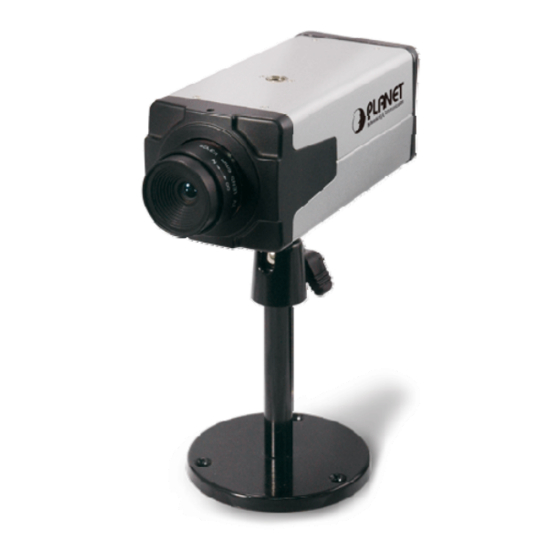
1. Introduction With the feature, simultaneously provides MPEG-4 and M-JPEG video streaming, the PLANET ICA-700 is a CCD Box PoE Internet Camera which uses high resolution 1/3-inch CCD sensor for capturing color images and CS-Mount optical lens. Compliant with IEEE 802.3af PoE (Power over Ethernet), it offers the benefit of easy deployment for users to... -
Page 6: System Requirements
· Memory Size : 512 MB or above · VGA card resolution : 1024 x 768 or above Optional: · Sound Card (for PC) · Microphone (for PC and ICA-700) · Speaker (for PC and ICA-700) 1.3 Features Simultaneous MPEG-4 and M-JPEG dual codec... -
Page 7: Application
1.4 Application Remote Monitoring Applications 1.5 Outlook Dual Mode CCD Dome Internet Camera... -
Page 8: Rear Panel
When this device is obtained power from PoE, you don’t have to attach the power adapter. Connect your Camera to a 10/100Base-TX hub or switch. It is compliant LAN (PoE) with IEEE 802.3af PoE. Either mid-span PSE or end-span PSE supported. ICA-700 User Guide... -
Page 9: Technical Specifications
1.6 Technical Specifications Video Image Sensor 1/3” SHARP CCD Horizontal Resolution 420 TVL 6 mm, F1.8 fixed iris lens Lens CS Mount type Horizontal: 43 degree View Angle Vertical: 33 degree Illuminator 0.1 Lux Video Codec MPEG-4 / M-JPEG Video Resolution Up to 30 fps @ 704x480 ;... -
Page 10: Installation
Please use the power adapter that is bundled in package. Using a power supply with a different voltage rating will damage and void the warranty for this product. 3. Connect Microphone and Speaker If you will use the 2-Way audio function, please connect microphone to Audio In and speaker to Audio Out. ICA-700 User Guide... -
Page 11: Software Installation
2.2 Software Installation 1. Insert the bundled product CD into CD-ROM drive to launch the autorun program. 2. When the web page displayed, please click your IP camera model name to next page. Select and click the “Setup Tool” hyperlink on the menu to start the installation process. Note: If the CD’s menu does not appear, click “Start”... - Page 12 5. Follow the step for configuring the Setup Tool, and click “Next” to continue. 6. If you wish to install the Setup Tool in an alternative location, click “Browse”; otherwise click “Next” to continue. ICA-700 User Guide...
- Page 13 7. If you wish to install the Setup Tool in an alternative folder of star menu, type a new folder or select one of the exiting ones; otherwise click “Next” to continue. 8. Check the installation summary, and click “Install” to install the Setup Tool. Dual Mode CCD Dome Internet Camera...
- Page 14 9. The program starts to install the Setup Tool in your computer. 10. The Setup Tool installation successful. Click “Finish” to complete the installation. ICA-700 User Guide...
-
Page 15: Software Quick Configuration
2.3 Software Quick Configuration This section shows how to perform basic communication functions by Setup Tool. 1. Double click the icon of Setup Tool on the desktop. 2. The Setup Tool screen will show up as below. It will automatically search and list the IP cameras on your network. - Page 16 In default values, please enter “admin” for both User Name and Password. Then click “OK”. 4. On the following System information screen, it displays the Product Name, Firmware Version and Hardware Version. Click on “Next” to continue. ICA-700 User Guide...
- Page 17 5. On the following Account settings screen, you can modify the Administrator login user name and password. And you can add some user accounts as Admin, Operator or Viewer. Please click “Next” to continue. 6. On the following Date/Time settings screen, you can adjust the date and time to synchronize with PC, manual setting or synchronize with NTP server.
- Page 18 IP address and DNS settings. Click “Next” to continue. 8. On the following PPPoE settings screen, if you are use PPPoE connection, please select “On” and fill the correct User ID and Password for dialling. Click “Next” to continue. ICA-700 User Guide...
- Page 19 9. On the following DDNS settings screen, if you have registered the account from the DDNS provider and want to use DDNS function, please select “On” to fill the correct User ID, Password and Hostname for connecting. Click “Next” to continue. 10.
-
Page 20: Viewing Live Video
This chapter introduces how to monitor the image from the IP camera by using Microsoft web browser. The recommended browser for Windows is Internet Explorer 6.0. 3.1 Connecting ICA-700 via Ethernet After finishing the Setup Tool, you can access the IP camera by using the browser. - Page 21 4. When you connect, the login page will be displayed as below. Note: 1. The default user name and password both are “admin”. 2. The Administrator’s ID / Password can be configured on the “Account” of Security menu. 5. The first time you view the camera, you will be prompted to install an ActiveX component as below.
- Page 22 1. Video will start playing automatically. There might be a delay of a few seconds while the video stream is buffered. 2. There are a number of options available on homepage, accessed by select list, button or icon. The details are described in Chapter 3.2 – General Options. ICA-700 User Guide...
-
Page 23: General Options
3.2 General Options Snapshot Click to capture live image shot and store the picture in your computer. Full Screen Click to view the live video for full screen on your monitor. Zoom Click to display / close the zoom window. Pause / Play Click to pause / play the current video. -
Page 24: Directly Zoom In / Out The Image
. You can use the right click of your mouse to move the to anywhere on the window. .2.2 Language ou can click the pulldown box to select system language, including English, Traditional Chinese, Simplified Chinese, Deutsch, Japanese and Spanish. ICA-700 User Guide... -
Page 25: Setting
3.2.3 Setting dministrator can click this Setting bar to go to the setting page. The details are described in Chapter 4 – Basic Setting & Chapter 5 – Advance Setting. 3.2.4 Client setting client setting option, you can select the Mode, View size, Protocol, Video buffer. Client setting Click the pulldown box to choose betw... -
Page 26: Image Setup
3.2.5 Image setup ou can use the tool bar to optimize the Brightness, Contrast, Saturation and Hue here. ICA-700 User Guide... -
Page 27: Basic Setting
4. Basic Setting his Chapter provides basic setting details of the camera’s web-based management. The camera can be configured via your web browser. That must have an IP address which is compatible with your network. ote: The recommended method to ensure this to use the supplied windows-based Setup Tool is described in Chapter 2.3 –... - Page 28 2. The welcome of setting page will be displayed as below. 3. The basic setting menu contains following options. Information System Data/Time Initialize General MPEG4 Camera > Co mputer view > Mobile view Setting Basic Informati PPPoE Network DDNS UPnP IP Notif ication Account Security HTTPS ICA-700 User Guide...
-
Page 29: System
4.1 System 4.1.1 Information his page will be displayed after clicking “Basic > System > Information” of the setting menu. It displays the system information of this camera. Information Product name This displays the name of this product. Firmware version This displays the current firmware versio This displays the current web version. -
Page 30: Date/Time
Interval to synchronize the date & time with the time server. Select the time zone and t ime difference from Greenwich Mean Time in Time zone the area where the device is installed from the pulldown box. ICA-700 User Guide... -
Page 31: Initialize
4.1.3 Initialize his page will be displayed after clicking “Basic > System > Initialize” of the setting menu. It allows you to maintain the system of this IP camera. Initialize Click this button to reboot th e device. A confirmation dialogue will Reboot appear. -
Page 32: Camera
Fill the alias here. Date/Time: Enable or dis able the Date/Time display. Display position: Choose display pos ition as Top or Bottom. Primacy mask Enables users to conceal an area of the vid eo image. Disable Overlay function. ICA-700 User Guide... - Page 33 Note: Real Time Streaming Protocol. RTSP is supported by most of the media clients . (RealPlayer, Media Player, QuickTime, etc…). The primacy mask page is as below. You can a djust the mask size and position to a specified area. Dual Mode CCD Dome Internet Camera...
-
Page 34: Mpeg4 - Computer View
Port range port range is 5000 ~ 7999. You can fill the numbers (1024~65535 in the field provided. RTP Multicast streaming Enable / disable multicast streamin g function. On / Off Multicast address Specify the multicast server address. ICA-700 User Guide... - Page 35 Specify the transmission port number of the video data. You can fill Video port the numbers (1024~65535) in the field provided. Specify the transmission port number of the audio data. You can fill Audio port the numbers (1024~65535) in the field provided. Set the maximum TTL that multicast can pass through.
-
Page 36: Mpeg4 - Mobile View
On / Off Enable / disable multicast streaming function. Multicast address Specify the multicast server address. Specify the transmission port number of the video data. You can fill Video port the numbers (1024~65535) in the field provided. ICA-700 User Guide... - Page 37 pecify the transmission port number of the audio data. You can fill Audio port the numbers (1024~65535) in the field provided. Set the maximum TTL that multicast can pass through. Time-To-Live Mobile View Image size 176 × 120 for mobile. Set the frame rate of the MPEG4 image.
-
Page 38: Mjpeg
Medium, Standard, Good, Detailed and Excellent. Note: Unicast streaming: Specify the transmission port number of the video data and audio data used when UDP (Unicast) is selected with the TCP/UDP transmission switching icon in the main viewer ICA-700 User Guide... -
Page 39: Network
4.3 Network 4.3.1 Information his page will be displayed after clicking “Basic > Network > Information” of the setting menu. It displays the network information of this camera. Information MAC address Display the MA C address of the device. Obtain an IP address If a DHCP server is installed on the netw ork, to select this while the automatically (DHCP) - Page 40 When you have set the HTTP port number to a number other than 80 on the Network setting page or in the Setup Program, access the device by typing the IP address of the device on the web browser as follows: Example: when HTT P port number is set to 2000 http://192.168.0.20:2000 ICA-700 User Guide...
-
Page 41: Pppoe
4.3.2 PPPoE his page will be displayed after clicking “Basic > Network > PPPoE” of the setting menu. It allows you to configure the dial-up connection. PPPoE Enable/disable the PPPoE function. On / Off The IP address obtained at the PPPo E connecting with network. -
Page 42: Ddns
Re-type the password to con firm. Enter the host name that is registered to the DDNS server. Host name Note: When you want to use DDNS function, you need to register an account in DDNS server first. ICA-700 User Guide... -
Page 43: Upnp
4.3.4 UPnP his page will be displayed after clicking “Basic > Network > UPnP” of the setting menu. It allows you to enable or disable the UPnP function. UPnP Turn On UPnP port For opening a port in a router or firewall in a private network in order to let a party from the outside world contact a user inside. -
Page 44: Ip Notification
SMTP: Select if SMTP authentication is necessary when an e-mail is sent. POP before SMTP: Select if POP before SMTP authentication is necessary when an e-mail is sent. ICA-700 User Guide... - Page 45 POP server name: It is necessary when the POP before SMTP is selected in Authentication. Type the POP (receiving mail) server name up to 64 characters, or type the IP address of the POP server. This setting is necessary when the SMTP server which sends e-mails performs authentication using the POP user account.
-
Page 46: Security
Password Set a password between 5 and 16 characters. Re-type the password to confirm. Re-type password Set a user to Admin, Operator or Viewer mode. Viewer Mode Viewer authentication Allows any viewer direct access to Live View. ICA-700 User Guide... -
Page 47: Https
4.4.2 HTTPS his page will be displayed after clicking “Basic > Security > HTTPS” of the setting menu. It allows you to access the IP camera via HTTPS. HTTPS Create & Install Create a self-signed certificate for HTTPS to recognize. Installed Certificate Display or remove the properties of the installed certificat Set HTTPS connection policy for different level of users. -
Page 48: Advance Setting
Note: The recommended method to ensure this to use the supplied windows-based Setup Tool is described in Chapter 2.3 – Software Quick Configuration. 1. Click “Setting” on the left side of home page. ICA-700 User Guide... - Page 49 2. The welcome of setting page will be displayed as below. 3. The advance setting menu contains following options. General FTP client Alarm sending Periodical sending General SMTP Alarm sending Periodical sending Setting Advance General HTTP event Alarm sending Schedule Setting Alarm buffer Setting...
-
Page 50: Ftp Client
FTP server. Select On to connect to FTP server using the passive mode. Attached file type Set attached file type to MPEG or MJPEG. Note: The frame rate and operability on the main viewer may decrease while a file is being transmitted by the FTP client function. ICA-700 User Guide... -
Page 51: Alarm Sending
5.1.2 Alarm sending This page will be displayed after clicking “Advance > FTP client > Alarm sending” of the setting menu. It allows you to send the image or video to FTP server with the alarm detection. Alarm sending Enable/disable the Alarm sending function. On / Off Remote path Type the path to the destination in FTP server up to 64 characters. - Page 52 Click Schedule and the setting menu for the effective period is displayed. Note: Motion Detection works only when the Video mode is set to MPEG4 and the Cropping is set to Off. ICA-700 User Guide...
-
Page 53: Periodical Sending
5.1.3 Periodical sending This page will be displayed after clicking “Advance > FTP client > Periodical sending” of the setting menu. It allows you to send the image or video to FTP server with the setting period. Periodical sending Enable/disable the Periodical sending function. On / Off Remote path Type the path to the destination in FTP server up to 64 characters. - Page 54 The periodical sending is always effective. You can specify the period when the periodical sending is effective in the Schedule schedule setting in the other section. Click Schedule and the setting menu for the effective period is displayed. ICA-700 User Guide...
-
Page 55: Smtp
5.2 SMTP 5.2.1 General This page will be displayed after clicking “Advance > SMTP > General” of the setting menu. It allows you to send the image via SMTP. e-Mail (SMTP) On / Off Enable/disable the SMTP function. Type the SMTP server name up to 64 characters, or the IP SMTP server name address of the SMTP server. - Page 56 Type the text of the E-mail up to 384 characters. (A line break is Message equivalent to 2 characters.) Note: When you set Authentication to On, be sure to select either or both SMTP or/and POP before SMTP. ICA-700 User Guide...
-
Page 57: Alarm Sending
5.2.2 Alarm sending This page will be displayed after clicking “Advance > SMTP > Alarm sending” of the setting menu. It allows you to send the image via SMTP with the alarm detection. Alarm sending On / Off Enable/disable the Alarm sending function. Set whether an image file is attached to the mail sent or not. - Page 58 Click Schedule and the setting menu for the effective period is displayed. Note: Motion Detection works only when the Video mode is set to MPEG4 and the Cropping is set to Off. ICA-700 User Guide...
-
Page 59: Periodical Sending
5.2.3 Periodical sending This page will be displayed after clicking “Advance > SMTP > Periodical sending” of the setting menu. Periodical sending On / Off Enable/disable the Periodical sending function. Type the file name you want to assign to the images when sending to the Image file name FTP server. - Page 60 The periodical sending is always effective. Always You can specify the period when the periodical sending is effective in the Schedule schedule setting in the other section. Click Schedule and the setting menu for the effective period is displayed. ICA-700 User Guide...
-
Page 61: Http Event
5.3 HTTP event 5.3.1 General This page will be displayed after clicking “Advance > HTTP event > General” of the setting menu. It allows you to send the image or video to HTTP server. HTTP event On / Off Enable/disable the HTTP event function. Type the URL of the HTTP server. -
Page 62: Alarm Sending
(pre-alarm, post-alarm). If you do not User alarm buffer select it, only the image of the moment of the alarm detection is forwarded. Click Alarm buffer to display the Alarm buffer setting menu. Parameter Message ICA-700 User Guide... - Page 63 Effective Period The periodical sending is always effective. Always You can specify the period when the periodical sending is effective in the schedule setting in the other section. Click Schedule and the setting Schedule menu for the effective period is displayed. Note: Motion Detection works only when the Video mode is set to MPEG4 and the Cropping is set to Off.
-
Page 64: Schedule
When this is checked, the Start time and End time set to Mon Use the same time (Monday) are applied to all days. In this case, the Start time and schedule every day End time of the other days than Mon (Monday) cannot be input. ICA-700 User Guide... -
Page 65: Alarm Buffer
5.5 Alarm buffer 5.5.1 Setting This page will be displayed after clicking “Advance > Alarm buffer > Setting” of the setting menu. Alarm buffer On / Off Enable/disable the Alarm buffer function. Video mode Display the video mode. Recording Capacity Display the maximum recording capacity of image/audio before the Pre-alarm period alarm detection. -
Page 66: Motion Detection
You can use the tool bar to set down-limit value. When detecting zone signals Sensitivity are over setting value, it would carry on assigned work. Note: Be careful! Motion Detection function don’t work with Patrol function at same time. ICA-700 User Guide... -
Page 67: System Log
5.7 system Log 5.7.1 Setting This page will be displayed after clicking “Advance > System Log > Setting” of the setting menu. It allows users to review any changes and events. Remote Log Enable remote log Check the box to enable the remote log function. Server Name Enter the address of the remote log server. -
Page 68: Appendix A --- Enable Activex Options On Your Pc
Enable the 3 options as below, • Download the signed ActiveX controls • Download the unsigned ActiveX controls • Initialize and script the ActiveX controls not masked as safe to Prompt By now, you have finished your entire PC configuration. ICA-700 User Guide... -
Page 69: Appendix B --- Bandwidth Estimation
Appendix B --- Bandwidth Estimation The frame rate of video transmitted from the IP camera depends on connection bandwidth between client and server, video resolution, codec type, and quality setting of server. Here is a guideline to help you roughly estimate the bandwidth requirements for your IP camera. The required bandwidth depends on content of video source. -
Page 70: Appendix C --- Mobile Phone Viewing
You can also use RTSP clients (RealPlayer, MPlayer, Windows Media Player, Quicktime…etc.) to view RTSP streaming, just type in “rtsp://<IP>:<PORT>/video.3gp” as the Player’s URL. 2.5G Mobile Phone viewing For 2.5G mobile phone viewing, type “<IP>/mobile.wml” into your 2.5G web browser. <IP> is the IP address of your IP camera. ICA-700 User Guide...
Need help?
Do you have a question about the ICA-700 and is the answer not in the manual?
Questions and answers